Editing your bird pics advice for newcomers

Messages
19,354
Name
Rich
Edit My Images
Yes
After getting a few pm`s and being asked what my technique was for editing in a recent thread I decided to start this off. As it was related to the bird forum I am hoping this does not get moved MODS :D and people will add their own bits of advice or tips if they so wish to. I am certainly no expert on this, so this is just an insight as to how I see it and what I do.

The most important thing is to try and get your image as good as you can within camera, this will save you a headache with editing at a later stage, check out any owners threads for your specific make and model, you will be amazed at how much information can be gained by that alone, and those little camera settings and adjustments will make a difference. A lot of threads do dissapear to the dark parts of TP so if you cannot find anything then put up a cry for help :D

As for my editing I will keep my explanation as simple as possible, and no I am not trying to hide anything. When I started out I never had a clue, so like a lot of others it was a steep learning curve, one of which I have not got to the top of yet :puke: There are a lot of people on here who`s work I am amazed at and admire, so if you have the will to learn and can set yourself a standard then that is a good thing imo. After posting my pics up for C&C, things like curves, gamma and white balance etc were going over my head. So I decided to take a copy of one picture and practice with it, there is no problem if it turns out wrong just delete and start again. Remember Google is your friend and you can get the do`s and dont`s of most photography related editing issues.How much time and effort you put into it is entirely up to you.

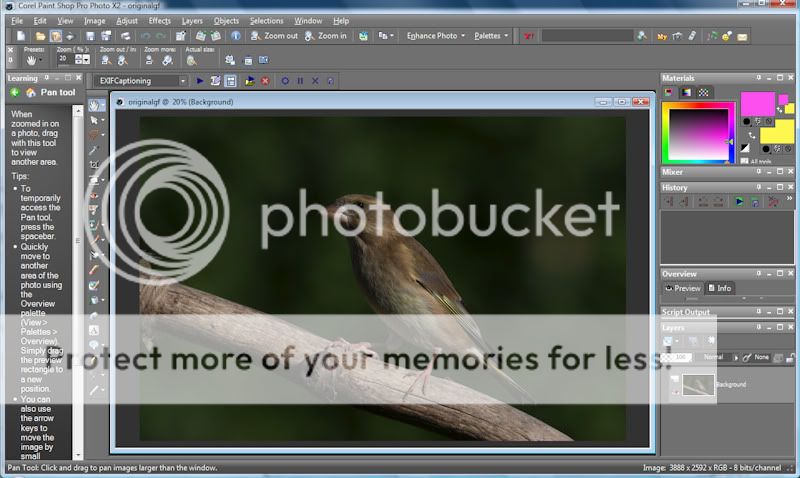
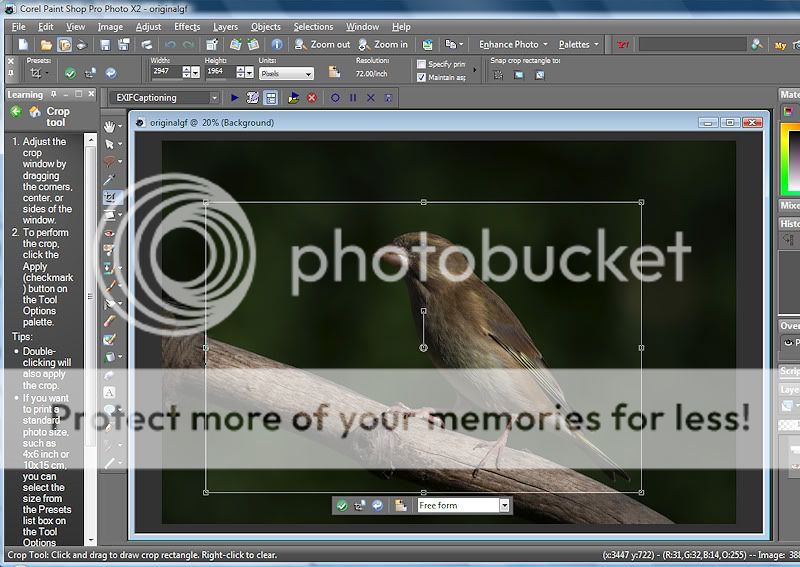
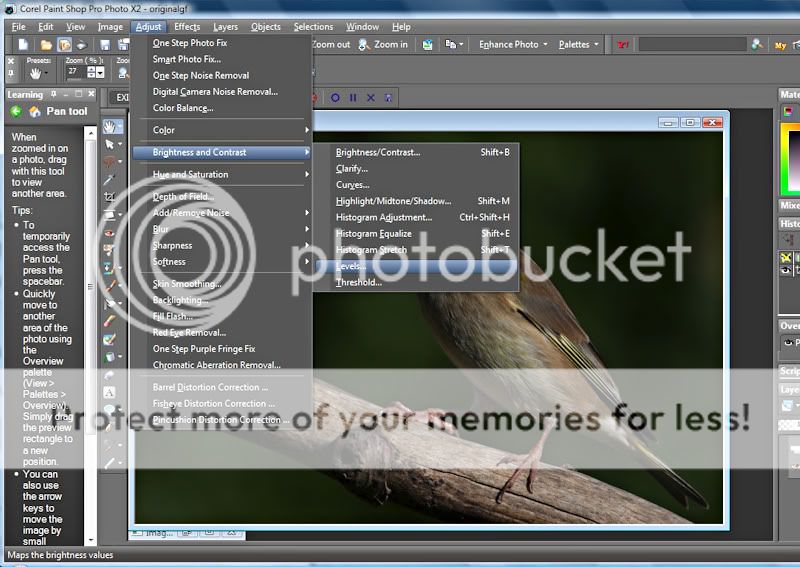
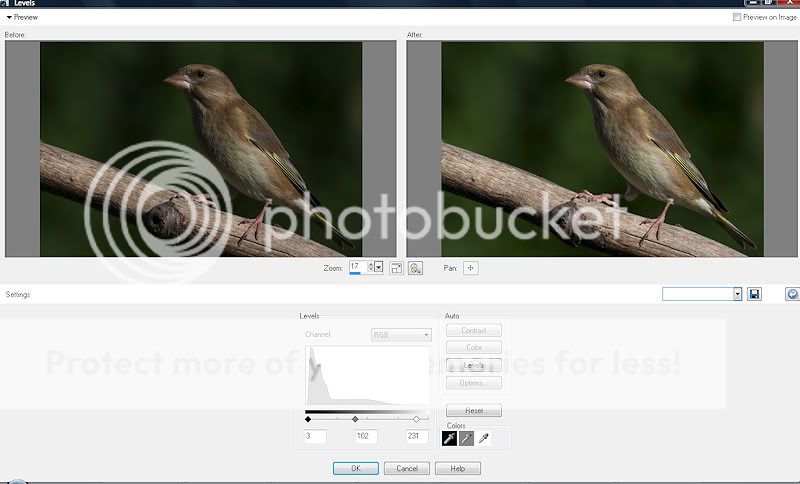
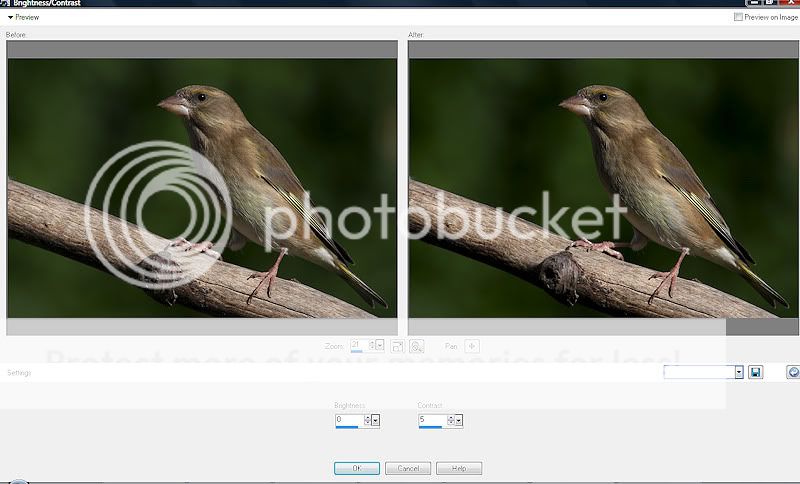
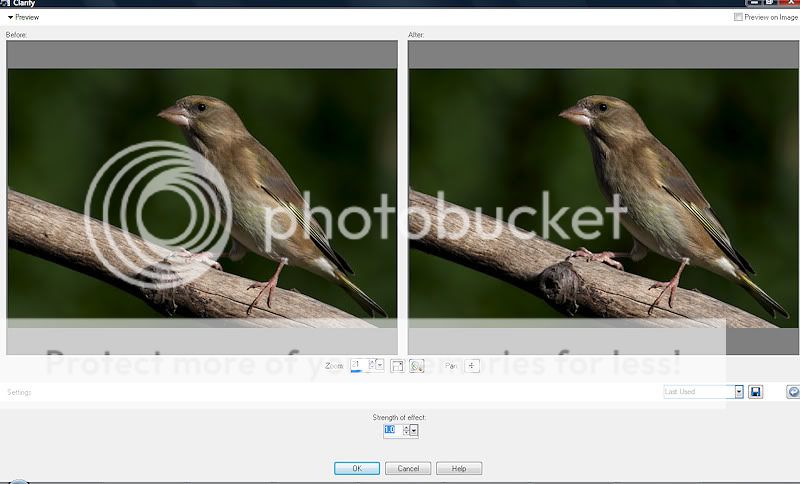
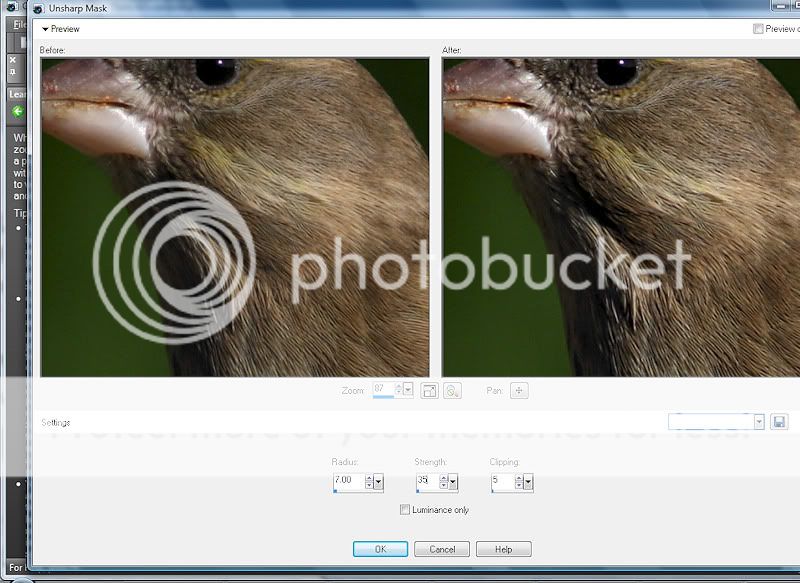
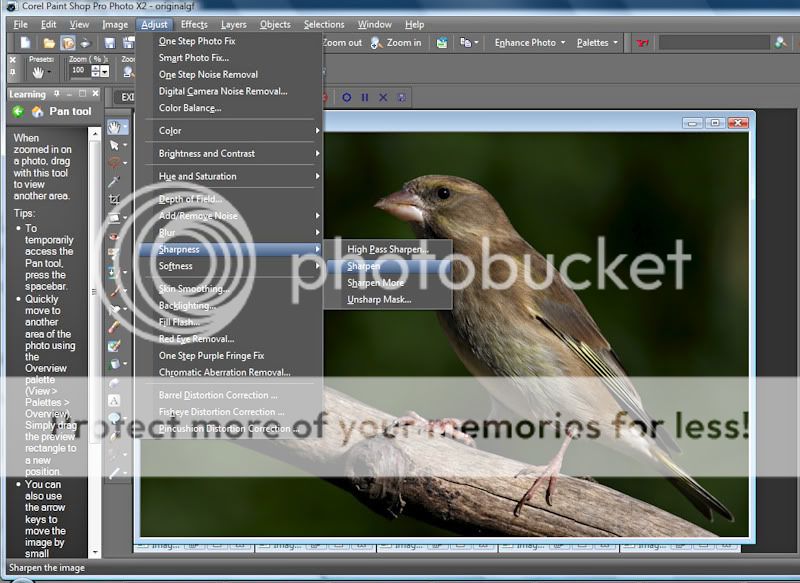
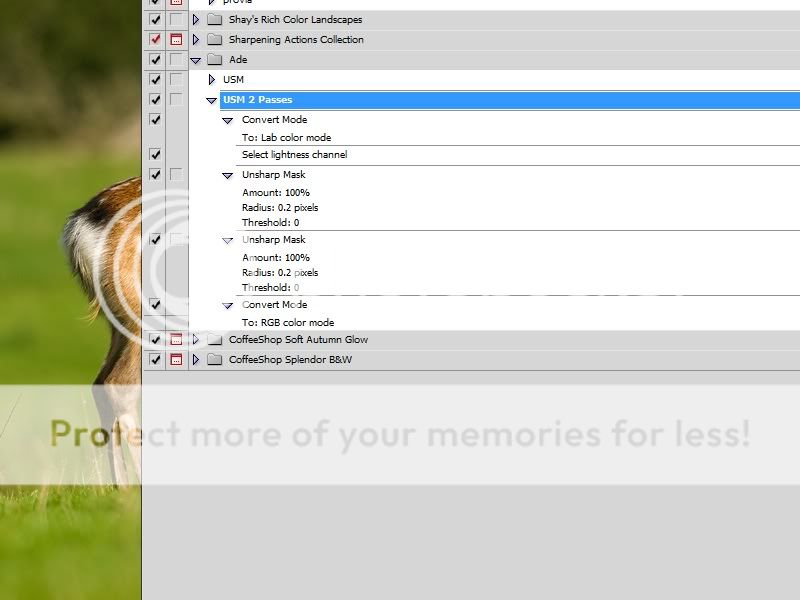
As people use different software there will always be limitations and results will always vary. Not being one for reading books on what things do I wanted to see for myself, so taking one adjustment at a time ie contrast, I would move the slider fully to the left and right to see the effect it had on the picture. Being heavy handed with my adjustments was a major problem with me and sometimes it still is. At first I made adjustments in no particular order, but now I tend to look more closely at it and try and decide which is needed the most at the begining. Sometimes during an edit I might adjust the same thing ie levels or curves two or three times. I use photobucket for hosting my pics and this can show your images once linked to TP differently to how your finished edit looked like, just a quick preview before submitting your image will be worth the trouble.

You cannot really tell someone how to produce a good picture, all you can do is post it up for C&C and listen to what people are saying :) It all takes time and patience and after a while you should be producing some decent shots. If this is of some use to one person then I have not wasted my time :LOL:

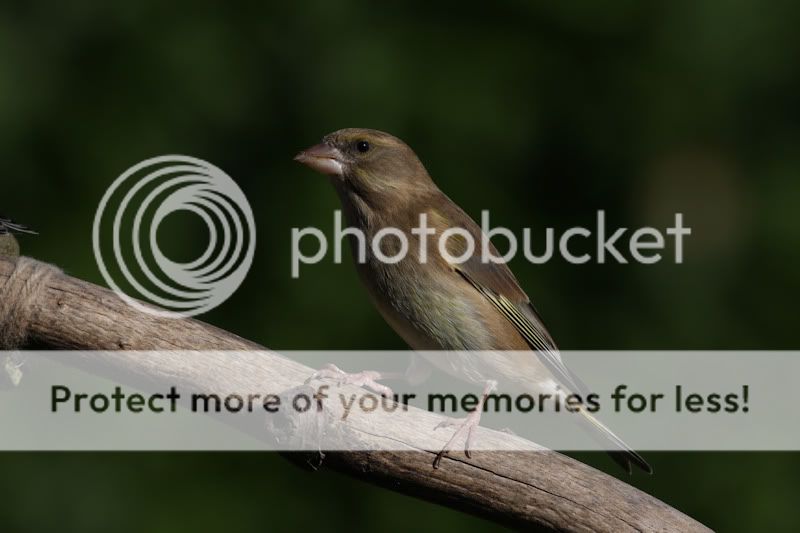
One of my first bird pics

IMG_7135.jpg
 
Good suggestion for a thread Rich and good advice particularly about trying to get as much correct in the camera as that makes the subsequent PP very easy.

Think it would be useful if you were able to do an edit, of the above LTT, as you would do it now to illustrate how PP skills can have a significant impact on an image.

Cheers Tom, along with using noise reduction,adjusting the shadows and highlights and reducing the saturation has kind of improved it a little. The white highlights are blown on the head in this one, and as you well know you cannot get back what is not there in the first place. I know a lot of people use layers when editing, I myself dont although it is something that I would like to have a go at to see if it either improves the photo even more or just makes life easier in pp. The other thing is that every picture comes out differently anyway so you have to make allowances for different aspects of the picture when editing. Lighting, colours,shadows etc will alter as you are adjusting it, so you might change one bit so it looks better but it upsets something else in the process. This was not so much telling people what they should do, but more of what to expect to do :D

As for an edit Tom this is as good as it gets for now as the wife is away and I shall play:banana::banana::banana::banana:

ltt_filtered.jpg
 
One of the best things I learned was using Masks. Quite often I wanted to reduce noise in the back ground only and then only sharpen the bird.
When I do sharpen the bird I use a particular setting that works for most birds but I then duplicate the layer and sharpen again and lower the opacity until it looks right or I will use a layer mask to lesson the sharpening on a particular part of the bird, usually the primary wing feathers.
PP is something that is either a chore or you enjoy doing it. I really enjoy working on photos and if I have no recent images to work on I will go back to some of my first images an redo them.

Dai

That is always a good idea Dai (y) I have found that when re-doing an old image you may achieve a good result with minimum pp. I found that doing too much editing to start with and not knowing what I was doing made it harder to improve, tying myself up in a knot so to speak :LOL: Other than the usual conversion from raw, if you are starting out and just adjust the basics such as brightness contrast etc, then it is easier to correct if someone suggests it does not look right. But I even found the basics hard to get my head around, but thanks to the input from people on here things are a bit easier :D
 
Rich, sorry for adding to your thread and i`ll bin this post if you want.

A very good sharpening technique that is easy to use can be found here on Richard Peters Blog.
 
Rich, sorry for adding to your thread and i`ll bin this post if you want.

A very good sharpening technique that is easy to use can be found here on Richard Peters Blog.

Cheers Ade no problemo ;) In fact I was going to mention about your thread which you did no editing on, but just wanted to keep it more in line with any usefull bits of info for people. As with any subject it is easy to go off on another tangent :LOL: And tbh after countless replies to pm`s explaining the same as I have done here, a lot of people would not even have the courtesy to say thanks, which is fine for the odd one or two but after a while it does make you wonder why you try and help, maybe it`s just me :shrug:
 
No,it`s not just you.

Great idea for a thread and hopefully some more contributions will be forthcoming..........(y)
 
Thanks a lot Rich for starting this thread.:clap: It's always more helpful, I think, if you can read tips which have been tried and tested rather than wading through books.
 
Apologies Rich.
 
Last edited:
Rich, sorry for adding to your thread and i`ll bin this post if you want.

A very good sharpening technique that is easy to use can be found here on Richard Peters Blog.

Thanks Ade, I read that a long time ago. When I had the 450D I was using the method that was suggested to me before resizing to 800. If your image for example was 3625 x xxxx after you had cropped it, then resize to 1024 on the longest side and then sharpen it twice, it will look bad at this point but dont worry. Then resize to 800 on the longest side and post it up, that method seemed to work well with images from the 450D but with the 50D it is too much, probably down to having more control with the image in camera now :shrug:
 
Thanks Ade, I read that a long time ago. When I had the 450D I was using the method that was suggested to me before resizing to 800. If your image for example was 3625 x xxxx after you had cropped it, then resize to 1024 on the longest side and then sharpen it twice, it will look bad at this point but dont worry. Then resize to 800 on the longest side and post it up, that method seemed to work well with images from the 450D but with the 50D it is too much, probably down to having more control with the image in camera now :shrug:

That was mine Rich, one I had stumbled upon on a US forum, you need to use a factor of 1.6x the finished size, so for here it will be 800 x 1.6 = 1280 pixels.

It depends on how much you have cropped the image as to how successful the "sharpen twice" on the 1280 image stage works, and to be honest I only sharpen once at the 1280 stage, I found that generally "sharpen twice" was overkill.

Worth repeating for newcomers as it does help reinstate the sharpness lost when resizing an image for the web.

Create a folder "1280 temp" (for storing the interim images)
Create a folder "Resized" (for storing the 800 pixel images)

In Photoshop (Full or Elements) ... using the 'Save for web' from the 'File' drop down (or keyboard shortcut)

Crop, edit exposure, white balance, clone out stuff if required, and apply any noise reduction. Basically get your large image ready, just do not apply any sharpening yet.

'Save for web' 1280 pixels - maximum quality - put this in a folder 1280 temporary.

Close your image - open the 1280 image from the '1280 temp' folder

Now sharpen this image - once (you can try twice and see how it looks when reduced to 800). I just use auto sharpen, now at this stage particularly if you have sharpened twice the result can look over done, however the next stage will sort that.

How many times you run sharpen, once or twice is only possible to judge after the next stage, and you see the result in the preview window, if it looks too much, simply cancel rather than save, CTRL Z to remove the second sharpen, then repeat the 'Save for web' described next.

'Save for web' 800 pixels - adjust quality to set the image below the 200kB limit on the forum - and put this in the resized folder.

Your image is now ready to load onto the site.

I should add that I can do the above in a much shorter time than this took to type, or indeed read :D
 
That was mine Rich, one I had stumbled upon on a US forum

:puke::puke: Have I known you that long Martyn :thinking:
Let it be known I have no plans to get married :nuts:
Thanks for the extra info on that (y)
 
This thread just shows what this Forum is all about....such helpful members who give a great deal of time with tutorials and advice to not so experienced people such as myself,

So thanks Rich and the others on here for all your time and efforts.


John
 
Rich, thanks for the pm and the lack of communication,understanding is totally my fault.

Again, sorry chief,i ucked up................:D


This thread should be kept going by all the good bird toggers, not me I hasten to add.........:LOL:............, to help all the newcomers............(y)
 
I'll have a go :D

OK, first things first. I'd like to give folk to opportunity to try this out themselves on the actual image I'm using. You can download the full size JPEG HERE. I am happy for anyone to use this to practise with and post their results on TP, but please dont use it for anything else :) It's actually one that I have 'binned' as I dont like the nobble of wood in the shot, but all the same ...

This is what it looks like untouched:

originalgf.jpg


This is what you will hopefully get if you try the little tut I've laid out in the next post. Any question please ask!

birdtut11.jpg
 
Last edited:
I use Corel Paint Shop Pro Photo x2. You can download a free trial of the new x3 version HERE if you like (just noticed the new version also has a new HD video editing bit on it as well!). I have found the x2 version to be the easiest to use software with endless possibilities and without the huge price tag.

Step 1. Open your image in your software:

birdtut2.jpg


Step 2. Crop your image to give the nicest composition. To make things easier for yourself later, try and set your crop ratio (seen just above the image) so the longest side is 800. Then select the little tick box next to 'Maintain aspect Ratio' bit slightly further along. Then it's just a case of dragging the corner of your crop select out, and move it around until you get what you want.

birdtut3.jpg


Now you have cropped your image, it's time to edit. the following steps are what I use for basic editing. I also go on to clone out little bits and bobs if needed and any other work that might need doing. But I think it's important to learn the basics first so I will leave those steps out.

Step 3. A levels tweak. Here you can see where to find the levels menu from your drop down lists.

birdtut4.jpg


Now you will get the levels window pop up. Play around with the sliders until you get what you want. The setting I have used in this case are from left to right 3, 102, 231.

birdtut5.jpg


Step 4. Contrast. Going into the same first menu as for the levels, go into 'Brightness & Contrast'. I prefer to keep this to a minimal when I have a dark background, so the setting here are simply Brightness = 0, Contrast = 5

birdtut6.jpg


Step 5. Clarify. I also like to give just a little bit of clarification to my bird shots. I don't always, but it does give just a little bit extra to most shot. The Clarify menu can also be found in the same first menu as above.

birdtut7.jpg


To be continued (who changed the image limit! grrr) ....
 
Last edited:
Continued ....


Step 6. Sharpening. Feeling happy with the the outcome of the above steps it's time to sharpen. I use the unsharpen tool which can be found like this:

birdtut8.jpg


Once the window pops open you can make your adjustments. On this image they are from left to right: Radius 7.00, Strength 35, Clipping 5. I usually keep my Radius and Clipping settings the same for most of my bird shots, only adjusting the strength for each individual image. On bird shots the best rule I have found for knowing how much to sharpen is sharpen to about 45 strength, then if you look at the bill on the bird and there is the over sharpened light line around it, reduce the strength until it just about disappears. Once you have made this step save your image. I have two files, one for full size edits and one for websize. Save this one in your full size edit file. BUT DONT CLOSE THE IMAGE YET!

birdtut9.jpg


Step 6. Resizing and sharpening for web. The first thing you need to do is undo the last step (sharpening full size). Then all you need to do is re size your image to 800 pixels on the longest side, and using the menu shown below simply click sharpen and then save this one in your websize file. Done and ready for uploading to your chosen hosting site!

birdtut10.jpg


The reason you only need to click sharpen for this step is because I find with this software, what ever your last Unsharpen settings were are applied to the image when you simply click sharpen!

I hope this helps, and I'd love to see folk have a bash using my Female Green Finch picture! If you use other software you should be able to find the same kind of tools and settings, but they might be slightly differently named.
 
Last edited:
I think a big thank you is in order for Jo :clap::clap: Thanks for taking time out Jo, I am sure that is going to help a few people out. As mentioned we all do things differently, but that is a good starting point with basics, as people get more comfortable with pp and pick up other ideas along the way they can develope from that.
 
Excellent idea for a thread Rich:) and thanks Martyn and Jo for the tutorials:)
Editing is something I've always struggled with
Pete
 
Last edited:
Can I offer a big thanks to Rich for starting this thread, to Martyn and especially Jo for such a helpful contribution :clap:. PP has always been a problem for me and very much a trial and error thing, mainly working in the dark too, this has helped a lot (y)
Can I ask a question though, one I suspect I should know the answer to but am unsure. With regard to resizing for the web, using PS, I open 'image > image size', then set the longest side as 800. Then I apply USM. Is this the same us 'saving for web' or are there advantages to either method.
Once again, thanks guys and gals (y)
 
This is a great thread and a great idea, so thanks Rich. Reading through it has shown me how much I have to learn about the nuances of PP to make the most of my posted images.

It's a long long learning curve (excuse the pun), but such an enjoyable one.

Back to CS4 for me to try out some of these techniques
 
Can I offer a big thanks to Rich for starting this thread, to Martyn and especially Jo for such a helpful contribution :clap:. PP has always been a problem for me and very much a trial and error thing, mainly working in the dark too, this has helped a lot (y)
Can I ask a question though, one I suspect I should know the answer to but am unsure. With regard to resizing for the web, using PS, I open 'image > image size', then set the longest side as 800. Then I apply USM. Is this the same us 'saving for web' or are there advantages to either method.
Once again, thanks guys and gals (y)
Cheers Trev, as far as I know :shrug: saving for web makes the file size smaller the dimensions, ie 800 x whatever stays the same.
This is a great thread and a great idea, so thanks Rich. Reading through it has shown me how much I have to learn about the nuances of PP to make the most of my posted images.

It's a long long learning curve (excuse the pun), but such an enjoyable one.

Back to CS4 for me to try out some of these techniques

:LOL: It is a learning curve, and one I am still getting my head around, but jumping in with both feet and playing about is the only way imo :) You cannot tell somebody how to edit a picture to get the best result, no more than you can tell somebody how to get the perfect capture to start with ;) people can only advise.
At the end of the day like anything else in life, you will only get out what you put in, which roughly translated just equates to practice, practice, practice. :D
 
no more than you can tell somebody how to get the perfect capture to start with ;) people can only advise.

Well for a start ... make sure that the sun is behind you, ideally coming over your shoulder, get the light right and it saves an awful lot of time in PP (y)

As for Trev's question I prefer the 'Save for web' option as it allows me to tweak the image file size (in Kb) using the quality slider. It is the way I know how to do it, however as with most computer programs there are always more than one way to get the same result ... it should also be noted that I am too long in the tooth to be learning new tricks .... old dog syndrome :geek:
 
An unashamed bump for this thread, as there is some useful info in the posts above.
 
Ian Cook showed me a great way to sharpen websize images some while back.It involves lab sharpening, i`ll dig it out and post it up soon.
 
Ian Cook showed me a great way to sharpen websize images some while back.It involves lab sharpening, i`ll dig it out and post it up soon.

Sounds interesting Ade, I shall keep a sharp eye out for your post :D
 
Sounds interesting Ade, I shall keep a sharp eye out for your post :D

Perhaps I should use it more often............:LOL:

Edit ..this is it.


Sharpen.jpg


Record it as an action, then play it once,twice or three times dependant on the photographs quality. It only works on resized files though really.
 
Last edited:
Donning kevlar and flameproof suit.......:)

I do think a lot of wildlife stuff on here is overprocessed, just stating my opinion and am not interested in going through the war again. Just think about how it looked when you capture the image and how it looks after being processed.
 
Donning kevlar and flameproof suit.......:)

I do think a lot of wildlife stuff on here is overprocessed, just stating my opinion and am not interested in going through the war again. Just think about how it looked when you capture the image and how it looks after being processed.

:LOL: It does not have to be a war Ade ;) I think there is a lot of well edited shots on here as you are well aware, surely if you have taken the time to look at somebodys thread and felt that it was overcooked, then come out and say so :shrug:
Ta for the info anyway ;)
 
Nah, it isn`t worth the relentless words. People can do their photography as they wish, as I shall with mine. But I know that certain birds are not as vibrant or as sharp...(there we go, the most overused word in this section)... as some people seem to think and saying so isn`t worth the bother, so I don`t bother....:)

Each to their own.
 
Ian Cook showed me a great way to sharpen websize images some while back.It involves lab sharpening, i`ll dig it out and post it up soon.
I think this may be similar to sharpening the luminosity channel which is my standard method sharpening. This method saves changing the mode to lab colour.

1 Duplicate the layer
2. Change to luminosity (from nomal)
3. Sharpen as normal via USM

You can add a layer mask to selectively sharpen if required.

Another way to do it is to sharpen as you normally would with USM and then choose 'fade unsharpen mask' and change the Mode from Normal to Luminosity.

Luminosity is basically the bright areas of an image. The reason you sharpen the luminosity channel is because this channel usually is very noise-free and can take a lot more sharpening than modes with color-data in it (like RGB).
 
Last edited:
I`ll take your word for it ........:)
 
Back
Top