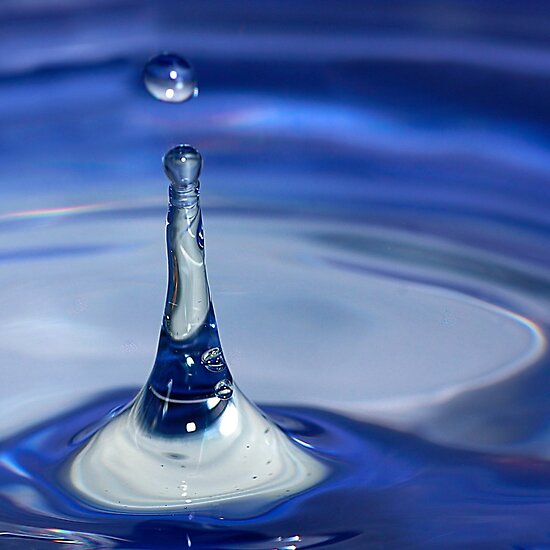
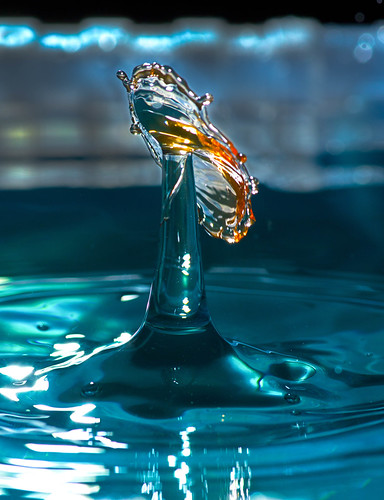
Tutorial Water drops: specifically; “collisions”.

Messages
2,043
Edit My Images
Yes
AshMashMash submitted a new resource:

Water drops: specifically; “collisions”. - Water drops: specifically; “collisions”.

I get quite a lot of questions about my droplet collision photos, so I thought I would include a tutorial of my method. I am sure there are other methods, but this is mine. It’s a bit wordy, sorry.


The basic theory:

The theory behind this sort of photo is to take a picture of something happening that only last’s for about, perhaps, 1/10,000th of a second or less. Of course shutter speeds don’t generally go to this speed, but...

Read more about this resource...
 
Last edited by a moderator:
Fantastic tutorial. Can not wait to give it a go. Need to get a few bits first.
 
Very clear guide and extremely helpful. Can't wait to give it a bash :bonk:
 
Great tutorial, also a good link to the collision video! Amazing!

Whats next for your collision work?
 
Excellent....thanks
 
Thanks all, I hope to see some attempts posted here from you guys! (y)

Whats next for your collision work?

Going to really aim at making the nice "flawless" backlit collisions with the rinse aid. It's really improved the lighting 10 fold I think. Took another today.
 
Great tutorial mate..thanks for takin the time! Like the backlit shots...gets better n better!
 
Ash - I have a question.

When I move the jug away to let the drops fall to the base liquid, the water flow hits the side of the jug and disturbs the first couple of drops.

How do you avoid that? I tried being quick, slow, holding it sideways, etc. :thinking:
 
Ash - I have a question.

When I move the jug away to let the drops fall to the base liquid, the water flow hits the side of the jug and disturbs the first couple of drops.

How do you avoid that? I tried being quick, slow, holding it sideways, etc. :thinking:

Hey :) Basically, try to find a thin-sided jug to lower your chances, use a slower drop rate, and move the jug quicker! As you say, a huge, annoying, percentage of them hit the jug and ruin your chances of a shot. All you can do is try again :)
 
great guide
 
Great guide - I posted a few of my efforts in the Macro section the other day. Is it best to use a white background? Also, how do you get the colour into parts of the water shot?
 
Thanks guys :)

Great guide - I posted a few of my efforts in the Macro section the other day. Is it best to use a white background? Also, how do you get the colour into parts of the water shot?

I think I commented on them :)

As for the background and colours... well that's entirely up to you, and depends how you're lighting them and what resources you've got.

1. Reflecting: use either coloured reflectors or use a white reflector and coloured gels over the flashes

2. Back-lighting: I use a white plastic of some sort (box, acrylic or something) and use coloured gels for my flashes.

The basic rule is: the splash will be the colour of the droplets, the spout will be the colour of the base liquid and the water surface will be the colour of the reflector/back-lighting box.
 
Excellent tutorial. I love the home-made setup. I do the same for floral shots and I always think 'I hope no one walks into the room now and sees this!' The drop shots on Flickr are wonderful. I shall have to try this...
 
Excellent tutorial. I love the home-made setup. I do the same for floral shots and I always think 'I hope no one walks into the room now and sees this!' The drop shots on Flickr are wonderful. I shall have to try this...

Thank you very much :) Do have a go! (y)
 
Great guide Ash,ive been considering getting a macro lens for a while you have convinced me.
Ian
 
Ash

I haven't tried this myself, but have you considered lining the bottom of the baking tin with either coloured waxed paper, or even a very thin coloured sheet of plastic and at the rear end curving it up above the level of the edge of the tin, then pouring the water on top? That way you would get the required colour and you could get a lower camera angle as you would have the 'infinity curve' at the back of the tin. Does that make sense? Just a thought.
 
Last edited:
Great guide Ash,ive been considering getting a macro lens for a while you have convinced me.
Ian

Wicked :) All but my very last two shots have been done with my 18-55mm lens however, so a Macro lens is not essential.

Ash

I haven't tried this myself, but have you considered lining the bottom of the baking tin with either coloured waxed paper, or even a very thin coloured sheet of plastic and at the rear end curving it up above the level of the edge of the tin, then pouring the water on top? That way you would get the required colour and you could get a lower camera angle as you would have the 'infinity curve' at the back of the tin. Does that make sense? Just a thought.

I have experimented with things like this, however you will still see the edge of water as it touches the edge of the curved plastic/sheet when that rises out of the water, and you'll therefore get a horizontal line across the page.

But thanks anyways, always up for more ideas! (y) You gonna have a go?
 
Great guide Ash,ive been considering getting a macro lens for a while you have convinced me.
Ian

Ian

I did a great macro shot last night using a Canon 'nifty-fifty' 50mm 1.8. I had an extension tube on the Sigma macro lens and just as I was finishing I thought I'd try the 50 on it. Worked a treat.
 
Last edited:
Yeah, but I'm redoing my study/studio at the moment. next week maybe. I bought some of the valves you mentioned. Thanks for that link.

Ah ok! Well I shall look out for some then in future, be sure to post them over in Macro for us! :D
 
WOW!! must have a go at this...thanks for the tutorial and great images
Dave
 
Cheers for the tutorial! deffo something I've wanted to give a go for a while, and this has given me a bit of a push to do it! :D just need to grab a few bits!
 
i had a little go at this over the weekend, taking about 60-70 pictures, the best one was taken after the 3rd shot so i should have given up then.
work.6703019.1.flat,550x550,075,f.water-spout.jpg
 
Thanks for the advice (y)

I've just finished doing some water drip shots and now have ordered the starter valve so I can try for some of those beautiful drop collisions.
 
Hiya,

I have just being trying this out... no luck yet... can I ask why the rinse aid?

Does it affect the way the drops impact or is it merely just for the the colour?

Thanks
 
Great advice, much appreciated from someone who has tried this, like the idea of the aquarium valve,

Neil.

No worries :)

Hiya,

I have just being trying this out... no luck yet... can I ask why the rinse aid?

Does it affect the way the drops impact or is it merely just for the the colour?

Thanks

As said in the post, it produces long flowing collisions. It lowers the surface tension of the water allowing it to become more "stretchy". So it simply makes a different form, it's not at all needed, just something different to try.
 
Ashley

A quality tutorial - thank you. I need to find some time to try this - it's on my "Do before 2012" list.

Thanks
 
Fantastic tutorial, need to go and get set up now. I wish I had read this tutorial before my first attempt a few months ago would have saved neatly a thousand shutter presses.
 
Back
Top