Star trails and Perseid meteor "shower"

Messages
11,513
Name
Stewart
Edit My Images
Yes
Not sure this is really a landscape. But it is a view or vista, so I guess this is probably the best place for it?

Anyway, a few weeks ago when we were promised a meteor shower (the Perseids), I spent several hours in a surprisingly cold field outside town in order to watch and (try to) photograph them. It was my first attempt at this, and I learned an awful lot about the practicalities of such photography, mostly by getting things wrong.

Amazingly, despite my general incompetence, I managed to get a decent picture. Here it is. Note the single solitary meteor in the lower right corner!

184772213-L.jpg


Technical stuff: This is a composite image compiled from 28 separate exposures taken between 23:00 and midnight. The exposures were mostly about 2 minutes each (except when I forgot to set the timer! :bonk:) and the total exposure time was 61 minutes 17 seconds.

All images taken with a 350D and EF-S 10-22mm lens set at 10mm; ISO 100; f/8. I think maybe I should have used a wider aperture and/or a higher ISO, but before this sequence I did a test exposure for 10 minutes at the same setting and there was definite sky fogging. (I was a few miles out of town, but the sky is never really dark in the south east of the UK.) Maybe I could have increased the exposure by a stop or so for each frame, but not much more.

Incidentally I saw 40 meteors between 23:00 and 01:30 when I packed up, of which about 8 were of the "wow!" variety. Despite having a 10mm wide angle, I estimate that only about 6 of these 40 would have been in the frame, which seems a little unlucky to me. Unfortunately the part of the sky I was photographing clouded over a bit between about midnight and 00:15, and then my lens starting fogging up with dew - but of course I didn't realise that until I came to pack up! Ideally I would have had something like a 2½ hour exposure from about 75 frames. Next time I will.

Comments and critique (on either the picture or my technique) very welcome.
 
I quite like this Stewart, but why the multiple exposures....?

You were rather unlucky with the comets evading your frame! Good for you though for getting out and recording it!

If you play with the white balance and apply a colour burn you'll illiminate that 'Southern Glow' (y)
 
I personally like the 'southern glow' and i think you shot is amazing. Can you tell me how you did it, so you took the shots rite, how did you merge them all together ? And nice meteor, theres a comet lingering about ive heard at the moment i think you should try and shoot that as your pretty good at this space buissness :D
 
:agree:Great shot.:notworthy:
I cannot get this type of shot any where as good as this can you give more detail to the shot.
 
I quite like this Stewart, but why the multiple exposures....?
Two reasons. But remember I don't really know what I'm doing here, so either of both of them may be unsound.

The first reason was that, when I did some test exposures, I found that the brightness in the sky started to get really intrusive after about 10 minutes. I thought that if I took lots of short exposure rather than one long one, I'd have more options for controlling the sky glow when I came to process the image. (And it has come out OK, though I don't know whether that's by luck or judgement!)

The second reason was simply that I felt a bit nervous putting all my eggs in one basket with a long exposure. I figured that, with a series of short exposures, I'd be more likely to get something useable if I'd done somethimg wrong somewhere. (And I think this turned out right too, since the temporary cloud cover and my lens dewing up were just minor inconveniences rather than show-stoppers.)

Maybe somebody with a bit more experience than me could let me know whether that makes any kind of sense.
 
Can you tell me how you did it, so you took the shots rite, how did you merge them all together ?
I cannot get this type of shot any where as good as this can you give more detail to the shot.
OK, well I got home with about 75 RAW exposures, though when I looked at them it turned out that only 28 were useable before the sky clouded over and my lens fogged up.

Firstly the RAW conversions. Each exposure was supposed to be 2 minutes, but they were hand timed using a kitchen timer and they varied a bit. (And some times I forgot to set the timer so the exposure was just guessed.) So I calculated how many stops different each exposure was from my "benchmark" of 130 seconds (2 minutes timed plus a bit of faffing around), and adjusted the exposure in the RAW converter to equalise them all. For example frame 24 was 113 seconds, so I gave it +0.2 stops.

Then I put each image as a separate layer in Photoshop Elements, and set the blending mode to 'Lighten' on each layer. According to the Photoshop Help, this mode "looks at the color information in each channel and selects the base or blend color—whichever is lighter—as the result color. Pixels darker than the blend color are replaced, and pixels lighter than the blend color do not change."

My reasoning was that this mode would preserve the images of stars whichever layer they are on, and it seems to have done that. A slightly undesirable side effect is that it preserves any sky brightness too, but in this particular image I think I've got away with it and it looks quite OK aesthetically.

This was really just the first technique I thought of. I'm sure there are better ones. In fact I've since found out that there are programs for dedicated astrophotography that will automate a lot of this. But as the picture shows, you can get half-decent results without them.
 
Your reasons make perfect sense and as the photo has 'worked', why change?

;)
 
great star trails and thanks for the tip about the shooting/processing(y)
 
great star trails and thanks for the tip about the shooting/processing(y)
Thank for the tips Stewart (y)
Don't be too hasty with your praise, guys! Like I said, this was a first experiment for me, and I did more things wrong than right. Even as far as the processing is concerned, I probably should have used a dedicated image stacking program rather than doing it all laboriously in Photoshop.

Anyway, as far as the shooting experience itself was concerned, I thought I had a fairly decent appreciation of the theoretical issues, but I learned a lot about the practicalities too. I wrote up a few DOs and DON'Ts to remind me next time. I may as well share it with you here...

  1. DO remember the basics - dark skies, tripod, wide angle (I used my 10-22mm at 10mm), remote release with lock, manual mode, bulb setting.
  2. DO do some research about where would be a good observing site, if you live in town. You want to get out of town in the direction of your primary subject (e.g. North East for the Perseids) so that the main sky glow is behind you. You want a site where the lights from passing cars won't ruin your night sight and won't affect the camera.
  3. DON'T forget that it gets cold at night. That night the temperature only dropped to around 12°C where I was, which doesn't sound too bad, but it's pretty cold when you're standing around doing nothing!
  4. DON'T forget to take a chair if you've gone away from home to get some dark skies. Standing around by your tripod for hours is hard work! And you'll get a major crick in your neck.
  5. DON'T expect to see any stars through the viewfinder. They're just not bright enough when you're using a wide-angle lens. This means that aiming the camera is not an exact science.
  6. DO try some test exposures to see what shutter speeds you can get away with before sky fogging becomes an issue. For example I started off trying a 10 minute exposure (f/8, 100 ISO) and got quite a lot of glow, so after that I kept exposures down to around 2 minutes.
  7. DO be prepared to try image stacking (examples) to produce star trails, rather than going for long trails in one exposure.
  8. DON'T forget that meteors can appear anywhere in the sky - the appear to radiate from one point, but they don't necessarily appear near that point. (See here.) So you might as well point the camera at an interesting and/or dark area of sky rather than at the radiant.
  9. DON'T overlook the possibility of using some sort of timer to control your exposures automatically rather than doing it by hand. I had a kitchen timer with me which I set to 2 minutes. Beep beep beep... cancel timer... end exposure... start next exposure... start timer... wait 2 minutes... beep beep beep... It's OK for a few shots but starts to get a bit wearing after an hour or more! Unfortunately the Canon TC-80 timer isn't compatible with my 350D, but if I'd been more prepared I'd have looked for an alternative.
  10. DON'T expect to see loads of meteors. Yes, on TV they said there would be up to 100 meteors per hour in this shower, but they also used those weasel words "up to". And in any case the number probably refers to the peak of the shower, assuming pitch dark skies and a team of observers. You simply can't watch 100% of the sky 100% of the time on your own, even if you don't have a camera to attend to. That night I saw 40 meteors in 2½ hours, of which about 8 were the "Wow!" type.
  11. DON'T DON'T DON'T overlook the possibility of dew. If you don't keep the lens warm, it will attract dew, as I found when I came to pack up at 1.30 a.m. I only had 28 usable images out of 72, and if I'd realised what was going on I could have packed up at midnight instead of 1.30!
I should add that the DOs were the things I did, and was glad I did; the DONTs were the things I did, and wished I hadn't!
 
Stewart - it's an excellent image, testament to your perseverance!

Also, thanks for the tips - they're really helpful!

I've tried startrails once and found that assuming you can get far enough away from the glow of sodium lights the results can be stunning. One day, I'll actually get a chance to try again when I'm down in the back end of beyond in Wales! :D

Cheers!

Matt
 
Thats a really nice image Stewart, as you've said one of the biggest problems with taking long exposures at night is dew, I tend to use a dew heater on my lens to stop the dew forming, it's well worth investing in one keeps the dew from causing those wasted shots and gives you the chance to shoot much longer exposures (if you want to).

Alan
 
hope you don't mind but here's one I took in earlier this month centered on the pole star, from a very dark location.

Was just over 20mins of exposure with the 50mm f1.8 on the 1D mkII at 50ASA, fitted with the dew strip.

Cheers

Alan

MP3Y1694at.jpg
 
yes Stewart wide open at f1.8

Alan
 
That's very interesting Alan. Thanks.

It's obvious that f/1.8 will capture far more stars than f/8, and comparison of our two photos confirms that. Trouble is, on my test exposures I was getting sky fogging on a 10-minute exposure at f/8. I guess the answer is that one needs really dark skies. Is that right? Where did you shoot yours? (How far away are the nearest towns?)
 
Hi stewart,

Yep, two things are important a moonless night and a dark sky site, where I took mine from was about 12miles from the closest town in the Sperrin mountains in Northen Ireland (my in-laws have a farm there), where I live on the outskirts of leeds there's so much light pollution I get light pollution from street lamps after about 5 seconds !

Alan
 
What is this dew problem and solution you are talking about, I only have one nights experience (from the Perseids as well) and didn't suffer from it.:shrug: I'm hoping to go out again in the next few weeks so any help on the matter would be good.:)


I'm assuming you didn't use Long exposure noise reduction whilst taking those shots as that is something I have always wondered how you sort out in long exposure composites?
 
thanks for the tips guys they're going to be quite useful. (y)
 
Dew can be a real problem depending on the temperature and weather conditions, it forms on the front elements of the lens and ruins any images, I use whats called a 'Dew-Not' heater strip wrapped around the lens (it's powered from a 12 volt source), there commonly used in astronomy circles a search on google will show uk suppliers ( I use www.modernastronomy.com ).

As for noise reduction no I don't use it (too time consuming).

Cheers

Alan
 
For star trail photos you should consider abandoning your digital camera and going back to good old film. The 'problem' with wide angle digital astrophotography is that the sensitivity of the CCD's is so good that light pollution will quickly spoil pictures. Even in a dark sky site natural skyglow or moonlight can have the same effect in very long exposures. In star trail pictures the 'reciprocity failure' effect of conventional film will mean skyglow fogging will be reduced and 12 hour+ exposures are a real possibilty!

Another consideration in very long exposures is camera battery life- after an hour or two in freezing cold conditions you may find your expensinsive DSLR shuts down mid shot! A cheap all manual film camera (mechanical not electronic shutter) will stay open ad infinitum. You can pick up cheap manual SLR's for as little as 99p on E-bay.

Next thing I'd suggest is go for a for a really slow slide film like Velvia 50- not most peoples logical choice for night time pictures but for long exposures slower ISO helps. Noisy CCD's will never be a problem with film- so no dark frame subtraction or other digital jiggery pokery required!

Lens fogging & dew- always a problem on cold nights - I got round this problem on remote sites and also in my back garden using a portable 12v hair dryer to warm the lens now and again!

To make star trails interesting it's worth thinking about including other content in the picture like trees buildings etc.
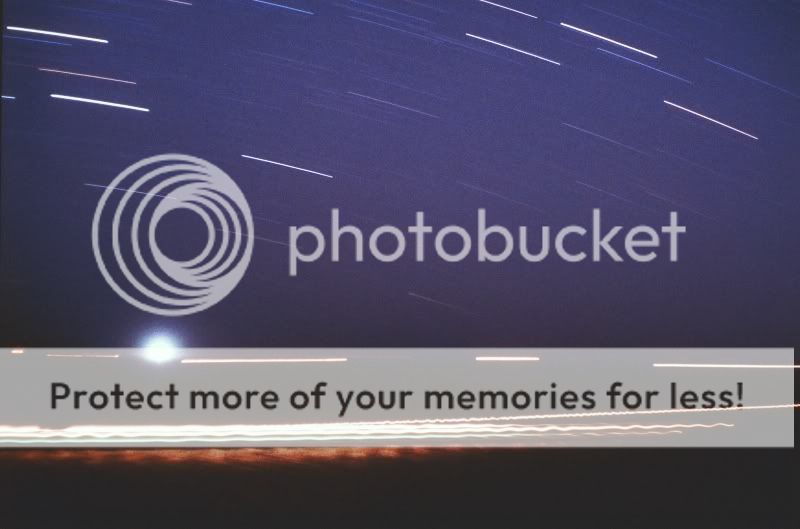
The photo below is one I took 20 years ago- a 30 minute exposure on Ektachrome 400 film and a cheap Zenit SLR. Taken from Rame Head near Plymouth, the bright, white light on the horizon is the Eddystone lighthouse some 8 miles out to sea. All the other 'star trails' are in fact ships moving in the English Chanel.
Eddystone-1.jpg
 
Back
Top