14 month old with paint in the 'studio'

Messages
1,454
Name
Gary
Edit My Images
No
So as I've not posted in a while, I thought I'd add these up.

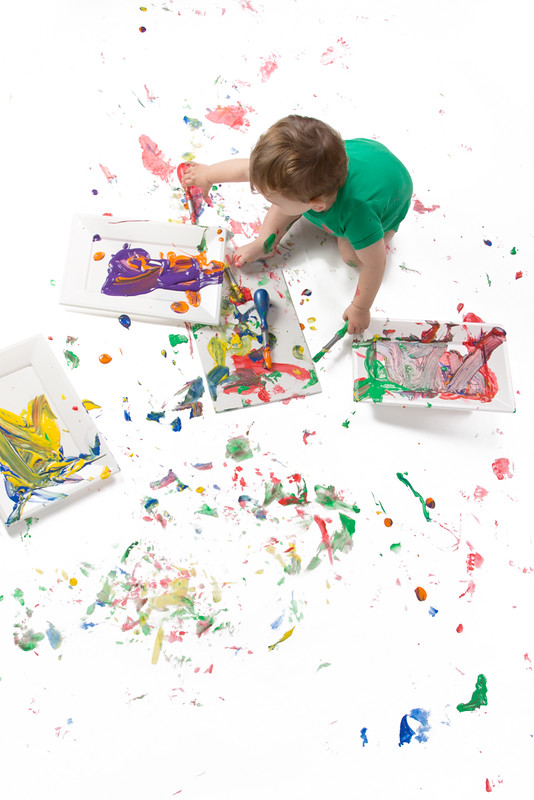
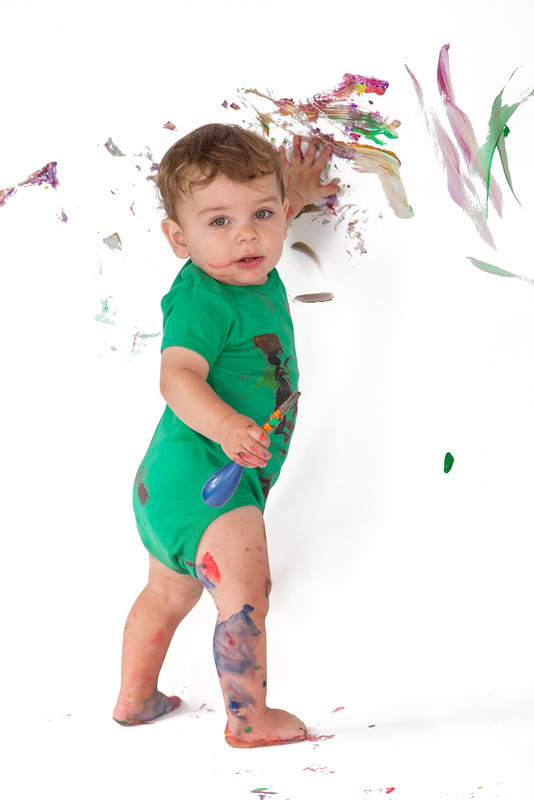
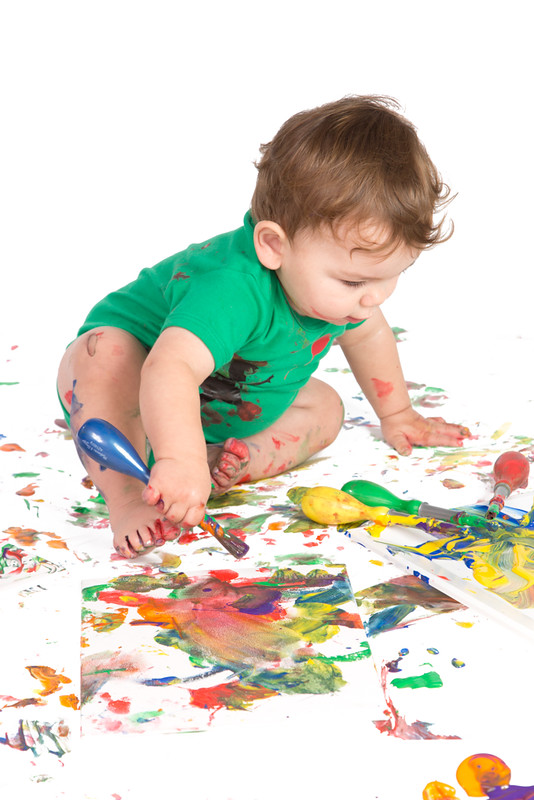
The idea behind this was my son had recently started walking and I had visions of a photoshoot where we paint the soles of his feet and are left with beautiful footprint trails. Then reality hit and I realised he'd have other ideas! As I'd ordered the paper background and paints, last minute I got some brushes and a canvas board and just let it unfold!

Thankfully my 'studio' gets set up in our kitchen as this took some serious cleaning up afterward. Big thanks to my wife for keeping my camera clean at the expense of her PJ's (small sacrifice to make!)


Painting_Photoshoot_02


Painting_Photoshoot_05


Painting_Photoshoot_07


Painting_Photoshoot_08


I've just noticed the first shot the face is a bit blown out but as I'm posting this at work, I'm not in a position to do anything about it! Feel free to make any other comments :)
 
Just appositive comment, I really like the angle of the second one. Keep them all they might be worth some money when he'll be famous!
 
Thanks both. He seemed to love it which helped my wife get over the mess (a bit :) ). Ten times messier than when we did a cake smash with him!

Thomas, I took a couple from a higher point of view to get more of the mess in! I think that shot was even looking from the background toward where I 'should' have been standing.

Thankfully I found a new technique which made the editing easier for that pure white background look, as I had to try for fairly even lighting to capture the mess. For those that are interested the technique is in Photoshop using the Apply Image command to create masks as they do here:

http://psd.fanextra.com/tutorials/mastering-the-apply-image-tool-in-photoshop/

I tried both techniques but found the more complicated one produces better results and once you record it as an action you can really put it to use. On some of the edits I ran the action twice with different offset values in the first Subtract Apply Image command and then blended the output of the two layers by hand.
 
I did something like this once ... Like a cake smash but a paint smash. I learned what colours make cack brown right away. In future I plan to stay away from the blues and greens. Everything took on all one colour quite quickly. I did it on white vinyl but my post wasn't very good. I cheated with the lights.

Good job!
 
Thanks Beth @sunnyside_up, I appreciate you dropping by to comment.

My original plan was to let the colours dry to prevent the brown muck but, as you can see from the last shot, that didn't really happen. We did have the heating on so I think the paint was drying fairly quickly and we introduced colours slowly through the shoot which may have improved things slightly.

The final canvas (pretty much as you see it in the last shot, bum print and all) is now on our fireplace and I have an 'arty' idea of how to recycle the paper background. I did use vinyl for the cake smash and it wiped up well but I didn't want to risk paint stains so I went with paper.

After seeing a few of your posts and looking through your flickr, I now want to move away from white backgrounds!!!
 
Superb, I really love these. Number 2, whilst unfortunately not showing your lads face, is really striking and says everything that needs to be said about how to have fun!

Might I ask what lighting was used here?
 
Superb, I really love these. Number 2, whilst unfortunately not showing your lads face, is really striking and says everything that needs to be said about how to have fun!

Might I ask what lighting was used here?

Thanks for stopping by to comment. Fun is most definitely the key word here :)

I now have an 12x18 print of the third picture up at my desk. Best way to brighten up a Monday morning!

My lighting is 1x Lencarta smartflash 200 biught second hand off here, fired through a decent size octagonal soft box (placed front left and up a bit). I have a flashgun (Nissin Di866) as a fill in, fired through a small square softbox (front right and about eye level to him standing). The background I normally blow out with two more flashguns (Yongnuo YN560 mkIII) fired into silver reflective umbrellas but for this, as I mentioned, I just tried to get a similar meter at the front and at the background. It all gts a bit cramped in the kitchen and the studio flash kind of has to go front left to fit it all in.

It is a studio on a budget but it works for my needs. I think all my stands, softboxes and flashguns came off eBay. I bought the Nissin ages ago as an on-camera flash but in the studio I fire that and the lencarta with some Yongnuo wireless triggers. The Yongnuo flashes are basic but have the wireless trigger bult in.
 
Back
Top