My Light Painting Evolving

Messages
1,033
Name
Matthew
Edit My Images
Yes
Thought I would Edit this thread into a timeline on how my skills, technique and creativity change while I learn new things. I have just really got into this over the last month and think I have become addicted!

This first batch of photos are repeats from separate threads but this will be where I post this from now on.

All photos are pretty must straight out of camera, only PP is possible slight crop, small levels adjust and slight noise reduction depending on conditions.

First Physiogram


First Physiogram by M+M Morrison, on Flickr


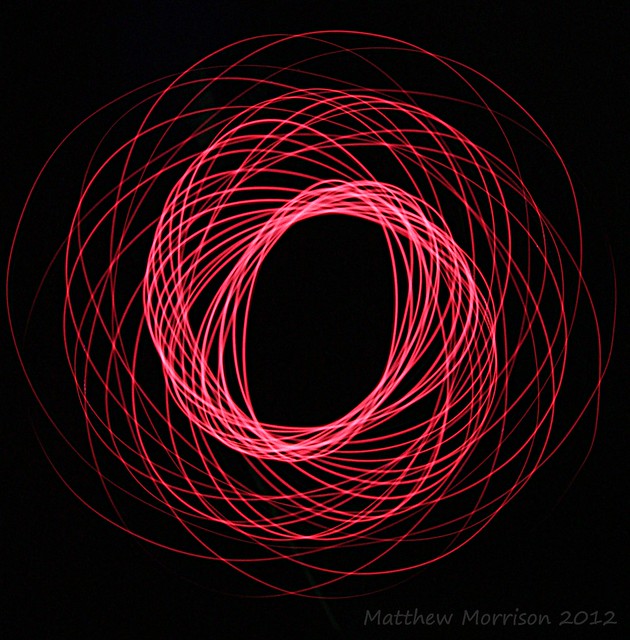
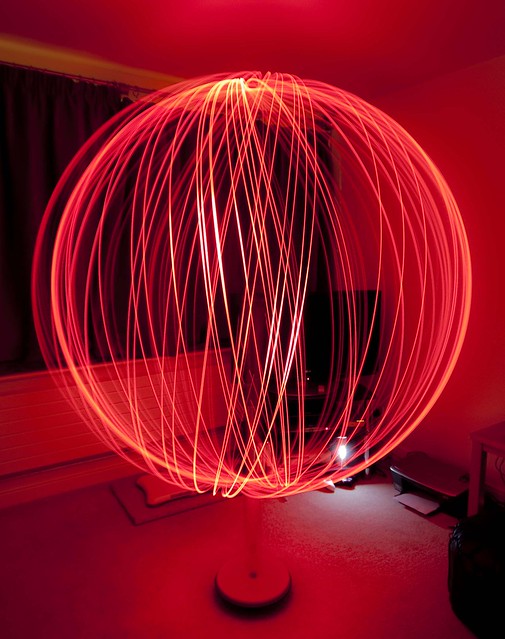
Red Physiogram by M+M Morrison, on Flickr

A bit of light-painting


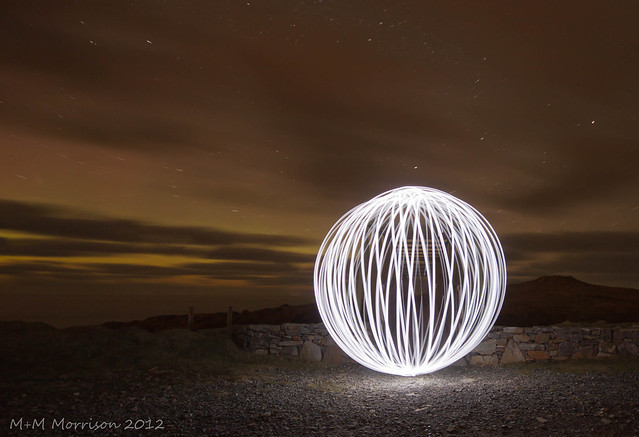
Barvas Ruin by M+M Morrison, on Flickr

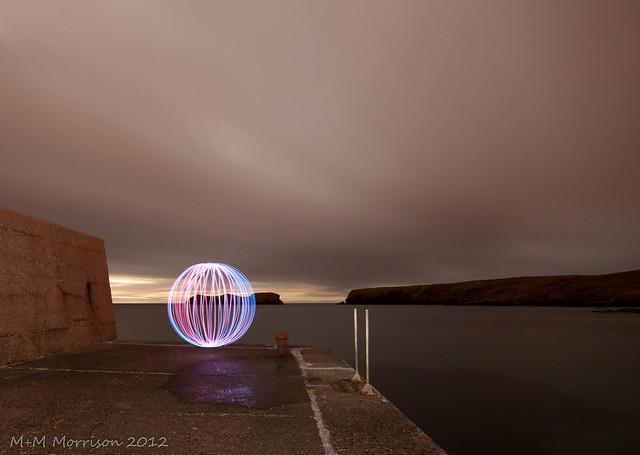
Then the Orbs, first came the making of the Orb tool and the first Orbs.

The prep


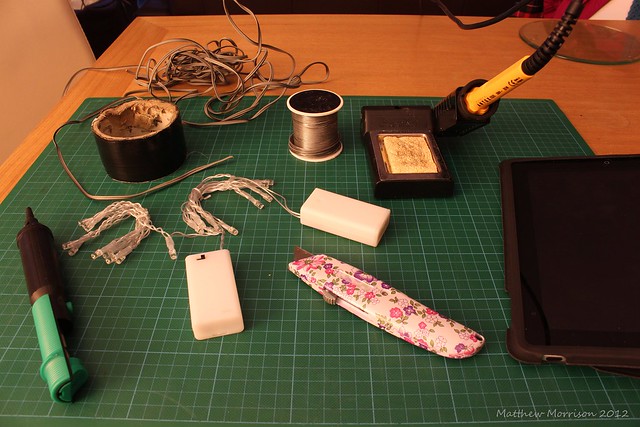
Can you tell what it's going to be??? by M+M Morrison, on Flickr
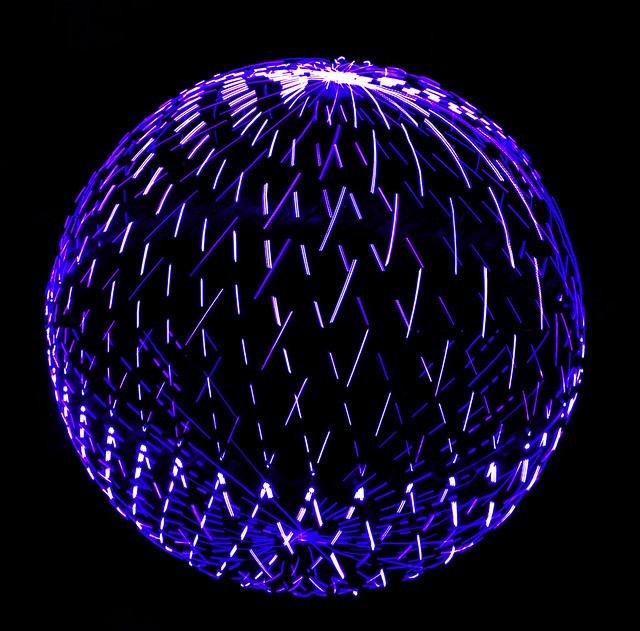
The first Orb


First Orb by M+M Morrison, on Flickr

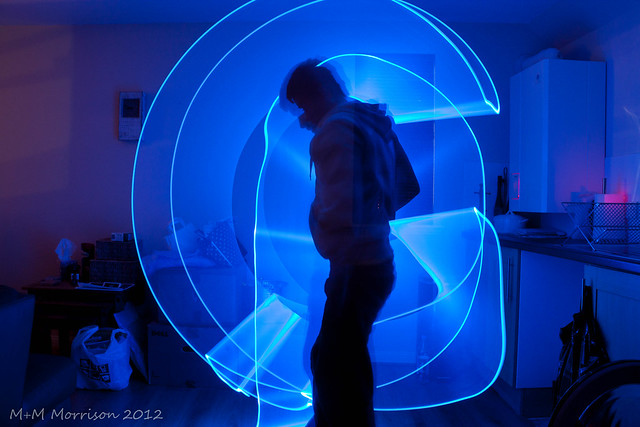
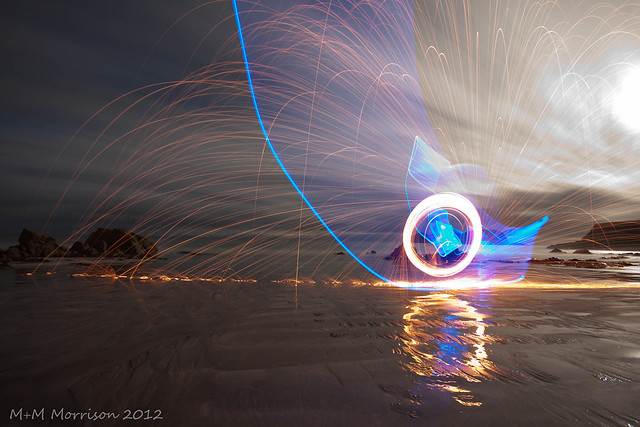
After the first night the wire I used broke, so got the tools out and used a good bit of Hi Flex power cord. Results was quite better and more controlled, a bit more practise and should be looking dam good :D Was quite hard avoiding the couch and worktop though hence one or two off swings.


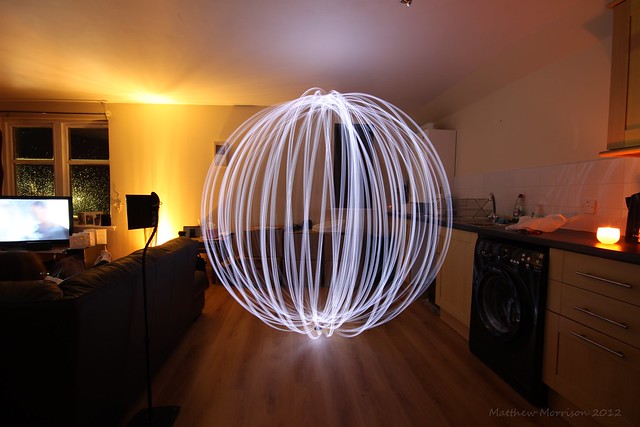
Another Indoor Orb by M+M Morrison, on Flickr
 
Last edited:
Love the middle shot. I can see the potential in this.

So what does the finished gadget look like? Or is it a secret ;)
 
Weather is no better down here in Uist, its getting depressing :bang: :LOL:

Good for the first attempts, im still at that stage myself. Its good fun (y)

Btw, nice Stanley :LOL:
 
Last edited:
Thanks guys, will post up version 2.0 later on, it may need another revision though!

Everyone needs a flowery stanley knife in their toolkit, they are sharper than all others!
 
Last edited:
Thanks guys, the background is the glow from the town of Stornoway, didn't get far out enough to get rid of it but it came out pretty nice after all!

Will post a photo of the tool tonight so easy to make if you can do simple soldering!
 
Last edited:
Yes your correct, sorry I haven't managed to get time for a finished article yet.

This is what I got link snipped the LEDs off and left enough wire to strip back on both the led side and battery pack (2 x AA) Added in the flex long enough to swing, soldered and insulated wires with duck tape and then strengthened with 2 long bolts.

Made a second one tonight, going to add some colour though to some of the LEDs.
 
Last edited:
how do you do this?? its amazing???

Hi there, well to create the Orb itself is basically put a coin on the ground as a marker, you want to swing the light round and then turn slowly. Keep the light above the coin each time and this will create the 'ball'.

If you check out some videos on-line they can explain better, or go to Denis Smith photography he is the master of it all!

Thanks guys it a completely new thing to me and am loving it very much!
 
Last edited:
I think this looks great, I really like the indoors one.

Absolutely no comment on the stanley knife.
 
Great work

I've tried several versions of construction to create different effects.
I'm sure many more ways of doing this are out there.

4328493960_ccfb5f74ce_z.jpg


3556720830_f08fb812f0_z.jpg


6015306729_d2d3d196d4_z.jpg
 
So here I am, adding my recent images and creations. As mentioned I am going to use this thread as a tool to show how I progress over the coming weeks and months when I get out to do this new fangled period of my life :D

So Last week I took the following (Already posted in thread of its own, added just to create the time-line)

1*

Aurora And The Orb by M+M Morrison, on Flickr

2*

Aurora Spin by M+M Morrison, on Flickr
 
Last edited:
Last edited:
Love the thread.

And that last wire wool one is inspired! Great idea (y)
 
Great thread:clap: That last one is excellent, hope you didn't get too singed;)
 
Great idea, nice to see your stuff evolving, big fan of the last few at the battery, I just love restricted space wire wool spins! All of them really nice though, well done.
 
Thanks guys, haven't managed out at all this week due to a holiday away, so hopefully more to come at the weekend.

Also got a new toy on the way, so that should add another dimension to it ;)
 
Last edited:
I should hopefully post a shot of the lot I use tomorrow, should give you an idea of what I use at least. I'm sure many people will use different styles of stuff for the same effect, home made stuff is always going to differ, but in a way is more satisfying to use.

As for settings of you want you can check my Flickr account, on each shot clock on the camera model (500d) to the right and it will list all the settings I have used. I try to keep iso as low as possible 100 - 400 max, f5.6 to 7.1ish and depending on the lighting at the time 2.30 to anything above 4 minutes or longer. There is an app called Exposure Calculator that can be used which can be quite helpful to judge exposure, practise is key and I still have a long way to go!

Hope that helps.
 
Last edited:
Haven't got a shot of my stuff yet but will get it done tomorrow. Now on to the fun stuff! Tonights escapade seen a return to the Barvas Machair (where I shot the Light Painted Ruin) Orbs weren't my strong point tonight, I put it down to the uneven rough terrain (and my noob-ness) but will have to learn to over come it with practice. Lenser V24 had its first proper outing as well, love it, love it and love it! On with the shots though.


Barvas River by M+M Morrison, on Flickr


Barvas River 2 by M+M Morrison, on Flickr


Ruined Orb by M+M Morrison, on Flickr


Ruin Fire by M+M Morrison, on Flickr


Night Ruin by M+M Morrison, on Flickr

Hope you enjoy looking as much as I do taking.
Thanks
 
Last edited:
I was out again last night, first meet up with a fellow light-painter who has been doing it for quite some time, Colin Cameron. Was a great night I learned quite a bit from him and was good having someone around to point out/help with and yarn to about techniques.

Here are the first 3 of the set, will add the rest over the next few days.


Orbing on the Pier by M+M Morrison, on Flickr


Bayble Island Orb by M+M Morrison, on Flickr


Burning in Bayble by M+M Morrison, on Flickr

Main thing I changed here was the weight of my Orb tool, I wasn't happy with the Orbs from the Barvas Machair, so took some weight off it. It seemed to help big style. I also went for 2 gels, each covered half of the LED's on the end which led to a nice effect (I think) so will continue to experiment. Also used the Exposure Calculator App to help out exposure times etc.
 
Last edited:
Thanks for the comments guys, much appreciated. I think that my Orbs are coming together and I learned quite abit the other night, I was surprised how they turned out, made my night anyway.

Regarding the V24, sadly they haven't been superseded or re-released, I spend a good 2-3 months searching until this one came up, one off sale though. If there was more I would have stock piled, they are such an awsome tool, was just about to order a Perspex rod to try and make my own!

Another few shots from the night should be up soon so check back for more fiery fun!
 
Last edited:
Last edited:
I absolutely love the orb shots, the wire wool it great too, but the orbs "speak to me".

What I can't get my dim little head around is why we can't see the person doing the spinning?
Am I missing something? Is it PP?
If I promise to give you sandwiches and biscuits, will you tell me?
 
Back
Top