GardenersHelper
In Memoriam
- Messages
- 6,344
- Name
- Nick
- Edit My Images
- Yes
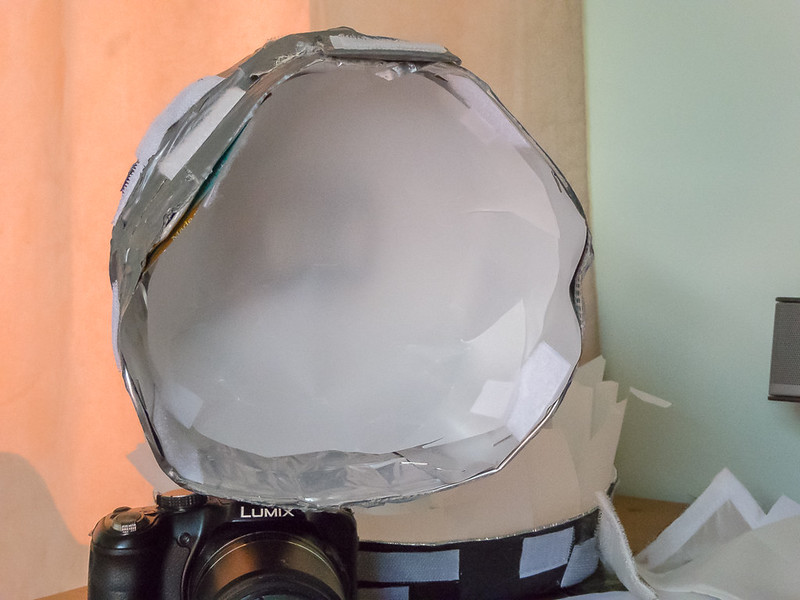
I have been trying to improve my diffusion and In this thread I looked at various combinations of packing material, parchment paper and perspex sheet in terms of how well they diffuse and how much light they lose.
Bryn @Tintin124 has recently been singing the praises of frosted plastic as a diffusion material, and his latest diffusion for the Venus looks very good indeed. Unfortunately I couldn't find any frosted plastic on line or at the local art shop, and so I bought some 3mm thick frosted perspex. This diffused well and didn't lose much light, but it was too heavy and awkward for me to want to use it.
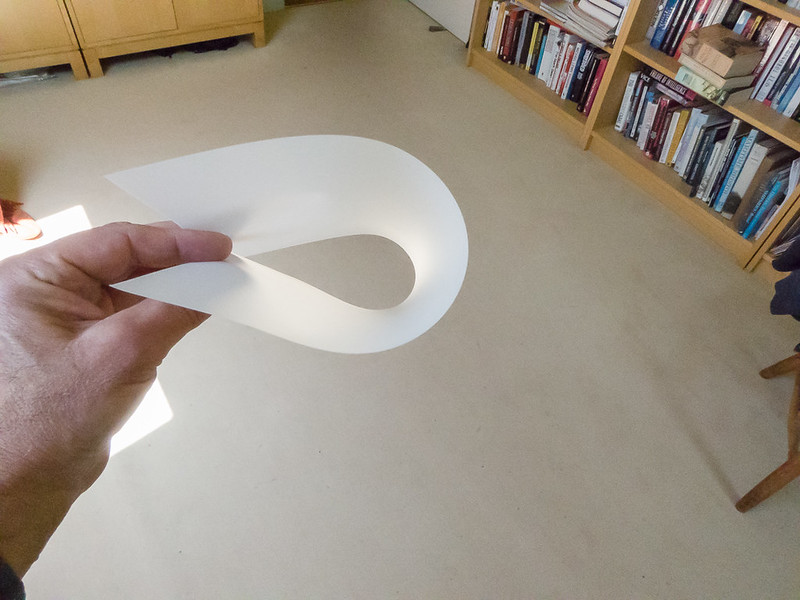
This morning I went into my local stationers shop and they had frosted plastic. I don't know if it is exactly the same stuff that Bryn is using but it is thin, light and pliable (although it crinkles if you try to bend it in two directions at once). They had it in three weights. I bought several A4 sheets of the heaviest sheet, 150g I think, although I'm not quite sure about that (18 p each) and some of the lightest, 90g sheets, several A4 sheets (14p each) and several larger sheets (50p each). The 150g sheets didn't come in the larger sheets unfortunately.

0741 2015_06_19 01 90g frosted plastic P1010668 LR 800 by gardenersassistant, on Flickr

0741 2015_06_19 02 150g frosted plastic P1010669 LR 800 by gardenersassistant, on Flickr
0741 2015_06_19 02a the frosted plastic is thin and pliable P1010670 LR 800 by gardenersassistant, on Flickr
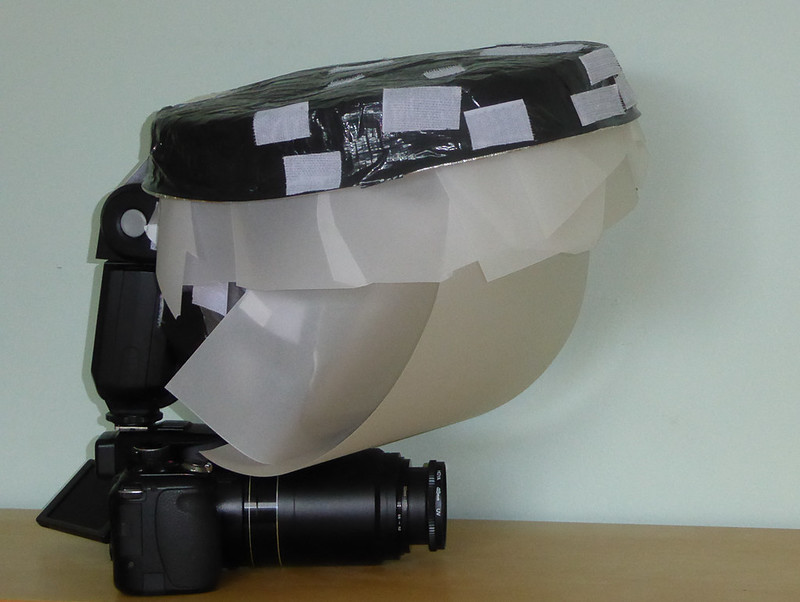
I disassembled my pie-tin diffuser and first of all worked on the cap.
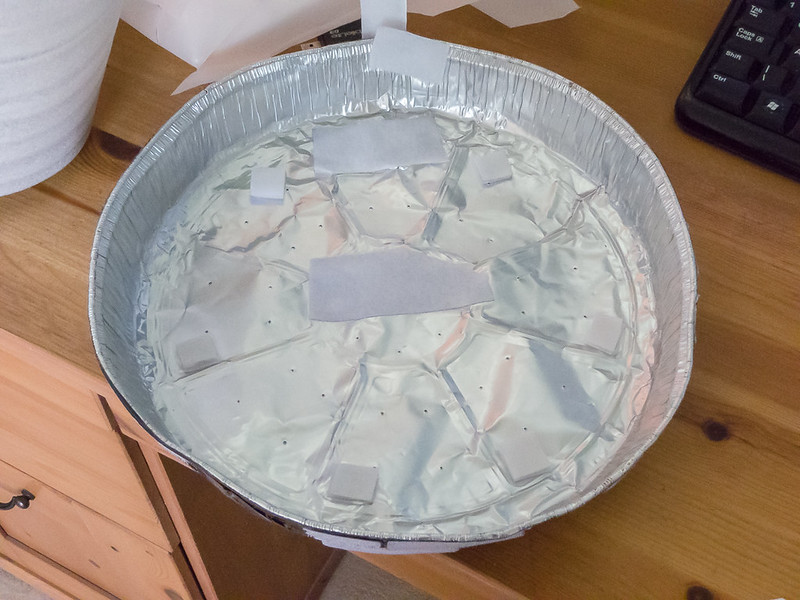
0741 2015_06_19 03 Cap from previous versions P1010659 LR 800 by gardenersassistant, on Flickr
I lined it with 90g sheet. I used self-adhesive hook and loop material ("Velcro", but from another supplier) to attach the lining to the cap, and used the same approach for fitting everything else together. The two areas not covered by the plastic sheet are pieces of Velcro used to attach the cap to the top of the diffuser bowl.
0741 2015_06_19 04 Cap lined with 90g frosted plastic P1010660 LR 800 by gardenersassistant, on Flickr
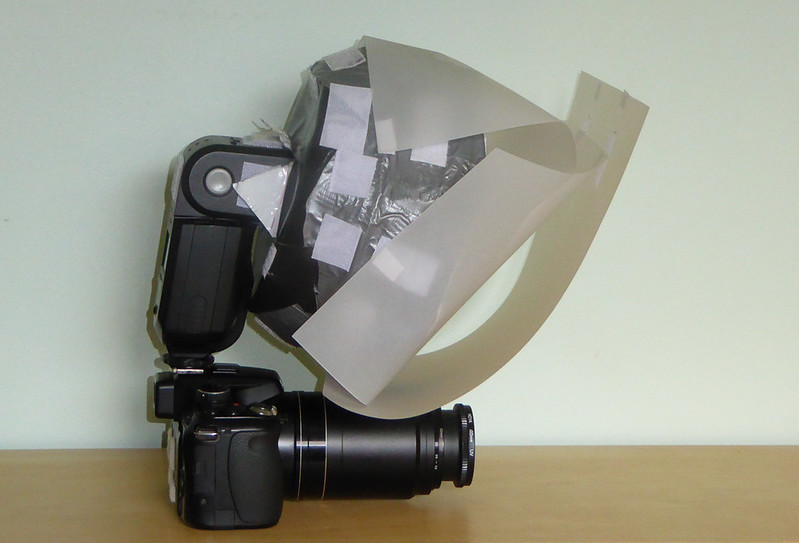
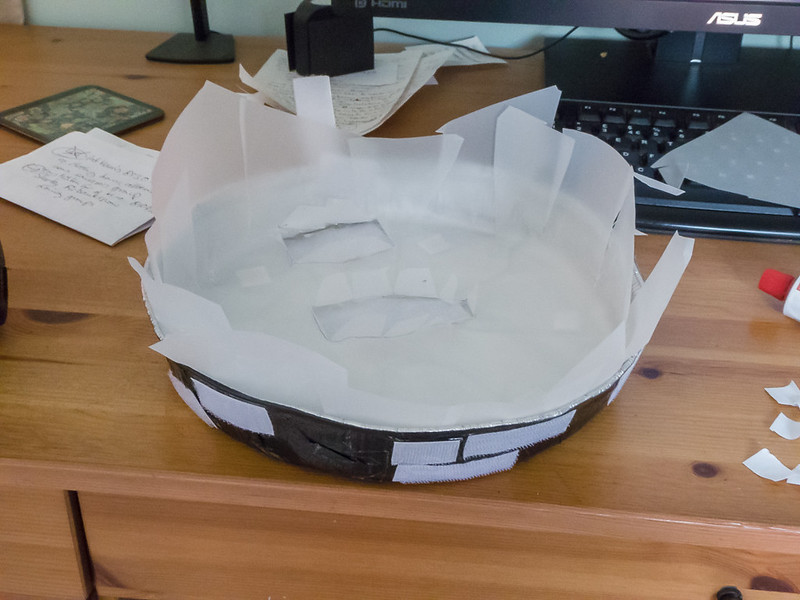
My next move was going to be to line the diffuser bowl, but it turned out to be easier to fit a concave piece of sheet. I used the 90g sheet because I had assumed that for the lining I would need a larger piece than I could get out of an A4 sheet, which is all I had for the 150g sheet. In fact, the way it turned out I probably could have used the 150g sheet. This first layer was attached so there was an air gap between the front of the flash unit and the sheet.
0741 2015_06_19 05 First concave layer, 90g frosted plastic P1010661 LR 800 by gardenersassistant, on Flickr
I then put a second concave layer of 90g sheet inside the bowl, with an air gap between the two concave layers.

0741 2015_06_19 06 Second concave layer, 90g frosted plastic P1010662 LR 800 by gardenersassistant, on Flickr
Next I fitted an A4 150g sheet on the outside of the bowl.

0741 2015_06_19 07 Third layer, 150g frosted plastic P1010663 LR 800 by gardenersassistant, on Flickr
Continued in next post ....
Bryn @Tintin124 has recently been singing the praises of frosted plastic as a diffusion material, and his latest diffusion for the Venus looks very good indeed. Unfortunately I couldn't find any frosted plastic on line or at the local art shop, and so I bought some 3mm thick frosted perspex. This diffused well and didn't lose much light, but it was too heavy and awkward for me to want to use it.
This morning I went into my local stationers shop and they had frosted plastic. I don't know if it is exactly the same stuff that Bryn is using but it is thin, light and pliable (although it crinkles if you try to bend it in two directions at once). They had it in three weights. I bought several A4 sheets of the heaviest sheet, 150g I think, although I'm not quite sure about that (18 p each) and some of the lightest, 90g sheets, several A4 sheets (14p each) and several larger sheets (50p each). The 150g sheets didn't come in the larger sheets unfortunately.
0741 2015_06_19 01 90g frosted plastic P1010668 LR 800 by gardenersassistant, on Flickr
0741 2015_06_19 02 150g frosted plastic P1010669 LR 800 by gardenersassistant, on Flickr
0741 2015_06_19 02a the frosted plastic is thin and pliable P1010670 LR 800 by gardenersassistant, on Flickr
I disassembled my pie-tin diffuser and first of all worked on the cap.
0741 2015_06_19 03 Cap from previous versions P1010659 LR 800 by gardenersassistant, on Flickr
I lined it with 90g sheet. I used self-adhesive hook and loop material ("Velcro", but from another supplier) to attach the lining to the cap, and used the same approach for fitting everything else together. The two areas not covered by the plastic sheet are pieces of Velcro used to attach the cap to the top of the diffuser bowl.
0741 2015_06_19 04 Cap lined with 90g frosted plastic P1010660 LR 800 by gardenersassistant, on Flickr
My next move was going to be to line the diffuser bowl, but it turned out to be easier to fit a concave piece of sheet. I used the 90g sheet because I had assumed that for the lining I would need a larger piece than I could get out of an A4 sheet, which is all I had for the 150g sheet. In fact, the way it turned out I probably could have used the 150g sheet. This first layer was attached so there was an air gap between the front of the flash unit and the sheet.
0741 2015_06_19 05 First concave layer, 90g frosted plastic P1010661 LR 800 by gardenersassistant, on Flickr
I then put a second concave layer of 90g sheet inside the bowl, with an air gap between the two concave layers.
0741 2015_06_19 06 Second concave layer, 90g frosted plastic P1010662 LR 800 by gardenersassistant, on Flickr
Next I fitted an A4 150g sheet on the outside of the bowl.
0741 2015_06_19 07 Third layer, 150g frosted plastic P1010663 LR 800 by gardenersassistant, on Flickr
Continued in next post ....