It would be extremely helpful if you could explain what you did.
At the moment I am using trial versions of Photoshop/lightroom and dxo optics pro. I'm more inclined towards Photoshop personally and will probably purchase a subscription to that.
Thanks Nick
OK, since you have Lightroom this will be easy. I'll try to explain the thinking/process I went through.
When I looked at the images in the post they looked a bit dark to me.
I went over to your Flickr and downloaded a large size version of the one that I worked on.
This is what it looked like in Lightroom. The histogram over at the top right confirmed my initial impression - there is a gap at the top of the histogram and this means that the brightest brightnesses are not being used. This results (as does a gap at the bottom end) in a flat-looking image.

MikraCoils Fly Lightroom 01 by
gardenersassistant, on Flickr
The first step was to close up that gap. I'll show you the sequence I went through (which you can track in the History panel on the left), but in retrospect I think there was a better way, which I'll describe at the end.
I moved the Whites slider to the right. This increases the brightness of the very brightest areas in the image, so you can make the brightest of them the brightest available brightness. Actually, I didn't move the slider directly. I held down the Shift key and double-clicked on the triangle in the middle of the Whites slider. This makes Lightroom shift the slider so as to close up the gap at the top of the histogram.

MikraCoils Fly Lightroom 02 by
gardenersassistant, on Flickr
I now wanted to make the dark areas on the fly's body lighter, so I moved the Shadows slider all the way to the right. The Shadows are the dark areas which are not absolutely the darkest areas (those are the Blacks).
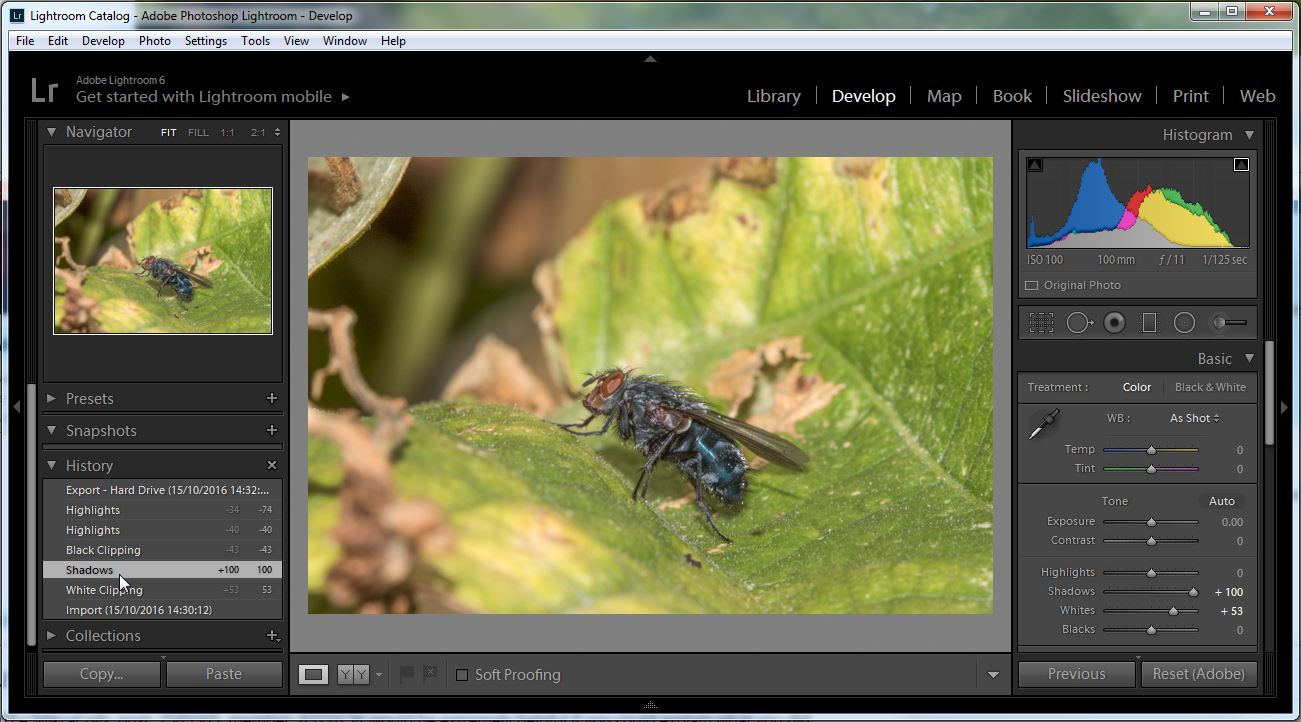
MikraCoils Fly Lightroom 03 by
gardenersassistant, on Flickr
Now the very darkest areas looked not dark enough to me, so I moved the Blacks slider over to the left.

MikraCoils Fly Lightroom 04 by
gardenersassistant, on Flickr
Now the light areas on the leaf looked a bit distractingly bright to me, so I turned down the Highlights, which are the bright areas which are not absolutely the brightest (that is the Whites).
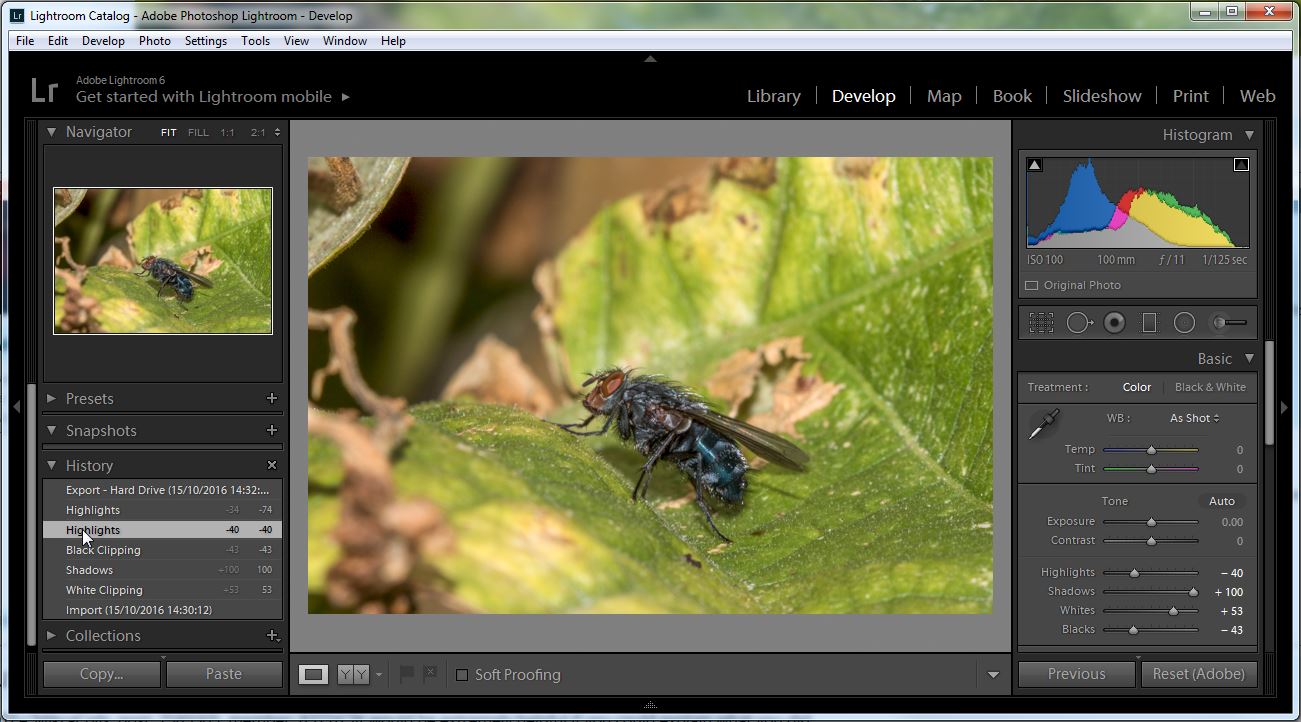
MikraCoils Fly Lightroom 05 by
gardenersassistant, on Flickr
Those areas still looked a bit bright so I turned down the Highlights a bit more.
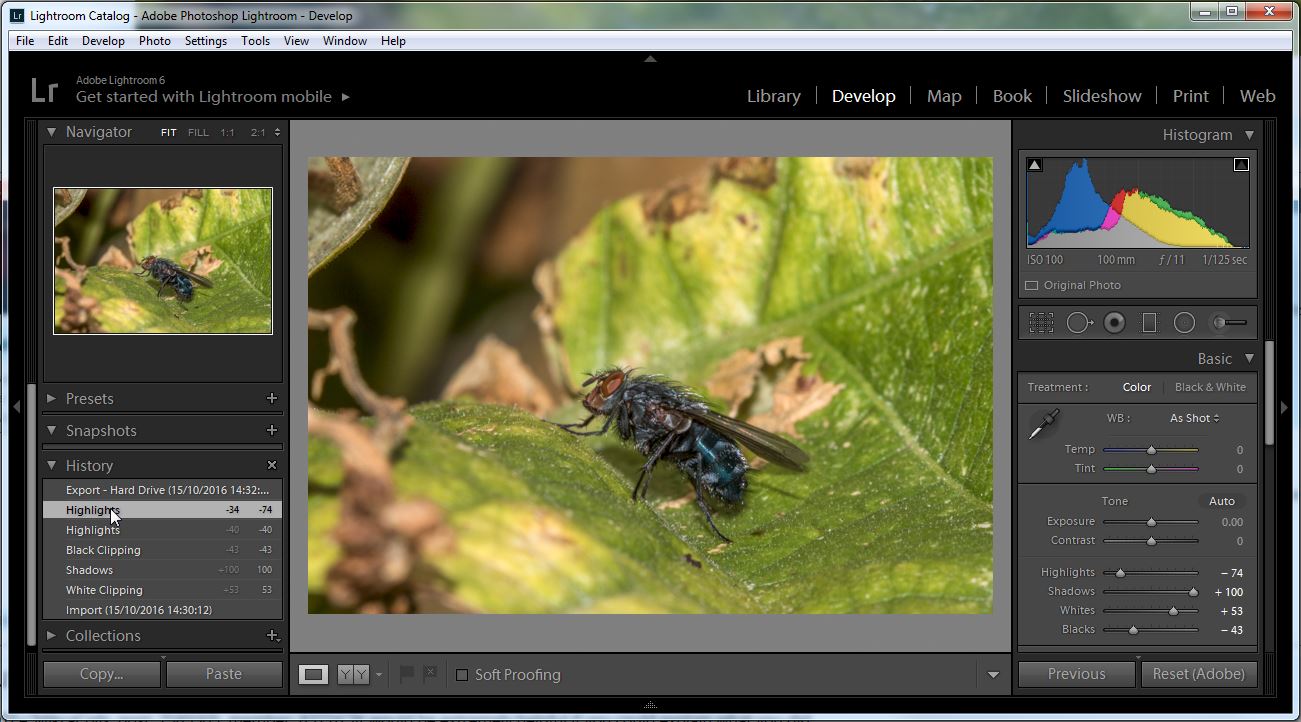
MikraCoils Fly Lightroom 06 by
gardenersassistant, on Flickr
And that was the version I exported and used in the animated gif I posted.
I'm not sure why I started with the Whites. I remember starting with the Exposure but not liking the effect, reversing it and starting again with the Whites.
According to a book I read about Lightroom, it is designed so you go from the top down in the Basic panel on the right. I remembered this when starting to draft this response and I had another go, this time starting with Exposure. I won't go through the whole sequence because you can recreate it for yourself by working up from the bottom of the History panel in this illustration.

MikraCoils Fly Lightroom 10 by
gardenersassistant, on Flickr
I started by holding down the Shift key and double clicking on the little triangle in the middle of the Exposure slider. Lightroom moved the Exposure slider up by just over one stop. I am always a bit suspicious about what Lightroom does in these circumstances - it often seems to make the light areas look too bright for my liking. I imagine that was what I reacted to first time around. However, this time I left the Exposure where it was and went through steps shown in the History panel, as before reacting each time to what I didn't like about the image.
In fact I did just three steps - Exposure, Highlights and Shadows - thought it looked ok and so I exported the image. However, when I looked at the exported image I wasn't quite comfortable with it so I made the other two changes shown at the top of the History panel.
When you have done both of these versions you will be able to compare them and see that they are rather different. I think I prefer the later one that started with Exposure. But that is by the by. Over to you now. Enjoy.
")


 IMG_2622 by mikra coils, on Flickr
 IMG_2620 by mikra coils, on Flickr
 IMG_2618 by mikra coils, on Flickr
 30287916446_5a4d8d52f6_z