Changing white to near black in PS CC

Messages
4,289
Name
Steve
Edit My Images
Yes
Good evening to my learned friends here on the best photography forum in the world. Is that enough BS to get some help around here :)

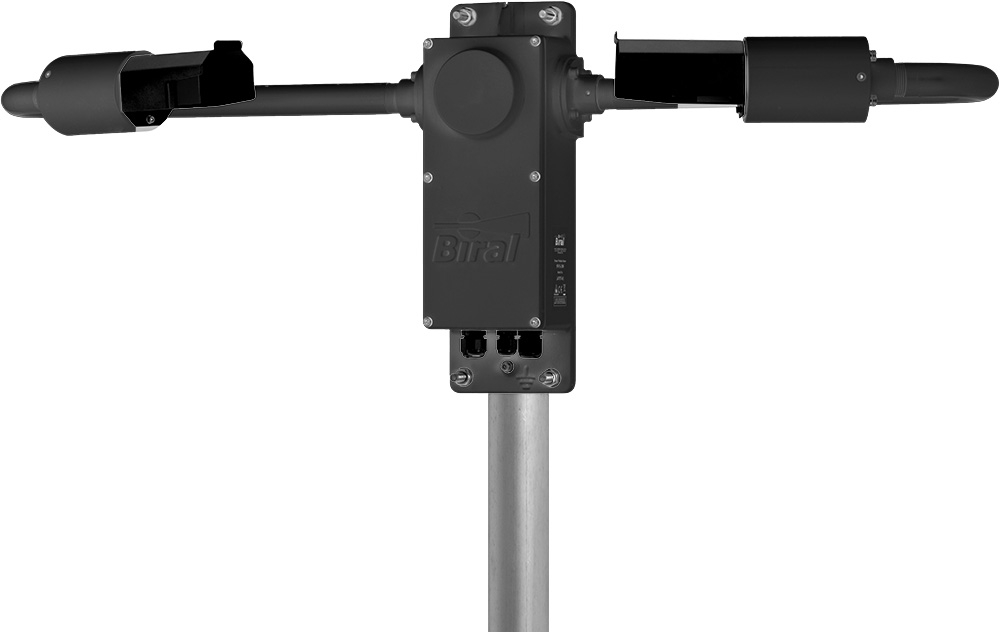
I have been asked by my boss to edit an image of one of our products that is predominanyly gloss white. He wants the white replaced by something close to black but retaining detail like an embossed logo and label. This is to simulate a hard anodised finish we are planning to use instead of powder coated paint.

I've tried a couple of methods from YouTube but always end up with an unwanted colour tint. Anyone care to share their wisdom and help me out?

The image is a .psd and can be seen here: https://www.dropbox.com/s/vgvhtpvr8aiodu0/SWS-100_left.psd?dl=0

Apologies, I know lots of you don't like clicking through to unknown places but I'm useless at adding images in here :(


Hi Steve,

Is this what you are looking for?


SWS-100_left.jpg
 
Last edited:
I've had a go, and this is what I understood from the description you gave.


SWS-100_left Edit Final
by redhed17 on Talk Photography

First I had to convert the CMYK in the PSD to RGB to be able to do a B&W layer later on.

I duplicated the Layer. I made a selection of the white areas using the Quick Selection Tool. Chose a Curves Layer, and pulled the right white point down, and pushed the right black point up, basically inverting the brightness levels of the selection. I also clicked a mid point on the Curve to adjust the brightness level. I then chose a B&W adjustment layer to ensure there was no colour cast.

This last step can be done to any image to get rid of any colour cast, but if there were other colours you didn't want to lose, you would reselect the initial selection by holding the Control key and clicking on the mask to re-select the selection, and then do the B&W adjustment layer.

Hope that is close to what you wanted.

sws-100_left-edit-final.15729
 
Thanks for the Saturday afternoon challenge ;)
White to black is a tricky one, and if you're changing the surface finish as well, you'd probably be better re-shooting with the right parts and colours.
However, you can get close-ish in PS realtively quickly. Flipping all the white to black by inverting the values looks weird though, because you invert the shadows and highlights too.
Instead, you need to keep the bright highlights and reduce the brightness of the midtones and shadows towards dark grey/black.
Then you can accentuate the highlights to help make the blacks appear darker.

To separate out the highlights from the midtones you can use Luminosity Maps (simple tutorial here)
I had a go, and got to the following pretty quickly with separate luminosity masks for the highlights midtones/shadows followed by some saturation reduction to remove any unwanted colour.
Then a little bit of dodging and burning on the logo, a copy/paste/invert of the safety label (Layer type> Screen) and some shoddy masking to bring back the original details where required.
satAfternoon_SWS-100_left.jpg
This only really changes the colour, to edit the surface finish you'll need to sharpen up reflections and highlights, and add more reflections and glossiness across the board ie: it'll be a huge faff - reshoot it!
Hope that helps, I'm off to do what I was supposed to be doing an hour ago ;)
 
Last edited:
Hey guys, thanks for the input. Sorry I haven't been back in here to see what's happening but I got whisked off on a business trip with limited access to t'Internet.

Shooting the real thing would be great - except it doesn't exist :( The bosses are considering applying a hard anodised finish instead of the whte painted one to make the device more corrosion resistant in off-shore and marine environments. They want an idea of what it would look like before commiting cash to getting one manufactured. I think Schpleep's result is the closest to how I envisaged it so I'm off to spend a couple of hours trying to replicate that.

Cheers again, guys - you're stars :)
 
Still can't get it to look as good as yours, Schlpeep. but it was good enough - they're going to get one anodised so I will be able to photograph the real thing :)
 
Still can't get it to look as good as yours, Schlpeep. but it was good enough - they're going to get one anodised so I will be able to photograph the real thing :)
Good stuff, glad my rough edit was useful. Let me know if the PSD would help and I'll PM a link. Also, see if you can get them to anodise it as a mid-grey, it'd be much easier to change the colour of a grey one in photoshop ;)
 
@schlpeep: Yeah, it was just the job and very realistic :)

Traditionally, we have always hard anodised to as close to black as we can - it's a kind of trademark thing; everyone recognises who's sensor it is :)

when I've got one to photograph I will put an image up here so you can see what it's like.
 
Back
Top