Few final images of Ella

Messages
1,564
Name
Graham
Edit My Images
No
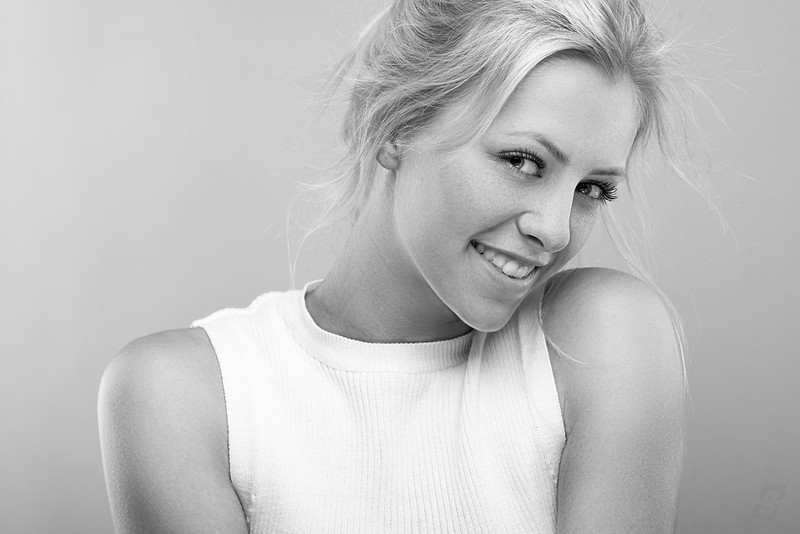
I think I've finally got through the majority of the keepers and didn't want to over-share on here, but wanted to post just a few more from the shoot. It's been a real learning curve doing this - from the lighting setup, posing, selection process, etc. - and I am very glad I embarked on the process of learning how to retouch in Photoshop - although I have loads to learn still, I could never go back to the plugin type software... ever...

Quite how I've gone this far without learning about frequency separation and dodging and burning(!) is a sad state of affairs :banghead:


EllaScott-192-Edit
by Graham Mayers, on Flickr


EllaScott-046-Edit-2
by Graham Mayers, on Flickr


EllaScott-234-Edit
by Graham Mayers, on Flickr
 
very good in b/w, the one in colour is... strange. Maybe a touch down on the editing, seems a little artificial.
 
Third one for me, what a fabulous pose and expression! Great work on all of these, I've been following the other threads too but haven't previously commented. Very impressive.
 
Alright you're just showing off now!!!!:banana:

Awesome set, the conversions work great. Well Done

Haha! Thanks for the comment :)

very good in b/w, the one in colour is... strange. Maybe a touch down on the editing, seems a little artificial.

Thank you. I've processed this one in the same manner as the rest, so I'm not sure why it stands out. Maybe it's because it's the closest crop of all my posts so far?

Those three are crackers. I especially like the second. And the third.

Bravo.

Thanks :D

The second one is amazing

Thanks, it's certainly one of my favourites too (y)

Third one for me, what a fabulous pose and expression! Great work on all of these, I've been following the other threads too but haven't previously commented. Very impressive.

Thanks mate :D
 
Wow, nice lighting, composition, editing and model..
 
Yep they look great.I thought the frequency separation was used to take shine off the skin and leave the skin texture behind obviously not a proffessional :) Do you use it for other things ?

Gaz
 
Those b&w conversions are so awesome, wonderful processing! You've outdone yourself here! There's no stopping you now Graham!

I do most of my processing in LR, so I'm intrigued to know more about this frequency separation thing.
 
Wow, nice lighting, composition, editing and model..

Thanks for commenting :)

Yep they look great.I thought the frequency separation was used to take shine off the skin and leave the skin texture behind obviously not a proffessional :) Do you use it for other things ?

Gaz

Thanks :) Nope, that's the essence of the technique. Leave all texture alone so that you can even out skin tones and reduce hot spots, etc. without losing the natural look of the skin texture.

Those b&w conversions are so awesome, wonderful processing! You've outdone yourself here! There's no stopping you now Graham!

I do most of my processing in LR, so I'm intrigued to know more about this frequency separation thing.

Thanks Bethy (y)

I never used to use Photoshop for editing (unless I was doing some skin smoothing using a plugin, or for more difficult cloning tasks) and now that I have spent a bit of time to learn some of these techniques I'm starting to wonder whether LR is going to feature as prominently in my workflow in the future.

The video tutorial that kicked it all off for me was this one - Ultimate Guide to Frequency Separation (mods, hope it's ok to link to it?). It's obviously a bit over the top for what I wanted to achieve in terms of 'flawless skin' vs. natural looking skin with blended tones, but it should be good enough for you to give it a go.
 
The video tutorial that kicked it all off for me was this one - Ultimate Guide to Frequency Separation (mods, hope it's ok to link to it?). It's obviously a bit over the top for what I wanted to achieve in terms of 'flawless skin' vs. natural looking skin with blended tones, but it should be good enough for you to give it a go.

Very nice! And extremely impressive for a first go at this kind of thing, I wish I'd thought that hard about things a bit sooner.

I can't tell from your processing - are you doing micro-level dodging and burning (like this) or is it nearly all frequency separation? I think I've got the hang of how and when to use the latter but when I try to dodge and burn at the small scale I lose patience long before getting results which are half way acceptable. I'm happy with DnB at the contouring / shading level, just not on the fine scale.

And have you seen this tutorial on how to stuff up an image using frequency separation? (been there, got the t shirt).
 
Last edited:
Nice images. I think the third one just takes it for me but not much between that and the second.
 
Nice pics :)
 
Very nice! And extremely impressive for a first go at this kind of thing, I wish I'd thought that hard about things a bit sooner.

I can't tell from your processing - are you doing micro-level dodging and burning (like this) or is it nearly all frequency separation? I think I've got the hang of how and when to use the latter but when I try to dodge and burn at the small scale I lose patience long before getting results which are half way acceptable. I'm happy with DnB at the contouring / shading level, just not on the fine scale.

And have you seen this tutorial on how to stuff up an image using frequency separation? (been there, got the t shirt).

Thanks Simon. This is probably the most prepared I've ever been, but I'm hoping it signals a change for me!

Holy hell! Micro D&B!! I'm just getting to grips with D&B in general - I didn't even know there was a micro category!

I'm by no means proficient at this stuff yet, but my current workflow is something like this:
  1. apply a global blur with a layer mask and use opacity to get a naturally smooth feel to the skin
  2. Use frequency separation and attack the high frequency layer first to remove blemishes and adjust texture that needs to be adjusted (I use the patch tool mostly)
  3. Use frequency separation and attack the low frequency layer to blend skin tones using Gaussian blur and the lasso tool
  4. Flatten image
  5. Use D&B visualise layers (solar curve and b&w layer) to enhance the light/dark areas
  6. Use an overlay layer filled with grey to dodge and burn on - pretty much just trying to get more even light/dark tones
  7. Repeat if needed
Seems to be working for me at the moment, but I don't really have a reference point for what too much looks like yet. What I do know is - I hate the plugin look now!!

Nice images. I think the third one just takes it for me but not much between that and the second.

Thanks :)

Love the b&w ones (y)

Thanks (y)

Nice pics :)

Cheers Ken :D
 
I couldn't add anything meaningful that hadn't been said already. :)
 
Thanks Simon. This is probably the most prepared I've ever been, but I'm hoping it signals a change for me!

Holy hell! Micro D&B!! I'm just getting to grips with D&B in general - I didn't even know there was a micro category!

I don't know anyone else who calls it micro D&B but I couldn't think how else to describe it. The guy in the video makes it look straightforward but time-consuming. That's not the case; it's blinking difficult & time-consuming. In the unlikely event that I ever need that level of retouching I'll pay someone who has already been through the pain of learning. I'd rather be shooting.
 
Back
Top