

- Messages
- 1,813
- Name
- Dave
- Edit My Images
- Yes
The Tutorial forum is closed atm so I will stick this in here for now.
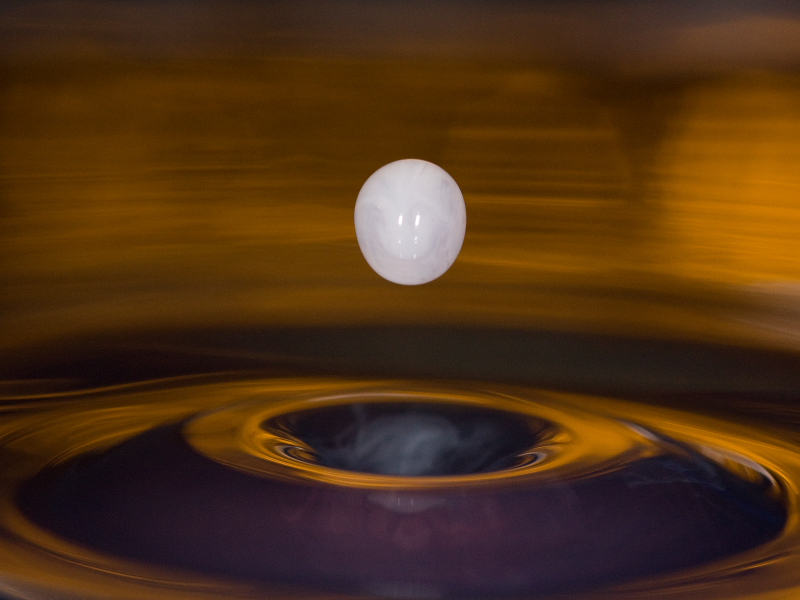
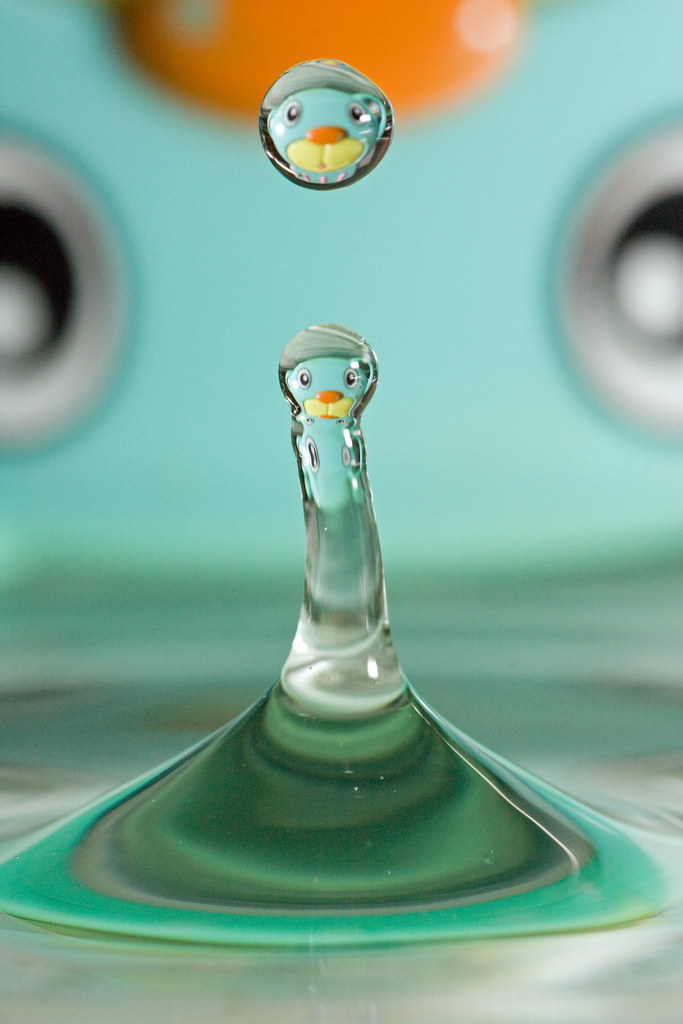
Pippy_Neville asked for tips on the Hi-Viz photogate as used in water drop shots .......
The Hi-Viz kits are available from here http://www.hiviz.com/ and are a self assembly kit for triggering flash for high speed photography.
The kit I built was a time delay photogate trigger http://www.hiviz.com/kits/spg-du.htm,
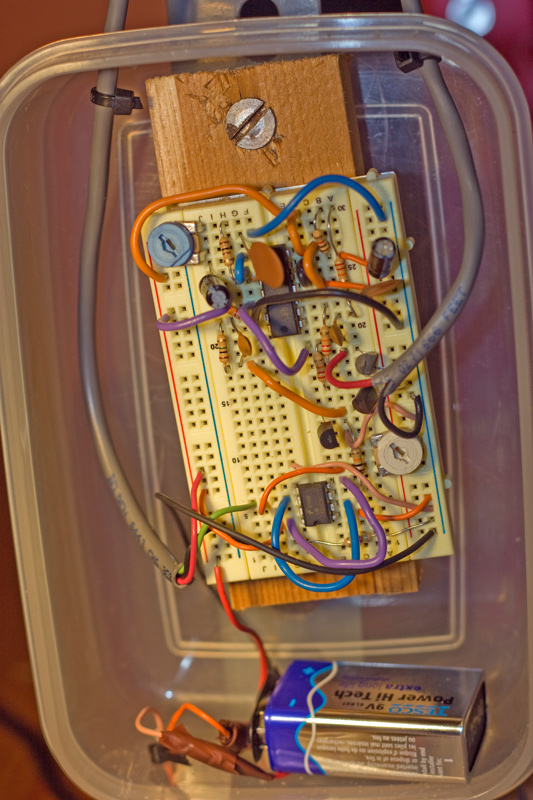
which is two IR sensors on a U shaped holder, that when broken by an object, trigger a flash unit. It has a time delay circuit that can be adjusted to delay triggering of the flash.
It is easy to build. It comes with a bread board, which is a board with holes in it to push the wires in, so no soldering is involved. The instructions are easy to understand, even for numpty's like me.
I built mine in about an hour and it worked first time.
After some consideration and with the knowledge gained from my previous water drop attempts I decided I would build a purpose made structure just for drop shots. Sad init My reason being that i wanted consistent results every time. Gantry for hanging drop container attached to a board which is clamped to the table with g clamps.
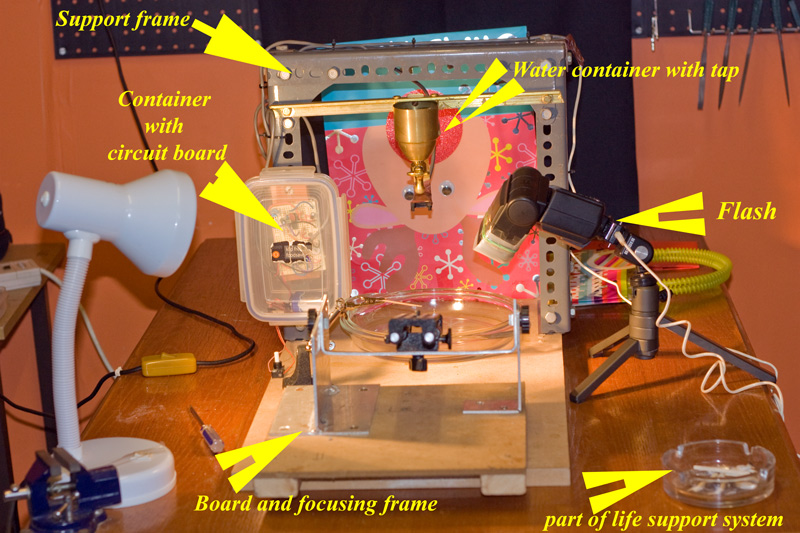 I made a gantry affair for attaching my focus rail and camera.
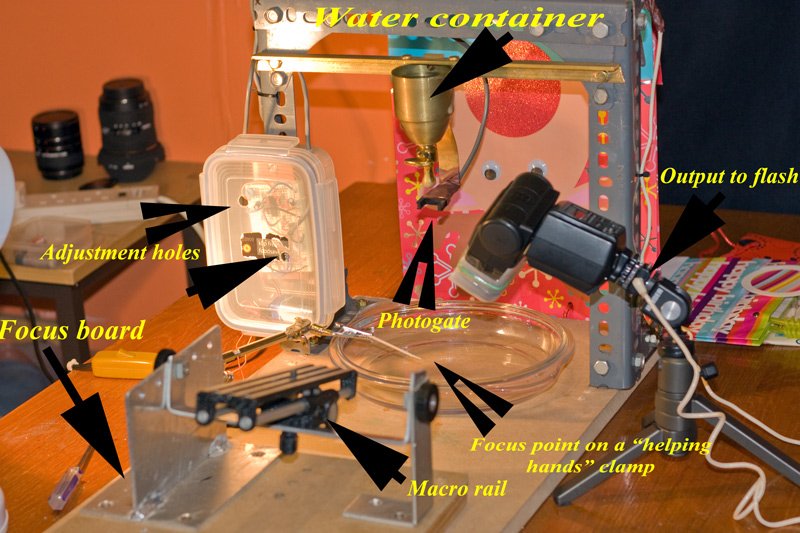
This is bolted to the other board for more stability. I have holes drilled into the brackets so i can set it up to the focal length of my lenses/tubes near perfect and the rail sorts out the fine focus. The setup I built was rock solid so there was no vibration. Much better than the tripod which moved with the floorboards when i moved about.
The trigger circuit I enclosed in a tupperware sandwich box so any splashes did not fry the circuitry. Two little holes in the lid allow me to alter the settings of the trigger with a small screwdriver.
Setup is easy. Get a focus point by dripping onto a skewer or something ( i use a cocktail stick). Hook the trigger output to your flash unit. The drop triggers the flash as it breaks the beam of the trigger. The sensitivity of the trigger can be altered and also the delay from breaking the beam to triggering the flash. The delay circuit is the important bit. It is very sensitive. A slight turn to the left lengthens the delay triggering and a slight turn to the right shortens it. It is VERY sensitive. From a drop breaking the photogate beam to hitting the water and bouncing and then settling down can be measured in an about 1/4" turn either way on the delay circuit!! So easy does it. Trial and error to start with I am afraid to get the delay set up correctly. Let the drops commence and turn the delay left or right so that the flash fires as the drop hits the surface then from that point take shots and check the photo to see what shape you had. Adjust delay left or right to get the shape you want. Bounces with drops on top are to the left side and crowns and mid air drops are to the right.
I do my drops in the dark on bulb but it works in dimmish light. I have added a switch to battery lead of the trigger so i can stop the flash triggering when i mess about with settings, to save flash batteries. So I set the drips going and get my shape i want from test shots. Get my focus as close as possible. ( its never totally spot on as you cant predict the angle of any bounces). I turn on the trigger, switch off the lights, turn camera on bulb using remote. After the flash, turn off bulb, turn off trigger and turn on light. Rinse and repeat until happy. With this set up, once you are happy with it, you can get every shot repeated with hardly any wasted shots.
Any questions?
Pippy_Neville asked for tips on the Hi-Viz photogate as used in water drop shots .......
The Hi-Viz kits are available from here http://www.hiviz.com/ and are a self assembly kit for triggering flash for high speed photography.
The kit I built was a time delay photogate trigger http://www.hiviz.com/kits/spg-du.htm,
which is two IR sensors on a U shaped holder, that when broken by an object, trigger a flash unit. It has a time delay circuit that can be adjusted to delay triggering of the flash.
It is easy to build. It comes with a bread board, which is a board with holes in it to push the wires in, so no soldering is involved. The instructions are easy to understand, even for numpty's like me.
I built mine in about an hour and it worked first time.
After some consideration and with the knowledge gained from my previous water drop attempts I decided I would build a purpose made structure just for drop shots. Sad init
My reason being that i wanted consistent results every time. Gantry for hanging drop container attached to a board which is clamped to the table with g clamps.
This is bolted to the other board for more stability. I have holes drilled into the brackets so i can set it up to the focal length of my lenses/tubes near perfect and the rail sorts out the fine focus. The setup I built was rock solid so there was no vibration. Much better than the tripod which moved with the floorboards when i moved about.
The trigger circuit I enclosed in a tupperware sandwich box so any splashes did not fry the circuitry. Two little holes in the lid allow me to alter the settings of the trigger with a small screwdriver.
Setup is easy. Get a focus point by dripping onto a skewer or something ( i use a cocktail stick). Hook the trigger output to your flash unit. The drop triggers the flash as it breaks the beam of the trigger. The sensitivity of the trigger can be altered and also the delay from breaking the beam to triggering the flash. The delay circuit is the important bit. It is very sensitive. A slight turn to the left lengthens the delay triggering and a slight turn to the right shortens it. It is VERY sensitive. From a drop breaking the photogate beam to hitting the water and bouncing and then settling down can be measured in an about 1/4" turn either way on the delay circuit!! So easy does it. Trial and error to start with I am afraid to get the delay set up correctly. Let the drops commence and turn the delay left or right so that the flash fires as the drop hits the surface then from that point take shots and check the photo to see what shape you had. Adjust delay left or right to get the shape you want. Bounces with drops on top are to the left side and crowns and mid air drops are to the right.
I do my drops in the dark on bulb but it works in dimmish light. I have added a switch to battery lead of the trigger so i can stop the flash triggering when i mess about with settings, to save flash batteries. So I set the drips going and get my shape i want from test shots. Get my focus as close as possible. ( its never totally spot on as you cant predict the angle of any bounces). I turn on the trigger, switch off the lights, turn camera on bulb using remote. After the flash, turn off bulb, turn off trigger and turn on light. Rinse and repeat until happy. With this set up, once you are happy with it, you can get every shot repeated with hardly any wasted shots.
Any questions?

 I have the one with the 4 leds and not the photogate like yours so not sure if it will be any good.