Lasagne tin diffuser - construction

GardenersHelper

In Memoriam
Messages
6,344
Name
Nick
Edit My Images
Yes
I was disappointed when I worked on the first set of test images from the 5-layer frosted plastic diffuser that I described in this thread. There may have been a bit of improvement over my previous diffusers, but I still had plenty of results that I didn't like the look of. So I sulked for 24 hours and did other, non-photographic things. Then, for some reason, last night, I suddenly decided to make a new diffuser. I would use the frosted plastic sheets that I recently bought, but in design terms I would start from scratch rather than modifying my current diffuser yet again.

This was not a planned endeavour. I made it up as I went along, doing everything "by eye" rather than measuring anything, and only having a vague idea of how one step might lead to the next. For example, I wanted to use several layers of plastic sheet inside a tin of a bit less than A4 proportions (A4 being the size of the sheets that I intended to use), but I had no idea how I was going to keep the sheets separate from one another.

I took photos with my point and shoot camera as I went along. It was night time. I used flash. They are rubbish quality. However, I hope they convey enough information to make it possible to follow what I did.

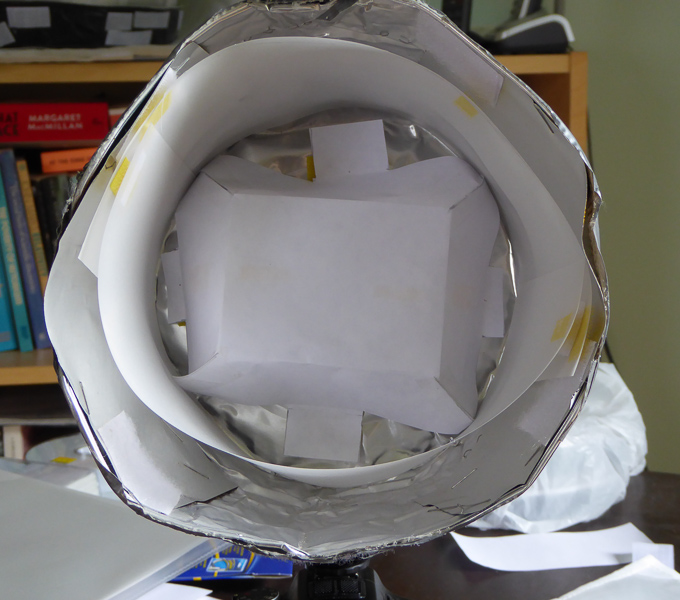
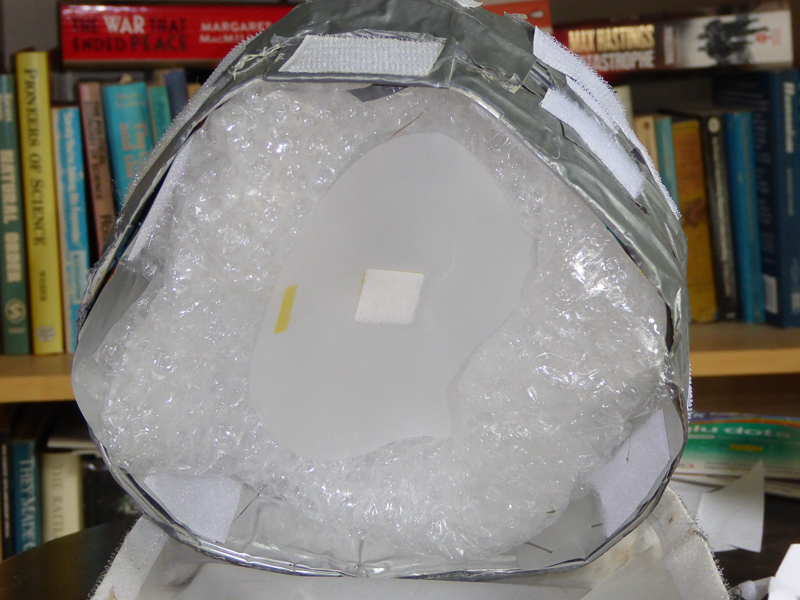
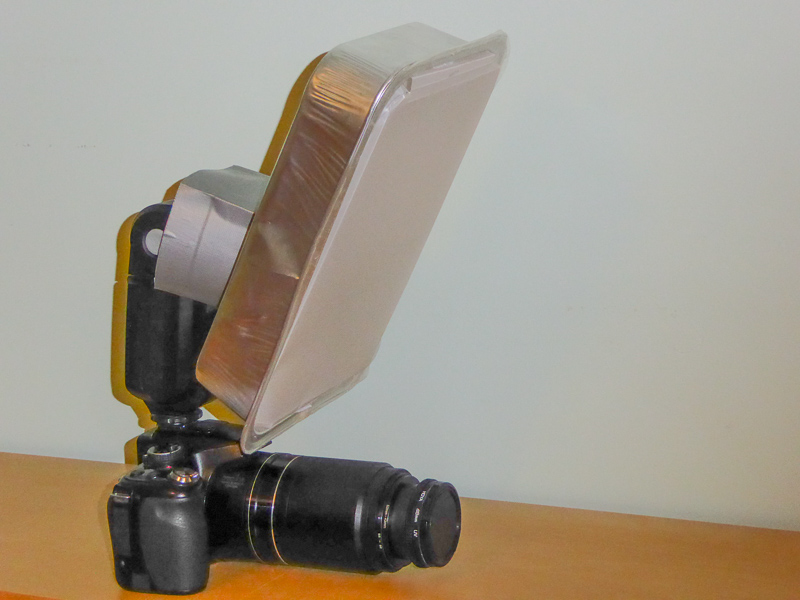
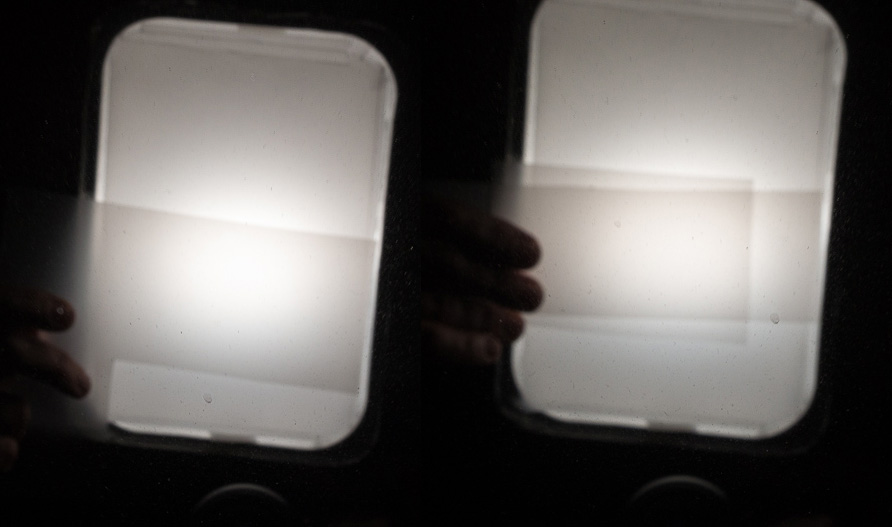
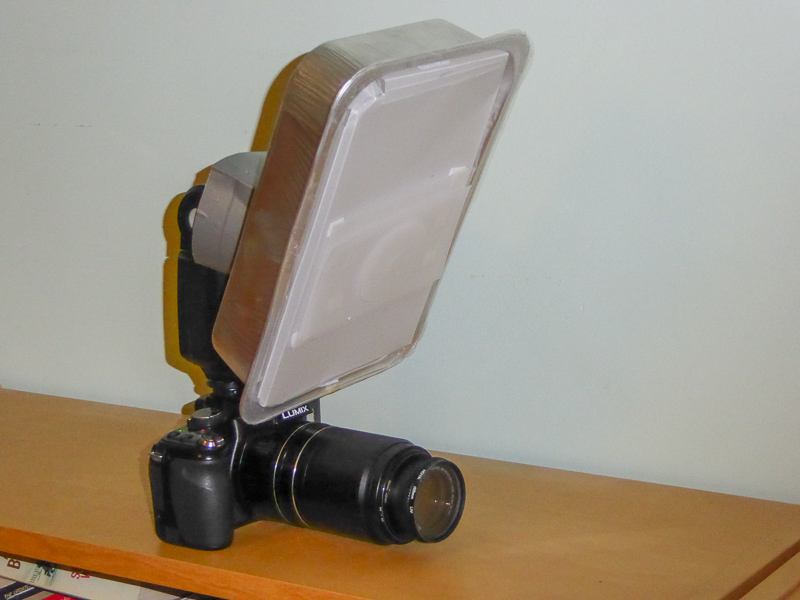
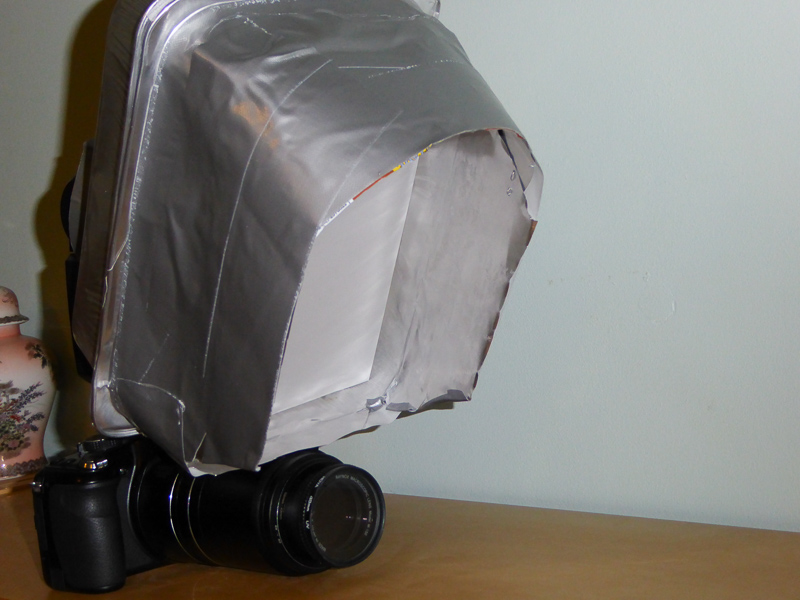
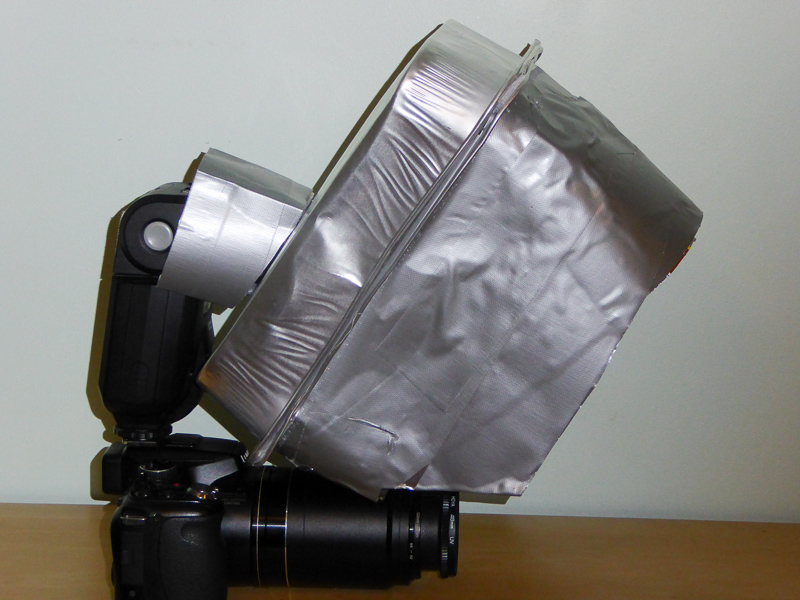
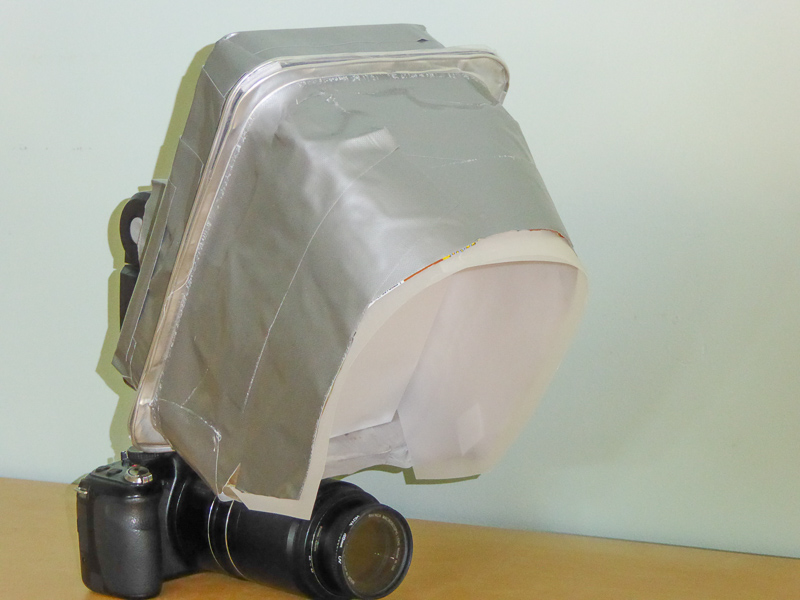
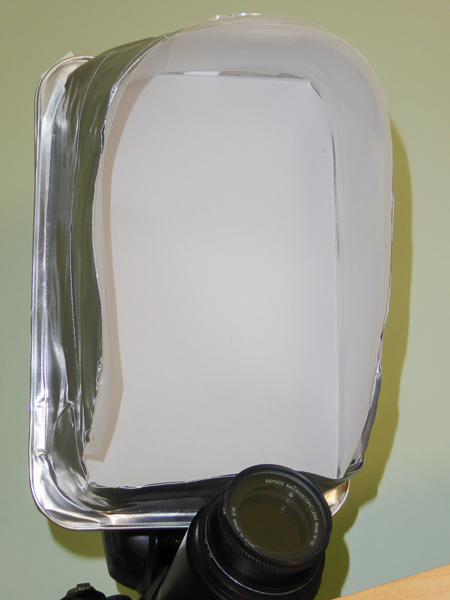
This post and the following four tell the story of constructing this latest gizmo. (But does it work? Well, in terms of usability, yes, from my testing out in the garden today it does seem to be very usable. It's quite light, it feels more robust than the previous version and gets in the way a bit less, I can angle the the light a bit to the left or right, it might use slightly less power than the previous version and the invertebrates don't seem to be disturbed by it. As to image quality, I don't know. I haven't looked at today's images yet. The funny thing is I don't care as much as I might. Quite possibly it will be turn out to be ho hum like the previous one as far as image quality goes. But I've really enjoyed building it, and that feels quite satisfying in its own right.)

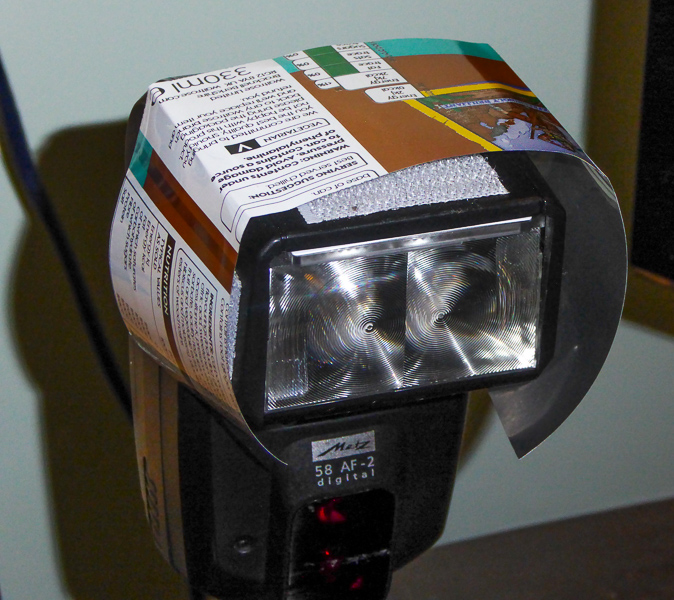
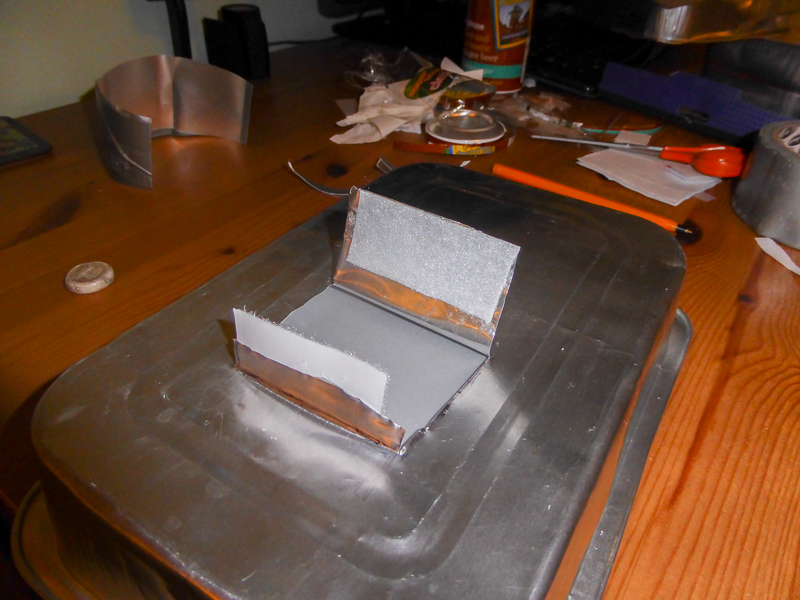
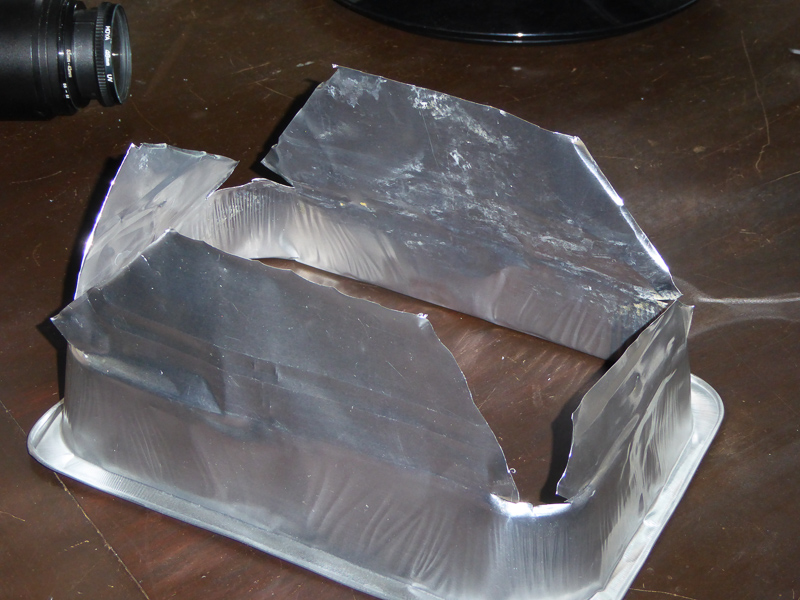
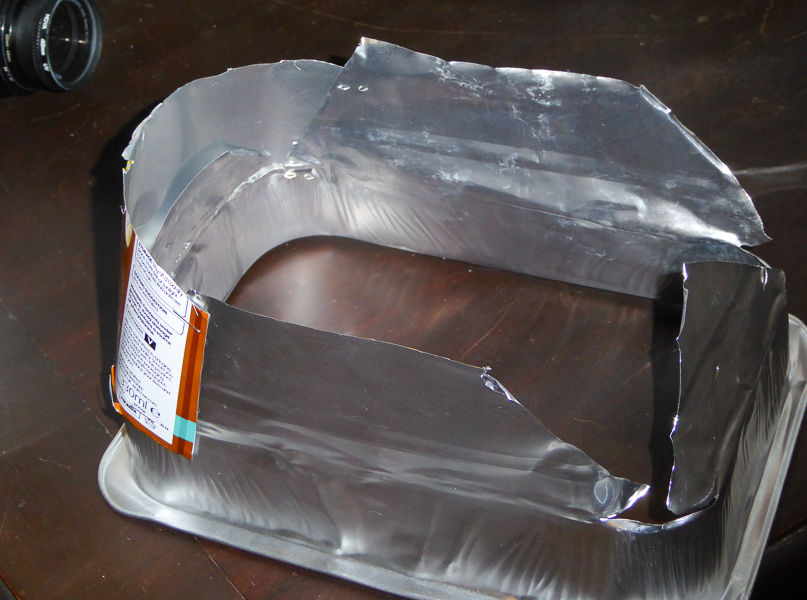
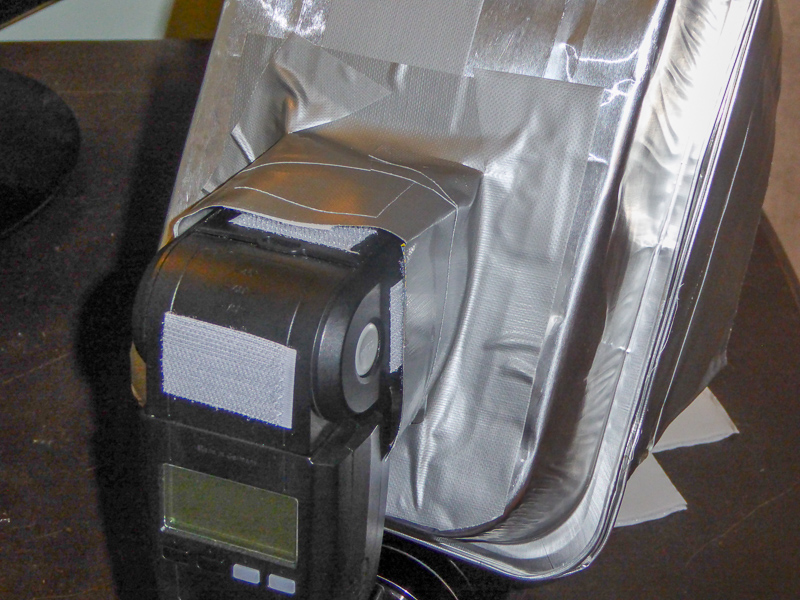
Here is a lasagne tin, with a hole cut out for the light to enter from the flash.


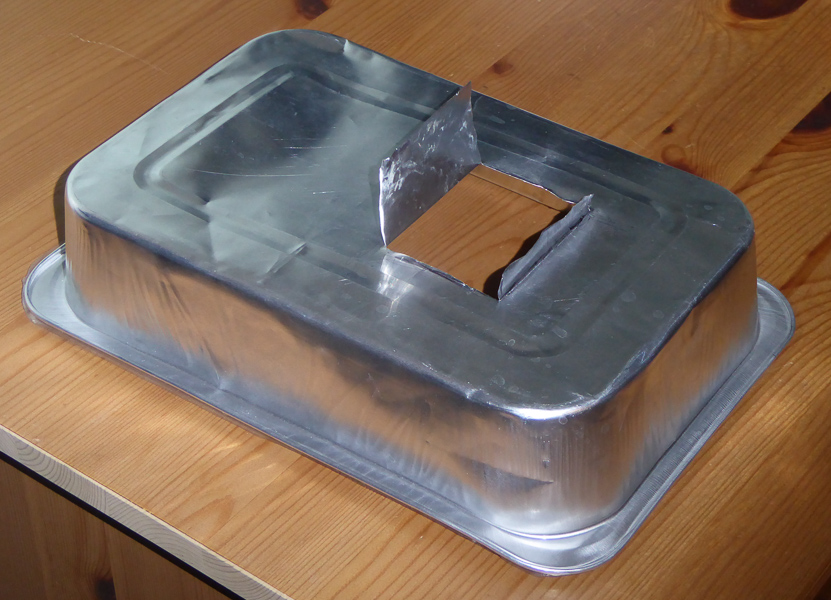
0743 01 2015_06_22,23 First tin - hole and flaps for flash gun
by gardenersassistant, on Flickr

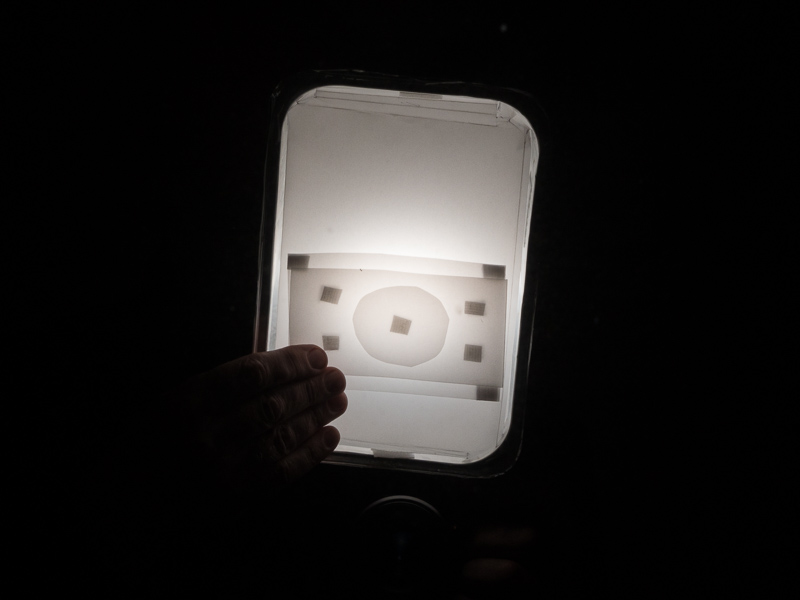
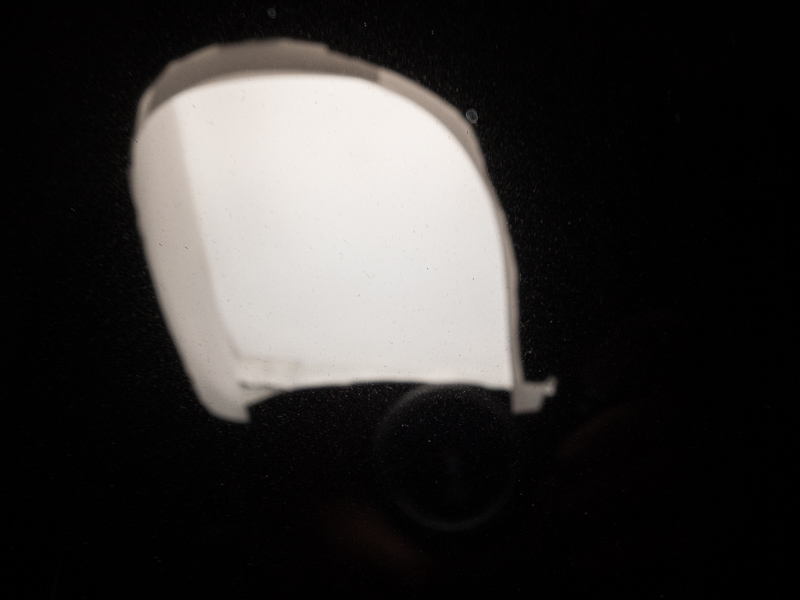
The flash head wouldn't be poking through into the tin so I was able to put a layer of frosted plastic across the hole. Like all the plastic sheet used this time, this was 160 gram (not 150 gram as I previously thought) frosted plastic.


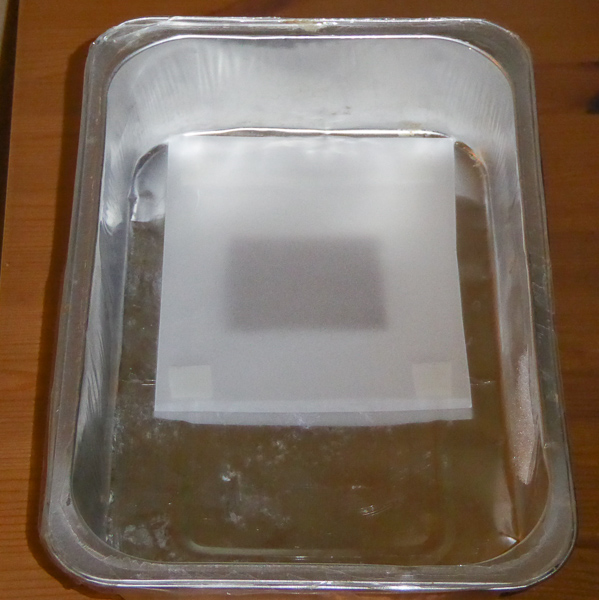
0743 02 2015_06_22,23 Piece of frosted plastic sheet over flashgun hole
by gardenersassistant, on Flickr

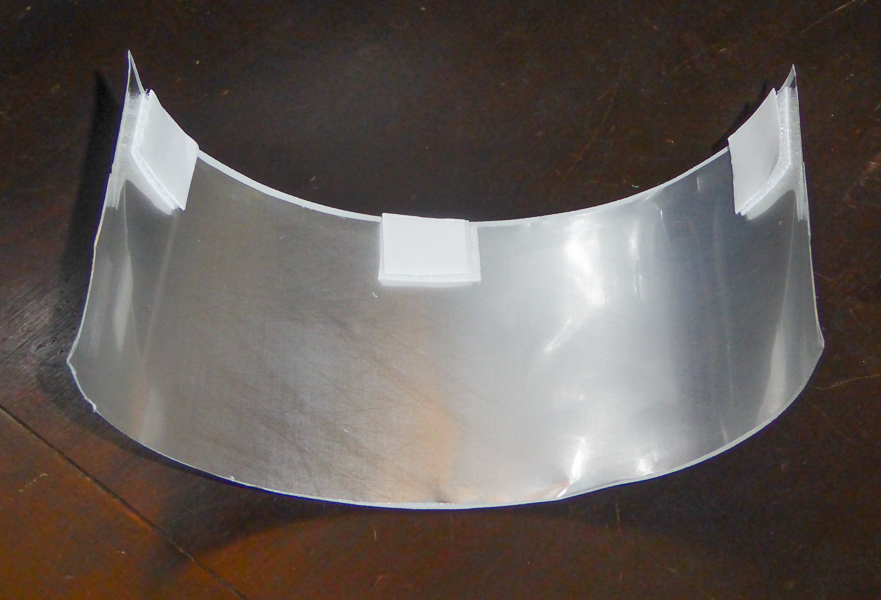
I then put an A4 sheet on the tin and marked out where the corners were. As with everything else I did, it was approximate. It was all done quickly, and when as a result things didn't fit properly I cut and bent things until they did fit, more or less.


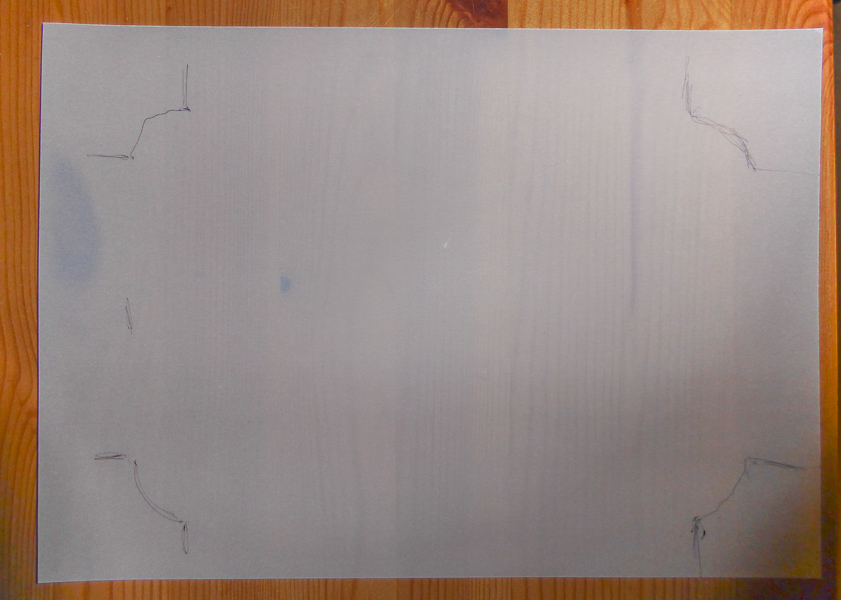
0743 03 2015_06_22,23 Corners of tin marked on first A4 plastic sheet
by gardenersassistant, on Flickr

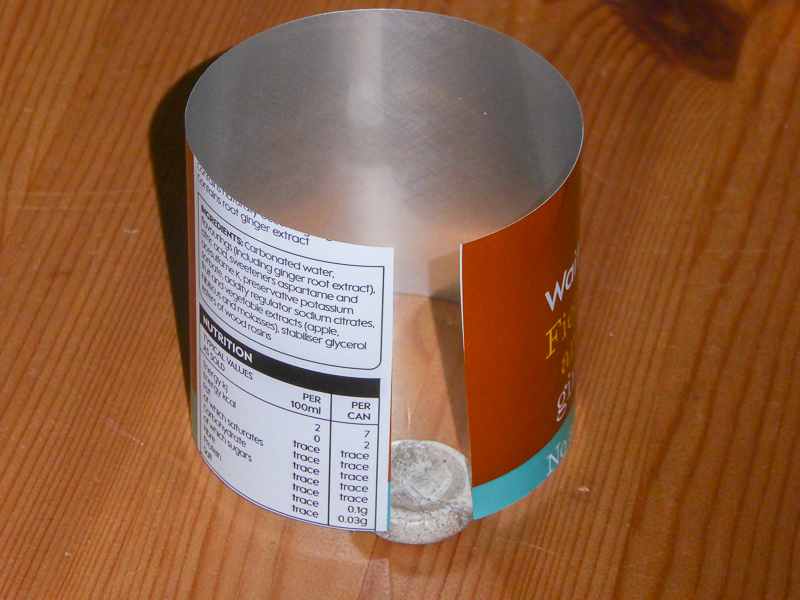
I then cut around the corners and made some cuts in the corners, in to where the edge of the tin would be.


0743 04 2015_06_22,23 Corners of plastic sheet cut off and cuts made in to where corner of tin will be
by gardenersassistant, on Flickr

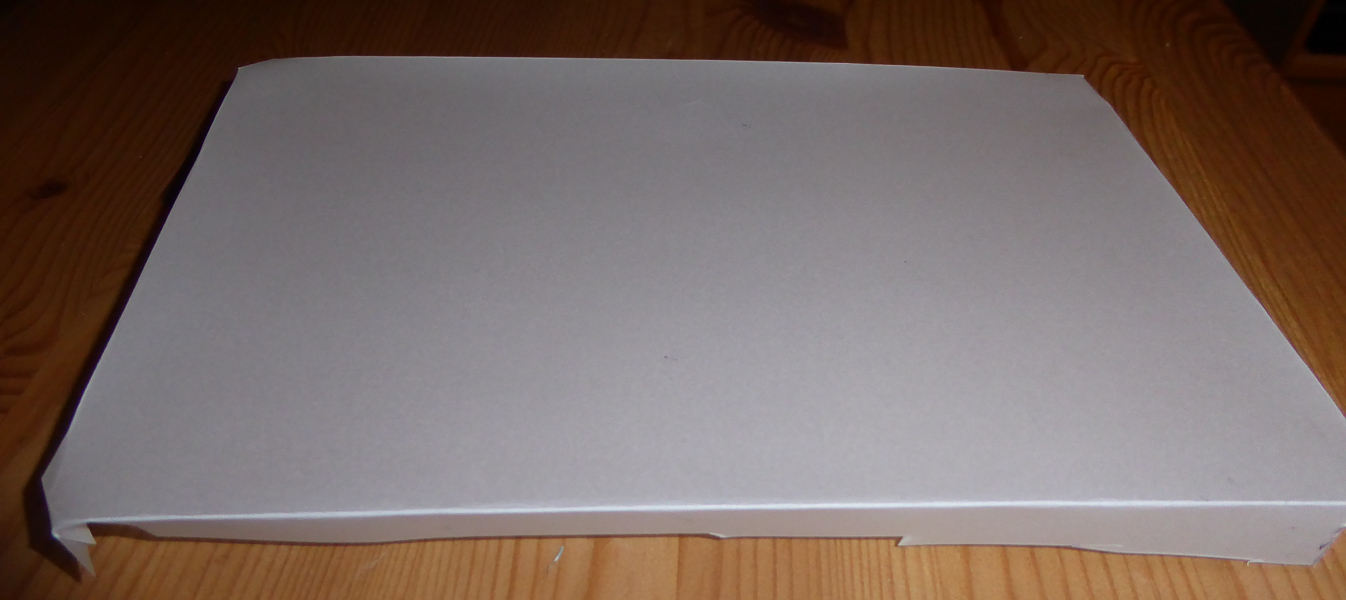
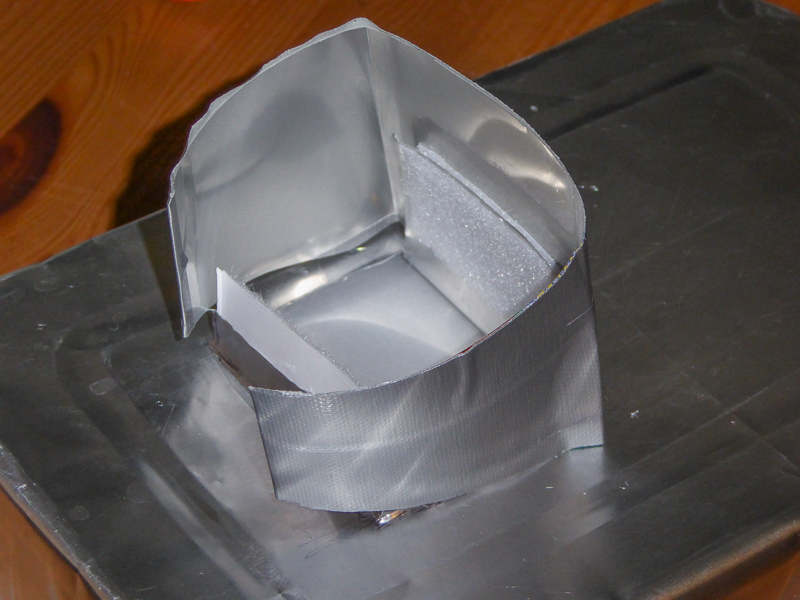
The long edges folded in fine. (Well, they folded in fine, but I got them in the wrong position, so I had to make new folds at the edges, more than once, until I got the size near enough.)


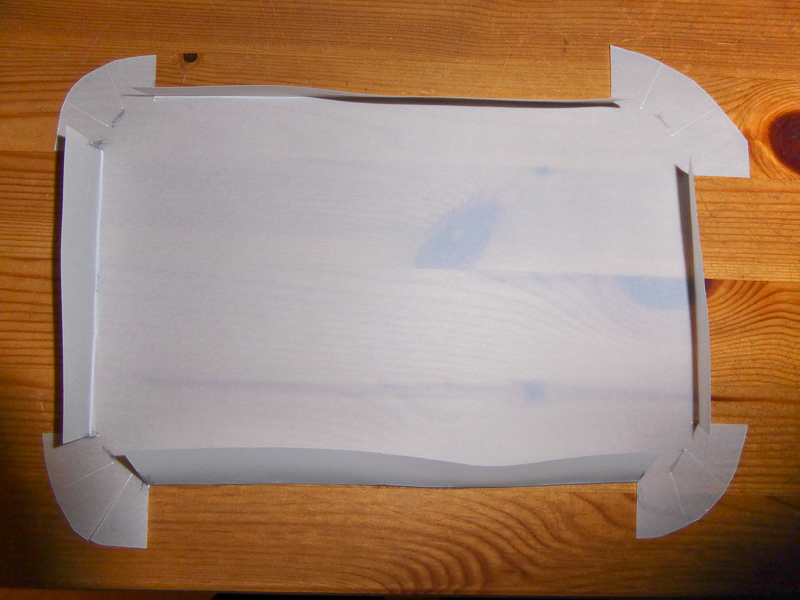
0743 05 2015_06_22,23 Edges of sheet folded in
by gardenersassistant, on Flickr

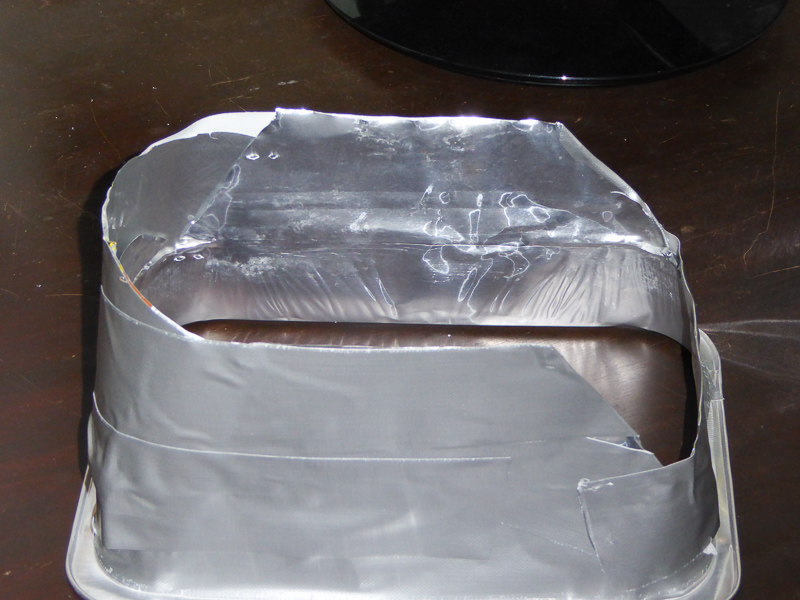
And here it is with the corners folded in. Not exactly round, but again, near enough.


0743 06 2015_06_22,23 Corners folded in
by gardenersassistant, on Flickr

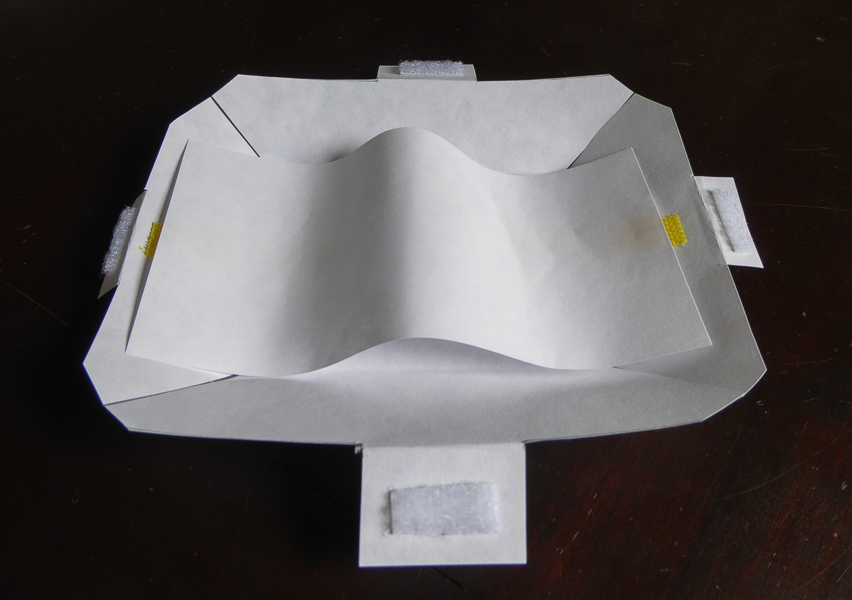
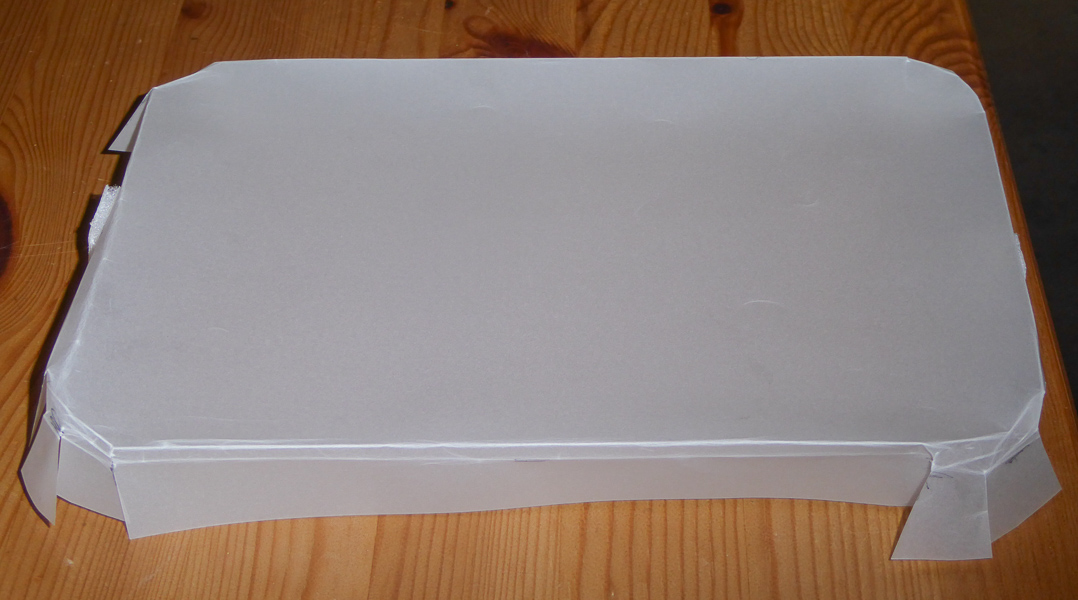
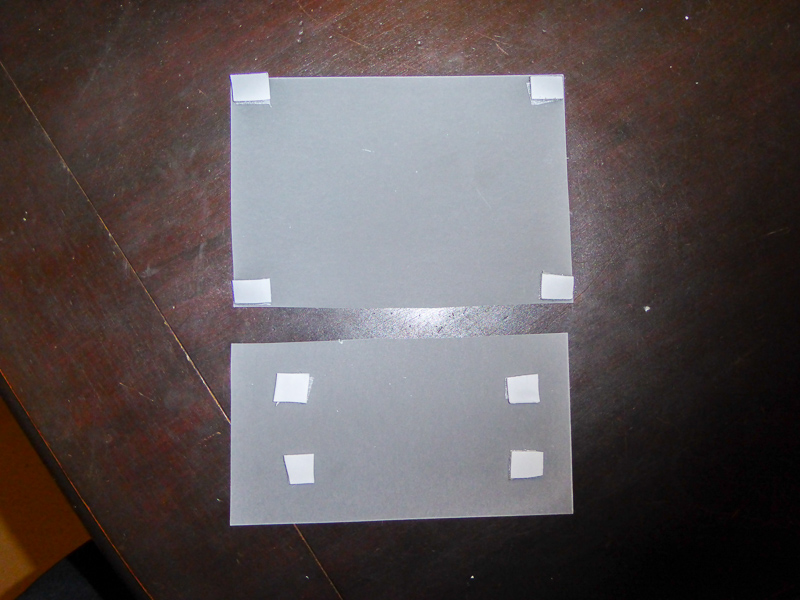
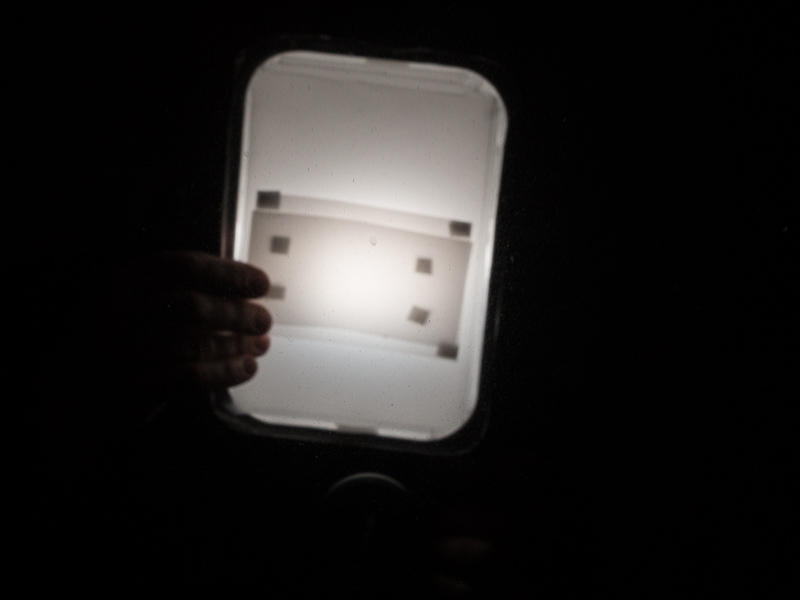
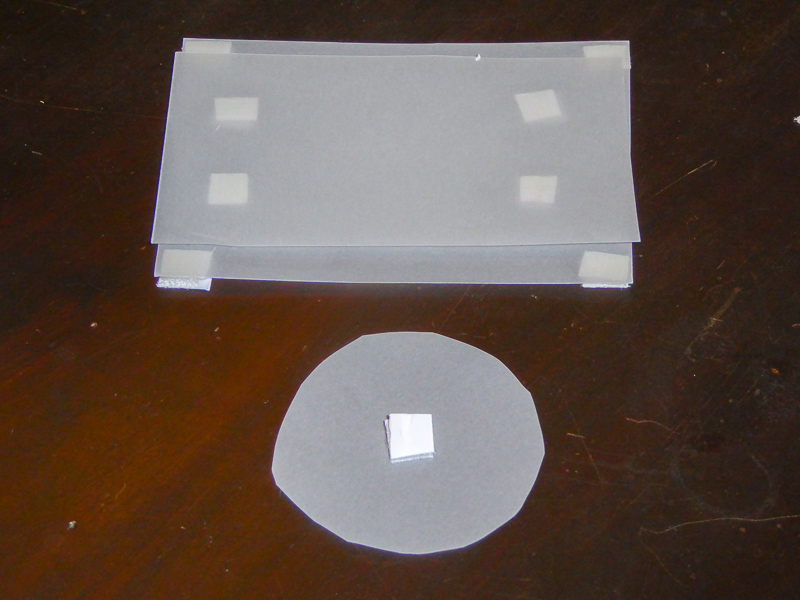
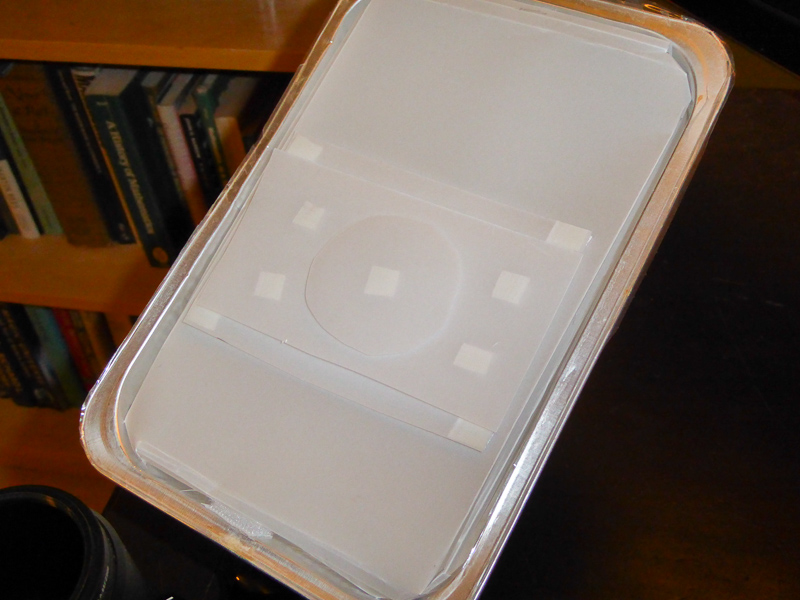
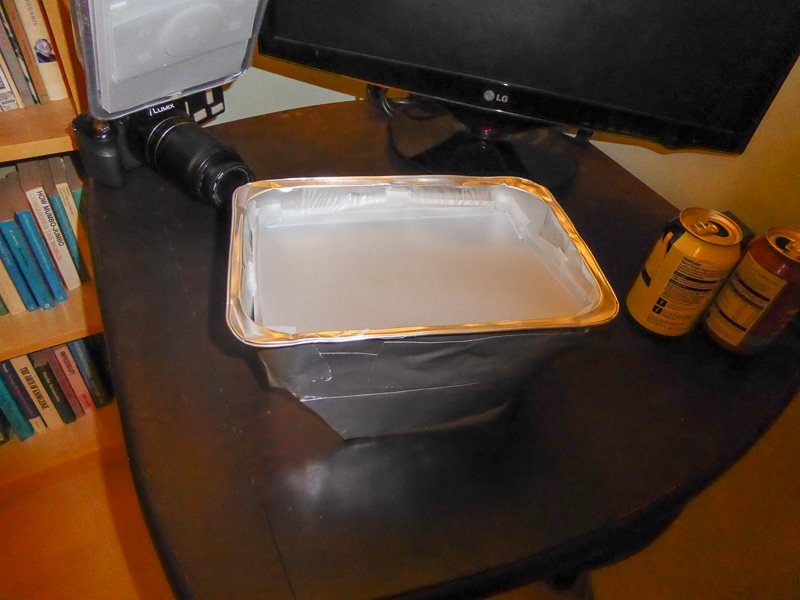
And here is the tin with the sheet inserted. I used little squares of velcro to keep the sheet in place, one square on each of the four straight edges. The squares were cut in pairs (one of hooks, one of loops) from self-adhesive pads, With the one of the pair stuck to the tin and one stuck to the sheet I would be able to take the sheet out if necessary. I used the same approach wherever I used velcro to give me flexibility to make changes later on, and to repair any damage the diffuser suffered in my (not very gentle) real world use.


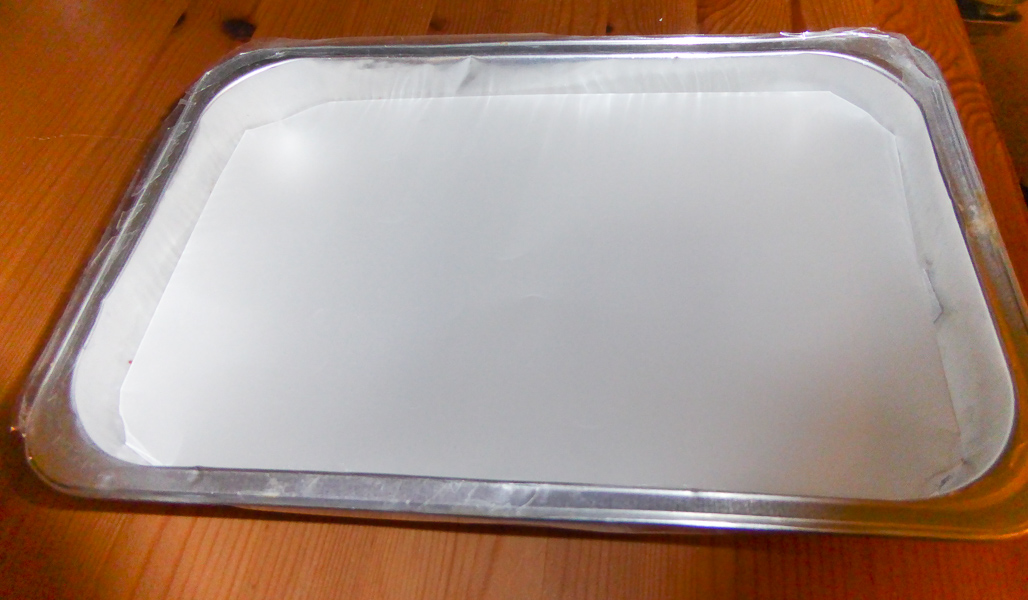
0743 07 2015_06_22,23 First A4 sheet in tin, attached by a velcro square on each edge
by gardenersassistant, on Flickr

Because of the folded edges, there was an air gap between the sheet over the hole and the A4 sheet.

Continued in next post ....
 
Last edited:
I cut a second sheet in the same way.


0743 08 2015_06_22,23 Second A4 plastic sheet prepared like the first one
by gardenersassistant, on Flickr

And here it is inserted into the tin. Here too there is an air gap between it and the first A4 layer.


0743 09 2015_06_22,23 Second A4 plastic sheet attached in the tin
by gardenersassistant, on Flickr

Next I cut the top and bottom off an aluminium can and slit it lengthwise. (Using scissors. As usual, I got very rough edges when I did this, and had to trim the edges to make them less dangerous.)


0743 10 2015_06_22,23 Aluminium can with top and bottom removed, and slit
by gardenersassistant, on Flickr

I then folded the aluminium strip so it would fit over/around the flash head.


0743 11 2015_06_22,23 Aluminium strip folded to go around flash gun head
by gardenersassistant, on Flickr

The flash head already had velcro (hook) pads on all four sides, so I stuck loop pads on the flaps on the tin so as to attach the tin to the flash head.


0743 12 2015_06_22,23 Velcro added to tin flaps to attached tin to flash gun head.
by gardenersassistant, on Flickr

After chamfering the "tails" of the folded aluminium strip (so the tin would sit at a downward pointing angle), I put gaffer tape around the outside of the aluminium strip and used another velcro pad pair to attach the aluminium strip to the larger flap on the tin.


0743 13 2015_06_22,23 Aluminium strip, chamfered sides, with gaffer tape on ouside, attached to top flap on tin using velcro
by gardenersassistant, on Flickr

Here is what the tin looked like attached to the flash.


0743 14 2015_06_22,23 First tin mounted on flash gun
by gardenersassistant, on Flickr


0743 15 2015_06_22,23 First tin mounted on flash gun (2)
by gardenersassistant, on Flickr


Continued in next post ....
 
Last edited:
I decided to do a mirror test to see what the diffusion looked like. On the first test, shown on the left, I saw quite a large, oval area of overexposure blinkies. I turned the flash power down by 1/3 stop, as shown on the right, and the area of blinkies was smaller.


0743 16 2015_06_22,23 Mirror test showing hot area in first tin
by gardenersassistant, on Flickr

I thought that perhaps I could even out the lighting a bit by blocking some of the light in the hot area. I held a slice of plastic sheet over (roughly) the hot area and the blinky area reduced in size, and it reduced some more when I added a second, smaller slice.


0743 17 2015_06_22,23 Impact on hot areas of layering extra slices of plastic sheet
by gardenersassistant, on Flickr

So, more velcro to fit two slices together.


0743 18 2015_06_22,23 Two slices of plastic sheet with velcro pads to fit them together
by gardenersassistant, on Flickr

The velcro pad pairs holding the two slices together also gave a small air gap between them. Holding the two layer patch over the hot area reduced the blinkies greatly, but there was still a smaller circle of blinkies in the centre.


0743 19 2015_06_22,23 Mirror test shows smaller hot area even with the two extra slices
by gardenersassistant, on Flickr

So I cut out a somewhat circular patch to add to the other two slices. (In retrospect, it would have made more sense to have the other two slices circular, or oval, and if I built another of these I think that is what I would do.)


0743 20 2015_06_22,23 Additional, circular slice of sheet
by gardenersassistant, on Flickr

With the 3-layer patch the lighting still wasn't completely even, but it was much more even than it had been.


0743 21 2015_06_22,23 Mirror test of three layers of extra plasic sheet over hot area
by gardenersassistant, on Flickr

Positioning the patch was quite important. I didn't want to have any bright edges resulting from putting the patch in the wrong place. I did mirror tests until I was confident about the position and then held the patch still while my wife marked the position. I then stuck the patch to the outer A4 sheet.


0743 22 2015_06_22,23 The hot area slices attached to the top A4 layer
by gardenersassistant, on Flickr

Here is the rig as it now looked attached to the flash gun and camera.


0743 23 2015_06_22,23 The first tin on the flash gun
by gardenersassistant, on Flickr


Continued in next post....
 
Last edited:
I wanted at least one and possibly two more diffusion layers, so I cut up another lasagne tin of the same size as the first one.


0743 24 2015_06_22,23 Cutting open the second tin
by gardenersassistant, on Flickr

Around one end I stapled another slice cut from an aluminium can. (I think I must have been getting tired by this point. It all looks pretty rough!)


0743 25 2015_06_22,23 Another slice from an aluminium can stapled to the second tin
by gardenersassistant, on Flickr

I put some gaffer tape around the outside, partly to provide a bit of protection against the jagged edges.


0743 26 2015_06_22,23 Some gaffer tape on the outside of the second tin
by gardenersassistant, on Flickr

I then cut and fitted a third A4 sheet, this one fitted into the second tin and arranged so as to give an air gap between it and the second sheet and its three-layer patch.


0743 27 2015_06_22,23 Third A4 layer of plastic sheet, this one fitted into the second tin
by gardenersassistant, on Flickr

I attached the second tin to the first tin with a small velcro pair on each corner.


0743 28 2015_06_22,23 The second tin attached to the first tin with velcro on the corners, and gaffer tape
by gardenersassistant, on Flickr


0743 29 2015_06_22,23 The second tin attached to the first tin with velcro on the corners, and gaffer tape
by gardenersassistant, on Flickr

Some more gaffer tape attached the aluminium strip on the back more firmly to the tin.


0743 30 2015_06_22,23 Gaffer tape around the top flap, securing the side side flaps to the first tin
by gardenersassistant, on Flickr


Continued in next post....
 
Last edited:
I decided not to add another diffusion layer at this stage because I didn't know how much flash power the rig was going to need in real world use. (I have found that indoors tests are not a good guide to this.) I would see how it went and if I thought it needed more diffusion, and there seemed to be enough power available to make that practical, then I could easily add another A4 layer later.

I cut another aluminium strip and set this up for use as a "visor".


0743 31 2015_06_22,23 A strip cut from a third aluminium can, with three velcro squares
by gardenersassistant, on Flickr


0743 32 2015_06_22,23 The third aluminium strip set up as a visor (but this hasn't been used)
by gardenersassistant, on Flickr

However, once I saw it in place I thought it might be a step too far for my subjects, and so I took it off and went out into the garden to test the rig.

After a few subjects I came across what I assume were some eggs on a leaf, shown here on the left.


0743 33 2015_06_22,23 Egg comparison - Before (on left) and After lining hood
by gardenersassistant, on Flickr

On the camera LCD I saw what looked like nice soft, largish highlights spoilt by small, intense highlights at the left hand end of the larger, softer highlight area. I thought this might be "leakage" of higher intensity light at the edge of the 3-layer patch so I went indoors to do a mirror test to try to see what was going on. As shown here, the diffuser was offset to one side (the left, looking at it from my position, behind the camera).


0743 34 2015_06_22,23 Mirror test of diffuser showed hot area at top side
by gardenersassistant, on Flickr

I was expecting to see a narrow band of blinkies along the edge of the 3-layer patch. However, there was a quite large area of blinkies in the upper left hand quadrant of the illuminated area. This made me wonder if the metallic interior of the hood was causing a problem, so I lined it with frosted plastic, bringing the lining out beyond the edge of the hood just to make sure no light got reflected off of serrations in the jagged metallic edge.


0743 35 2015_06_22,23 Visible inside area of second tin lined with plastic sheet
by gardenersassistant, on Flickr

Seen from below.


0743 36 2015_06_22,23 Visible inside area of second tin lined with plastic sheet (2)
by gardenersassistant, on Flickr

Later on I went back out and captured some more photos, and eventually got back to the eggs, as shown on the right above. It looks to me as though the lining might have improved the situation, but I would be very cautious about going further than saying it is possible. That is because the angle is not the same (and I now know for sure that the angle of a shot can make a huge difference to highlights) , the focus and dof fall differently, and the amount of flash power may have been different. The images look very different to me (not so much the highlights, but the overall tonality). I have no idea why, but I rather doubt lining the hood could have made that much difference, although I suppose it is possible.

Anyway, that is the story of the construction of my (version 1) Lasagne diffuser.
 
Last edited:
Labour of Love there Nick... I do somewhat think you are making a possible simple solution complicated. Essentially now you have made a large softbox.

A suggestion for the sharp edges you could use silver tape, which is basically foil lined tape :)

You certainly do well to keep the diffusion layer separated. :D
 
Labour of Love there Nick... I do somewhat think you are making a possible simple solution complicated. Essentially now you have made a large softbox.

I do complicate things :D, but in this case I can't see how to get similar functionality with a much simpler approach.

Talking of complexity and simplicity, I tried two more approaches today. The first was another complicated one, which took a while to build. I emptied out my (somewhat) circular pie dish diffuser and created a "dome" of parchment paper with a lateral "spreader in it, also of parchment paper.


Parchment dome
by gardenersassistant, on Flickr

The circular inner layer is frosted plastic, which I added because a mirror test showed that the bowl was hot around some of the edges.


Parchment dome diffuser with front layers removed
by gardenersassistant, on Flickr

I then added the outer fabric layer that I have used before. The rig still had a hot centre so I used a couple of frosted plastic layers in the centre to calm it down. Did a very brief test in the garden. It was brief because it was immediately obvious that it needed too much flash power.

I then tried a much simpler approach. I emptied out the pie dish diffuser again and this time stuffed it with small-bubble bubble wrap, and added one layer of frosted plastic to calm down the centre before adding the fabric top layer.


Pie tin bubble wrap diffuser
by gardenersassistant, on Flickr

It seemed to work quite well but the eggs shown in the above post were still there and I did a like for like comparison between the bubble wrap pie tin and the lasagne tin diffusers. It looked (on the camera LCD, I haven't looked closely on the PC yet) like the lasagne tin diffuser produced a better result.

A suggestion for the sharp edges you could use silver tape, which is basically foil lined tape :)

Thanks for the suggestion. I wonder though, would sharp edges be more likely to break through a thin layer of aluminium foil than gaffer tape? I've not use silver tape though so perhaps I've got the wrong idea about it. Presumably it is this sort of stuff.

You certainly do well to keep the diffusion layer separated. :D

Yes, four layers with fairly wide gaps, and the three central additions have small gaps between them. I picked up the point about separating the layers from earlier discussions I read here.
 
Thats the right stuff you could gaffer it then Silver line it to make sure that your not losing any of the reflectiveness of the tin can.

Watching with Eagerness :D
 
Thats the right stuff you could gaffer it then Silver line it to make sure that your not losing any of the reflectiveness of the tin can.

That makes sense. What I did with this one was to run the gaffer tape around the outside only, a bit proud of the edge in some places (and not quite up to it in others) because of the unevenness of my rough and ready approach. I didn't want to run it over the edge and back into the inside because if I ran it far enough back into the bowl to stick properly it might as you suggest lose reflectiveness. On the other hand just running it over a tiny amount (which in any case would be tricky with such wobbly edges) means it doesn't stick properly, even though the gaffer tape glue is really (I mean really!) sticky, so it comes loose quite quickly. I've made that mistake before! Running it over a decent amount and then putting sliver tape on top would solve that though. Good thinking. I'll get some.

Watching with Eagerness :D

Have to admit I'm having as much fun building these things as actually using them! I took a grand total of three captures with the domed parchment version - it was really obvious it wasn't going to work. But that didn't spoil the enjoyment I got from working out how to do it and constructing it. Besides which, I find I can learn things from failed attempts.
 
Back
Top