WE NEED YOU... IN DRAFT --- Want to get into Macro???

Messages
8,826
Name
Bryn
Edit My Images
Yes
Document IN DRAFT but if you feel you can add to it or have some experience that you would like to share please include a post... I will collate it or you would like to see something be put in here then let me know and I will try.

Good starters Video;

View: https://www.youtube.com/watch?v=Ozd-Z4J7IKs


This is a short guide of options of how to get into Macro, what you need, what you don't need and just some guidance.

Hopefully this should answer some of the most common questions seen from new users or people that want to do Macro after seeing photos from this section.

Usual threads seen are;
I need a Macro Lens?
I want to start Macro
Which Macro lens should I buy?

Mostly due to them seeing some of the amazing images produced in this section, but everyone gets sold on marketing from Lens makers with their MACRO stamp on it. So to dispel the myth you need a Macro lens to do macro. BECAUSE YOU DON'T :D

This thread >>>> HERE <<<< is quite old but some very good info in there but I will try and keep this guide short.

A very good read on this blog >>> HERE <<< from @Carlh who started Macro recently and shows how quickly you can make progress and what he found works for him.

Macro photography is one of the hardest forms of photography due to the magnification that is involved. The higher the magnification the harder it becomes due to the magnification of other factors wind, handshake and being able to get close to subject (if a bug or flower).

Lets go through some options... you probably have some of this kit without realising it is capable for Macro use.

Reverse Lens

You can reverse any Lens but the kit you most likely have is the kit lens - 18-55mm or similar variety.
This is probably the cheapest method as all you need is a reversing ring that cost a couple of pound from your favourite store (Amazon, E-bay etc) basically you fit the reversing ring onto the end of your lens like a filter and then attach that end to the camera body.

The biggest issue with this setup is that you will lose electronic functions suchs as AF/Image stabilization and if lens has electronic Aperture you will need to set it before reversing.

You can buy this to maintain the electronic functions... >>>HERE<<< But at £250 is a little expensive if you just want to try macro.

Cheaper version for £100 >>> HERE <<<

You can pick up older Lens which have an aperture ring so don't have to worry about the way to set the aperture prior to reversing.

Sample of Kit lens reversed:


Close-up diopters / Achromats
Diopters or close-up lenses are simply magnifying glasses that you can screw onto the front of a lens to increase object size.

Its is probably best to stay away from the cheap ones due to the issues that of Chromatic Aberration (CA) but you can get some optically excellent ones that fairly cheap called;

Raynox 150/250/202/505 with the 150/250 being in the £40 bracket. 202 in the £70 bracket. These all have a thread size of 43mm so if you don't want to use adapter that comes with it you will need a step down adapter from your Lens thread to 43mm.
Canon 500d - (Not the camera) not cheapest option but renowned for the optics but matched with the Raynox

Raynox 202

Raynox 250


Extension Tube
These extend the distance from the Lens elements to the camera sensor and in turn allow you to get closer to the subject. These can be added to any of options shown here to increase the magnification.

These range in price from a few quid to hundred plus and in non AF and AF flavours and come in a set of 3 normally small, medium and large which can also be put together to create whatever length of tubes you want.

I would recommend you get the AF ones as this allows aperture control and keep exposure functions in tack. Its best to keep away from the really cheap plastic ones with plastic mounts as they can cause issues with lens connections.

Extension Tube on 24-105mm Lens


Macro Lens - 1:1 Lens
Generally a prime lens in the 60mm / 100mm / 180mm range with slight variations and all able to shoot subjects to 1:1 scale and above in the case of Canon's MP-E

Links to Things you may want to consider and look at;

Offical ID Thread >>> HERE <<< Please place images that you want ID'd in here and not create your own thread unless you also wish for Critique

Macro Rigs >>> HERE <<< Show off your Macro Rig or check out other peoples setups.

One mans Journey (@GardenersHelper) of getting through Macro >>> HERE <<< Blog of the use of Achromats DSLRs vs Bridge Cameras

Focus stacking
(also known as focal plane merging and z-stacking[1] or focus blending) is adigital image processing technique which combines multiple images taken at differentfocusdistances to give a resulting image with a greater depth of field (DOF) than any of the individual source images.[2][3] Focus stacking can be used in any situation where individual images have a very shallow depth of field; macro photography and optical microscopy are two typical examples.

The starting point for focus stacking is a series of images captured at different focal depths; in each image different areas of the sample will be in focus. While none of these images has the sample entirely in focus they collectively contain all the data required to generate an image which has all parts of the sample in focus. In-focus regions of each image may be detected automatically, for example via edge detection or Fourier analysis, or selected manually. The in-focus patches are then blended together to generate the final image.

http://en.wikipedia.org/wiki/Focus_stacking


If you can add or feel I have missed something glaring let me know or want to add your own images taken with various setups.
 
Last edited:
I'll add my little technique for how I take photos of insects - but it should be relevant for food and other objects that is useful for macro photography, because it isn't all about bugs and insects.

<anything> (almost) can be an interesting image for macro photography (except the sky, my arms aren't long enough :/ no, seriously you can't macro a cloud for example. Not unless you're a bit of a scientist and can make one in a jar.

I'll go for Baked beans and bugs below. Starting with bugs.

Well, flies are very good at moving very quickly and when we move quickly, they will move quicker! What you must do, is moveslowly. Slow enough that they don't really take much notice of you. You must have tried this at home when trying to splatter one, you roll up your newspaper and try and swot one and off it goes.

So when you have been successful at swatting them, you most likely moved quite slowly getting nearer and nearer (sort of like stalking prey) before that deathly blow with the newspaper - same thing with photography, except dont whack them with your camera kit, you're there to photograph them, not kill them or break your lovely expensive equipment.

I try to not disturb any insects when photographing them. They're not in the wild to annoy me, I'm there, annoying them or trying not to ! I am also not out there to kill them. If they come in my house, thats a different story, but out in the wild, thats their home and I totally respect that.

Some people use AF (autofocus), others do not. I'm going to bypass autofocus as I'm not very good at using it, the way I work, is manual and a move of rocking back and forth like a crazy person.

So for manual use, switch off the AF on your lens if you have it.

I'm not going to go into the technicalities of manual exposure and so on, because to be honest, if you're shooting macro, you should already have a good idea of how to manage your camera in manual mode, if not, leave this thread, pop into one of the beginner threads under a subject you like and get some more experience of photographing flowers, people etc.. Macro should be after you've mastered your manual camera settings :) (for me anyway, I'll post up some "before" and "after" macro shots in a post further down).

So moving slowly camera and viewfinder in place, everything is blurry. Use your focus ring to infinity, if you want some room between you and the subject - or turn it the opposite direction to get it in as close as you can but that does mean <you> have to get closer. You still dont have to move, just lean. You can experiment with what suits you best, depending on the size of the bug/plant and how far/near you can get, for your best composure.

Now lean - not move, lean forward until the object comes into focus.

You might want to have one eye looking through the viewfinder and your other eye open, for some reason - I see better, even though my one eye isn't looking through the viewfinder. Just gives you a better understanding of your surroundings as you lean forward i.e you can tell if there's a branch you're about to bump into.

To me, getting bugs is about the eyes - thats just my personal preference and my style. Some do the same, others like to get the other interesting body parts. Some like to get <all> of the object in focus but thats stacking and will probably get more detail in the OPs post as this thread evolves.

Back to the eyes.

As the object comes into focus, wait until the EYES are in focus - in the case of a flower, you might want the petal to be in focus, you might want the stamen to come into focus - whatever you're trying to photograph, lean forward and backward until that particular part of what you want to photograph, comes into focus.

You'll need continuous shooting mode on too as you will need to rattle off several images as the slightest, ever so slightest movement will move you a tiny tiny bit and knock focus off completely, so shoot lots.

Hold your breath as well, not long enough that you go blue and pass out but a few seconds at a time.

Take your time. Concentrate. Pointless doing it in a playing field or somewhere where there is a lot of distractions.

Try and do it early in the morning, the cooler temperatures subdue the insects/bugs, but you might not find as many interesting bugs (like bees for example) early in the morning. I see loads of bees around flowers in the evening, so if you have the time, go out twice a day. Early in the morning and after your tea. :)

You might want to practice on dead bugs first. There's plenty around if you look, especially if you have a shed in the back garden or in your conservatory. Don't have a go at the missus for not cleaning up the conservatory if there are any in the corners of the windows or shelving. In fact, if you do spot a dead bug in the conservatory, photograph it and then clean up after you and tell the other half, might score some points. Tell her (or him), you will clean the conservatory up from now on. That gives you a chance to do some bug hunting without even leaving your house :)

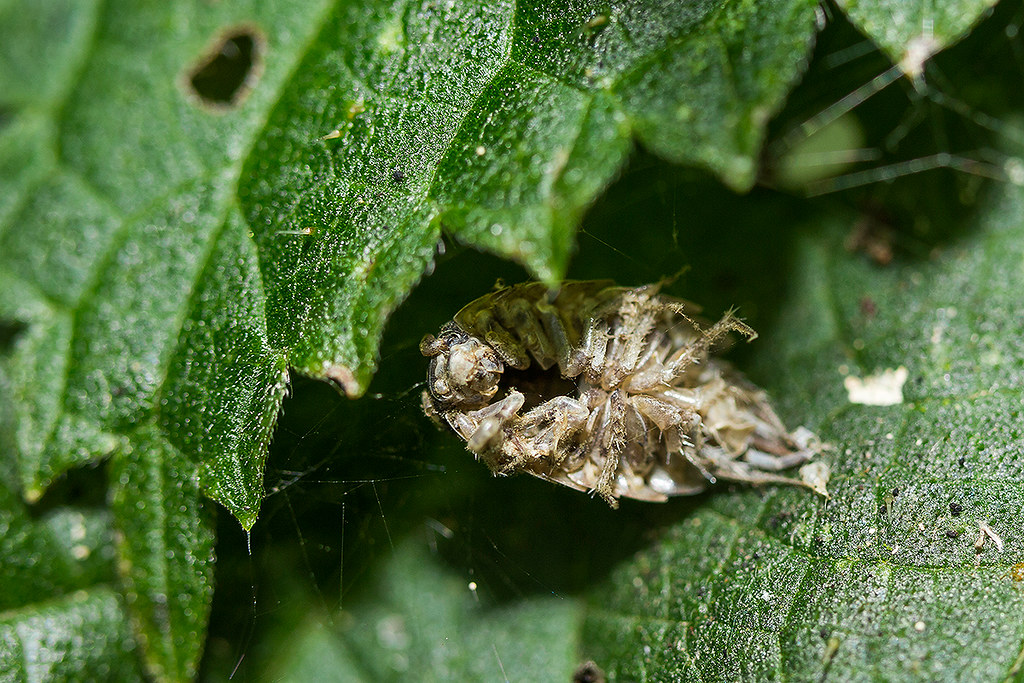
Here's a dead bug I found recently. Not sure what happened to the poor fellow.

14696443056_a11b6ea251_b.jpg


I had to take several shots - even though its not going anywhere because its deceased, my normal body functions caused natural tiny movements putting it out of focus.

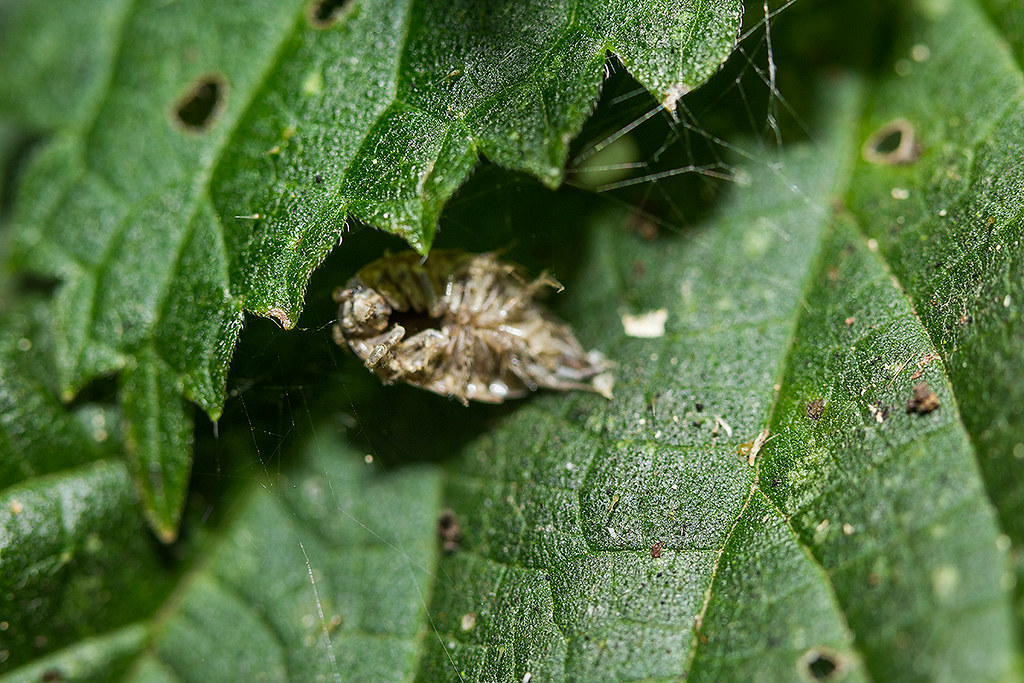
It literally took me 10 shots to get the one decent one above. Most of the others looked something like this:
14536480717_cf5a879dd9_b.jpg


So make sure you rattle off plenty of shots of each subject you're trying to photograph.

Dont forget, you dont have to leave the house to get macros. Go in your kitchen - you'll have cupboards full of interesting things to photograph, labels, food, ingredients. Lots and lots of things you can practice on.

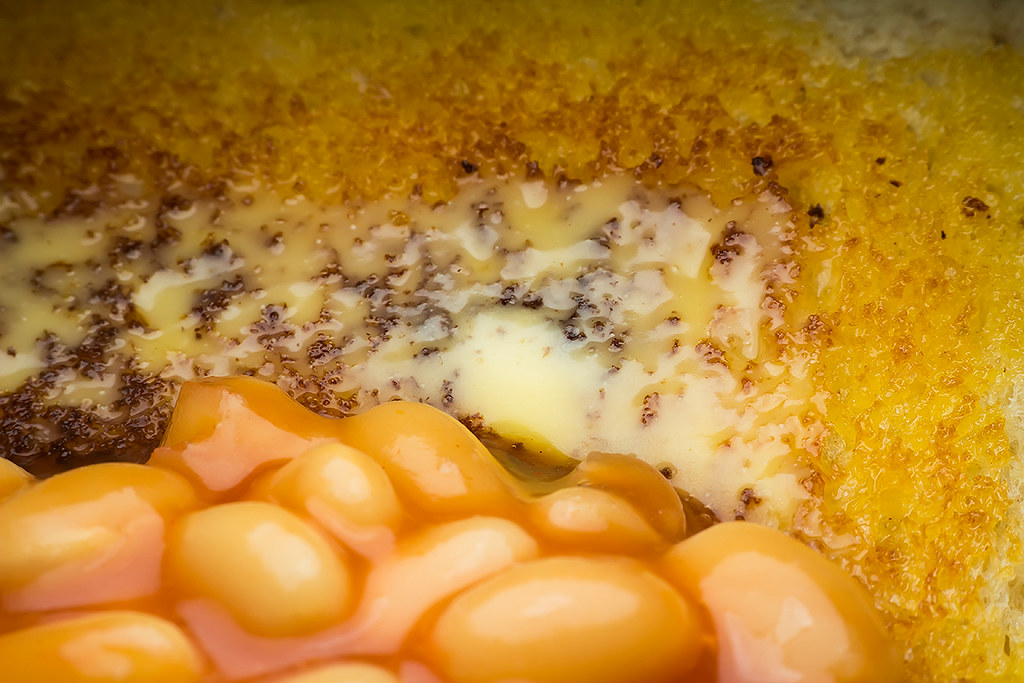
here's my tea, baked beans on buttered toast. Taken with a fairly cheap lens, the canon 50mm f1.8 (shot at F20), with a pringles tube diffuser. So there's plenty you can photograph before even starting to look at bugs. Practice makes perfect.

14524330549_ea8f0c820f_b.jpg


Hope my 5 pence worth was worth your time reading this. Just to show old macros and my latest stuff, using the exact same equipment, I'll do another post for this fantastic thread for beginners macro, as soon as I can.

OP please feel free to rob anything from this post so it goes into your main post so there's not a million pages for user to read through. Once you've taken what you need, I'll just blank this post.

Macro is fun. Macro is <different>. Macro is addictive ! Macro can be anything you like ! I LOVE, absolutely LOVE looking at other people's macro work. Its interesting, its informative (I've learned a lot about the insect world and still am learning), its another world !
 
Last edited:
Here's the kind of structure I think this thread should follow:

Macro definition > greater than 1:1 all that nonsense

Some useful links...

Types of macro > Wildlife, Studio stacks, water/oil drops, other...

Macro Equipment >
> On a budget > Extension tubes, reversing rings, close up fiters, achromats
> bit bigger budget > Macro lenses > focal lengths etc.
> additional kit > tripod etc.

Lighting >
> Natural Light > exposing for background > challenges (pros/cons)
> Flash > avoiding fall off > challenges (pros/cons)
> Diffusion

Techniques
> studio stacking
> hand held stacking

Composition>
Rule of thirds
Low angles
Don't clip limbs ;)

Ok that's all I got off the top of my head :)
 
Last edited:
Just a quick heads up, guys, don't worry about the thread getting messy,
once you are all sorted, and it's all written out properly,
Just post it and let one of us know, and we can lose this thread.

Or just keep adding to the 1st post,
and we can lose any irrelevant discussion parts.

Bryn, You should be able to edit the 1st post to include other people's input.
But if you cant just ask and we can do it for you.
 
@TimmyG do you really think we need the definition part?

I mean if you think you need a macro lens you have already got an idea of what macro is.... Also if you have seen bill's thread any definition will just get everyone going nuts.

Clipping blooming limbs lol...

Do you want to write the piece about stacking as the person with experience of both studio and handheld?

@Cobra cheers think we may have to make this thread a link to other threads with the actual detail on it.

All do you think people will click links?
 
Last edited:
@TimmyG do you really think we need the definition part?

I mean if you think you need a macro lens you have already got an idea of what macro is.... Also if you have seen bill's thread any definition will just get everyone going nuts.

Very likely. I've kept my mouth shut this time!

I would be willing to draft something that might be relatively uncontentious whilst covering the main ground (i.e. "it's 1:1", "oh no it's not"). I think it depends on how it is written. I'd go for a "A lot of people consider macro to be ... On the other hand...." etc approach,

I think it would also need to distinguish between "macro" as applied to macro lenses (which is fairly straightforward), and "macro" as applied to images (which is a bit more complicated because of sensor size considerations).

All do you think people will click links?

In my experience a lot of people won't. :(
 
@@[USER=1870]Cobra cheers think we may have to make this thread a link to other threads with the actual detail on it.

All do you think people will click links?[/USER]
A suggestion.

Use this thread to sort out how to structure things and collect contributions, comments on them and amended versions.

Construct a "Reference thread" where someone (e.g. you!) puts stuff when it's ready to go into the Reference thread. The first post might start out by briefly explaining what the thread is about and then giving a contents list with links to posts further down in the thread (like I used in this post for example). That way people can click on links for quick access or scroll their way through the thread, whichever they prefer. So the fact some people won't click on links wouldn't matter.

Especially if only one or a limited number of people can post to the Reference thread, it can be adjusted (new posts, amended posts, deleted posts) as appropriate. If links are used from the top post then it wouldn't matter so much if the order of the subsequent posts changes occasionally.
 
Here's the kind of structure I think this thread should follow:

Macro definition > greater than 1:1 all that nonsense

Some useful links...

Types of macro > Wildlife, Studio stacks, water/oil drops, other...

Macro Equipment >
> On a budget > Extension tubes, reversing rings, close up fiters, achromats
> bit bigger budget > Macro lenses > focal lengths etc.
> additional kit > tripod etc.

Lighting >
> Natural Light > exposing for background > challenges (pros/cons)
> Flash > avoiding fall off > challenges (pros/cons)
> Diffusion

Techniques
> studio stacking
> hand held stacking

Composition>
Rule of thirds
Low angles
Don't clip limbs ;)

Ok that's all I got off the top of my head :)

Nice. Perhaps under "Techniques" I'd add "Post processing" and also "Managing DOF" (which could cover single-image DOF as well as stacking, probably in separate entries).

Looking at Carl's contribution, I think we might need two sorts of post in the thread (or two threads). One summarising the sort of areas Tim has identified, setting out options in a neutral, non-committal way. And another giving individual's contributions on how they go about macro/closeup work, and/or how they think one should/must/can only sensibly go about it. This allows for personal opinions such as Carl's "You'll need continuous shooting mode on too", and opinions such as "you can't use autofocus for macro" and "there's no point using small apertures because of the loss of detail from diffraction".

It might be that the "Reference" thread just contains the neutral stuff about the options, with a link to a thread containing contributions from individuals about how they go about it, written in whatever style/approach seems best to them.
 
A suggestion.

Use this thread to sort out how to structure things and collect contributions, comments on them and amended versions.

Construct a "Reference thread" where someone (e.g. you!) puts stuff when it's ready to go into the Reference thread. The first post might start out by briefly explaining what the thread is about and then giving a contents list with links to posts further down in the thread (like I used in this post for example). That way people can click on links for quick access or scroll their way through the thread, whichever they prefer. So the fact some people won't click on links wouldn't matter.

Especially if only one or a limited number of people can post to the Reference thread, it can be adjusted (new posts, amended posts, deleted posts) as appropriate. If links are used from the top post then it wouldn't matter so much if the order of the subsequent posts changes occasionally.

This is kind of what is already happening. This thread is now for contributions and then we (I) can create a whole new one with all the collated information in it and it become the sticky which will not be able to be replied too... that way we can make this thread for the contributions that people want to add and it be edited for addition to sticky if it is something new and important.

In regards to people personal experiences agree this thread should avoid I do this really and maybe I setup a thread for that which can be another reference for the sticky to have.

Key to this whole Idea is that its brief enough so people will actually read it especially new starters but detailed enough to get them going.
 
Last edited:
@TimmyG do you really think we need the definition part?

I mean if you think you need a macro lens you have already got an idea of what macro is.... Also if you have seen bill's thread any definition will just get everyone going nuts.

Wikipedia has an excellent explanation, and because it's on Wikipedia there is no arguing with it, it must be right!

Happy to put some bumpf around stacking techniques (along with associated software for processing). @nass is much more skilled at the studio side of things, so it might be better to link to pages on his site unless he would like contribute here.
 
@Cobra cheers think we may have to make this thread a link to other threads with the actual detail on it.

All do you think people will click links?
As per PM's Bryn, to save the whole thing scaring off beginners, thats the way to go.
If you make the tutorial a "show case" of basic information, rather than crammed with information,
You'll get the readers interest, and they will click through to other links, for more information.

As PT Barnham said, "Leave them wanting more" :)
 
I'd just like to add some images from my toilet-paper diffuser bryn so you can hack apart and put it into your main post for the thread.

Toilet paper is a very cheap diffuser (if you cant afford toilet paper, I'd suggest selling your camera equipment as toilet paper is a nice luxury!), gives a nice spread (yuck) of light over the subject, light fall off is quite gentle too as you can see from the examples below, taken with a Canon 600d F1.8 MKii 50mm @various F-stops (aperture settings) shown against each image and the Raynox DCR250.

1.. F8, 160th
14764479475_d907444898_b.jpg


2.. F14 - this was shooting "down" onto the plant, the green thing behind it, was the rest of the thistle.
14758407992_c0820023ec_b.jpg


I'll be going for just extension tubes for a few days with the toilet paper and see what sort of difference it makes as far as working distance etc.. I think the extension tubes may need me to be closer but I'll do some shots and note down what tube sizes I'm using so you can build up a nice library of settings and components bryn.
 
Last edited:
Natural light
This is definitely a draft I'm pants at putting things into words so please re edit this!
I mainly do natural light closeups and macro up to 1:1 its very difficult to get enough light at higher magnifications without flash
I really like the soft light that natural lighting gives and will try to explain what I do but it's not complicated to be honest

I use a Canon 7D and 100L macro but the gear itself isn't important
The most important thing is to find a subject perched on a plant in nice light with an uncluttered background with good composition
Natural light works best when you get a some cloud diffusing the sunlight a bit

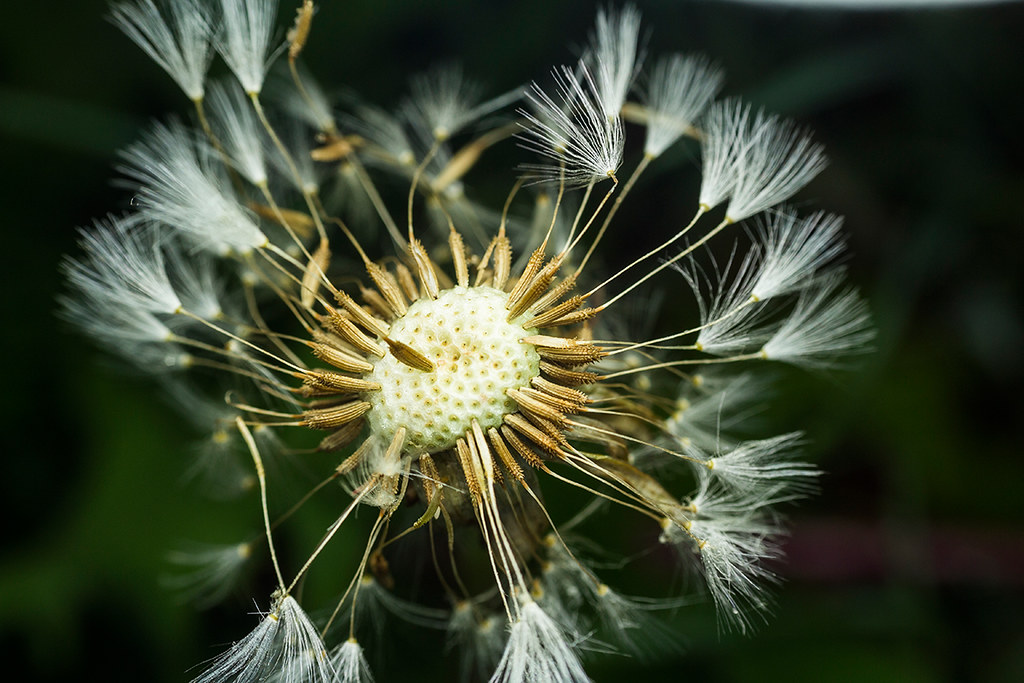
14568224741_a8216f2dd7_c.jpg


It's always worth going out in the rain you can get some beautiful effects from the water drops

14275710576_d53913c993_c.jpg


Back lighting works really well with natural light I try to get the sun directly behind the subject
if you have got a bit of cloud cover you get a nice halo effect
with butterflies this will light up the wings

14171247033_29c01a4ba7_c.jpg


With flash you can really use whatever aperture and shutter speed you want up to a point as the flash will give the right amount of light to get the exposure
with natural light you will have to use wider apertures to get a reasonable shutter speed and raise the ISO
Most of the time I use ISO 400 and often go to 800
Noise isn't a problem as long as you get the exposure right
 
Last edited:
If I may be so bold:

I carry a few a4 cards around 1 x Grey 1x Blue and 1 x Green makes BG's easy if you have the time

Natural light is a MUST as far as I'm concerned

Les :p
 
If I may be so bold:

I carry a few a4 cards around 1 x Grey 1x Blue and 1 x Green makes BG's easy if you have the time

Natural light is a MUST as far as I'm concerned

Les :p

Do you want to write down your method for capturing bugs in natural light. You may be so bold.
 
I know I posted this under a different thread so if theres anything you can dissect from this bryn to put in here, might be useful for others going the extension route.

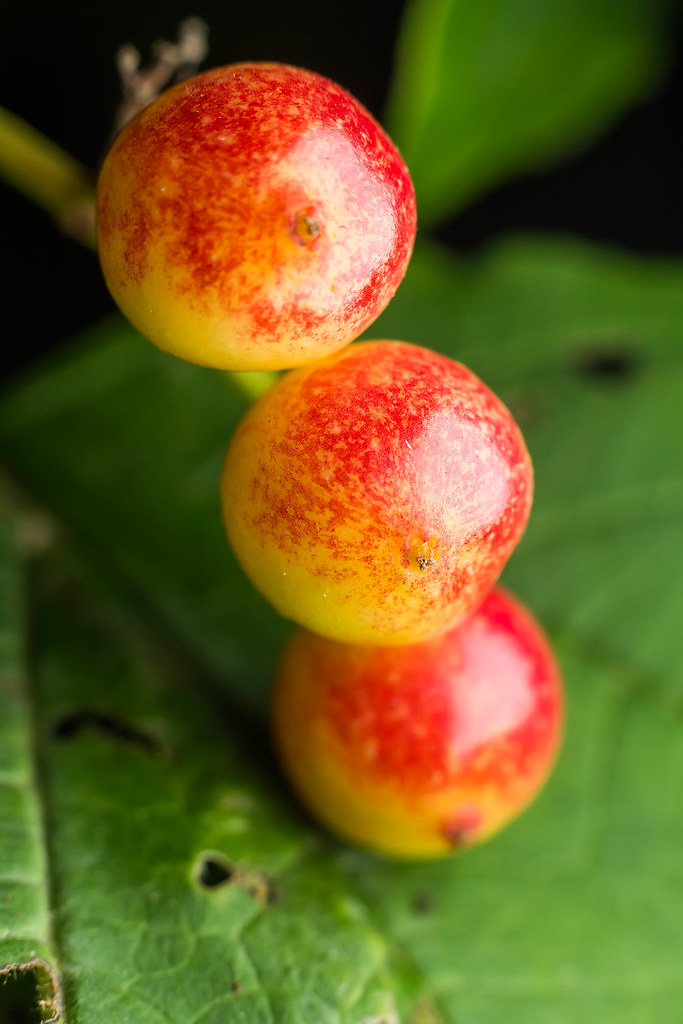
Took just the 31mm section of an extension tube, the 50mm f1.8 (shot at F7.1) and the pringles diffuser with bog paper. Problem with the longest tube section on a short focal length was the working distance. A couple of inches, I should have took the 13mm or 21mm section just to get a little more distance from the subjects or used a longer focal length lens such as a 70mm or 105mm.

Id say the more important thing that has happened to my macros lately, has been the pringles tube and toilet paper diffuser. The lighting has made such a difference as opposed to a bare flash with its own diffuser.

1..
14597003699_f58d4ba2fb_b.jpg


2..
14597025738_997bc4c82a_b.jpg


3.. When I looked at the clumps of berries, (several clumps) I thought about the rule of odd numbers, so these 3 caught my eye.
14597152097_d903beec78_b.jpg


4..
14597152007_cdbfa05640_b.jpg


ta bryn
 
@Carlh most common factor is lighting, it's not about lenses at all really.

Once you nail Lighting it tend to all come together... Well it did for me and you.
 
@Carlh most common factor is lighting, it's not about lenses at all really.

Once you nail Lighting it tend to all come together... Well it did for me and you.
agree the lighting made 80% of the difference. mr.clark should get some input in here, he makes amazing images though i think ian's setup is a bit more complicated and hi-tech than toilet paper :)
 
agree the lighting made 80% of the difference. mr.clark should get some input in here, he makes amazing images though i think ian's setup is a bit more complicated and hi-tech than toilet paper :)

@IanClark :)

Think he uses a 20cmx20cm softbox with dual diffusion layers. Ian any lighting advice.
 
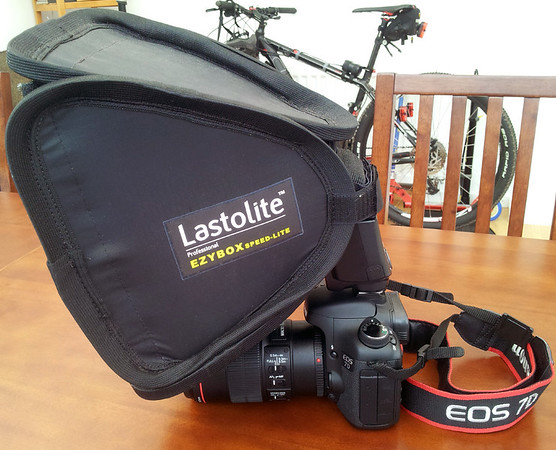
Hi All, Yes I use a Lastolite ezybox speedlite 22x22cm diffuser. It's really cumbersome and I've often said I need something smaller but I just love the light I get from it. Because it's so big, it can be put onto the flash via the hotshoe and it still puts light at the end of the lens.

Inside, it is lined with a silver reflective material. It then has an internal panel of vinyl (or whatever it is) that's about 15x15cm. Then it has the outer 22x22cm panel. However in between those two panels I have placed a double layer thickness of that foam sheeting you get flat panel TV's and Monitors in. Kitchen roll can be used or anything else that you see recomended for diffusion on forums.

As mentioned, it's daft and cumbersome and yes, occasionally frightens bugs but not too often.

This image is a little misleading as I used my mobile phone to take it and it seems to have distorted the perspective somewhat. It's not as high and stretched out as it looks here.

i-hhs48XL-M.jpg
 
Last edited:
Looks massive lol I thought mine was bad with just a bit of tubing hitting every feckin thing but that, doesnt half produce some lovely light though! You must have arms like popeye lugging that around :)
 
@Carlh I have a Chinese knockoff from fleabay which also gives great light sometimes use it instead of my ringflash. Though getting in tight spots is a nightmare.
 
Hehe, the diffuser weighs very little Carl.. Just the camera and lens is the main weight ;)
 
So Bryn asked me to talk about extension tubes. What they do, FAB's etc...

Well, what do they do? They move the lens further away from the sensor which effectively increases the magnification to greater than 1:1, at no loss of image quality because they contain no glass.

I use a combination of 3 extension tubes (mine were made by Jessops, but there are plenty of manufacturers that you can buy them from) and the three tubes are 13mm, 21mm, and 31mm, which can be combined in any order.

With my 13mm tube, the magnification is increased by 0.26x.
With my 21mm tube, the magnification is increased by 0.35x.
With my 31mm tube, the magnification is increased by 0.45x.
With the 13 & 21 (34mm) the magnification is increased by 0.48x.
With the 13 & 31 (44mm) the magnification is increased by 0.58x.
With the 21 & 31 (52mm) the magnification is increased by 0.66x.
With all three tubes, the 13, 21, & 31 (65mm) the magnification is increased by 0.79x.

However, with each tube that you add, so too do you lose light, thereby if you keep the aperture constant, then your shutter speed will increase, and quite significantly. You will see that when you look at the 4 images below, which shows the same image but using just the lens, then adding the 13mm, then the 21mm on top of that, and finally all three, the 13mm, 21mm, and the 31mm all together.

So the features and benefits are simple - closer focusing and greater magnification. However, you do lose light, there making camera shake more prevalent, and of course, your focusing has to be critically good. You will need a tripod, as shooting with three tubes on will most certainly result in blurred images. And naturally, the greater you magnify your subject, so too do you greater magnify any movement and unsteadiness.

The biggest negative (or biggest positive depending on how much importance you apply to it) is the depth of field gets even smaller, with the more tubes you add. If you think that having enough for your subject in focus is bloody hard, just consider what having a huge amount less will mean!

Anyway, that is it in a nutshell. There are convoluted ways of explaining how tubes work and their effects, but I think this will give you all an idea of what is what when it comes down to getting even nearer, to discovering what something small looks like when seen bigger again!

So finally to the four examples photographs. I haven't done any post processing, except for my "shrink to web" action in Photoshop, which downsizes the image to 1024x768 at 100ppi with a unsharp mask set at about 72. On each photograph I have put the shutter speed in the bottom left corner for you (aperture remained constant at f/9, and the photos were taken tripod mounted using natural light).


Image 1: Canon 100mm L IS on its own:

1080_1-1_Lily.jpg


Image 2: With a 13mm extension tube:

1080_1-13_Lily.jpg


Image 3: With the 13mm and the 21mm extension tubes together making a 34mm extension:

1080_1-34_Lily.jpg


Image 4: All three tubes, so now at 65mm extension:

1080_1-65_Lily.jpg


Hope this is of some use to some of you, and will encourage you to buy extension tubes and give it a go. It's cheaper than buying (if you shoot Canon) Canon's MPE-65!


Paul.
 
Last edited:
Excellent little write up and example photos Paul.

Just FYI, everyone, Paul is the reason I got into Macro quite a while back.
 
Just a quick test and for my notes... Tammy 90mm VC + 2x Full set of tubes.

Images are of a key....

Focus set at Infinity


Focus set at 1:1


As you can imagine this makes the camera lens combo very long and for what its worth not worth the extra magnification you get over I set of tubes.
 
WOW Bryn - great exercise to show it that you can get in <extreme> close, but for bugs, would be nigh on impossible and even for product shots would be a waste as you'd be looking at the material itself unless of course, that was the subject. I bet the lens end was touching the key? Maybe if it were a 300mm or 500mm you could get a little distance but would have to be done on a tripod. Ant shots would be great, but I guess that there would have to be loads of ants, firing off a load of shots in hope a couple could end up in focus?
 
Hi
I am going to make one of the Pringle tin diffusers to try out. Just after a little advice on what to set the flash too. Do you experiment
or have a setting that seems to suit most images. Any advice on were to go after making the diffuser would be much appreciated.

Thanks
Derek.
 
Hi
I am going to make one of the Pringle tin diffusers to try out. Just after a little advice on what to set the flash too. Do you experiment
or have a setting that seems to suit most images. Any advice on were to go after making the diffuser would be much appreciated.

Thanks
Derek.

My principle aim as starting point is f11 1/200s and ISO 200, flash power 1/16th or ETTL -1/2
 
Back
Top