

GardenersHelper
In Memoriam
- Messages
- 6,344
- Name
- Nick
- Edit My Images
- Yes
In this thread Andrew (@lightshipman) posted 4 images of an orchid and the issue of white balance was raised by a couple of us. I mentioned the possible use of a grey card to help adjust white balance. I have found grey card adjustments so useful that I thought it might be interesting to provide an example. I have also been using camera profiles recently, which I have also found useful, albeit more subtle in their effects, so I thought I would add that into the mix.
Gray card adjustments
You can use grey card adjustments for both RAW and JPEG images. You have to use post processing software that knows how to handle white balance adjustments, which I think is the case with most image editors.
To make grey card adjustments to an image you first need to capture a "white balance reference image" of something neutral coloured, typically a white or grey card (not any old white looking or grey looking card, but one that has been prepared specifically for photographic purposes to be absolutely neutral). While out taking photos you capture an image of the card every now and then, like this.

0601 7 IMG_5581 Shooting a white balance reference shot by gardenersassistant, on Flickr
I use a piece of white and a piece of grey card. White is meant to be better for white balance adjustment, but is easy to over-expose, so if the white area of the reference images does get over-exposed I use the grey area instead. Grey seems to work fine as far as I can tell.
When you come to post process your images you use the eye dropper tool on a white balance reference image to set that image's white balance. You can then copy that white balance to other images.
The following illustration shows the same shot, captured with a Canon 70D. At the top left is what the image looked like when processed using the "As shot" white balance. At the top right is what it looked like after using a grey card adjustment.

0601 1 70D White balance x camera profile by gardenersassistant, on Flickr
Cameras often have trouble with colours in the blue/purple range. In this case the grey card adjusted image is much more realistic, and I find that generally to be the case.
Camera profile adjustments
Different cameras capture colours differently, and even two cameras of the same model can differ a bit apparently, and different makes and models can differ a lot. To counteract this and get more of a "standard" or (hopefully) "realistic" rendering of colours you can use camera profiles.
Unlike with grey card adjustments, camera profiles only work with RAW images. You have to use post processing software that knows how to handle camera profiles. This is less common that with white balance adjustments. Photoshop, Elements and Lightroom can use camera profiles. I don't know about other software.
As with grey card adjustments, you capture reference shots. In this case the shots are of a multi-coloured target, like this.
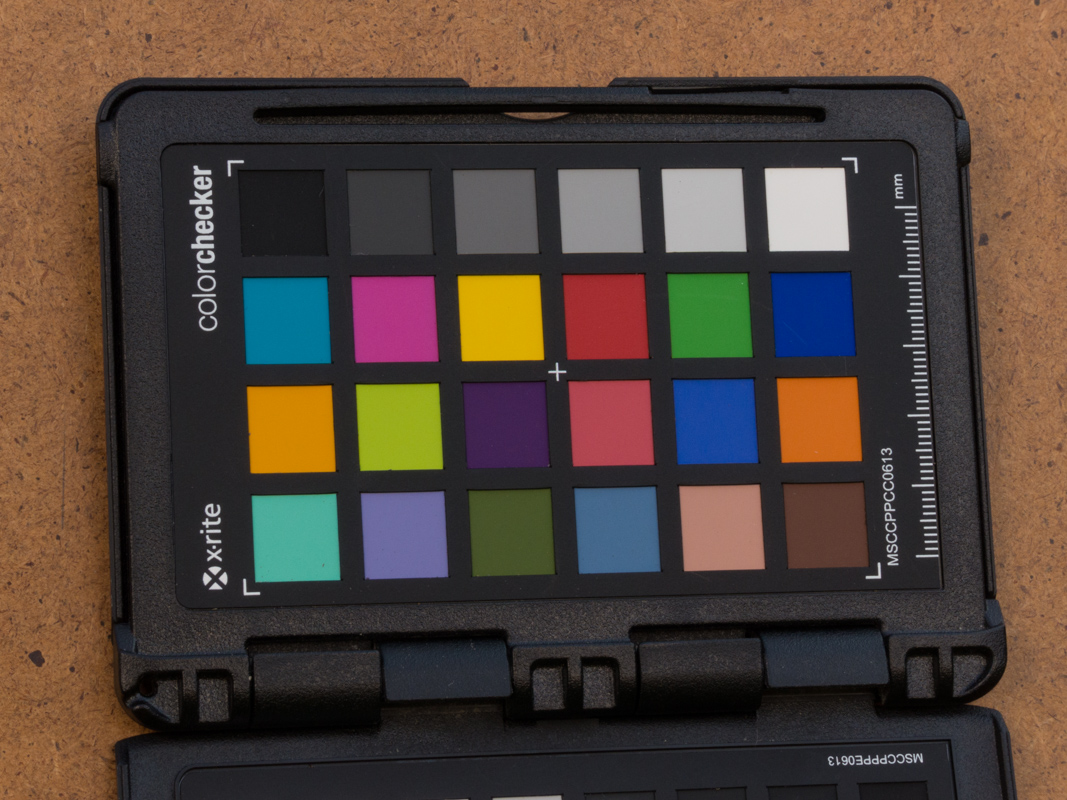
0601 8 P1490299 Shooting a camera profile reference shot by gardenersassistant, on Flickr
You then create a "camera profile" for the camera that captured the reference shot. I do this using Adobe DNG Converter, which converts a RAW image into a DNG image, and then DNG Profile Editor to create the camera profile. (DNG converter and DNG profile editor are both free, and the conversion to DNG and the preparation of the camera profile are both quick and easy.)
If your post processing software knows about camera profiles you can tell it to use the appropriate camera profile instead of the general purpose profile that it normally uses. The bottom two images in the composite image above illustrate the effect of using a camera profile. At the size shown above the effect looks rather slight, if you can see it at all. However, if you compare larger versions of the image the differences are much more clearly visible. Here are larger versions of the image, with 1100 pixel high versions available at Flickr. Both of these used a grey card adjustment. The first uses Lightroom's general purpose "Adobe standard" profile. The second uses a camera profile prepared for the 70D that captured the shot.
If you can download the images and flick between them so that one replaces the other without you moving your eyes the differences will be much easier to see than if you try to compare them by moving your eyes from one to the other on this page or in some other software. I use Faststone image viewer to flick between images - it lets me switch instantly back and forth between images using the arrow keys so I can keep my eyes fixed on a particular part of the image as I flick back and forth to compare them.
Adobe Standard profile

0601 3 IMG_5578 Grey card WB, Adobe Standard profile 1100h by gardenersassistant, on Flickr
70D camera profile

0601 4 IMG_5578 Grey card WB, 70D camera profile 1100h by gardenersassistant, on Flickr
For the comparisons I have done, I have generally found the versions using camera profiles to be more pleasing to my eye, and more realistic. For the most part (but not always) they seem to have more "depth"/clarity or some such, to be more subtle/less garish, and to have more realistic colour rendition. I routinely use camera profiles these days.
There is an issue as to whether you need to make one or more camera profiles every time you go out shooting, or whether you just need one profile for a camera, or perhaps a few for different conditions. It seems to me that for the most part different profiles for a particular camera produce fairly similar results, the main possible exceptions being (if it is sunny) very early in the morning, shortly after dawn, and late in the afternoon, shortly before sunset. It also doesn't seem to matter much whether reference shots are captured in the sun or in shade.
Grey card and camera profile adjustments for different cameras
The above examples relate to a Canon 70D dSLR. Both techniques work for other cameras. Grey card adjustments work for any camera, and camera profiles can be used for any camera that can capture RAW images (as long as those images can be converted to DNG images).
Here is a shot of the same flower, on the same day, captured a few minutes before the 70D version, using an FZ200 bridge camera. (Unfortunately this shot used a very small aperture and the 70D version used a much larger aperture, so the dof is very different in the two versions. They were not captured as test/comparison shots, but are the most suitable and similar images I can find for this comparison.)

0601 2 FZ200 White balance x camera profile by gardenersassistant, on Flickr
Adobe Standard profile

0601 5 P1490307 Grey card WB, Adobe Standard profile 1100h by gardenersassistant, on Flickr
FZ200 camera profile

0601 6 P1490307 Grey card WB, FZ200 camera profile 1100h by gardenersassistant, on Flickr
It is possible that these techniques are even more useful for my FZ200 than my 70D because it seems to me that the auto white balance on the FZ200, and the unadjusted colour rendition on the FZ200, are not as good as on the 70D.
Gray card adjustments
You can use grey card adjustments for both RAW and JPEG images. You have to use post processing software that knows how to handle white balance adjustments, which I think is the case with most image editors.
To make grey card adjustments to an image you first need to capture a "white balance reference image" of something neutral coloured, typically a white or grey card (not any old white looking or grey looking card, but one that has been prepared specifically for photographic purposes to be absolutely neutral). While out taking photos you capture an image of the card every now and then, like this.
0601 7 IMG_5581 Shooting a white balance reference shot by gardenersassistant, on Flickr
I use a piece of white and a piece of grey card. White is meant to be better for white balance adjustment, but is easy to over-expose, so if the white area of the reference images does get over-exposed I use the grey area instead. Grey seems to work fine as far as I can tell.
When you come to post process your images you use the eye dropper tool on a white balance reference image to set that image's white balance. You can then copy that white balance to other images.
The following illustration shows the same shot, captured with a Canon 70D. At the top left is what the image looked like when processed using the "As shot" white balance. At the top right is what it looked like after using a grey card adjustment.
0601 1 70D White balance x camera profile by gardenersassistant, on Flickr
Cameras often have trouble with colours in the blue/purple range. In this case the grey card adjusted image is much more realistic, and I find that generally to be the case.
Camera profile adjustments
Different cameras capture colours differently, and even two cameras of the same model can differ a bit apparently, and different makes and models can differ a lot. To counteract this and get more of a "standard" or (hopefully) "realistic" rendering of colours you can use camera profiles.
Unlike with grey card adjustments, camera profiles only work with RAW images. You have to use post processing software that knows how to handle camera profiles. This is less common that with white balance adjustments. Photoshop, Elements and Lightroom can use camera profiles. I don't know about other software.
As with grey card adjustments, you capture reference shots. In this case the shots are of a multi-coloured target, like this.
0601 8 P1490299 Shooting a camera profile reference shot by gardenersassistant, on Flickr
You then create a "camera profile" for the camera that captured the reference shot. I do this using Adobe DNG Converter, which converts a RAW image into a DNG image, and then DNG Profile Editor to create the camera profile. (DNG converter and DNG profile editor are both free, and the conversion to DNG and the preparation of the camera profile are both quick and easy.)
If your post processing software knows about camera profiles you can tell it to use the appropriate camera profile instead of the general purpose profile that it normally uses. The bottom two images in the composite image above illustrate the effect of using a camera profile. At the size shown above the effect looks rather slight, if you can see it at all. However, if you compare larger versions of the image the differences are much more clearly visible. Here are larger versions of the image, with 1100 pixel high versions available at Flickr. Both of these used a grey card adjustment. The first uses Lightroom's general purpose "Adobe standard" profile. The second uses a camera profile prepared for the 70D that captured the shot.
If you can download the images and flick between them so that one replaces the other without you moving your eyes the differences will be much easier to see than if you try to compare them by moving your eyes from one to the other on this page or in some other software. I use Faststone image viewer to flick between images - it lets me switch instantly back and forth between images using the arrow keys so I can keep my eyes fixed on a particular part of the image as I flick back and forth to compare them.
Adobe Standard profile
0601 3 IMG_5578 Grey card WB, Adobe Standard profile 1100h by gardenersassistant, on Flickr
70D camera profile
0601 4 IMG_5578 Grey card WB, 70D camera profile 1100h by gardenersassistant, on Flickr
For the comparisons I have done, I have generally found the versions using camera profiles to be more pleasing to my eye, and more realistic. For the most part (but not always) they seem to have more "depth"/clarity or some such, to be more subtle/less garish, and to have more realistic colour rendition. I routinely use camera profiles these days.
There is an issue as to whether you need to make one or more camera profiles every time you go out shooting, or whether you just need one profile for a camera, or perhaps a few for different conditions. It seems to me that for the most part different profiles for a particular camera produce fairly similar results, the main possible exceptions being (if it is sunny) very early in the morning, shortly after dawn, and late in the afternoon, shortly before sunset. It also doesn't seem to matter much whether reference shots are captured in the sun or in shade.
Grey card and camera profile adjustments for different cameras
The above examples relate to a Canon 70D dSLR. Both techniques work for other cameras. Grey card adjustments work for any camera, and camera profiles can be used for any camera that can capture RAW images (as long as those images can be converted to DNG images).
Here is a shot of the same flower, on the same day, captured a few minutes before the 70D version, using an FZ200 bridge camera. (Unfortunately this shot used a very small aperture and the 70D version used a much larger aperture, so the dof is very different in the two versions. They were not captured as test/comparison shots, but are the most suitable and similar images I can find for this comparison.)
0601 2 FZ200 White balance x camera profile by gardenersassistant, on Flickr
Adobe Standard profile
0601 5 P1490307 Grey card WB, Adobe Standard profile 1100h by gardenersassistant, on Flickr
FZ200 camera profile
0601 6 P1490307 Grey card WB, FZ200 camera profile 1100h by gardenersassistant, on Flickr
It is possible that these techniques are even more useful for my FZ200 than my 70D because it seems to me that the auto white balance on the FZ200, and the unadjusted colour rendition on the FZ200, are not as good as on the 70D.

")

 DSC_2971
 DSC_2972
 DSC_2960
 DSC_2973
 DSC_2969
 DSC_2974