Keltic Ice Man said:
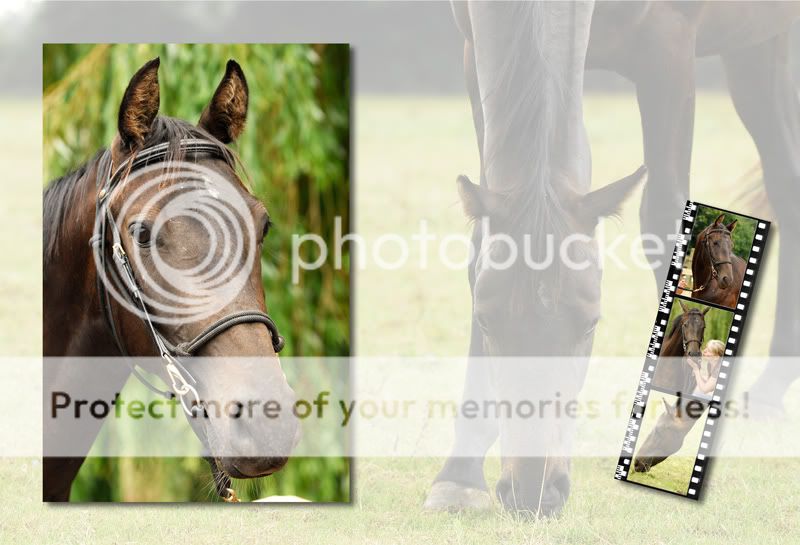
CT - how do you get the back picture to look fainter than the others? do you fancy doing a quick list of what you did or a tutorial for some of us beginners?
I used PSP but it's pretty much the same in CS2 I think.
I reduced the opacity of the picture. You can only apply opacity to a layer, so you can't just apply it to your original background shot. You need to make it into a layer. There's a few ways you can go about it but the easiest is probably:-
Open your chosen background pic. From the drop down Edit menu select Cut which copies the image to memory, (or to Clipboard depending how you prefer to think about it) leaving you with an empty picture. You need to select a suitable colour for this empty frame as you're going to paste your pic back in later and when you reduce the opacity you need a colour underneath which isn't going to affect the colours in your original shot. White is probably the safest colour unless you're after a particular effect.
So make this a pure white plain pic by using the white fill tool on 100% opacity or just by selecting white as the background colour.
Make sure the image is flattened by going to the Layers menu and selecting Merge All or Flatten depending on which software you're using.
Now go to Edit and select
Paste As A New Layer (not a selection) This pastes your picture back over the top of the white background but as a floating layer which can be moved around, although you don't want to move it.
Go to The Layers menu and select Layer Properties. This brings up a box with a number of controls. You'll see one of them is Opacity. Reduce the opacity of your picture by using the slider or entering a numeric amount. (50% etc). When you're happy with the amount of opacity go up to the Layers menu again and flatten the picture. This merges your layer with the background.
Select the pics you want to post onto this background. The ones I used were initially all the same size as the background. I just reduced them to 30% of the original size. Copy these pics into memory one at a time by using Edit/Cut, and paste each one onto your background pic
as a new layer You now have three floating layers which you can drag around, rotate and arrange as you wish. By going to the Layers menu and selecting Arrange Layers you can move these pics up or down (below or above) in relation to each other. Make sure the layer you want to move is selected as the active layer.
Once you're happy with the arrangement of your pics. Go to the Effects menu and select Drop Shadow with opens a control box where you can select the direction, size, opacity, colour etc, for your shadow. Black usually works best. Apply the drop shadow to each of the three smaller pics in turn, selecting each pic as the active layer before you do so.
Finally go to the Layer menu and flatten your pic. That's it... don't forget to save it and with a different file name if you don't want to overwrite your original background pic. You can add text if you wish using the Text menu.
It's a lot easier and quicker to do it than describe it, and you're only really limited by your imagination.
")