Preparing colour image for B&W conversion

Messages
1,156
Name
Chris
Edit My Images
No
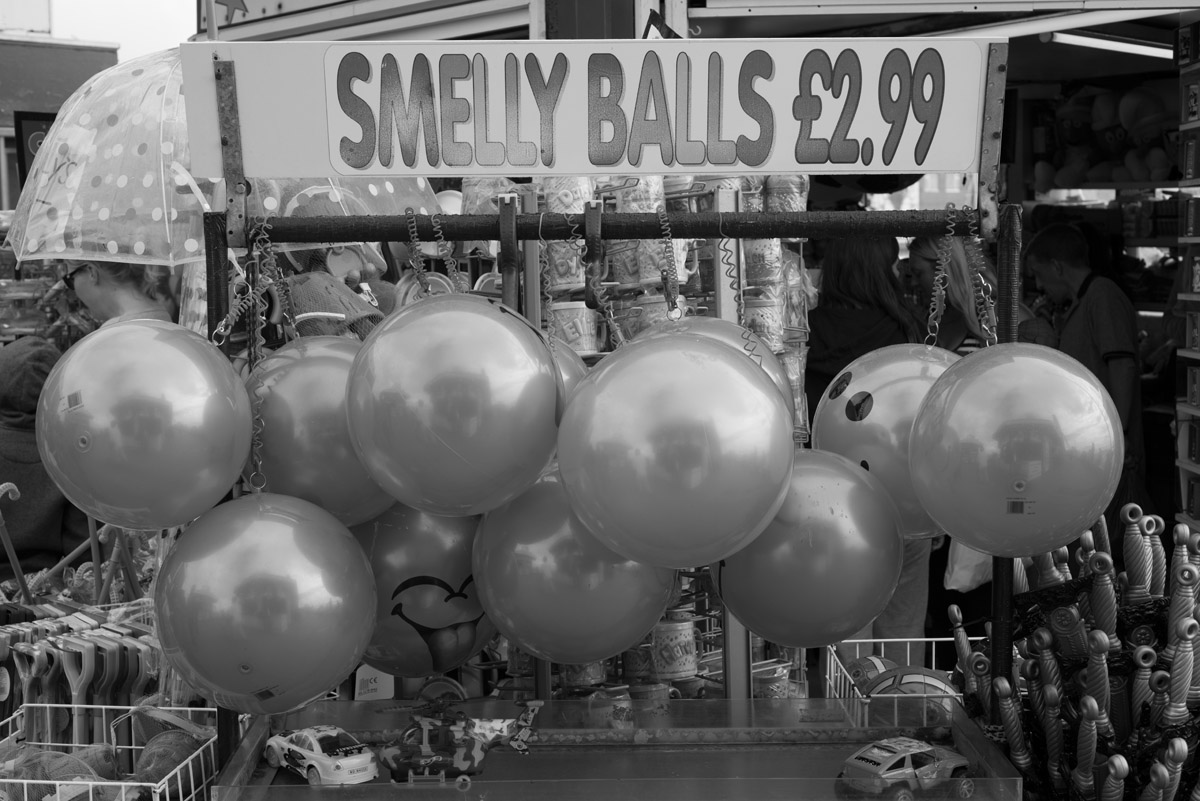
I have been testing out a few of the many ways of converting colour to B&W and have settled on

http://www.photoshopessentials.com/photo-editing/black-and-white/hue-saturation/

for the time being

HOWEVER ................

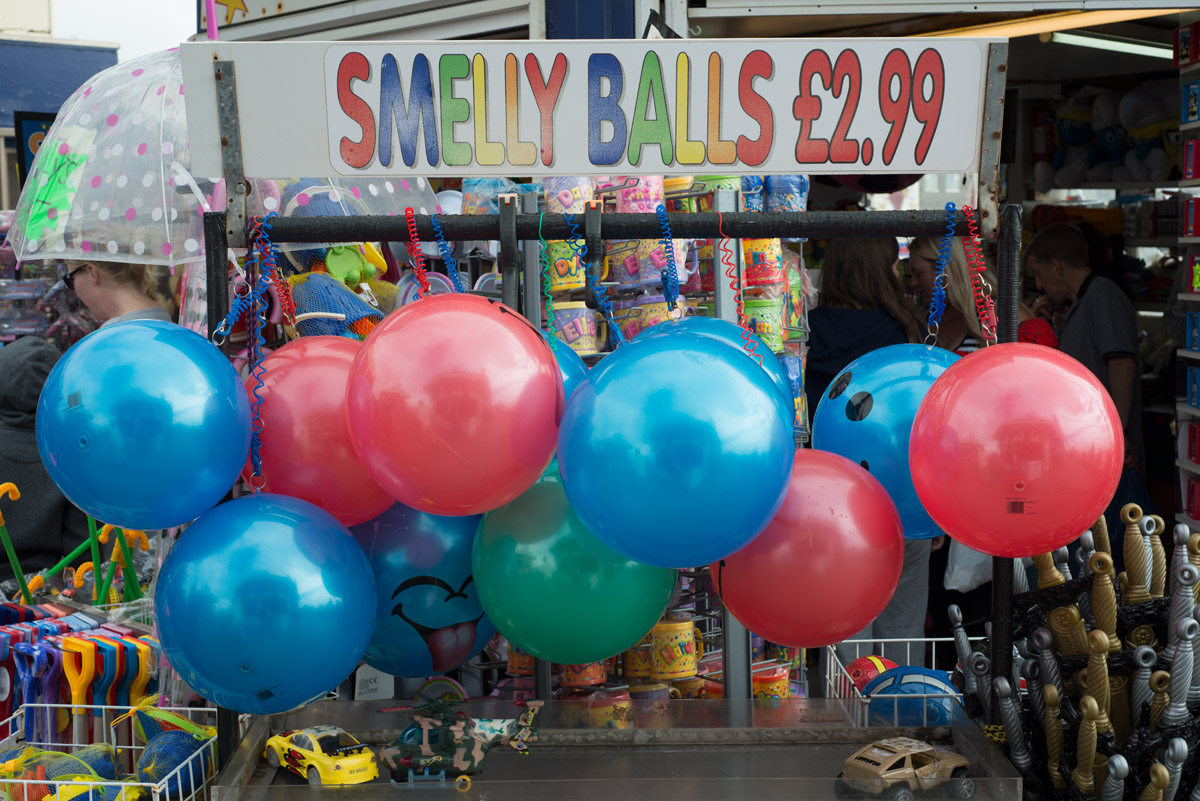
The different methods seem to start with a 'given' image.

What can you do to a colour image to give you the best starting point to convert to B&W?

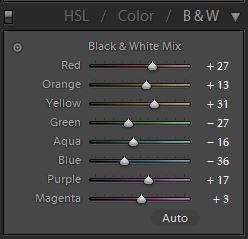
The only advice I have found is in the Kelby and Kloskowski book on PSE 11 for digital photographers where it says (for converting to B&W in Camera Raw) that this is one of the rare times you begin by clicking the auto button.

Would this be a good starting point even when you are going to convert using a method other than Camera Raw?

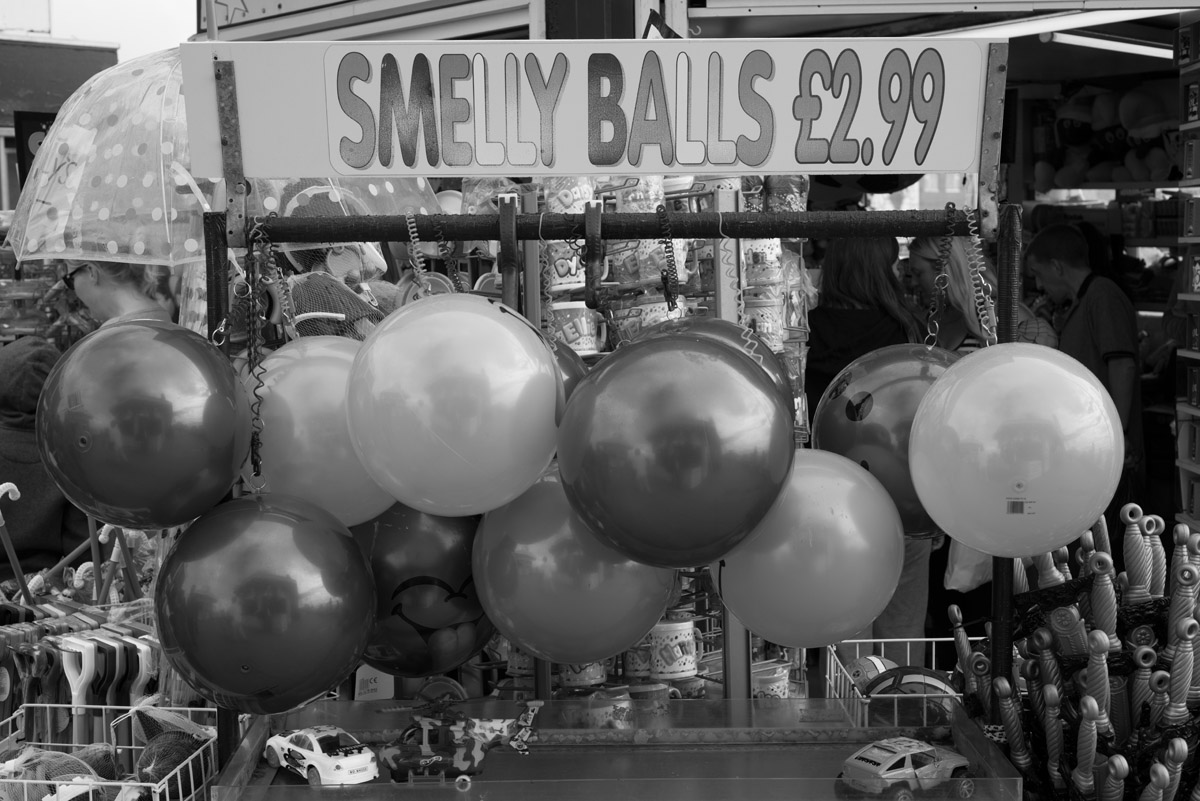
What other methods might I try?
 
The link you provided makes absolute sense. Scott Kelby seems to have lost his mind if you ask me. Auto anything in the work flow can only end in tears if you ask me.

The link you provided makes perfect sense. To re-iterate that, here's an extract from a post I often copy and paste whenever this subject crops up. It was written in response to another thread, but the process discussed is relevant here.
------------------------------------------------------------------

Never shoot B&W in camera.. unless you really want to do it the full on way we used to prior to digital.. using colour filters to separate tones etc. Shoot RAW, as you're not locked into the whole 256 tones of RGB of a 8bit JPEG, then do your B&W conversions post process.

Do not just remove colour, desaturate etc... think about how tones relate to grey once converted.


Making a great mono image from a colour one relies on understanding what colours are translated to what tones. As an example, remove the colour from a shot, and something that's red, and something that's green may well end up being the exact shade of grey depending the exact colour and brightness.

Never just convert an image using convert to greyscale, and personally, for the same reason I;d never set the camera to shoot in black and white either... because you have NO control over where the tones fall.

I nearly always use Lightroom's B&W function (or photoshop's.. they behave in the same way... but LR is working on the RAW and is completely reversible should you decide to change it later)

Look at this shot.

qfIFi.jpg

A straight "Convert to greyscale" in Photoshop resulted in this.

RlsLp.jpg

All the tones are almost identical.

As the most differentiation in the colour shot is between red, blues and yellows, I adjusted those channels in Lightroom's B&W palette to give a visually similar separation of tones in the balls and the sign.

Df0BM.jpg

Which resulted in this... a much more pleasing rendition.

uukVJ.jpg


Why anyone shoots B&W in camera, or just converts to greyscale is beyond me, as you have zero control over where the tones lie. It's for this reason those who used to shoot extensively with mono film will have used colour filters to do exactly the same thing... separate out tones.


[edit] These images are unedited in any other way... so they may look a bit flat. I've only played with teh colour channels in B&W to make my point.


Have a play with it... don't rely on pug-ins etc... they teach you nothing.. (unless you have plug-ins that allow manual adjustment of colour channels).
 
Pookeyhead - thanks -I had seen your post elsewhere on the site and thought it was really good then and still do now:)

Do you have any views on manipulation of the colour image prior to actual conversion?

To be fair to Scott Kelby, it was only that part of the process - ie pre-conversion to B&W - for which Scott Kelby was suggesting (as an exception) that you use the auto button in camera raw.
 
Last edited:
It depends what you're trying to achieve. If you want to darken a blue sky for example, then yeah, you could lower the brightness of the blue channel prior to conversion, and the results would be darker. Be careful though, as excessive channel adjustments can, and probably will degrade quality if you view the image at 100%
 
Last edited:
David's post hits the nail on the head re Auto - my experience is that they always produce a flat and grey image not a black and white one.

I still hold that the key to a good B&W shot is having the elements in the shot when you shoot it in RAW colour. A bold blue sky with strong clouds will convert well, whereas an overcast sky will just become a flat grey sky. If the tonal range is similar then you will struggle to create enough definition an s separation in the B&W conversion.

I've found tweaking the individual contrast sliders for each colour channel to help but be careful that you don't over process the image as it will start to lose quality and you'll get noise/pixelation.
 
Thanks for the responses - I just wanted to be sure I wasn't missing a trick in doing conversions.

From what you say there isn't any standard/generally recognised set of adjustments I could make to an existing image whilst it is still in colour and before beginning conversion.

So I will continue muddling through and hoping for the best:)

What I have learnt and am still learning is how colours will look in B&W - sorto of pre-visualising them. I converted lots of my photos to B&W and could then see how they converted and what I could do to make them work (for me) Like everything, it is subjective and for some B&W is more opinionated as it is just as much about the conversion as the compostion itself.

There is a good B&W forum if I can mention it ? http://www.digitalmonochromeforum.co.uk/welcome.php lots of great photos and some good "how to" posts
 
For myself it is (and I am not an expert). Start from an original RAW file :
In Lightroom
#1 Zero any changes Lightroom may have made wnen importing the file.
#2 Crop (if needed)
#3 White balance (if needed)
#4 Levels adjustment (if needed)
#5 Usually give it a bit of "punch" (if needed)
#6 Curves adjustment (just a gentle S curve usually)
#7 Export to Photoshop as a PSD file (most my images are for web use so it will be resized for web publication during export)
#8 Noise reduction (possibly selectively) if needed.
#9 Then into NIK Silver Efex
#10 Quick run through some of the presets to see what looks ok
#11 If one looks ok then tweak the NIK settings (possibly using control points).
#12 Back in to photoshop
#13 Final sharpening and export as a jpg.
 
Ask Santa for a copy of Silver Efex Pro. It's utterly brilliant! All the techniques discussed above can be done with a few clicks. Any bang up to date software that has the Zone System as a fundamental part is worth the outlay?!
 
I nearly always use Lightroom's B&W function (or photoshop's.. they behave in the same way... but LR is working on the RAW and is completely reversible should you decide to change it later)

This.

I do a lot of monochrome and spent many years trying umpteen different methods of b/w conversion in Photoshop, but LR's controls are usually flexible enough for me to get the result I'm after in a quick time.
 
Thanks for the replies - silver Efex seems to crop up regularly but I can't justify it at the moment - certainly not until I satisfy myself that I can't get what I want from PSE 11.

Hence my request for advice/tips on what to do to the colour image BEFORE I start converting to B&W (regardless of the actual conversion method itself).
 
Thanks for the replies - silver Efex seems to crop up regularly but I can't justify it at the moment -

You don't need it. Pretty much everything it does can be done manually in Lightroom, and the presets are invariably horrible and often destructive of quality (as most presets are).
 
You don't need it. Pretty much everything it does can be done manually in Lightroom, and the presets are invariably horrible and often destructive of quality (as most presets are).

All so true & I agree, after trying lots of pre-sets in the early days & learning the long way I feel better about getting there 'under my own steam' as it were.
 
You don't need it. Pretty much everything it does can be done manually in Lightroom, and the presets are invariably horrible and often destructive of quality (as most presets are).

I actually have PSE 11.

Went out today on a visit (Quorn railway station) with members of my photography class and converted some images to B&W using the method in post 1 =

http://www.photoshopessentials.com/photo-editing/black-and-white/hue-saturation/

and was pleased with the results and found it easy to use - I didn't even have to mug up on it.

But in terms of preparation of the coloured image I am trying auto in Camera Raw (as per Kelby and Kloskowski) plus clarity plus a bit of vibrance (and which is pretty much same as RichardTaylor suggestions above - thanks for them by the way), until I can find anything any better.

So at the moment I can't see I will be getting any specialist software for B&W conversions, unless it is very cheap.
 
I thoroughly recommend LR & you download a free trial from Adobe as I find it is far easier to do B&W in that than the PE10 or CS2 or CS6 trials I 've used but hey what suits one man doesn't necessarily suit every other.


Fantastic. Your brain almost adds the colours back into the "smelly balls" sign

I wish I'd spotted this before getting some A3 B/W pictures framed...
 
Last edited:
Taking control of the tones colours are represented in like this is the only sensible way to convert a colour image to B&W.
 
Back
Top