
You are using an out of date browser. It may not display this or other websites correctly.
You should upgrade or use an alternative browser.
You should upgrade or use an alternative browser.
Studio lighting portrait
- Thread starter Fangman
- Start date
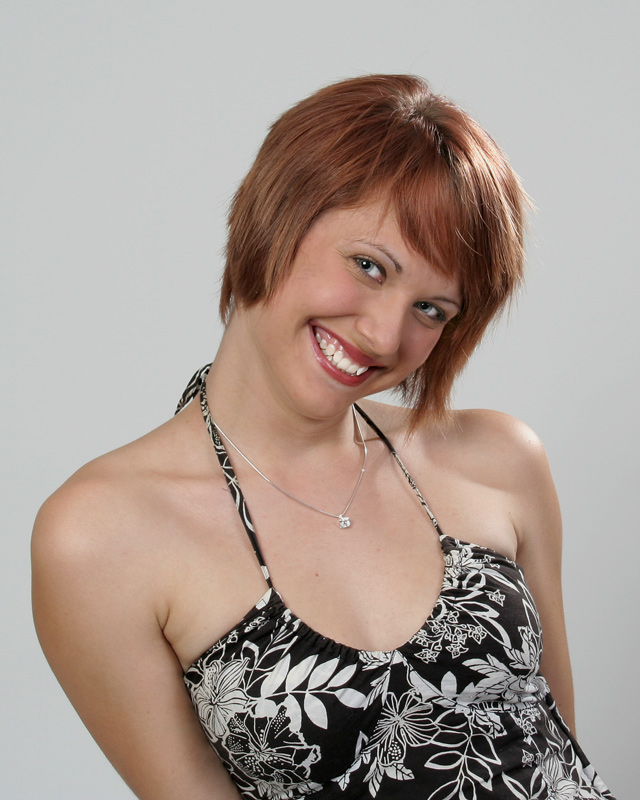
Better than the other ones - nice and sharp, but so it should be in a studio with as much DoF as you want.
The lighting looks a bit flat to me - looks like you've used two lights at the front of the model, but at almost the same output - the 'fill' light needs to be at least 2/3 less output of your main flash. Also, your hair light is way too bright and distracts a little.
Also... is that background meant to be 18% grey? If its supposed to be white then it needs to be lit seperately with another flash set at least 2/3 more than the main light.
I've shown this to the other photographers here at work (two stills phots and two video camermen) just to make sure that I'm not just being a b*st*rd about this and we all agree that it's a valiant 1st effort but could (and should) be better. Go back to the club and shoot the man who told you to set the lights up in this way (and for the record - no-one uses hair lights anymore they're so 1990's).

D
davy
Guest
is it just me or or does the levels adjustment seem to have turned the background a slight shade of greeney/blue??
I don't know much about lighting and portraiture (something I'm trying to work on) but I would agree with Arkady about hte highlight in the hair.
Otherwize a pleasing shot and well posed, the model looks very natural and relaxed.
Davy
I don't know much about lighting and portraiture (something I'm trying to work on) but I would agree with Arkady about hte highlight in the hair.
Otherwize a pleasing shot and well posed, the model looks very natural and relaxed.
Davy
OP
- Messages
- 2,839
- Edit My Images
- Yes
. Go back to the club and shoot the man who told you to set the lights up in this way (and for the record - no-one uses hair lights anymore they're so 1990's).
The chap belongs to the 1950's who was setting up the lights - I am a youngster at 65!
The background was nearer white than 18% grey.
I stopped down a notch or so after checking my forst takes but never got a pose as pleasing as this.
Thanks for the comments and advice as usual.

- Messages
- 2,553
- Name
- Chris
- Edit My Images
- Yes
*snip* (and for the record - no-one uses hair lights anymore they're so 1990's).
That being the case, Rob, is the aim to get as much contrast between the model's hair and the background as possible, a case of if the sh*t fits, or being far more subtle - using a low output light from the side or something?
- Messages
- 2,553
- Name
- Chris
- Edit My Images
- Yes
Pretty good for a guitar player anyway.
I like the idea a lot. A lot of the old photos I restore need complete new backgrounds, and that would be a very simple technique to use for the portraits.
Hahaha! Just think what it'd be like if I was a bass player... er (even worse) a drummer!
To do it, select the background eraser tool, set the limits to Discontinuous mode, tolerance to about 20% and protect the foreground colour. Trace just around the outside of the model. When it comes to doing the hair, zoom in and reduce the brush size and tolerance.
- Messages
- 2,553
- Name
- Chris
- Edit My Images
- Yes
Chris, Im going to ask a really dumb question here now... where might I find the background eraser tool?
In CS2 (not sure if it's there in earlier versions), click and hold the eraser tool until it expands to display 3 options. Background eraser is the second in the list...
")
InaGlo
TPer Emerita
- Messages
- 8,683
- Name
- Glo
- Edit My Images
- Yes
Sorry for butting in on your thread Fangman.In CS2 (not sure if it's there in earlier versions), click and hold the eraser tool until it expands to display 3 options. Background eraser is the second in the list...
...Ta Chris
OP
- Messages
- 2,839
- Edit My Images
- Yes

Used selective colour to get background and "clouds" and gave a bit more life to the skin tones - about 10 mins play time after checking 65 references for "citing" in a medical textbook for my daughter!
Thanks to you all for your comments and instruction.
Now we're getting there... aplogies if my earlier comments seemed a bit...brusque. Suffering from the usual self-inflicted hangover plus having a serious bun-fight with our IT suppliers at the moment, so I've been Mr Extra-Grumpy all week.
I think Chris' background treatment works... a treat and improves the original immeasurably.
I think someone else mentioned the colour balance as being wa-aaaay too cold. Either shoot RAW (if you don't already) or spend more time on a custom WB before shooting. I find that on Nikons with my Bowens kit I need to use the pre-set Flash setting with a factor of +3 dialled in to get skin tones the way I like them ( warm-ish).
OP
- Messages
- 2,839
- Edit My Images
- Yes
very nice end result...cool!
Thanks guys!

This is the beauty of this forum - Constructive and helpful critique . . .even Warspite! You know we love you really! Keep the comments coming - I'm here to share and learn, both from comments on my postings and reading others. Don't pull any punches as if everyone is too polite we won't get a true opinion or varing views.
Phil the fang.
