Colour negative degradation

Messages
53
Edit My Images
No
I've tried scanning some 110 negatives (using a custom made adaptor) on my Nikon Coolscan V.

They are all from the 1980s and I've noticed many of them (when zoomed up) have defects...lots of them.

The idea was to scan the negatives rather than the prints, as they would be higher quality but I'm now thinking that the prints will be better, albeit less sharp.

I've also scanned a lot of 35mm positives (of the same age and older) with no such issues.

Does the process of turning a negative into a positive, give it some physical protection?
 
Some examples of the images would help us to understand what the problem might be.
 
It's possible the film wasn't handled properly when processed, maybe rushed or old chemicals. Could be a lot of things, as Andrew says it might be easier to trouble shoot if we could see what you are seeing.
 
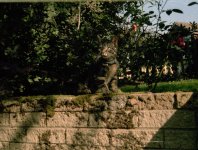
So, you can see white bits round the cat's face. That looks like the emulsion has come away from the negative? If you zoom up, you can see more (smaller) white dots.
 

Attachments

  • Piggy.jpg
    Piggy.jpg
    220.5 KB · Views: 28
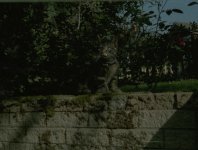
Another issue which I'm encountering is how dark the scans are. This is how it looked before I made some auto adjustments in Photoshop.
 

Attachments

  • Image2.jpg
    Image2.jpg
    132.5 KB · Views: 12
So, you can see white bits round the cat's face. That looks like the emulsion has come away from the negative? If you zoom up, you can see more (smaller) white dots.


If it's showing white on the positive image, it can't be missing emulsion - that would show as black bits.
 
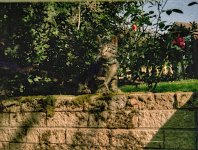
I've rescued the white bits using healing in Snapseed on my poor old smart phone so it at least shows they can be rescued but as to why they are there I haven't a clue ! it does show how well the cats ( Piggy) markings work against the back ground.
PIGGY23.jpeg
 
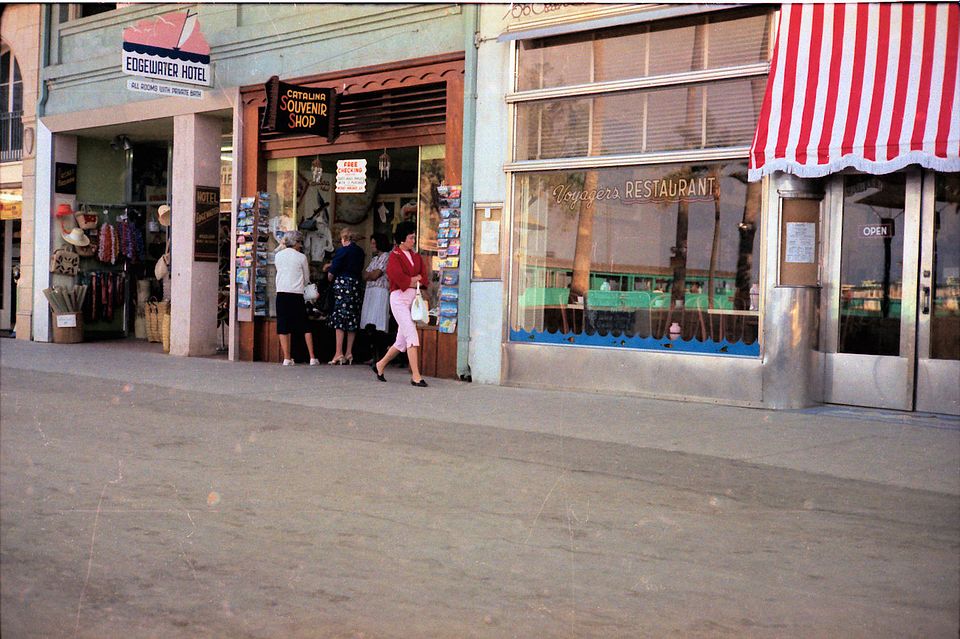
I have Kodacolor negs from back in 1962 (I was 12!) and I can assure you that there was no defect evident in scanning.
catalina_0002_zps4mnwfdru.jpg


and from about 1964
1964-2_zpstuaar9ky.jpg
 
I've rescued the white bits using healing in Snapseed on my poor old smart phone so it at least shows they can be rescued but as to why they are there I haven't a clue ! it does show how well the cats ( Piggy) markings work against the back ground.
View attachment 417988

I'm guessing the same can be done in Photoshop (but probably not as quickly!)

I'll do a few and see if it's worth touching up dodgy negatives or just scanning pristine prints on my flatbed.
 
Last edited:
I have Kodacolor negs from back in 1962 (I was 12!) and I can assure you that there was no defect evident in scanning.
catalina_0002_zps4mnwfdru.jpg


and from about 1964
1964-2_zpstuaar9ky.jpg

I have some B&W negatives from the late 1960s, which haven't been scanned yet.

As said earlier, none of my 1960s colour slides show any issues (apart from the usual flecks of dirt)

Perhaps 110 film was inferior? It wasn't a serious format after all...
 
I've scanned a lot of my negatives from the 70s, and a few of my father's Dufaycolors [*] and negatives in 6x9 size from the 30s to 50s. I've seen all sorts of damage to older negatives and (particularly) slides. Damage includes scratches, creases, cuts, dust spots, fly dirt, finger prints, mould, fungus, reticulation and missing bits of emulsion! 110 film is smaller, so any damage would show up more.

Slides tended to have more damage because "in the old days" they were handled much more for boring the neighbours with slide shows!

Generally, fixing up in post is appropriate, though with colour films (except Kodachrome) using the infra-red channel on a scanner with appropriate software may do quite a good job. I even managed to use IR on some of my Kodachromes with SilverFast, using its masking capabilities to concentrate on monotone areas like sky.

* You can see a bit of the damage to the Dufaycolors at https://www.talkphotography.co.uk/threads/scanning-dufaycolor.505898/ .
 
Another issue which I'm encountering is how dark the scans are. This is how it looked before I made some auto adjustments in Photoshop.
just looking at this - and I realise I may be "teaching grandma to suck eggs" here - but honestly, that's not really "digging out" much information - now, I know 110 negs are TINY - to be honest, I found that even scanning 35mm was damned hard work to get the best out of the scanner on such small negs.

Presumably, you're pushing the Coolscan V as hard as it'll go on resolution (it's been a while since I had one of those on my desk iirc it was 4000dpi res) and using some sort of digital scratch resolution - i used to use silverfast and use multiple pass scaning and (iirc - as I say it's been way over a decade since I went near this stuff) think it was called DIgital ICE to get rid of the little white sparkly artifacts.

Other than that it's down to actually sorting out your scanning profile for the negatives - very often the "film profile" of a 100 ASA Neg film, billed as the same product on 110,35mm and 120 would actually be completely different formulations and need different intensities from the scanner illumination - possibly something exagerated by the "custom made" 110 adaptor - assuming that means it's not a Nikon standard part, and the scanner doesn't realise it's being "fooled" into scanning a smaller neg.

I know you've put this in the PP and image editing section - and that's fine - but I think that there's possibly more gains to be made in spending a day in playing around with your settings and scannign software/firmware to actually get a better source in the first place.

If you want to go down this route - it might be as well to move the thread to our F&C section, where you'll be able to get reams of advice about scanning solutions - because, well, most of us denizens of F&C use a hybrid approach - and even the darkroom guys will often use digital scans instead of a wet "contact sheet" for initial shot selections...
 
Back
Top