Recommend a cheap effective light for pictures of small objects at home

Messages
3,644
Name
Keith
Edit My Images
Yes
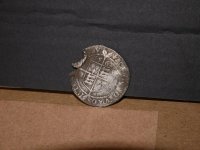
Mostly metal detecting finds, but sometimes other small captures for photo challenges and stuff.

I'm often in the spare room and lacking natural light, plus the room is not positioned well to use light from the window. I've used an old swing arm office lamp pretty effectively before but it's falling apart now and something on a stand would be more practical.

I've seen some cheap Neewer LED panels with stands on Amazon with 3 light settings, maybe a 2-pack to position left/right of me and I shoot the coins/objects from the centre? Or are these inferior to umbrella lamps?

I don't do this often so cheap and cheerful will do, and I occasionally vlog intros to videos too.

I presume a pair of lights gets the best results by combining left/right angled light removing shadow?

Any suggestions gratefully received.
 
Last edited:
Not sure what you mean by umbrella lamps but no constant led lights are going to beat a flash's power for stills but then a flash would be no good for video. Unless its important that they are dual purpose I would look at getting a flash for the stills and an led for the video.
What kind of budget are you looking at? Do you have a built in flash on your camera that could be used to trigger an off camera flash in slave mode?

If so a used very basic flash that would work for that kind of setup can be pretty cheap. I have picked them up to use as a second off camera flash on bidding for less than £20. (actually picked up 2 Sigma brand ones for £17 a while back) They are no frills but work great when used effectively.

Check out the Lighting Challenges to see what can be done with a single flash/ light and simple modifiers like a bounce card, umbrella or softbox.
 
Not sure what you mean by umbrella lamps but no constant led lights are going to beat a flash's power for stills but then a flash would be no good for video. Unless its important that they are dual purpose I would look at getting a flash for the stills and an led for the video.
What kind of budget are you looking at? Do you have a built in flash on your camera that could be used to trigger an off camera flash in slave mode?

If so a used very basic flash that would work for that kind of setup can be pretty cheap. I have picked them up to use as a second off camera flash on bidding for less than £20. (actually picked up 2 Sigma brand ones for £17 a while back) They are no frills but work great when used effectively.

Check out the Lighting Challenges to see what can be done with a single flash/ light and simple modifiers like a bounce card, umbrella or softbox.
So basically a cheap light that flashes in sync with the camera flash?
I thought people set up lights to get things just how they wanted and then shoot, but I'm new to lighting.
 
So basically a cheap light that flashes in sync with the camera flash?
I thought people set up lights to get things just how they wanted and then shoot, but I'm new to lighting.
Pretty much, you would need a speedlight i.e. flash which has the ability to be used in slave mode (most do but some don't) and when your on camera flash fires a sensor on the speedlight detects the flash and also fires. It's power, angle and modifiers used will greatly affect the results.

You would still need to set it up how you wanted it to shoot so you would need a basic understanding of lighting theory.

As I said its well worth checking out the Lighting Challenges to see what is possible. Most of them are geared towards using a single flash so ideal for learning the basics of lighting with limited kit.
 
Last edited:
Pretty much, you would need a speedlight i.e. flash which has the ability to be used in slave mode (most do but some don't) and when your on camera flash fires a sensor on the speedlight detects the flash and also fires. It's power, angle and modifiers used will greatly affect the results.

You would still need to set it up how you wanted it to shoot so you would need a basic understanding of lighting theory.

As I said its well worth checking out the Lighting Challenges to see what is possible. Most of them are geared towards using a single flash so ideal for learning the basics of lighting with limited kit.
Cheers mate
 
A speedlite that works well with your camera, hopefully with it's head adjustable for angle and rotation, will be best for starters. You don't need on made by the camera manufacturer, but one designed to work properly with your brand and model camera would be the best choice. Round or rectangular doesn't really matter. There are small advantages for each that aren't very important at this point. I recommend Godox, because they offer the widest range of models and accessories to grow into. There are rebrands of Godox that work well too, usually just a different name on them. Flashpoint is a USA rebrand of Godox and another rebrand is available in Europe. Their X Band of remote controls are something to grow into. Just be certain not to buy an old version used that does not have the X band capability and you will be able to grow with it for many years in the future.

A good basic starter for flash lighting is "The Strobist". Search for it on the Internet. It's NOT ON YOUTUBE. There are two parts, and although now quite dated, you will learn a lot from it quickly, and it's FREE. Once you know your camera and can use it well, learning flash lighting and generally how flash and continuous light behaves. It will take you through the next big step in quality photography. Knowing what the inverse square law is (not the math, but how it applies to your lighting) will make a huge difference too. There are many videos on Youtube about photography, but not all are good. Some are outright bad. Learn who to watch and who not. The principles of Photography have not changed. New gear makes better use of it, but you don't need the latest, greatest. It will just waste your money. Many Youtube videos are "Infomercials", designed to separate you from your money, while other videos actually teach you how to apply light for the best result, even if you don't have the latest high dollar gear.

The attached photo was taken using just one studio flash with a 7" round reflector and a grid (honeycomb) at a 5' distance. In the background is a bunch of my studio light stands and other gear, but the inverse square law of light and a specific F-Stop setting on the camera prevents you from seeing any of it in the photo. The room overhead ceiling (work light) was On, and nearly directly above the camera too. I leave this light on for most of my shoots for my safety as well as others who may be in my studio, but adjust my lights and camera so that this light does not affect my shoot.

Whenever I buy a new light, flash or constant, and/or modifiers, I always experiment with them -
1. To know how it's light spreads with distance
2. How hard the light is
3. How bright it can be.
4. How dark it can be and still provide some useable light. Believe it or not, some flashes can be set for lower power than others.
5. How each modifier affects each light source.
6. How many ways it can be mounted to make good use of it.
7. Learning how to bounce your flash to spread and soften the light.
8. Develop a feel for how much light power is really needed for the kind of shot planned.
9. When outdoors, learn how to make use of the Sun and Shadows using reflectors and the Light from the Sun for your needed photography lighting. (this will save your wallet, back, and leg muscles). You may still use flash outdoors, but only in rare cases do they need to "Overpower the Sun". Doing so is expensive, and hard on the back and leg muscles. Circular Polarizing filters help when you have "Too Much Sun".

And probably many other traits about each light. In other words, how to use each one and it's available modifiers effectively. This requires experimenting, since each light and modifier can produce different lighting at different distances and conditions.

I could go on, but I think these will get you a very long way, for starters. I've been learning lighting since the early 1950's in high school (I was a yearbook photographer in my last 3 years of high school). A lot has changed in photography lighting equipment and control systems for using it since then, so I'm still learning lighting and the photo gear needed to work best with it. We have come a very long way in photography lighting since then.

Charley
 

Attachments

  • IMG_0002 LoRes.jpg
    IMG_0002 LoRes.jpg
    8.9 KB · Views: 7
A speedlite that works well with your camera, hopefully with it's head adjustable for angle and rotation, will be best for starters. You don't need on made by the camera manufacturer, but one designed to work properly with your brand and model camera would be the best choice. Round or rectangular doesn't really matter. There are small advantages for each that aren't very important at this point. I recommend Godox, because they offer the widest range of models and accessories to grow into. There are rebrands of Godox that work well too, usually just a different name on them. Flashpoint is a USA rebrand of Godox and another rebrand is available in Europe. Their X Band of remote controls are something to grow into. Just be certain not to buy an old version used that does not have the X band capability and you will be able to grow with it for many years in the future.

A good basic starter for flash lighting is "The Strobist". Search for it on the Internet. It's NOT ON YOUTUBE. There are two parts, and although now quite dated, you will learn a lot from it quickly, and it's FREE. Once you know your camera and can use it well, learning flash lighting and generally how flash and continuous light behaves. It will take you through the next big step in quality photography. Knowing what the inverse square law is (not the math, but how it applies to your lighting) will make a huge difference too. There are many videos on Youtube about photography, but not all are good. Some are outright bad. Learn who to watch and who not. The principles of Photography have not changed. New gear makes better use of it, but you don't need the latest, greatest. It will just waste your money. Many Youtube videos are "Infomercials", designed to separate you from your money, while other videos actually teach you how to apply light for the best result, even if you don't have the latest high dollar gear.

The attached photo was taken using just one studio flash with a 7" round reflector and a grid (honeycomb) at a 5' distance. In the background is a bunch of my studio light stands and other gear, but the inverse square law of light and a specific F-Stop setting on the camera prevents you from seeing any of it in the photo. The room overhead ceiling (work light) was On, and nearly directly above the camera too. I leave this light on for most of my shoots for my safety as well as others who may be in my studio, but adjust my lights and camera so that this light does not affect my shoot.

Whenever I buy a new light, flash or constant, and/or modifiers, I always experiment with them -
1. To know how it's light spreads with distance
2. How hard the light is
3. How bright it can be.
4. How dark it can be and still provide some useable light. Believe it or not, some flashes can be set for lower power than others.
5. How each modifier affects each light source.
6. How many ways it can be mounted to make good use of it.
7. Learning how to bounce your flash to spread and soften the light.
8. Develop a feel for how much light power is really needed for the kind of shot planned.
9. When outdoors, learn how to make use of the Sun and Shadows using reflectors and the Light from the Sun for your needed photography lighting. (this will save your wallet, back, and leg muscles). You may still use flash outdoors, but only in rare cases do they need to "Overpower the Sun". Doing so is expensive, and hard on the back and leg muscles. Circular Polarizing filters help when you have "Too Much Sun".

And probably many other traits about each light. In other words, how to use each one and it's available modifiers effectively. This requires experimenting, since each light and modifier can produce different lighting at different distances and conditions.

I could go on, but I think these will get you a very long way, for starters. I've been learning lighting since the early 1950's in high school (I was a yearbook photographer in my last 3 years of high school). A lot has changed in photography lighting equipment and control systems for using it since then, so I'm still learning lighting and the photo gear needed to work best with it. We have come a very long way in photography lighting since then.

Charley
Thank you Charles, good of you to provide so much information.
 
My studio flash lighting is all Godox and Flashpoint now, and my field kit the same. I have Studio strobes, mostly in pairs, from 300 w/s up to 1,000 w/s, 5 Godox speedlites, and 3 AD200 Pro II lights for the field kit, all acquired in the last 6 years and all still working with no service required at all. I have 3 X Pro IIc flash transmitters and one X2Tc transmitter for Canon and one for Fuji, again acquired over the last 6 years and all still working fine. Any time that I have a problem it has always been operator fault. I bump channels or settings and then wonder why they won't work. Most of my studio strobes are mains powered, as I have power strips running along the studio ceiling about 10' apart from the backdrop system all the way back to well behind the usual camera location, with an electric outlet every 6" on each. Between them I have a DIY ceiling support grid made from 1 X 1 X 1/4" steel angle spaced 4" below the ceiling. I can hang lights from these or use 5' lengths of the same angle to bridge between these 10' angles, giving me the ability to hang about anything, anywhere that I choose from the ceiling in a 10' X 16' area. With lights on stands, power comes from above, so no cables are on the floor. It is an extremely rare occurrence when I need to run a cable on the floor.

I bought BN-Link wireless power control modules from Amazon and have one plugged in between my light power cable and each mains outlet. The BN-LINK modules come in boxes of 5 with two wireless transmitters included. Here in the USA Amazon sells these at about $26/box of 5 modules and 2 transmitters. They come with a button pair to operate each module, but the power modules are easily reprogrammed to work with any button pair, even with buttons on additional remote transmitters. One power module can be operated from up to 8 different transmitters, or as many power modules as are needed from one button pair. Their operating range is easily several hundred feet, so more than needed for all but the largest of studios.

Programming these to turn on and off each group/kind of lights lets me power them on and off from the wireless remote at my camera location. One button pair powers all of my connected studio strobes on and off. A second button pair powers all of my 8 LED Bi Color panels that I use for video on and off. I have two halogen 500 watt theater spots and power each on and off separately with their own button pairs, and 6 Black Light LED panels with their own group on off buttons too, So at present, 5 different groups of lighting that can be separately powered on and off without the need to climb ladders. All of these ceiling hung lights are high enough that I can set up for portraits, still life, product, and video shoots without the need to put up and take down most of these lights when I want to switch from still to video or back. Power is available on the ceiling wherever I want to place a light, on the ceiling grid or on a light stand below. My Tether cable also runs up to the ceiling grid and across to my laptop computer where it sits on a computer table behind camera right in the back corner of the studio. There is enough slack to be able to freely move the camera around in the camera half of the studio, and it rarely touches the floor, so no trip hazards from it either.

Even the center ceiling "Work Light" of my studio is now wirelessly controlled from my camera location, a tool chest on wheels where I usually place my camera when taking a short break, my computer table, and at the door where the original light switch had been located. Each can turn the light on or off without me or anyone else needing to move around in the dark. This remote control is different than the ones used for the photo/video lights, but also was purchased from Amazon for a reasonable fee. A transmitter / receiver package is bought, and then additional switches as needed, I think also with an 8 switch limit. Again, the teaching function is easy when adding switches, a button and an LED light on the receiver module. You press and hold the button until the LED starts flashing. Then press a button on the remote. The LED will flash rapidly indicating that it has "paired" and then it will turn the light on and off. Do the same for each additional switch. If you should ever need to erase the programmed switches, you will need to hold the button on the receiver in while powering up the light from one of the switches. It will completely erase the programmed switches, so you will then need to program each switch back in to get them working again.

I use these same kind of power control modules during the holidays to power on and off all of my light decorations, so no more crawling behind/under furniture. One button pair now turns off and on every electric candle in each window of the house. A second and third button pair controls all of the decorations inside the house.

Charley
 
Last edited:
I presume a pair of lights gets the best results by combining left/right angled light removing shadow?
Probably not, but depends on what you're trying to achieve.

Done well one light either side will give you a good reproduction of something flat & non-reflective, e.g. a document or drawing.
Otherwise what you'd actually be doing is introducing two sets of shadows which make any subject look a bit odd.

I'm assuming that your finds are fairly small and not very shiny?

It also depends how much effort you want to put in. Ideally you'll have two lights and be able to control their position and apparent size relative to the subject.

Very crudely...

Small light = shinier highlights & sharp edged shadows
Large light = smoother highlights & shadows

Light off to the side = more texture & 3 dimensionality
Light in front = flatter looking, better for documents

I'm normally an advocate of flash but I think the extra complexity may not be justified by the level of results your trying to achieve - you implied you're looking for quick & dirty rather than wanting to learn how to optimally light a range of subjects.

--------------------------------------------------------------

Here's one suggestion.. make yourself a mini studio & use a tripod.

Get a large cardboard box. Remove the top and front. Line the back & bottom with a piece of A3 card.
Replace the sides with thick tracing paper.

Shine one led light (Key) through the tracing paper. That'll make the light seem bigger and remove hard edged shadows, but still give it some 3d-ness. Move the key backwards & forwards to get the result you want. Remove the tracing paper if you want more shinyness and texture.

Have another light (Fill) directly in line with the camera with another diffuser of some sort on it. Either another tracing paper/shower curtain bodge or a shoot through umbrella.
If the shadow areas are too dark then turn the fill light on a little. Don't over do it.

I should say that approach is very much a compromise but it will be cheap, get you a long way and will be quick to set up & put away.

When I was first learning I did similar - albeit with flash - and an over complicated velcro system which allowed me to swap the backdrop, the tracing paper diffusers and all sorts.

I've just dug out my very first attempt using this approach, unretouched. Sadly I don't have a pic of the setup.


S4110592.jpg
 
Last edited:
I've done quite a bit with cheap lighting that was not intended for the purpose over the years. One of my favorites is a diffusion dome I made from a translucent white garbage bin. You can buy commercial ones for a lot more, or you could do similar for even less (paper dome/cone, etc)... There's plenty of reasons to use kit made for purpose, but the tools matter farless than the techniques.

This is a small women's watch taken using the garbage can and two household LED bulbs in cheap holders, and the camera/lens wasn't particularly high end either (Nikon 1).


Eco-Drive by Steven Kersting, on Flickr
 
Last edited:
Mostly metal detecting finds, but sometimes other small captures for photo challenges and stuff.


I presume a pair of lights gets the best results by combining left/right angled light removing shadow?

Any suggestions gratefully received.

As a general rule, removing shadows is the worst possible course of action, we want to create the right shadows in the right places, and that's basically what the various lighting challenges are all about.

But, for your metal detecting finds, removing (or at least minimising) shadows often does work, just don't use it for other types of subjects.

LED light panels are an abomination for still photography, the worst possible choice, they're good for video but for nothing else.

Flash is just so much more versatile, more powerful and easier to use than any form of continuous lighting, but beginners always assume the opposite. And studio flash, as opposed to small, complicated flashguns, is even easier and cheaper than flashguns, although flashguns are certainly usable.

The whole process is often over-explained and over-complicated, it's actually very simple, just try it and see, and whatever choices you make, post your results here and ask for feedback.
 
As a general rule, removing shadows is the worst possible course of action, we want to create the right shadows in the right places, and that's basically what the various lighting challenges are all about.

But, for your metal detecting finds, removing (or at least minimising) shadows often does work, just don't use it for other types of subjects.

LED light panels are an abomination for still photography, the worst possible choice, they're good for video but for nothing else.

Flash is just so much more versatile, more powerful and easier to use than any form of continuous lighting, but beginners always assume the opposite. And studio flash, as opposed to small, complicated flashguns, is even easier and cheaper than flashguns, although flashguns are certainly usable.

The whole process is often over-explained and over-complicated, it's actually very simple, just try it and see, and whatever choices you make, post your results here and ask for feedback.
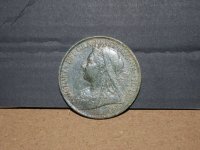
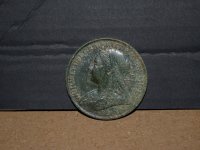
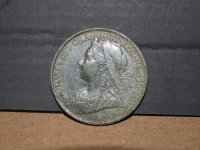
Picture time !
Just to illustrate my inexperience with lighting, after reading this from Garry, I finally investigated the flash settings on my Pana G80, only to find I have a pretty wide range of exposure levels, or in my language "more flashy" or "less flashy" ;)

These are just a first muck about changing the flash levels, but already its made me realise there's so much I can do with light if I get the hang of it. More to the point, so much I can do with flashes if I start putting some time in. Time to switch into Blue Peter mode and build some nice backgrounds too.

06 08 26 02.jpg
06 08 26 03.jpg
06 08 26 04.jpg
06 08 26 01.jpg
 
Sadly, built-in flashes are in the worst possible place. They suit camera manufacturers, not photographers.

As you can see from your various shots, the flash is hitting the subject almost straight on (very slightly above) and bouncing straight back into the lens, causing unwanted glare, which not only looks ugly but also hides detail and fails to show the relief properly. Don't worry about the jargon, but the proper name for the glare is specular highlight, an (unwanted) reflection of the light source.

What you actually need is for the light to strike the subject at an angle. We all know that the angle of the reflected light is exactly the same as the angle of the light that hits the subject (angle of reflectance = angle of incidence), and we know that becasue it applies to everything else we know too, for example a bouncing ball, a pebble skimming across water, a snooker ball hitting another ball or the cushion, just as obvious examples.

That's the very basic physics, and there's no way around the laws of physics, so the built-in flash is simply no good for this purpose.
 
Sadly, built-in flashes are in the worst possible place. They suit camera manufacturers, not photographers.

As you can see from your various shots, the flash is hitting the subject almost straight on (very slightly above) and bouncing straight back into the lens, causing unwanted glare, which not only looks ugly but also hides detail and fails to show the relief properly. Don't worry about the jargon, but the proper name for the glare is specular highlight, an (unwanted) reflection of the light source.

What you actually need is for the light to strike the subject at an angle. We all know that the angle of the reflected light is exactly the same as the angle of the light that hits the subject (angle of reflectance = angle of incidence), and we know that becasue it applies to everything else we know too, for example a bouncing ball, a pebble skimming across water, a snooker ball hitting another ball or the cushion, just as obvious examples.

That's the very basic physics, and there's no way around the laws of physics, so the built-in flash is simply no good for this purpose.
I take the point, not really a good option, but nevertheless it got me trying things with light, so a positive regardless of the results. Much to learn.
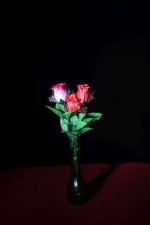
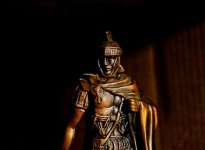
I took this the other day for the weekly challenge. A shoe box with one end removed to create a shadowed background, and then a table lamp with a tissue over the front for a crude diffuser. The small figure of a Roman soldier and the lamp positioned to create the end result.
Its no masterpiece but it made me happy, and again its a start. From little acorns....
04 08 26 06.jpg
 
Back
Top