Exposure latitude

Messages
11,167
Name
Suz
Edit My Images
Yes
Is there anywhere I can find the rough exposure latitude ie number of stops or partial stops between a normal blue sky and a burnt to a crisp white one?

Went to Ness gardens today and was annoyed to find the previously reliable centre weighted metering seemed to be on the fritz and behaving like matrix ie bonkers. Sunny 16 rule seemed out of the window. I checked the histogram (tricky in bright sunlight) and it seemed ok but it obviously wasn't as skies were burnt even though there wasn't much sign of highlight blinkies. Shade areas were fine. Contrasty lighting was fine. Full sun was hopeless. Is this just normal for centre weighted average and is there a reasonable recipe eg in full sun dial -x ev? In darkish surroundings I noticed it did over expose a bit too. I'd have expected under exposure in sunny conditions to match over exposure in darker ones. It seems to over expose regardless! Unless it is bright white, in which case under exposure is what you'll get.

I was using daylight white balance rather than AWB. I wonder if this can affect metering decisions? Does locking the iso calm the metering down a bit as if you've set the aperture and locked the iso then it only leaves shutter speed for it to fiddle with.

If you are using a polariser and use daylight white balance can that upset metering?

I could do with some kind of weirdy lens cone to take an incident light reading and lock it to that as I bet that would be more accurate.

Going to go out to Biddulph Grange tomorrow so ideally I'd like a plan of attack as the weather is going to be the same :D
 
I was running some exposure experiments today, using a Sekonic incident meter, the Sunny 16 rule and spot metering from various tones within a scene. It was sunny with clear blue skies, perhaps a little haze showing in the atmosphere.

With the sun directly behind me the Sunny 16 guideline worked perfectly and my Sekonic meter confirmed Sunny 16 to be spot on to within 0.1 stops. The sky on the horizon was spot metering at +1 with a Sunny 16 exposure dialed in. Higher up in the sky, where it was visibly bluer, it could be easily made to read at 0. Higher still, not that I measured it, it would certainly have metered at below 0.

I find that usually, with the sun somewhere behind me it is no trouble to expose well for the scene as a whole, and the sky and possible white clouds do not present a difficulty. The trouble starts when you begin to shoot against the light and your sky/haze/clouds become backlit and start to wash out. I try quite hard to avoid including the sky when shooting in that direction. It rarely produces results I desire, and I'm not one for faffing about with ND grads.

Here, for example is a Sunny 16 exposure with the sun behind me. No problem at all with the sky.

20110929_222444_.JPG


As you will note from the histogram, the blue of the sky was a long way away from clipping point. Even adding +2 stops to the exposure in Lightroom does not cause clipping in the sky.

Had I turned round through 180 degrees any attempt at a similar shot would almost certainly have been futile - washed out sky and the shadow side of the bird. Maybe if you have really clean air you can get away with it, but living on the eastern outskirts of London there is usually something grotty in the air to spoil things.

EDIT : here's another example, from a few days ago. The exposure is 2/3 stop brighter than Sunny 16, because my shutter speed was maxed out at 1/8000 but I wanted to shoot wide open at f/1.4. I thought I might not get away with it, but that it was worth a try. Shooting raw I had a bit more leeway than a JPEG shooter might. As it was, no problem in any case.

20110929_223751_.JPG


The scene is brightly sunlit, with clouds in the distance, yet despite the slight overexposure there is not highlight clipping. This is because the sun is off to the side, but still just over one shoulder. I am not having to set my foreground exposure to suit the shadow side of my subject. The sun is still working with me, not against me. Had I moved 90 degrees to my left, forcing the sun against me and shooting into the shadow side of my subject, the sky in that direction would have been a whiteout.

This is what happens when you shoot into the shadows against a backlit sky....

20110929_224721_.JPG


It's tough to set one exposure that accommodates both the shadow side of your subject and your light source within the frame and exposes both correctly. Fortunately, in this example I did not care one bit about the blown background. I wanted the subjects to be isolated both by shallow DOF and by allowing the background to blow out and thus lose clutter and distractions.
 
Last edited:
Hmm. I was shooting sunwards quite a bit. It's quite frustrating when you take a shot into the sun with a dslr and the skies burns to a crisp but the same shot taken with a flipping camera phone and the sky is still blue and it looks more pleasing.

Going to try with a different lens and with a lens hood on instead of the polariser. Will try backing exposure off by one stop and see where that gets me. I might also spot meter off the nearest bit of grass and lock that as an exposure and see whether that produces more sensible results.

Lens I used today didn't have a uv filter on. Wonder if it is actually better to have one on if you are shooting into the sun?
 
If you insist on shooting towards the sun and including the sky in your scene you might need to review your approach to metering. Are you sure that the sky ahead of you looks blue and yet the camera is delivering a white sky? My experience of the skies here in Blighty is that you need an exceptionally clear day for the skies towards the sun to look blue. Usually they look and by saying look I mean to the naked eye, not in a photograph, hazy and washed out. Even if there is some blue in there you will need to underexpose the sky to bring out the blue. That will have a knock on effect on the rest of the scene.

If I'm shooting into the sun and want to preserve usable detail in my sky then I will spot meter the brightest part of the sky at +3 and then fine tune the image in post.

20110929_231148_.JPG


I do not think metering off the grass is the solution if your challenge is to hold detail in the backlit sky. It might get you a great looking lawn, but if the sky is your problem area then that's where you need to start looking for solutions, not down on the ground.

In my opinion filters are not the solution. If you're aiming towards the direction of the sun a polariser isn't going to help, and a UV filter never will.

Now shoot in the clean air of the mountains and you'll have a far easier time of shooting towards the sun. This is with a CPL, but that's not helping. The strongest effect is on the left hand side of the frame, away from the sun. In the direction of the sun itself the polariser is having little effect. That is why the sky is very dark blue on the left, but just a regular blue in the sun's direction.

20110929_231838_.JPG


Maybe up in Stoke on Trent you have the luxury of clean air and properly blue skies, but real blue skies are a rare treat here in Essex.
 
Need to see a pic really Suz. TBH, it sounds more like a dynamic range problem than an exposure issue. If the sky is blue, a polariser can make a big difference to that, but not if the sun is low (as it is at this time of year) and you're shooting towards it.

Have you tried Lightroom? In Tim's screen grabs, the two sliders bottom right, Recovery and Fill Light, do amazing things in darkening down highlights and lifting shadows (looks like Tim has them on SOOC defaults, apart from the plane). Provided your highlights aren't blown, and since you didn't have blinkies flashing they can't be, the data is on the file and could be pulled in line.

Tim, your 50 1.4 shots - did you add a vignette? :eek: :D
 
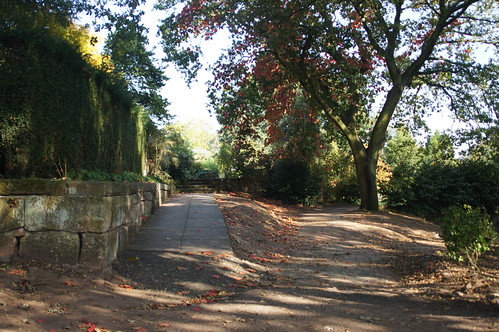
Sky was visibly blue in all cases. I was up in Neston on the wirral and I had a similar issue (but not as pronounced) at Ladybower yesterday.

I don't have lightroom. I may have missed blinkies as I had trouble seeing in the sun. Can check the pics in sony's own software as that shows where highlights are blown.

This is one of them. I'll have to dig out the others which were far worse.


DSC01441.JPG by srichgtr, on Flickr

Shot the above into the sun yesterday and it was nowhere near as blown as today's under similar conditions. Also did another with about +1 and sky was still blue but sun flare was bigger.


DSC01416.JPG by srichgtr, on Flickr

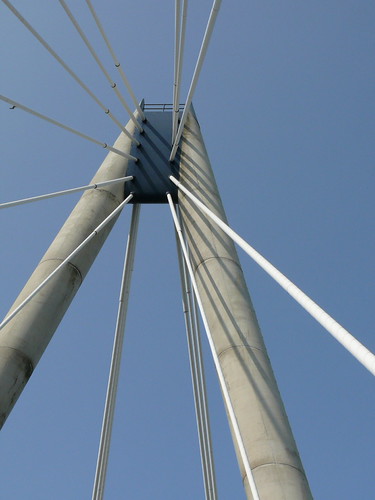
Shot this with a bridge camera in more blue sky:


Southport Bridge by srichgtr, on Flickr

I'll check them with more than one app as it could be that iphoto is the culprit as photos seem to look better on flickr than they do from iphoto.
 
I've just recalibrated the mac so that it is using the 2.2 gamma and srgb colour space. The washed out look has reduced. Looks like some of it could be an ID10T error :)
 
TBH, I'm not sure what the problem is ;) Hard to judge the originals from what Flickr might have done to them, but the first one is fine. There's a lot of dynamic range between the sky and dappled shade, but exposure looks sound and there's plenty of data in either end of the file that could be sorted out pretty much any way you liked.

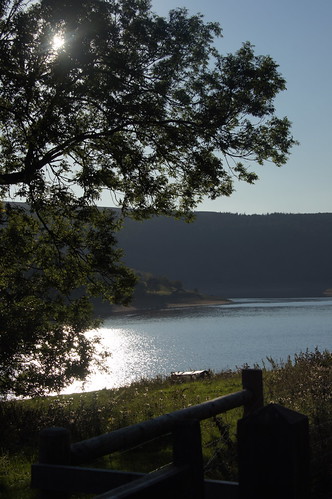
Sun/water is difficult in terms of dynamic range - they'll both be well blown, very bright. You could maybe do something with the foregound but the basic problem is the subject.

Bridge? Looks fine. A few tweaks and it'd be perfect.

Edit: BTW, compacts and camera phones have huge amounts of post processing built in, compared to DSLRs. But you can always replicate that.
 
Last edited:
Have you tried Lightroom? In Tim's screen grabs, the two sliders bottom right, Recovery and Fill Light, do amazing things in darkening down highlights and lifting shadows (looks like Tim has them on SOOC defaults, apart from the plane). Provided your highlights aren't blown, and since you didn't have blinkies flashing they can't be, the data is on the file and could be pulled in line.

I've deliberately shown the edit history on most of my examples so you can see there is no funny business going on. As far as exposures and dynamic range go the only shot that has been messed with is the plane, which clearly I've massaged just to show that the details are there to be extracted if they exist at all. I've updated the screen grab to show the adjustment history....

20110930_065419_.JPG


Here's a shot to show the effect of highlight recovery and fill on a backlit subject with a tricky sky and no filters....

20110930_070749_.JPG


Tim, your 50 1.4 shots - did you add a vignette? :eek: :D

No vignette added. That's the raw file with no edits except the WB adjustment listed in the history. I expect that's why Canon introduced LPIC. DXOMark gives the lens -2.1 stops in the corners for vignetting at f/1.4....

http://www.dxomark.com/index.php/Lenses/Camera-Lens-Database/Canon/EF50-mm-f-1.4-USM/(camera)/436

At SLRGear the vignetting measurement at f/1.4 is off the charts....

http://www.slrgear.com/reviews/zproducts/canon50f14/ff/1vignet.gif
 
Last edited:
Shot this with a bridge camera in more blue sky:


Southport Bridge by srichgtr, on Flickr

I'll check them with more than one app as it could be that iphoto is the culprit as photos seem to look better on flickr than they do from iphoto.
This subject is front lit. You are not shooting towards the sun. Also, by aiming upwards you are pointing towards the darker part of the blue sky.

If you're going to make comparisons you need to play fair.

p.s. checking the EXIF I note it's a Sunny 16 exposure - 1/800, f/8, 200 ISO. :)
 
Last edited:
These are the worst two:


I noticed I have DRO on auto. I'm wondering if that is lightening the foreground by default as in many of these the foreground was darker than it has been rendered by the camera. Normally I have left it on level 1 ie weak.

Changing the calibration has made a big difference. Much better looking photos from the dslr.

I think having an EVF on the bridge helps as you realise when it might struggle and probably go and pick another angle more readily. I should probable try liveview on the dslr in tricky conditions then I'd be able to compensate more easily.

Thanks for the input. I suspect a lot of it is me being fussy or just expecting too much :)
 
I ran a little test/demo this morning to hopefully better illustrate the problems with the sky when shooting towards the sun. Here are unedited images shot within a couple of minutes of each other from the same location (within a couple of feet).

20110930_095202_.JPG


The top row all have a Sunny 16 exposure. The first image is with the sun more or less behind me - call it 180 degrees from dead ahead. The second shot is with the sun maybe 70 degress away from dead ahead and the third is towards the sun, but still keeping it clear of the frame, maybe 20 degrees from dead ahead. In the third image you can see quite well how the sky becomes brighter the closer towards the sun the lens is aimed. The images reflect quite well how the sky and overall scene looked to the naked eye.

The fourth image is with the exposure dropped by 2 stops to let the colour in the sky show through. The price for that privilege is a total blackout of the foreground "subject". In the final shot, again using a Sunny 16 exposure, I've shot straight up above me. As you will note, the sky is very dark up above.

The problem with blown skies is caused when shooting towards your light source when you have dirty air (not pure, crystal clear blue) or clouds acting as giant softbox diffusers. It's not a camera fault. It's a fault of choice. Your subject is in its own shadow while the sky is backlit and scattering light all around. That's not an easy exposure to make work. I don't bother trying.
 
These are the worst two:

<snip>

I noticed I have DRO on auto. I'm wondering if that is lightening the foreground by default as in many of these the foreground was darker than it has been rendered by the camera. Normally I have left it on level 1 ie weak.

Changing the calibration has made a big difference. Much better looking photos from the dslr.

I think having an EVF on the bridge helps as you realise when it might struggle and probably go and pick another angle more readily. I should probable try liveview on the dslr in tricky conditions then I'd be able to compensate more easily.

Thanks for the input. I suspect a lot of it is me being fussy or just expecting too much :)
Both shots look overexposed to me and quite probably that DRO thingy is doing you no favours. I have all such "features" (curses more like) disabled in my cameras. How on earth can you hope to get control of your exposures if the camera is fiddling about with them before you get to see the results? Your shadows don't look very shadowy at all. Some of the plants on the ground look almost bleached to white and it is no real surprise that you are struggling with the sky.

Here's a shot from many years ago in harsh lighting. The background is a little overexposed, but even so, look how dark the shadows are....

20110930_092457_000.jpg


Your shadows don't come anywhere close to looking like that. You're probably a bit overexposed to begin with, but heaven only knows what DRO is doing to your pictures.

One of no doubt a gazillion golden rules about digital photography - expose for the highlights and develop (process) for the shadows.
 
Last edited:
Thanks. I shall experiment further. DRO is supposed to lift shadows while retaining highlights ie what RAW processing is intended to do. It has been ok until recently. It's obviously more suited to some conditions than others.
 
Thanks. I shall experiment further. DRO is supposed to lift shadows while retaining highlights ie what RAW processing is intended to do. It has been ok until recently. It's obviously more suited to some conditions than others.

Good comments and great info from Tim (as usual :)).

Nothing to add really other than to make the comment that correct exposure is often in the eye of the beholder and there are various ways of achieving that.

Tim seems wary of trusting the camera to do much by way of on-board tweaking, whereas I'm quite happy to let it have a go as a starting point. For example, I always have the auto vignetting correction on and often use Canon's HTP which even alters the Raw file and is therefore taboo with many users, but it seems to do for me what I would normally do in post anyway.

I pay close attention to the LCD and histogram though, always with blinkies enabled. Regardless of what is happening with the subject or what the meter may be up to, that shows you exactly what you've got on the actual image file, and ultimately that's the only thing that matters.

I would also add a :thumbs: for Lightroom which is the first programme I've been able to really get to grips with quickly, and it does amazing things so easily.
 
Last edited:
Nothing to add really other than to make the comment that correct exposure is often in the eye of the beholder and there are various ways of achieving that.
Not so much when you have a scene of extended dynamic range and are struggling to accommodate your highlight and shadow information. You have to do the best you can to fit it all in. Since the complaint here is burnt highlights I don't think there is much wiggle room here. The highlights have to be nailed just below (or at) clipping point, not above. Not many options there as I see it. Once you've done the best job you can of capturing those photons then you can set to work to make the best looking (to you) image possible.

Of course there is also the option of using filters or HDR to tackle the problem.

Tim seems wary of trusting the camera to do much by way of on-board tweaking, whereas I'm quite happy to let it have a go as a starting point.

It's not that I'm wary of them, so much as they are of no use to me, since I only ever shoot raw and don't use DPP, and I'd rather not have the camera fracking about with my JPEG preview image and resulting histogram if I'm actually trying to gain control of my exposures.

As for HTP, as a raw shooter who is careful to meter for and monitor highlights, and again not using DPP, it serves no useful purpose for me other than to wrestle with my attempts to ETTR and potentially increase noise.

I'd far rather decide what processing would most benefit the image, after I've captured those unmolested photons, rather than have the camera make those decisions for me and mess with things before the image leaves the camera.

Sure, there are times when those enhancements can be very nifty, and if you shoot to JPEG a real boon for getting a usable shot SOOC, but I have a different style of shooting, which affords me the luxury of making those choices at leisure after taking the shot rather than before.
 
Last edited:
I like that phrase 'unmolested photons' :thumbs: I have an image of someone with a butterfly net...

When asked what I'm doing I'll be tempted to say 'I'm molesting photons' rather than say I'm taking photos.... don't think good will come of it :D
 
I had a mess around today. The DRO Auto option seems actually to be better than switching it off in contrasty lighting. Turning it off just led to dark foreground but the same burnt out sky. Turning it off in full sun and fixing the iso at 200 was generally more successful than leaving it on.

Generally -0.3EV was desirable with centre weighted metering.

Need to explore in built HDR next as there were a few occasions where it should have worked quite well.

Think a lens hood and no polariser actually ended up being better.
 
I would also add a :thumbs: for Lightroom which is the first programme I've been able to really get to grips with quickly, and it does amazing things so easily.
While the Lightroom sales pitch is going on, here is Lightroom's one click lens correction applied to that dodgy photo....

20111001_084936_094936.jpg


Gotta love Lightroom. :thumbs:
 
While the Lightroom sales pitch is going on, here is Lightroom's one click lens correction applied to that dodgy photo....

<snip image>

Gotta love Lightroom. :thumbs:

Yes :thumbs: If I may, I'll say a bit more then, for anyone interested ;)

What Tim has done is just tick one box, Enable Lens Corrections on the right. This picks up the exif data so it knows what lens has been used, the f/number and focal length, and focusing distance (on most lenses).

It then looks up its custom data base including hundreds of lenses, for all these settings and sorts out the darkened corners (vignetting - note how the histogram has compressed to the right, by scrolling up and comparing to the original). It also corrects distortion, and I think it's taken a smidge of barrelling out of this shot by straightening the line at the bottom.

What you can't see here is the correction to CA (pink/green fringing) and while the result is relatively subtle here, when you click that box with a typical consumer zoom, the improvements can be dramatic. To be fair, quite a few other programmes have a similar feature these days, including Canon's own DPP software.

Then scroll up to some of Tim's other screen grabs showing the Basic adjustment panel on the right and notice the histogram is divided into sections. These roughly indicate the zones where the sliders for Exposure, Recovery, Fill Light and Blacks operate. For example, Recovery will pull back and darken highlights, including some that appeared to be blown on the JPEG as there's usually about a stop or so of headroom that JPEGs discard.

Then there's my favourite, Fill Light, which brightens the sector of the histogram second from the left. It's amazing what you can pull out of the shadows with that one.

What I really like about Lightroom is the way that is harnesses the full processing power of Adobe and reconfigures the bits of Photoshop that we need into simple controls. Things that would take a numpty like me hours to do (so of course I never bothered) now take seconds. And that's apart from its comprehensive library, and output options for print and web.

I won't go on :D I paid £120 for my copy of Lightroom 3, from Amazon, which is about £100 off the official UK price. It's a US import, which apparently means Adobe UK might get snooty about support, but I've never needed any of that. It works and upgrades as normal, and I just installed the new v3.5 yesterday.
 
What I really like about Lightroom is the way that is harnesses the full processing power of Adobe and reconfigures the bits of Photoshop that we need into simple controls.
Whilst I agree 1000% with everything you've said Richard, I disagree here. What Lightroom does is provide a different UI to Adobe Camera Raw, but with exactly the same processing. To prove this, take a copy of an image that has been processed in Lightroom. Open in ACR. Click the tabs on the right hand side and set the sliders to exactly the same values as those in the develop module in Lightroom. You will have exactly the same result, just the control panels are placed on tabs rather than a scrollable list.

Don't get me wrong, I love LR and think it's by far the best way to work, but all the same processing features are available in Photoshop/Bridge (no, I'm not starting the debate again, but until I looked closely, I thought LR offered a LOT more than PS in an easier to use way - the only thing I can find where it does is the instant undo to any point in edit). If you use the Slideshow/Print/Web areas, there might be more there, but I don't use these at all...
 
Whilst I agree 1000% with everything you've said Richard, I disagree here. What Lightroom does is provide a different UI to Adobe Camera Raw, but with exactly the same processing. To prove this, take a copy of an image that has been processed in Lightroom. Open in ACR. Click the tabs on the right hand side and set the sliders to exactly the same values as those in the develop module in Lightroom. You will have exactly the same result, just the control panels are placed on tabs rather than a scrollable list.

Don't get me wrong, I love LR and think it's by far the best way to work, but all the same processing features are available in Photoshop/Bridge (no, I'm not starting the debate again, but until I looked closely, I thought LR offered a LOT more than PS in an easier to use way - the only thing I can find where it does is the instant undo to any point in edit). If you use the Slideshow/Print/Web areas, there might be more there, but I don't use these at all...

No disagreement at all Andy :) especially the bit in bold. I didn't mean to imply that Lightroom does anything you can't do in other ways, it's just how easily it does it, and the way it cherry picks from the Adobe portfolio to give us the bits photographers want, right through from cataloguing, through image enhancement/manipulation, and on to outputting by various media. One stop shop.

There are things it doesn't do, so it is designed to work with the plug-ins of your choice. I have PSE (which I never use now), Portrait Professional and Photomatix.

For me, it's the only programme that has evoked any enthusiasm for PP at all. And while I'll readily concede that says quite a lot about me, it's also true that seasoned Photoshoppers who know all the wrinkles, once they try Lightroom it seems to instantly take over 90% of their work.
 
Back
Top