
GardenersHelper
In Memoriam
- Messages
- 6,344
- Name
- Nick
- Edit My Images
- Yes
For this thread I used the Raynox MSN-202. This has a very short working distance of around 30mm and I find it quite difficult to use. I decided to try photographing similar subjects with a less powerful setup, this time using a Raynox 150 and a Raynox 250 stacked together. This has a working distance of around 70mm. As with the MSN-202, I used them on my FZ200 with KX800 twin flash.
Some of the time, and quite possibly for all the images in the next post, I used my "steadying stick". I made it some weeks ago but this is the first time I have tried using it. It is especially useful for higher magnification work.

0957 1 Steadying stick by gardenersassistant, on Flickr
This is how it is used.

0957 4 Using the steadying stick by gardenersassistant, on Flickr
It is made of a wooden dowel rod inserted into the rubber end of a drain plunger. The dowel rod fits between the lens barrel and the camera grip. It only takes a little pressure on the front of the stick with the fingers that are wrapped around the camera grip to stop the camera moving up or down on the stick. Releasing that pressure a bit allows the vertical position of the camera on the stick to be adjusted.
The steadying stick damps down the movement from hand-shake while allowing flexibility of movement. This makes it easier to compose shots, focus and stay in position for multiple shots.
The rubber plunger spreads the load and stops the stick sinking into the ground and avoids damage to grass, flower beds etc.
The stick has velcro around the end to keep the stick in the plunger, but allowing the stick to be removed and replaced with a stick of a different size.

0957 2 Velcro around end by gardenersassistant, on Flickr
I have longer sticks for subjects that are higher off the ground, but I haven't tried using them yet.

0957 3 Tall steadying sticks by gardenersassistant, on Flickr
Whether a stick is usable or not depends on where the subject is and what else is in the surroundings.
Continued in next post....
Some of the time, and quite possibly for all the images in the next post, I used my "steadying stick". I made it some weeks ago but this is the first time I have tried using it. It is especially useful for higher magnification work.
0957 1 Steadying stick by gardenersassistant, on Flickr
This is how it is used.
0957 4 Using the steadying stick by gardenersassistant, on Flickr
It is made of a wooden dowel rod inserted into the rubber end of a drain plunger. The dowel rod fits between the lens barrel and the camera grip. It only takes a little pressure on the front of the stick with the fingers that are wrapped around the camera grip to stop the camera moving up or down on the stick. Releasing that pressure a bit allows the vertical position of the camera on the stick to be adjusted.
The steadying stick damps down the movement from hand-shake while allowing flexibility of movement. This makes it easier to compose shots, focus and stay in position for multiple shots.
The rubber plunger spreads the load and stops the stick sinking into the ground and avoids damage to grass, flower beds etc.
The stick has velcro around the end to keep the stick in the plunger, but allowing the stick to be removed and replaced with a stick of a different size.
0957 2 Velcro around end by gardenersassistant, on Flickr
I have longer sticks for subjects that are higher off the ground, but I haven't tried using them yet.
0957 3 Tall steadying sticks by gardenersassistant, on Flickr
Whether a stick is usable or not depends on where the subject is and what else is in the surroundings.
Continued in next post....
 0954 51 2016_09_06 P1320229_DxO10 RAW 01cP DNG SP7 1300h
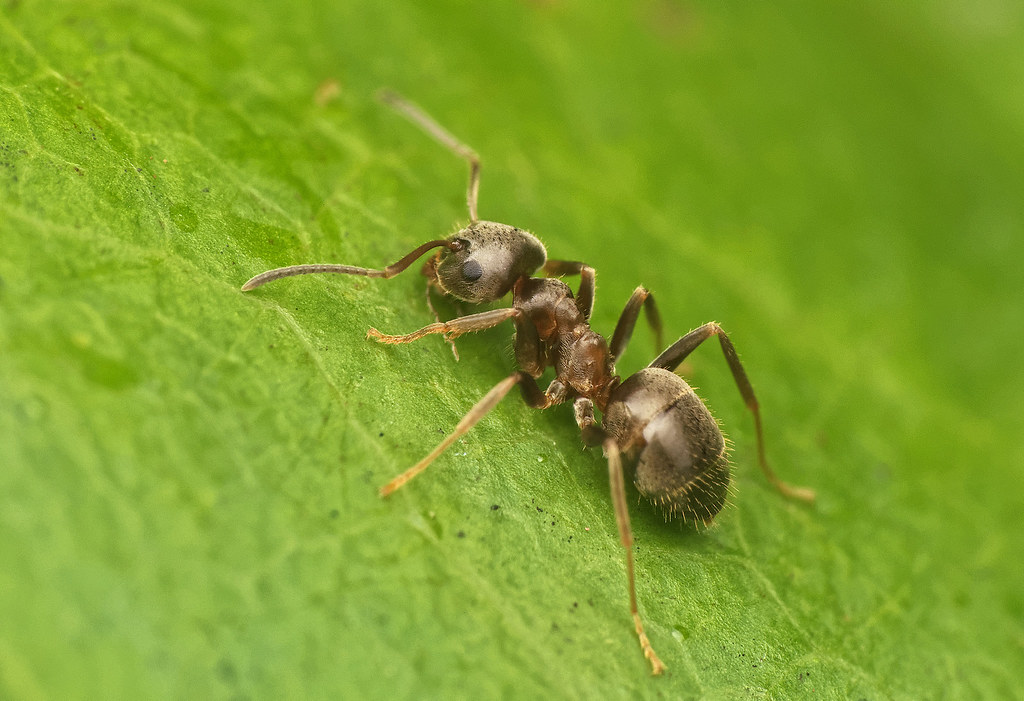 0954 52 2016_09_06 P1320269_DxO10 RAW 01cP DNG SP7 1300h
 0954 54 2016_09_06 P1320288_DxO10 RAW 01cP DNG SP7 1300h
 0954 55 2016_09_06 P1320291_DxO10 RAW 01cP DNG SP7 1300h
 0954 58 2016_09_06 P1320321_DxO10 RAW 01cP DNG SP7 1300h
 0954 60 2016_09_06 P1320345_DxO10 RAW 01cP DNG SP7 1300h
 0954 63 2016_09_06 P1320371_DxO10 RAW 01cP DNG SP7 1300h
")
 I must warn you however, you will not be popular with my wife when the mop stale and plunger disappear from the cupboard.