Here are my Silverfast settings:
View attachment 403514View attachment 403515
View attachment 403516
The only thing I change (other than the output directory) is the Negafix setting - while I tend to leave it set to the film I'm using, sometimes I get better results by using another film type (e.g. selecting Ilford Delta for HP5+). It can differ from roll to roll, or frame to frame sometimes. I'll edit the histogram
occasionally, but not very often.
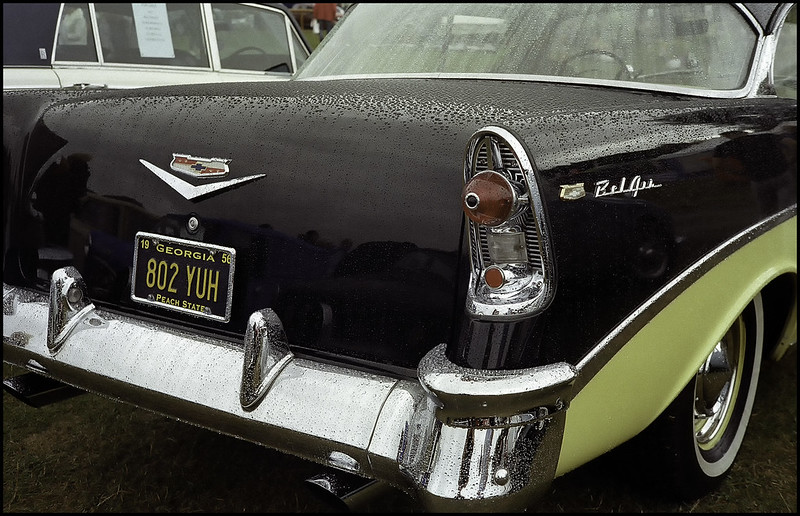
Here's that same picture after it's been through Lightroom (the only real tweaks I make are to the highlights, shadows, blacks, whites, and add a bit of Clarity (between 15 and 20). I think the Lightroom sharpening is at whatever it defaults to. I usually add a little more sharpening in Photoshop, but haven't done that here.:
 Scan example
 by
fishyfish_arcade, on Flickr
And, here's a version I tried converting using Negative Lab Pro. I think I might prefer this one, it has a touch less contrast. All the Lightroom settings are the same, except for the white and black points, which I adjusted slightly differently on each shot to avoid clipping. Both are edited to my personal tastes, but they can be made to look considerably different if required.
 Scan example-2
 by
fishyfish_arcade, on Flickr
For Vuescan, because I use Negative Lab Pro, I just use their recommended settings to produce a RAW DNG file:
Learn the settings and techniques for getting the best scans to work with in Negative Lab Pro

www.negativelabpro.com
I do have a seperate Vuescan profile for reversal film though.


 ). I've also used a Nikkor 60mm macro lens with the slide copying adapter. The scanner is slightly better, although the macro lens set up it quicker. I can use the scanner with an old MacMini and the original software (in OSX Tiger!) if needs be.