
You are using an out of date browser. It may not display this or other websites correctly.
You should upgrade or use an alternative browser.
You should upgrade or use an alternative browser.
Sir Santa!
- Thread starter duttytd
- Start date
OP
duttytd
Mummy, where do babies come from?
- Messages
- 4,533
- Name
- Anthony
- Edit My Images
- Yes
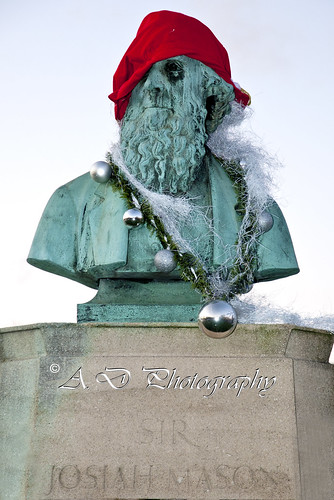
I drove past it today and seen it had a santa hat and some decorations on it so thought id stop for a snap but i couldnt position anything as there was flowers infront of it and i didnt want to step on them.
I can see it not being to everyones taste, it made me laugh so thought id share it.
Tony
I can see it not being to everyones taste, it made me laugh so thought id share it.
Tony
OP
duttytd
Mummy, where do babies come from?
- Messages
- 4,533
- Name
- Anthony
- Edit My Images
- Yes
SarahLee said:Have you tried it in B&W Tony?
There's some nice tones and contrast in it, but I'm finding the combination of the verdigris and bright red hat a bit too harsh on the eye - I think a moody B&W might bring out the best in it.
I will have a try. Thanks for taking the time to comment.
SarahLee
TPer Emerita
- Messages
- 13,060
- Name
- Sarah
- Edit My Images
- No
it seems that my photoshop skills have beat me this time... i cant seem to get a moody black and white look
This is the sort of thing I had in mind.
It's not great because it was a very quick 5 minute edit on a small file but it gives you an idea. Just say if you want me to take it down.

SarahLee
TPer Emerita
- Messages
- 13,060
- Name
- Sarah
- Edit My Images
- No
Only a few steps if you're using Photoshop.
- create a duplicate layer of the background (in case you mess things up)
- create a B&W layer - I moved the red slider slightly to the left and the cyan slider slightly to the right (not too much because we'll pick that up in step 4)
- create a curves layer and set to medium contrast
- Now go back to that duplicate background layer and use the dodge and burn tools to add further areas of light and shadow. I lifted the tones in his face slightly with the dodge tool on midtones, then using the burn tool and varying opacity set to shadows I added more contrast and texture to his beard, shirt and stonework.
- Finally I stuck in a vignette because I'd lost all tone from the sky.
You can always tweak the opacity of any of the layers to tone down the effect if it's too much or even reduce the B&W layer to let some colour tint back through.
OP
duttytd
Mummy, where do babies come from?
- Messages
- 4,533
- Name
- Anthony
- Edit My Images
- Yes
Only a few steps if you're using Photoshop.
- create a duplicate layer of the background (in case you mess things up)
- create a B&W layer - I moved the red slider slightly to the left and the cyan slider slightly to the right (not too much because we'll pick that up in step 4)
- create a curves layer and set to medium contrast
- Now go back to that duplicate background layer and use the dodge and burn tools to add further areas of light and shadow. I lifted the tones in his face slightly with the dodge tool on midtones, then using the burn tool and varying opacity set to shadows I added more contrast and texture to his beard, shirt and stonework.
- Finally I stuck in a vignette because I'd lost all tone from the sky.
You can always tweak the opacity of any of the layers to tone down the effect if it's too much or even reduce the B&W layer to let some colour tint back through.
Thanks a lot really appreciate you taking the time to show and tell