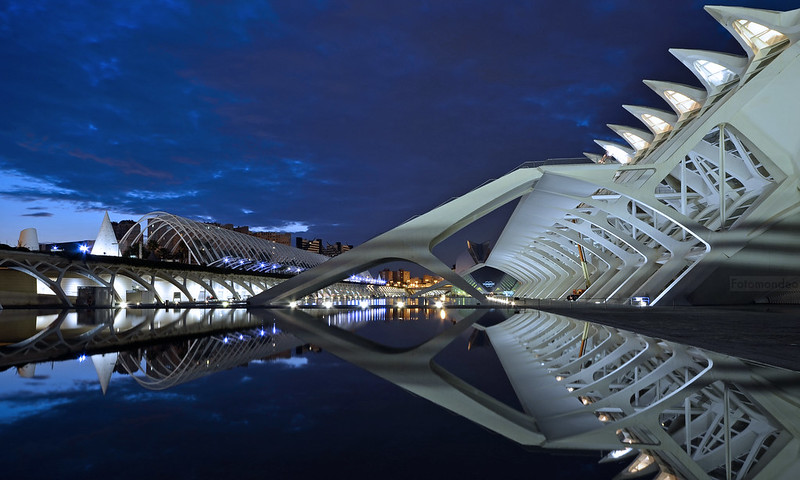
Night time photography

Messages
107
Name
Gary
Edit My Images
Yes
Hi,

This is something I've been trying for ages and don't seem to get the hang of the technical aspects so I'm calling on you guys for help.

Looking through the forums, there are some awesome photos on here of night shots either in a city, light trails, etc and they're incredible.

Mine however, are a grainy mess and just look horrendous. Granted, it's probably my choice of lighting (Most practicing uses street lights).

I've got examples but am almost too embarrased to upload them! Wondered if anyone could provide technical guidance on the basics, and what lenses would be best for these kind of shots, (or even if this matters at all).

Thanks

G
 
Without examples, we simply cannot explain what you are doing wrong.. please post.. don't be worried.. no one will laugh, or make you feel bad. We're here to help.

Grain would lead me to believe that you're either using a high ISO or recovering very under-exposed images.

Post a link to images, or post them directly on here... without seeing them we're just guessing.
 
Hello mate, welcome aboard!!

First of all, don't be shy or embarrassed! We don't bite. Well, most of us don't. ;)

The grain sounds like noise which can be caused by the long exposure. What camera do you have? Have you checked to see if it has in camera LE noise reduction? Make sure it's turned on. It usually works by taking a dark exposure and combining them in camera.

Use the lowest ISO available to you and shoot RAW if you can so it makes editing easier.
 
First thanks to @Proud2btaff for your kind comments :)

Gary, please don't be afraid to post your photos here, honestly were on the whole a very friendly bunch, there are some incredibly talented night time photographers on TP who will be more than happy to get you started with they're advice and knowledge (y) so again come on let's see some pictures (y)

Matt

My Pleasure Matt, good advise should always be shared.
 
Haha here goes.

10784651796_b8f403a764_b.jpg


Please note, I wasn't doing this for the scenery or an ideal place to take images, I just wanted to try and get the lighting right, which you'll see is naff. But this is where my technical ability is at the moment.

Cheers again

Gaz
 
Gary can you post the EXIF data please. Looks like you have shot at a very high ISO to me.
 
What camera is it Gary? Nikon D3200?

If the camera was on auto-exposure, it has probably chosen a very high ISO (sensitivity of sensor) and the higher the ISO the more the noise will be apparent.

Was this on a tripod, or hand held?

Ideally, you should set as low an ISO as you can get away with, place the camera on a tripod, and use a longer shutter speed.
 
Last edited:
Exposure 8s, f36, iso 12800.

I did shoot high ISO just because that's what the camera suggested (or so I believe). Which is why I'm coming to you guys, so I can tell my camera what to do rather than the other way round ;)

I had this on a manual setting which I believe is the best option for night time photography, and yes it was shot on a tripod.

Thanks

Gary
 
Last edited:
Exposure 8s, f36, iso 12800.

I did shoot high ISO just because that's what the camera suggested (or so I believe). Which is why I'm coming to you guys, so I can tell my camera what to do rather than the other way round ;)

It's very rare that I move away from ISO 100 when I do night shots. Also at f36 your lens will not be at its sharpest.
 
There's your problem. Set ISO 100... and use a longer speed.. and a sturdy tripod.

You can use a high ISO setting to get a meter reading... like in your case.. 8 sec, f36, ISO12800... but if you'd have shot at a wider aperture to get a little more sharpness back... but still small enough for decent depsth of field.. say f16... your shutter speed would have been around 2 seconds @ 12800... so...

at f16...

2 secs at 12800
4 secs at 6400
8 secs at 3200
16 secs at 1600
32 secs at 800
64 secs at 400
128 secs at 200
256 secs at 100


Once you have a meter reading, each stop in ISO will double, or half your exposure times accordingly.

Obviously, once you get past 30 secs, you'll need to use B and a cable release.
 
Last edited:
Awesome, thanks guys.

Ricardodaforce, what appeture would you suggest for sharpest results? I only have two lenses at the moment, the 18-55mm and a 35mm lens.

Thanks

Gaz
 
Awesome, thanks guys.

Ricardodaforce, what appeture would you suggest for sharpest results? I only have two lenses at the moment, the 18-55mm and a 35mm lens.

Thanks

Gaz


Well my 18-55 is pretty good in the f5.6 to f8 range.
 
As has been said ISO was 100% the issue, when shooting at night the only well virtually only reasons you'd ever use a high ISO is if you don't want light trails or movement in the scene, or your looking at doing star scapes, if light trails are your aim you want to stick to the base ISO, you'll also want to consider a white balance to remove the colour cast of the sodium lighting or at least knock it back to a more tolerable level

Please have a read of my guide to light trails it will likely answer any questions you may have (y)
 
I would highly recommend using manual. It seems you have your aperture extremely small for some reason. For optimal sharpness I would recommend something in the range of f8-f11. Your camera probably recommended such a massive ISO to compensate for the tiny aperture. To keep the learning curve manageable I would set the camera to aperture priority whilst manualing setting the ISO as low as possible (usually 50, 100 or 200 depending on the camera.) This means you can use an aperture like f10 or f11 and the camera will automatically set the exposure accordingly, without raising the ISO. One more thing would be the weird lines along the top third of the screen. Hope this helps!
 
Well my 18-55 is pretty good in the f5.6 to f8 range.

careful here... lenses may be sharpest around f5.6 to f8... but that doesn't mean you should shoot at this aperture. You set what aperture gives you the depth of field you require. I woudl suggest that f36 was complete overkill though :)
 
As Pookeyhead said, use a sturdy tripod and a longer shutter speed. Keep the ISO as low as you can.

I do quite a lot of blue hour and night photography and always try to keep at ISO 100. That way your image remains as "clean" as possible. Here are some examples. The EXIF data is available for you to look at to check settings:


Soyuz
by Ricardodaforce, on Flickr


Mi Tierra - EXPLORED - Thank you!
by Ricardodaforce, on Flickr


Valles Marineris
by Ricardodaforce, on Flickr


Bay Watch - EXPLORED - Thank you!
by Ricardodaforce, on Flickr
 
Thanks for the responses everyone! I'm off out to give it another go.

Ricardo, those are exactly the kind of images I was hoping to get from it!

Thanks

Gaz
 
As above.... you've got your camera to behave as you wish... now find a dynamic, interesting subject other than the corner of your street. Try also to shoot shortly after sunset to retain some light in the sky... that often makes for interesting shots.
 
You can see the improvement already! It has probably been mentioned already, but have a play with the white balance you'll soon see the dramatic difference that can have too!
 
Thanks Wozza, I've just bought myself a book from amazon, Understanding Exposure, hopefully that will help too. Off out early Sunday to see what I can get! :)
 
Plenty of good information above regarding exposure settings but I have to disagree with the suggestion to use Aperture priority mode (or shutter priority).
When you leave decisions in the hands of the camera you have no real way of knowing what it's doing or why. It only takes a mis-timed car headlight shining into the lens as the camera's metering and you'll get a shot that's much darker than it should be because the camera thought it was much brighter than it was. In turn, that means you reduce your chance of being able to recreate any given shot.
Instead, head straight for full manual mode and methodically work your way through the settings for your situation. Start with a base ISO speed of 100 or 200, whichever is the lowest non-synthesised setting for your camera (my D700 goes to ISO200 then the synthesised ISO speeds range from L.03 to L1.0)
Use the aperture setting to control the light source (if any). In your case above, the light source in question would have been the car light trails. f/8-f/11 is best ballpark for capturing taillights from a single vehicle on a streetlit road.
Use shutter speed to control the ambient light. Ignore the actual streetlights as they're always going to render as blown highlights. Concentrate on the overall brightness of the scene incl levels of illumination on the road surface and background areas. At f/11 (as selected above for your light trails) you might expose for 15 seconds to get the lighting right. At f/8 you would have to halve your shutter speed to 8sec or at f/16 you could double it to 30sec.
With car light trails shutter speed matters because (presumably) you want to capture the passage of a car right the way through the scene. 8sec might have been pushing it for your shot, 15sec looks just about doable if you time the shutter release perfectly, 30sec would be adequate but by dialling in the f/16 aperture you'd be dimming your light trails by one stop...
The bottom line is it comes down to personal preference and balance. In order to *consistently* achieve the former and capture the latter you've got to put the camera in full manual mode, the sooner the better.
 
Thanks Wozza, I've just bought myself a book from amazon, Understanding Exposure, hopefully that will help too. Off out early Sunday to see what I can get! :)
I think I have the same book, but haven't read it! Oops!
 
Plenty of good information above regarding exposure settings but I have to disagree with the suggestion to use Aperture priority mode (or shutter priority).
When you leave decisions in the hands of the camera you have no real way of knowing what it's doing or why. It only takes a mis-timed car headlight shining into the lens as the camera's metering and you'll get a shot that's much darker than it should be because the camera thought it was much brighter than it was. In turn, that means you reduce your chance of being able to recreate any given shot.
Instead, head straight for full manual mode and methodically work your way through the settings for your situation. Start with a base ISO speed of 100 or 200, whichever is the lowest non-synthesised setting for your camera (my D700 goes to ISO200 then the synthesised ISO speeds range from L.03 to L1.0)
Use the aperture setting to control the light source (if any). In your case above, the light source in question would have been the car light trails. f/8-f/11 is best ballpark for capturing taillights from a single vehicle on a streetlit road.
Use shutter speed to control the ambient light. Ignore the actual streetlights as they're always going to render as blown highlights. Concentrate on the overall brightness of the scene incl levels of illumination on the road surface and background areas. At f/11 (as selected above for your light trails) you might expose for 15 seconds to get the lighting right. At f/8 you would have to halve your shutter speed to 8sec or at f/16 you could double it to 30sec.
With car light trails shutter speed matters because (presumably) you want to capture the passage of a car right the way through the scene. 8sec might have been pushing it for your shot, 15sec looks just about doable if you time the shutter release perfectly, 30sec would be adequate but by dialling in the f/16 aperture you'd be dimming your light trails by one stop...
The bottom line is it comes down to personal preference and balance. In order to *consistently* achieve the former and capture the latter you've got to put the camera in full manual mode, the sooner the better.

Thank you for the detailed information, really helpful. I tend to use full manual mode in instances like this, I think for me I wrongly selected the High ISO as I thought this was as it should be. Thanks again!
 
If shooting in RAW format though would you bother experimenting with white balance in camera, or leave it until the processing stage ?

Yes I would, white balance correction in RAW should only be for fine tuning, you should always try and get it as right as possible in camera (y)
 
cheers for that - but what sort of white balance would you try to use in camera for a shot of a stream using a Big Stopper ND filter - always get confused with these :)

Well given big stoppers are supposed to be without colour cast I'd say you've got to go with the white balance to suit the scene
 
Im thinking I still don't get the exposure right with mine, as I often feel there is a slight blueish cast with my Lee filter

Well that sounds like you do need to set a slightly warmer white balance than the light would suggest in order to capture the scene (y)
 
Back
Top