Chroma - Lasercut Acrylic 4x5 Field Camera

Messages
10,055
Name
Steve
Edit My Images
No
I blame @Carl Hall for this but we were talking over the weekend about my next project and came up with 2. Firstly, the dark cloth hoody which is basically a standard hoody with a longer/larger hood which can be pulled over your head and around the ground glass for focusing then dropped back down afterwoods so you look a little less like Superman in Wellies ;0) I've already spoken to my sweat shop about this (my mum) and am putting together something that can be attached to an existing hoody so you can wear it with your own clothes rather than making a complete new piece of clothing. I actually think this could be pretty good and Carl's even offered to buy the first so I'll hold you to that bud!

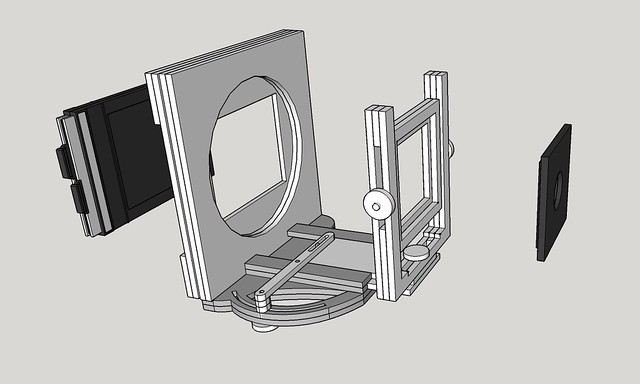
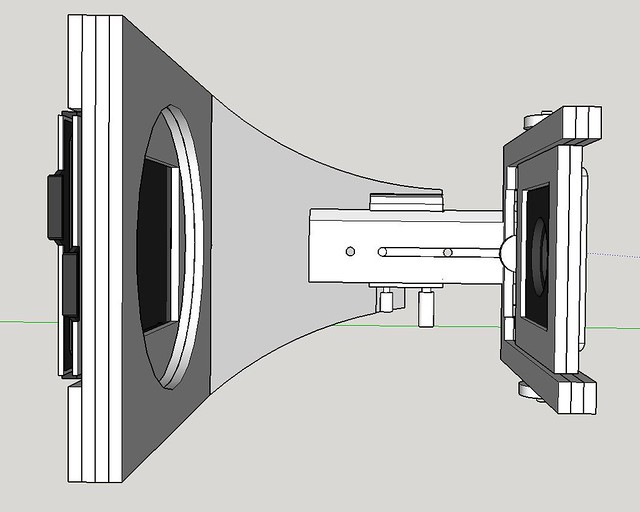
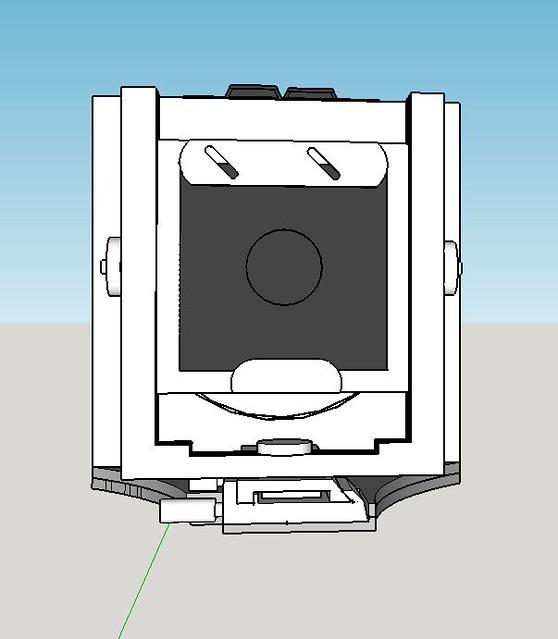
The second crazy idea was making a 4x5 field camera entirely out of lasercut acrylic sheet. In my head I'm going to make one of out translucent acrylic for added crazy value but initially I'll make it opaque;

Shortest Focal Length (around 120mm with current design)
29880846911_a9b98b1342_z.jpg


Medium Focal Length

29336846684_46b8ff555b_z.jpg


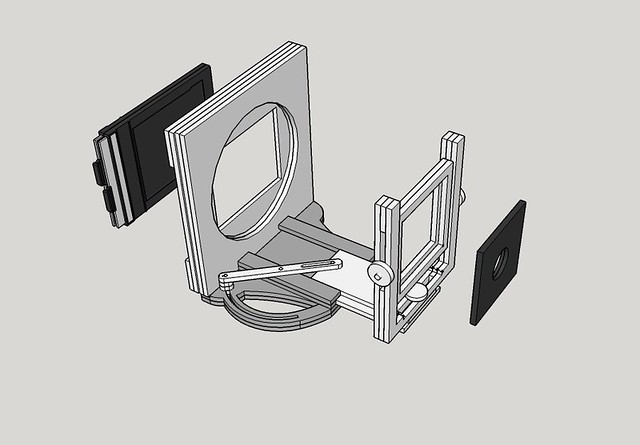
Longest Focal Length (around 220mm with current design)
29337356893_628cba1c0f_z.jpg


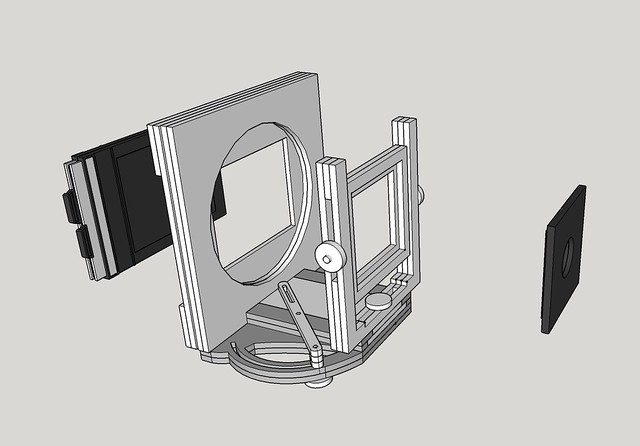
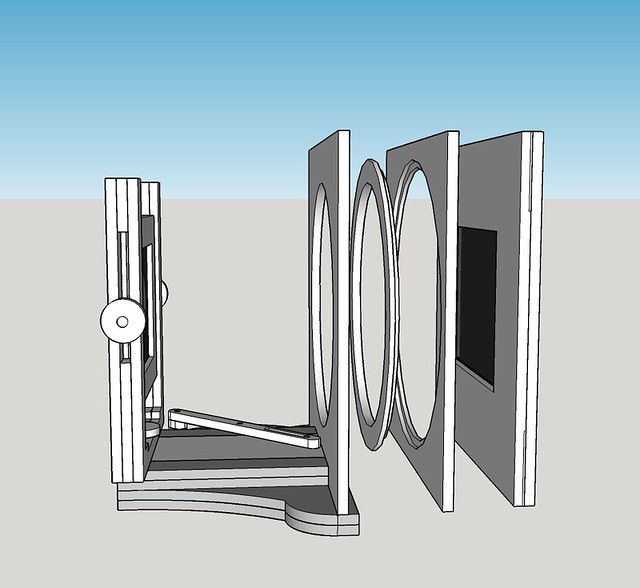
The back rotates to allow portrait/landscape shooting.

Exploded view of revolving back components;
29337356993_60cc3aeea5_z.jpg


I'm using the same friction fit for the DDS that I used on the Polaroid 110 conversion which means there's no need for additional brackets/clamps to keep it simple. Fully extended, the whole camera is 240mm long and 225mm high so quite compact. The rear standard slots through the base so is fixed with no movements for simplicity and the front standard is removed by unscrewing the central bolt in its' base so the camera can be separated for packing. I haven't split the parts out into a flat layout to work out how much acrylic will be needed yet but I'm hoping it will be kept down to a small area to keep the cost down. I'll get in touch with my friend with the laser cutter to get some costs.
 
Last edited:
Rather than using a traditional rack and pinion focusing method, I've drawn it up using a sliding front standard which is controlled by a pivoting arm on the base. There's a threaded bar which fits through an arc on the base with a knob on the other side so the focus can be locked or loosened to adjust. I'm not 100% sure about how smooth this method would be but it's probably the simplest method to build it with simple lasercut components.
 
Wow, you didn't waste any time with this idea did you! Looks awesome, I'm looking forward to seeing this progress

Carl's even offered to have the the first for free so I'll hold you to that bud

(y) :p

Superman in Wellies

I might see if I can get someone to embroider a giant white S on the red side of the cloth :D
 
Wow, you didn't waste any time with this idea did you! Looks awesome, I'm looking forward to seeing this progress


(y) :p


I might see if I can get someone to embroider a giant white S on the red side of the cloth :D

You should have been sitting with him on the train back, his mind was whirring away trying to design it on the hoof.
 
Not finishing those decks then :D


I would build the front standard around a linhof board and save some work.
Rear tilt is handy for looming type effects, playing around with perspective, but not exactly a requisite.
 
Lol, I need to go outside into the garage to finish the decks but I can draw this up from the comfort of my desk! What's the difference with the Linhof board, is it just smaller? I stole Carl's plans for the lens board that he built and worked around that for size.
 
Lol, I need to go outside into the garage to finish the decks but I can draw this up from the comfort of my desk! What's the difference with the Linhof board, is it just smaller? I stole Carl's plans for the lens board that he built and worked around that for size.

They're the closest thing to a standard, most (all?) modern field cameras use those boards. I adapted my Arca to take them rather than the huge the 171 that it uses.
 
Ah right ok. This board is 93.5 square so seems pretty small. If it's wrong, I'm blaming Carl.

That's the size my Nagaoka uses. Mind you the board is also 6mm thick which is really thick compared to others. Seeing as you're making them for a custom camera can you not just make them to suit your own camera design? It's only another piece of cut acrylic to add to the list right?
 
Thats smaller than the Linhof boards. they're 96 x 99mm but they are also 3 for a £10 on ebay...
 
The second crazy idea was making a 4x5 field camera entirely out of lasercut acrylic sheet. In my head I'm going to make one of out translucent acrylic for added crazy value but initially I'll make it opaque;

Presumably if it's totally clear you'll be using X-ray film to be consistent :D
 
Last edited:
Well, the lens board and DDS mount would be opaque and the rest translucent as the frame/movements don't need to be light tight :0)

Edit- Sorry, the joke went way over my head but I've just re-read it!
 
Last edited:
Ok, my mate with the laser cutter came back last night to say he's happy to give it go. The different depth cuts are done by setting the power/speed of the laser so will take a bit of trial and error to get right but should work which is good. I've nearly finished splitting out the pieces from the model into a single flat sheet to get an idea of size so will do that today.

Randomly, I got a message last night through Flickr from someone who wants to buy one if I get it to work, how do I get myself into these things!
 
IMG_1475052884.241837.jpg

There are all the individual pieces. Apart from the rear piece of the lens board, it's all cut from 6mm sheet. I need to add some texture to the locking knobs so they're easier to use but apart from that I think it's ready to try out. I'm going to order the threaded bar at the same time so I can assemble it all.
 
Last edited:
You might want to put some extra light tight cloth on the inside of the parts that should be light tight - we were looking and using some black acrylic here in work for laser enclosures and so took a transmission spectrum of a sample of black. It was great in the visible, like sheet steel, but it became more transmissive at wavelengths longer than 730nm (near IR). That's probably within the sensitivity window for some films. It wasn't completely transparent, but it could cause problems with fogging if you had the dark slide out for an extended time (mins-hours on a bright day).
 
Thanks for that @Cuchulainn I'll do some testing with internal baffles/flocking once I get the parts cut.

I've just drawn up an additional focus arm/pivot pins which can be used for wide angle lenses with a flange depth <120mm. Using the alternative focus arm I should be able to fit lenses with a depth down to around 75mm which should cover most lenses except for the crazy wide Rodenstock's which I'll never be able to afford anyway :0)
 
I may have a new focus mechanism that's more simple than the slider setup I drew originally;

IMG_1475508924.630818.jpg

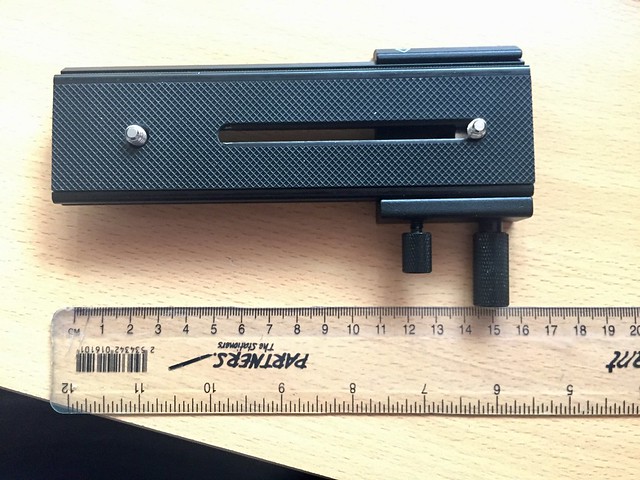
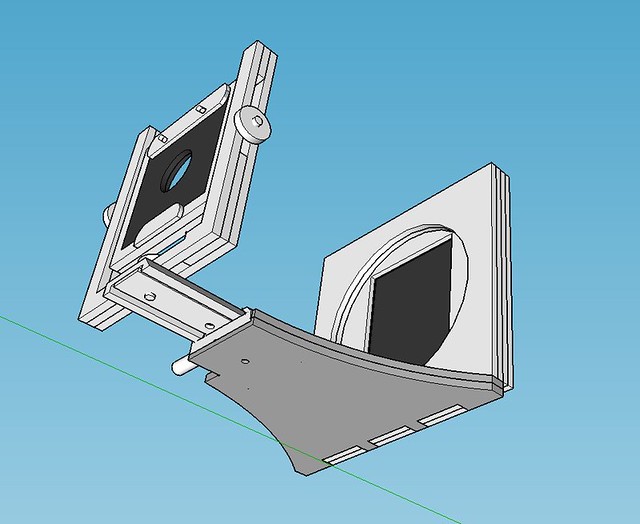
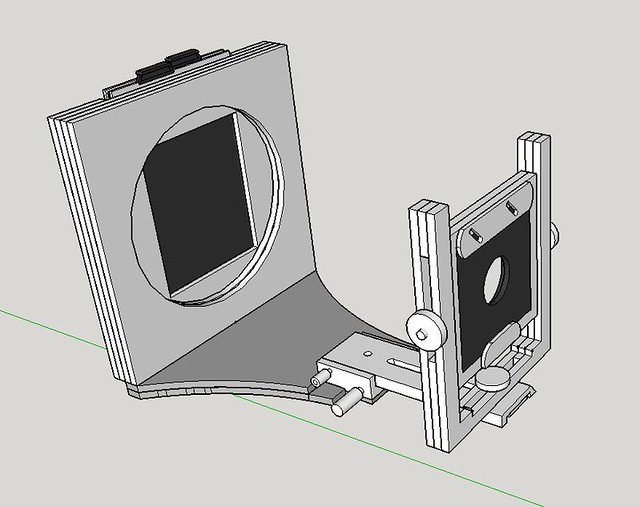
I ordered one of these 2-way Macro sliders last night as it looks like a good size and provides flexibility in mounting position for the front standard so I can cover a wide range of lenses. I've re-drawn the base of the camera to accommodate the rail and it looks like it should be a good fit.

Minimum extension with front standard mounted at end of rail = 160mm

IMG_1475509338.272633.jpg

Maximum extension with front standard mounted at end of rail = 260mm

IMG_1475509362.798628.jpg

Using the flexible mount on the macro rail I could also mount the standard very close to the back for ultrawide lenses (not that I could ever actually afford one!). This is only a guess until I get the slider and measure it but it looks like I could get the distance down to around 50mm which will mount all but the most radical of lenses.

IMG_1475509728.659673.jpg

Obviously movements would be more limited at that depth but if I use a bag bellows it should allow enough compression to fit although realistically I'm more likely to use a 90 or 150 lens.
 
You might want to put some extra light tight cloth on the inside of the parts that should be light tight - we were looking and using some black acrylic here in work for laser enclosures and so took a transmission spectrum of a sample of black. It was great in the visible, like sheet steel, but it became more transmissive at wavelengths longer than 730nm (near IR). That's probably within the sensitivity window for some films. It wasn't completely transparent, but it could cause problems with fogging if you had the dark slide out for an extended time (mins-hours on a bright day).

It's like an echo, @stevelmx5 ;) :p

@Cuchulainn, where do you work fella? We might be in the same line of work :)
 
We are in a related line of work then!

No, I'm in Strathclyde - just recently started, so getting used to the city and uni!
 
Now i've finished kicking myself for the rookie developing error last night, I've measured up the macro slider rail to fit it into the existing chassis properly.

30056978612_6a9e30f977_z.jpg


It's actually a really good size and not a million miles from my original design. The longest travel is around 100mm and it currently has a 90mm long slot with a sliding threaded fitting that screws into a standard tripod mount. The sliding fitting won't be much use to me because if I loosen it to add some swing it will screw up the focus so I've drawn up a small piece of 3mm acrylic to bond underneath and give 3 threaded mount points at set distances, along with a 4th for the fixed point closest to the film back.

30171476195_899d31ea5a_z.jpg


29542457813_142381a933_z.jpg


30171475845_e395e625a8_z.jpg


29875867220_c0178ab8c1_z.jpg


The smallest knurled handle, nearest to the back of the camera, is the locking adjustment which presses a rubber strip against the side of the sliding plate to hold it in place. The front adjustment is used to move the plate forwards/backwards. The rack/pinion isn't a bad fit but could do with some grease to smooth it out a bit, I can't really complain for £12!
 
Last edited:
All components are now drawn up and aligned to fit on a 3'x2' sheet. I'm going to get them cut from 6mm mdf first to test out the fit and alignment. Assuming they actually line up properly and the film holder clips in properly, I'll look at cutting another set from Acrylic :0)
 
I thought I'd get a price for a bellows to be made by Custom Bellows rather than fighting with my own. The quote came back at £94 so I think I'll keep it DIY :0)

Yeah bellows are rediculously expensive. Though there are a couple of Chinese makers on eBay that might be able to sort you out for a bit less. I really must finish (start) mine.
 
I have been thinking about this too as I have a laser cutter at work and lots of Perspex in various thicknesses up to 10mm. Up to now, I have just used the CNC router we have to make cameras.


Steve.
 
Last edited:
I found another guy making custom bellows earlier so sent him an email. His quote came back at £120 but then he replied again a bit later to say he's got another set that he made but were never bought so I could have them for £25 :0). The only problem is they're slightly smaller than I wanted but I'll be able to make a plate for each end to secure them to the camera and cover any gaps.

IMG_1477600128.445830.jpg

There is a 3mm gap above and below the rear section because the rotating back needs a circular aperture. For £25 I think it's worth the hassle of making a plate to go over the last lip of the bellows and cover it!
 
That was my thinking too. Having the back rotating meant that I'd originally planned to have square ended bellows but these rectangular ones will still cover the back in portrait (130mm high vs 121mm film aperture) although it's close!

IMG_1477608369.619563.jpg

I've gone over the cutting plans with the guy doing the laser cutting today. He's doing some other jobs for me first then will get the parts cut from 6mm MDF to test fit and finish. Long term I'll use Acrylic because it's more hard wearing and better at dealing with rain but a 3'x2' sheet of MDF only costs £4 so if it doesn't work first time I won't lose sleep over it!
 
If you can move the rear of the bellows forward of the film plane, you can get a bit more coverage, but that impacts on the shortest focal length you can use.

Long term I'll use Acrylic because it's more hard wearing and better at dealing with rain
True, but it's less resistant to falling over - or more accurately, the results of falling over!


Steve.
 
Last edited:
It's been a while since I updated this thread but I've been going over a lot of different design ideas to build a motorised front standard. This would be separate to the basic lasercut camera but built around the same lens board/body.

The tilt/swing movements are controlled by two stepper motors which are linked to larger gears. The tilt stepper is embedded in the upright and rotates the lens board/frame around an axle using the large gear that's fixed to it;

IMG_1481763457.031386.jpg

IMG_1481763463.876182.jpg

The swing stepper is embedded in the horizontal base arm and uses the same large gear to rotate the entire front standard around.

IMG_1481763612.693375.jpg

IMG_1481763619.820559.jpg

By my rough estimate, small 5v stepper motors should be strong enough for both axes but I'll need to build one to know for sure. My plan is to control both steppers with individual rotary encoders which would give very high precision movements. The encoders also have a push button function built in that would return each motor to a start point.

IMG_1481763791.447862.jpg
 
After drawing the basic shape I've started to round off the edges to make it look a bit less chunky,

IMG_1481763843.442988.jpg

I'll do the same to all edges of the standard before looking at doing a test print to see what the strength/weight is like.

The whole standard will rise/fall using a small scissor lift mechanism. In turn, the whole unit can be moved left/right on a sliding mechanism that's fixed to the focusing rack. Sounds complicated but not as bad in reality :0)
 
Back
Top