I have wanted to do something similar myself - DIY Groundpod that is - to support a camera + lens which I could operate remotely from inside the house. I have plenty of 'birdies in the garden' photographs taken from a pop-up hide but nothing taken at ground level. The rob-nikon and BeccaF frying pan idea is what set me off to construct the arrangement shown in the iPhone images below.
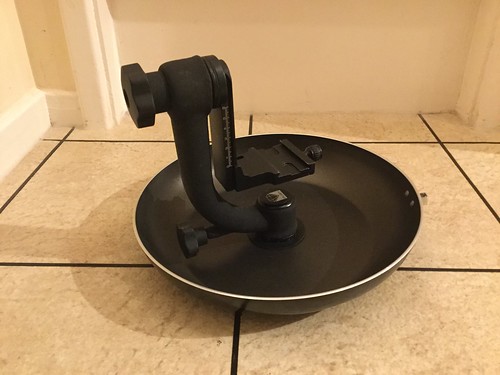
The first picture shows a frying pan attached to my MP-360 motorised tripod head. This is controlled remotely so that once the camera is set up on the grass, I can pan and tilt in order to frame the shot as I like it - although the birdies DO tend to wander a bit. I have attached an Arca-Swiss quick release clamp to the MP-360 which stays permanently in place. There is a plastic plate between the clamp and MP-360 which I designed and made to avoid any twisting. I also designed and made two other plastic plates in order to stop any movement of the tripod head once it is in place. The first of these goes between the MP-360 and the frying pan base.
The second plate makes up the second part of the frying pan sandwich and is shown below.
To explain all the hardware ..... three M3 nuts and bolts secure the top plastic plate, one M4 bolt protrudes into a hole in the MP-360 head (not a threaded hole), which is there for the purpose of anti-twist. (I think so anyway, can't see any other reason for that hole in the MP-360 base but happy to be told different if anybody knows why it is there). The M4 bolt is held in place by a corresponding nut on the other side of the plastic plate which means that it stays in place.
In the centre is the UNC 1/4" bolt which is the main connector to the head. I have ordered one from China which has a slot and a hand tightening ring - this will replace the cap screw which is currently in place when it arrives.
Frying pan with the MP-360 motorised head removed. The idea is that I can replace the motorised head with an Arca Swiss clamp pretty quickly and once the bolt arrives from China, without the need for an allen key.
The M4 anti-twist bolt is a good fit for the Arca Swiss clamp - not easy to see in this picture but it is there!
The frying pan cost me £4 from Morrisons and being made of aluminium, it is not difficult to drill. Of course, I needed to be pretty accurate with the fixing holes for the M3 and M4 screws so I made a plastic template to assist. Once the centre hole had been drilled, I fastened the template in place with a UNC 1/4" bolt and nut and then drilled the other four holes with my template guide.
All in all I am pretty pleased and thanks again to rob-nikon and BeccaF for the frying pan idea. If anybody is inspired to do the same and needs more details, let me know. I am happy to make another set of three plastic plates, (top, bottom and template) but would have to charge for materials and postage. (Same applies to the fourth plate which I used between the MP-360 and Arca-Swiss clamp if you are making an identical set up).
Alan


 All Photos-167 by -Rob - Nikon-
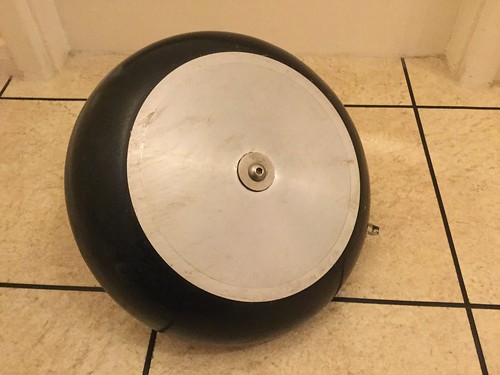 All Photos-168 by -Rob - Nikon-


