Hi-Key film photography

Messages
4,347
Name
You can call me Sir.
Edit My Images
Yes
I've got an idea in my head for this weekend where I want to photograph a blonde model with pale skin in a white dress against a white background. I'm doing this on film so there's potential for disaster everywhere:'(.

Messing around last night with my DSLR I found I could go 2/3 of a stop brighter on camera than the light meter suggested and retain skin detail. If I went to a full stop brighter it blew out.

1)Will film act the same as the DSLR or will it take a full stop brighter or need to be less than 2/3?

2)In the days of film,if you were trying something like this would you expose the negative at the meter setting and then overexpose the pring to be on the safe side?

Any other tips?

Looking forward to your replies.
Kev:thumbs:
 
What are you using to meter with Kev?

To get high key negs I find I need to overexpose white sujects by at least 3/2 stops.
 
I've got a sekonic 308 light meter. Do you mean 3/2 as in 1.5 stops or 2/3 and it was a typo? 2/3 worked best in my DSLR test but I wondered if it would be a different case with film.

I did some stuff the other week at home where I was trying to blow a wall out (before I had a meter). Using the DSLR I opened the aperture just to the point where detail was lost and then transferred these settings to the film camera. When I developed the film I found there was still detail in the wall. I'm not sure if this was down to a difference in properties between film and digital or if ISO100 on my DSLR ir different to ISO100 on the film I was using (not unheard of by all acounts).

I know I could expose to what the meter says and fiddle the rest in photoshop but I'm trying to get away from that and get it right in camera which is proving a lot harder with film for obvious reasons.
 
With negitive film it has more tonal range than a DSLR sensor like you found with your wall shots. You are best to add another stop onto your SLR findings so if 2/3 stops gives you the high key effect on your DSLR your better to go 3/4 on film. Like you said it is a lot harder with film but it is a skill and an art to get it right and have a feel for it ;)
 
Hi Kev,

I meant 1.5 stops.

with film you get a lot more leeway in the highlights, instead of digital clipping.

Theoretically if its a white wall you are shooting, your meter will tell you an exposure for mid grey and depending on the film and developer combo you can add anything up to about 4 stops over that and still retain faint detail.

My advise is add 1.5 stops, 2.5 stops and 3.5 stops in a bracketed sequence, or do a quick test roll at the time if you can. take a change bag and dev it there and then (less than 10 minutes) and then check the exposure that way. Treat it like shooting polaroid to check the exposure;)

If thats not possible just go with 2 stops over and fix it in printing if its wrong
 
Much scarier doing this on film - uinless you can process and see the results on the spot. On the other hand it's harder to blow the highlights on film. Bracket everything and try to see a test roll before you go too far. Look forward to the results.
 
Cheers for the responses chaps, very helpfull. I'm going to order some B&W Polaroid I think. I could take my developing gear but I don't know if there will be a water supply at the venue and I have enough trouble loading film onto a reel without worrying about keeping the model and other people hanging around!

I won't be printing in the traditional sense as I don't know how or have the equipment. I'll scan the negs and print from the PC but like I said I'd like to be able to get it right in camera and do as little on the PC as possible. I'll give 1.5 stops a try I reckon, if I have to push it a bit more in PS I'll be happier doing it just a little bit like a minor correction than having the neg look completely different to the print.

Thanks again folks.
 
what about moving the exposure up in half stops each shot, so some will be under some over but your almost guaranteed a few good shots.
Not like your sending em off for expensive printing you can scan pp and print the best
 
I know what your saying David bit a hit and miss method is going to prove expensive (relatively) when I only get 12 frames per roll. I reckon a pack of B&W polaroid is the answer but atleast now if I start at 1.5 stops I'll waste less polaroid than if I started at the meter reading and worked my way up.

Cheers for your input though,
Kev
 
I reckon a pack of B&W polaroid is the answer

the problem with polaroid film is its of higher contrast than normal B&W film so its hard to judge highlight exposure. It behaves much more like digital than film.

Could you scout the location before hand and do a test rooll with no one else there?:shrug:
 
Possibly, although it's a bit short notice. A white wall should be a white wall so it might be able to find one elsewhere to use. Having said that it might be fun and a bit of a challenge to develop on the move and it'll fill up some time for me as we've got the space all day.
 
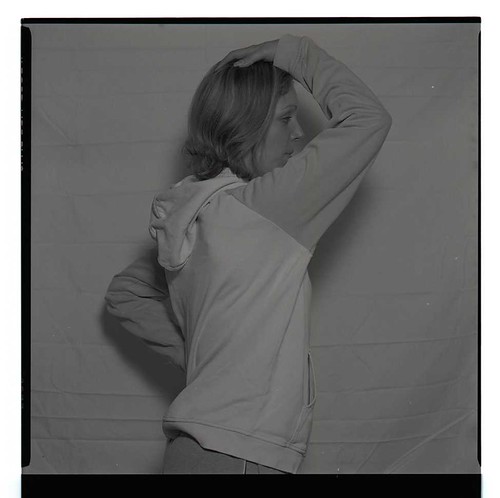
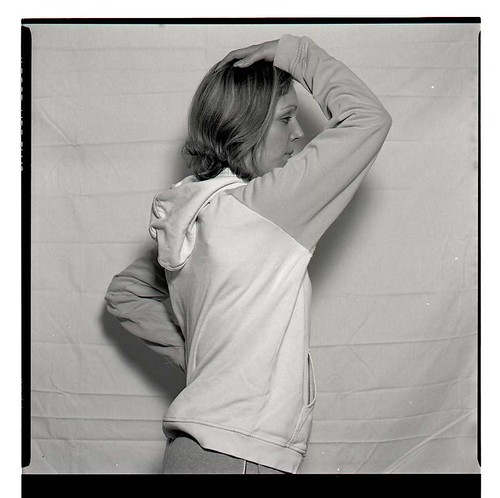
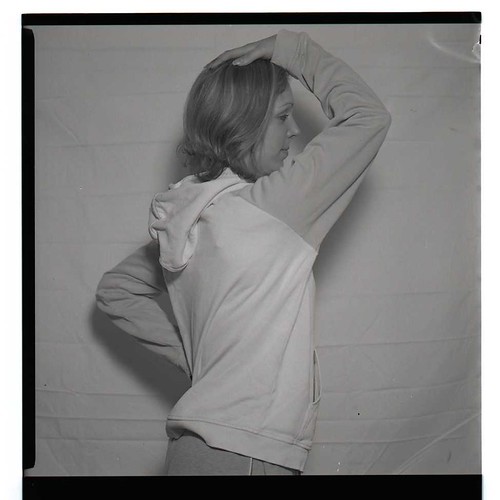
just when you think things are starting to come together you develop a film and find out you are no nearer where you wanted to be than when you started. I ran a roll through the camera the other night. I metered the flash at F8, started the camera at F4 and went to F16 in half stop increments.

I also need to learn more about scanning I think for the following reasons (ignore the poses at was purely an exercise in exposure nothing else).

This is a shot at F8, what the meter said, straight scan, no adjustments. Now to me it look very underexposed but could that be how straight scans are supposed to look?

3223899676_de9915519e.jpg


Here's the same scan with a levels adjustment during the scan phase, still looks a bit under exposed to me.

3223899636_6c2cbd69ce.jpg


Here's the shot at F4, two stops over the meter reading, straight out of the scanner with no adjstments. Still looks a bit under exposed and nowhere near the effect I was after.

3223899560_40c047e901.jpg


Here's the same shot at F4 with a levels adjustment at the scan phase.

3223951970_be266b5316.jpg


Now it's bloody darker than the straight scan:bang:

All scans seem to be dark unless I add backlight correction or adjust the levels. Is this a trait of using a flatbed scanner or is it an indication that I am underexposing my shots.

Looks like I'm going to have to go atleast three stops brighter to get the desired effects and I'm not sure I've got the flash power for that:bang:.


A question about metering then. I'm using incident metering which is supposed to give me a figure to properly expose an 18% grey. Now I assumed that if the 18% grey is correctly exposed then anything lighter e.g. whites will be over exposed and darkt tones e.g. black will remain under exposed. This doesn't seem to be the case in my shots here and I seem to be a bit lost.


Heeeeeeeeeeeeeeeeeeeeeeellllllllllllllp!!!!!!!!
 
Back
Top