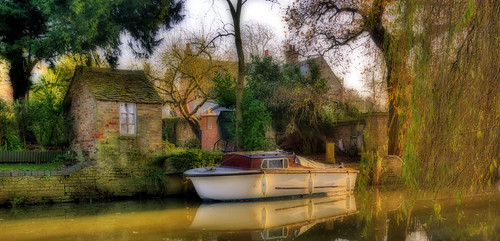
how do you get that silky look?

joescrivens

Suspended / Banned
Messages
15,052
Name
Joe
Edit My Images
Yes
That's pretty much a tripod, nd filters and long exposures.

Arthur
 
The images you have linked to have generally been taken at long exposures to blur any motion - water, moving clouds, foliage in wind.

With the camera locked onto a tripod, use a reasonably small aperture - f11 or maybe f16 along with a low iso setting and a neutral density filter - as dark as you can afford.
 
The Orton effect gives a misty look. Try THIS

I took this picture and used the Orton effect

3083673803_7717cd5ce3.jpg
 
The images you have linked to have generally been taken at long exposures to blur any motion - water, moving clouds, foliage in wind.

With the camera locked onto a tripod, use a reasonably small aperture - f11 or maybe f16 along with a low iso setting and a neutral density filter - as dark as you can afford.

Yep - that is spot on. Also, to make the image as sharp as possible, use a cable release for the shutter, and also use mirror-lock-up to avoid the camera shake when the mirror slaps about. Usually this is absorbed by your body when you are holding the camera, but on a tripod on a longer exposure it is much more noticable.

For neutral density (ND) filters, the best stuff is made by Lee Filters (Robert White sells them), Cheaper options are Cokin but they tend to leave a magenta colour cast on the pics. Basically they just reduce the amount of light entering the lens allowing you to use a longer exposure.

You may also want to consider a graduated ND filter if the sky is much brighter than the land/sea. This will reduce the brightness of the top of the image (or the bottom if you put it "upsidedown") to balance the exposure better.

Of course, if you cant be bothered with ND filters, just wait until the sun goes down and there's less light, so you get a longer exposure.

For water with texture on, 5-10 secs should work. For very very smooth water which removes pretty much all texture, you'll want 3-4 minutes so you'll need Bulb mode and a lockable cable release.
 
Checkout the welding glass by searching welding on the forum for my welding glass thread ;)
 
Yep - that is spot on. Also, to make the image as sharp as possible, use a cable release for the shutter, and also use mirror-lock-up to avoid the camera shake when the mirror slaps about. Usually this is absorbed by your body when you are holding the camera, but on a tripod on a longer exposure it is much more noticable.

For neutral density (ND) filters, the best stuff is made by Lee Filters (Robert White sells them), Cheaper options are Cokin but they tend to leave a magenta colour cast on the pics. Basically they just reduce the amount of light entering the lens allowing you to use a longer exposure.

You may also want to consider a graduated ND filter if the sky is much brighter than the land/sea. This will reduce the brightness of the top of the image (or the bottom if you put it "upsidedown") to balance the exposure better.

Of course, if you cant be bothered with ND filters, just wait until the sun goes down and there's less light, so you get a longer exposure.

For water with texture on, 5-10 secs should work. For very very smooth water which removes pretty much all texture, you'll want 3-4 minutes so you'll need Bulb mode and a lockable cable release.

cheers, I don't like the idea of grad ND filters as I can hardly ever imagine a perfect horizon, what about when you have mountains that are going up into the sky?

I think in these cases I'd rather do a couple of exposures and use the sky from one in the other. Lee are a bit out of my price range but I might get a hoya one
 
cheers, I don't like the idea of grad ND filters as I can hardly ever imagine a perfect horizon, what about when you have mountains that are going up into the sky?

I think in these cases I'd rather do a couple of exposures and use the sky from one in the other. Lee are a bit out of my price range but I might get a hoya one

Indeed, in the case of a lumpy horizon some bracketed exposures and post-processing merging is a better bet. They are good for seascapes though obviously, or if you are in the Fens.
 
if your using nd filters what range would you say I have two 4x and sometimes even with both together it still looks like a nuke has gone off or it's to dark... I know it's practice etc.... but do anyone have a rough guide ie

sunset - grad 4 shutter setting etc
 
Animal said:
if your using nd filters what range would you say I have two 4x and sometimes even with both together it still looks like a nuke has gone off or it's to dark... I know it's practice etc.... but do anyone have a rough guide

For what it's worth....

In reasonable daylight I use the 0.6 and 0.9 (ND4 and ND8) ND grads. For long exposures I use the infamous £2 eBay welding glass. In full sun about 30s at f5.6 is roughly right for my piece of glass (some experimentation is always needed!).

For dawn and dusk shots I always end up using the 0.9 (ND8) grad filter. For long exposures I use a 0.9 (ND8) as well.

I also have 0.3 (ND2) grad filters and sometimes stack them or use them inverted with the above just to see what the result looks like :)
 
Joe, for long exposures please also be aware that stray light entering the viewfinder will ruin the picture, so once you're all set up on the tripod use the supplied bit of plastic to prevent stray light getting into the viewfinder. I speak as someone who learnt this the hard way :bonk:
 
if your using nd filters what range would you say I have two 4x and sometimes even with both together it still looks like a nuke has gone off or it's to dark... I know it's practice etc.... but do anyone have a rough guide ie

sunset - grad 4 shutter setting etc

Not sure about sunsets, but for long exposures:
Start with the ND filter NOT attached.
  • Fix the ISO
  • Select Aperture priority and select your required aperture
  • Meter the scene, make a note of the shutter speed selected and take a test shot
  • Switch to manual, dial in the ISO, aperture and shutter speed from the test shot. Adjust the shutter speed if the test shot isn't satisfactory.
  • Once you've got a shot you're happy with, attach the ND filter and decrease the shutter speed by the same number of stops as the filter strength
  • Take the shot
Bobs your mothers brother.
 
Not sure about sunsets, but for long exposures:
Start with the ND filter NOT attached.
  • Fix the ISO
  • Select Aperture priority and select your required aperture
  • Meter the scene, make a note of the shutter speed selected and take a test shot
  • Switch to manual, dial in the ISO, aperture and shutter speed from the test shot. Adjust the shutter speed if the test shot isn't satisfactory.
  • Once you've got a shot you're happy with, attach the ND filter and decrease the shutter speed by the same number of stops as the filter strength
  • Take the shot
Bobs your mothers brother.

right so lets say I was shooting at f11 and shutter speed of 60. Then I attach an ND8 which I believe is a 3 stop filter. I stop the shutter down to 30?
 
Do you mean 1/60sec, or 60 seconds?
At 60 seconds, you'd need to up the shutter speed to 480seconds, at 1/60 you've be at 1/8. Each stop doubles the shutter speed.
I frequently get this the wrong way round though, but it's normally fairly obvious from the resulting picture :D
 
Do you mean 1/60sec, or 60 seconds?
At 60 seconds, you'd need to up the shutter speed to 480seconds, at 1/60 you've be at 1/8. Each stop doubles the shutter speed.
I frequently get this the wrong way round though, but it's normally fairly obvious from the resulting picture :D

yeah I meant 1/60th.

So stoppping down three times from 1/60 is 1/8? how does that work?

is it like: 60/2 =30 thats 1 stop. 30/2 =15, thats 2 stops, 15/2 = 7.5(so 8) thats three stops
 
In the link you posted Joe, I think there is more post processing going on than a grad filter.

Hard to tell, but I would guess at a long expose using a full ND filter, then in post, vignetting, a bit of HDR/digital grad, and colouring.
 
Back
Top