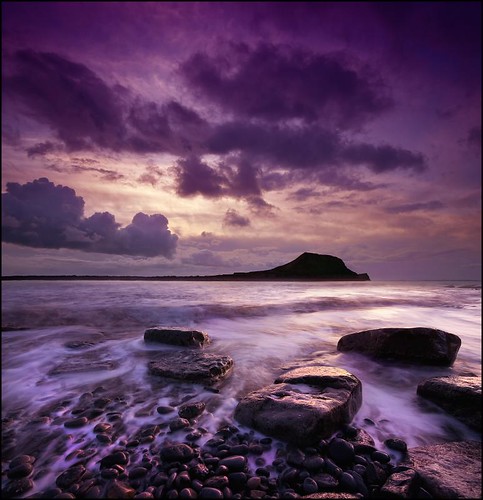
Landscape photography tutorial?

Messages
679
Name
Simon
Edit My Images
Yes
Hi all,

As per the title, is there a good landscape photography tutorial on here anywhere?

Main reason is I'm off to South Devon (East Prawle area) a week tomorrow and am all ready to go with my D300s, my 16-85mm, my Redsnapper tripod, my hitech filters (0.3, 0.6, 0.9 ND's and soft grads), and cokin filter holder. Trouble is, despite having a fairly good grasp of photography in general, this will be my first shot at using filters so am a bit daunted by the different exposure times needed depending on which filter I'm using, and if I'm stacking them, etc etc.

If there's nothing on here, if someone could point me at something good, idiot proof, and printable (so I can carry it with me when I'm out walking), that would be much appreciated. Also, if anyone is in that area of Devon and is a bit more of an expert than me and fancies showing me the ropes, I'd happily pay you back with a few pints of whatever you fancy :thumbs:

Cheers
Simon

p.s. forgot to add that it's mainly coastal areas that I'll be in. And I know that my soft grads aren't ideal for that.
 
The filters come in three strengths, although there are two ways used by different manufacturers of indicating those strengths:


1-stop ND2, ND2X, 0.3 ND

2-stop ND4, ND4X, 0.6 ND

3-stop ND8, ND8X, 0.9 ND


Metering Your Shot:


The whole reason for using a neutral density graduated filter is to control the exposure difference between the sky and the ground, so you'll need to take control of the light metering to make full use of the effect. Ideally you'll set your camera to manual so that the settings don't change when you start using the filter.

Your first step is to determine the strength of filter you'll need. The simplest method is to take a meter reading with the foreeground,taking note of its exposure settings. Now repeat this step but this time with the sky.

The difference between these two readings will indicate the strength of graduated filter that you need. A 1-stop difference in the readings will need a 0.3 ND graduated filter, a 2-stop difference a 0.6 ND grad, while a 3-stop difference will require a 0.9 ND grad. My most often used filter is the 2-stop (0.6 ND one), with the 3-stop (0.9 ND) being used only occasionally.


Once you've decided on the filter you need, use the meter reading you took from the foreground to take your shot.

You should now find your filtered image is perfectly exposed throughout.

Stacking is just working out the multiples of the stops each of the filters give.
 
Your first step is to determine the strength of filter you'll need. The simplest method is to take a meter reading with the foreeground,taking note of its exposure settings. Now repeat this step but this time with the sky.

The difference between these two readings will indicate the strength of graduated filter that you need. A 1-stop difference in the readings will need a 0.3 ND graduated filter, a 2-stop difference a 0.6 ND grad, while a 3-stop difference will require a 0.9 ND grad. My most often used filter is the 2-stop (0.6 ND one), with the 3-stop (0.9 ND) being used only occasionally.

Hi mate, thanks for your response and sorry for replying so late. We've been moving out of the flat this weekend so haven't had much of a chance to come on.

I understood pretty much all of what you said, except some of the stuff I've quoted above. To take a meter reading of the foreground, and then the sky, is it simply a case of pointing the camera at each and making a note of the settings it suggests to have a perfectly exposed shot?

Then, how do I determine what the difference is? Sorry, basic question I know. How much is a 1 stop difference in terms of shutter speed or aperture? If I shot in manual at, say, f8, and got two different shutter speeds for the two meterings, how do I work out how many stops difference that is?

Cheers
Simon
 
Every doubling/halving of shutter speed is a 1-stop difference.

The difference between 1/250 and 1/500 is 1 stop, likewise the difference between 15 seconds and 30 seconds is 1 stop.

The difference between 1/1000 and 1/250 is 2-stops, and between 1 second and 4 seconds is also 2 stops.

(Aperture is slightly more confusing due to the way it's derived from the maths, but doubling/halving the aperture value is a 2-stop difference, so the difference between f/4 and f/8 is 2-stops)


Handy tip of the day
Your camera body will do shutter/aperture increments in 1/2- or 1/3- stop increments, check the manual/settings to see which.. then you can just count the 'clicks' and either multiply by 2 or 3 to get the number of stops you've adjusted the exposure by. This is very handy when you've got the overall exposure you're happy with but want to change the exposure creatively to a different aperture/speed. For every click one way of adjusting one setting you need a click the other way on the other setting. Just check that the shutter and aperture are both set to the same adjustment increment.

To apply this to landscapes and working out the difference between foreground and sky.. set your chosen aperture and meter the speed off the sky to set the initial exposure. Now point the spot meter to the foreground and adjust the shutter speed to get an exposure. Count the 'clicks'. If your camera is set to 1/3-stop increments (seems to be the default for most) and you counted 6 clicks from the foreground to the sky then that is 2-stops (6 x 1/3), so a 2-stop ND grad would be useful. Taking the sky exposure first and then the foreground exposure second leaves you with the right exposure set on the camera to add the filter and take the shot.
 
You could just select Aperture priority for your metering and switch to manual when youve got your settings.Ignore the shutter speed for now.And just note the stop difference in apertures.

So for example...... if your meter reading for the sky gives F11 and your foreground meters F8.....that means there is a one stop difference between the two, which means you would need to use 0.3GND to balance the exposure.

Put it back in manual select F8 with your apropriate grad and turn the shutter dial until the exposure meter is centered in the viewfinder.

If shutter speed is your priority you can do it the SP mode way.

Personally I can do it all manual as im used to it, but thats an easy way to start.

The best way to think of stops is that your halving or doubling light that hits the cameras sensor.

Consider the basic table below,when you close the aperture you generally do it in full stops (although most camera to in 1,3rd increments these days) and you reduce the light by half each time... and double it when opening the aperture.

Shutter speed has the same Halving/doubling influence on light also.

So using this basic calculation table we can just count down or up the table to work out our difference.

F/5.6 is one stop below f/8 and two below F/11 and 3 below F/16 etc.

And shutter speed works the same way.


Aperture: f/1, f/1.4, f/2, f/2.8, f/4, f/5.6, f/8, f/11, f/16, f/22, f/32,

shutter speed: 1/15 1/30 1/60 1/125 1/250 1/500 1/1000 1/2000

I spot meter on a neutral mid tone in the foreground and matrix meter on the sky...then I count the stops in the table.simples!:)

In depth explantion
 
Thanks chaps. I'm beginning to understand it all a lot better now.

When it comes to stacking a Grad with an ND filter, is there a certain way of doing things, or order in which I should meter and then add the ND and ND grad? I'm thinking for things like seascapes where I want to hold back the sky but still get that misty water effect low down in the foreground
 
The filters come in three strengths, although there are two ways used by different manufacturers of indicating those strengths:


1-stop ND2, ND2X, 0.3 ND

2-stop ND4, ND4X, 0.6 ND

3-stop ND8, ND8X, 0.9 ND


Metering Your Shot:


The whole reason for using a neutral density graduated filter is to control the exposure difference between the sky and the ground, so you'll need to take control of the light metering to make full use of the effect. Ideally you'll set your camera to manual so that the settings don't change when you start using the filter.

Your first step is to determine the strength of filter you'll need. The simplest method is to take a meter reading with the foreeground,taking note of its exposure settings. Now repeat this step but this time with the sky.

The difference between these two readings will indicate the strength of graduated filter that you need. A 1-stop difference in the readings will need a 0.3 ND graduated filter, a 2-stop difference a 0.6 ND grad, while a 3-stop difference will require a 0.9 ND grad. My most often used filter is the 2-stop (0.6 ND one), with the 3-stop (0.9 ND) being used only occasionally.


Once you've decided on the filter you need, use the meter reading you took from the foreground to take your shot.

You should now find your filtered image is perfectly exposed throughout.

Stacking is just working out the multiples of the stops each of the filters give.


I cheat and use the matrix metering on my camera, seems to work just as well as using manual and metering for the foreground. :geek:
 
Thanks chaps. I'm beginning to understand it all a lot better now.

When it comes to stacking a Grad with an ND filter, is there a certain way of doing things, or order in which I should meter and then add the ND and ND grad? I'm thinking for things like seascapes where I want to hold back the sky but still get that misty water effect low down in the foreground

For misty water you want anything from 1 sec up...the longer the shutter speed the flatter it will look.

In which case...you could manually select you desired shutter speed e.g 5sec then watch the exposure meter(make sure the focus point is on a neutral mid tone in the foreground)as you click the aperture dial till its centered.
Work out the sky by tilting the camera up and then adjust the aperture dial until centered....count the stops....add your appropriate gnd.

If you want to forceably bring the sky down...just add another grad to underexpose...I do that all the time.

4435257491_887dd66045.jpg
 
The whole reason for using a neutral density graduated filter is to control the exposure difference between the sky and the groundgive.

can I ask here..? as not got my head around this yet

only got one ND Grad - a ND4
if I use with grad line on the horizon - then matrix meter, wont the exposure be correct for ground and darkened sky ?
 
Not Necessarily.

The camera will try and average out darks and lights in the scene to find an overall compromise in exposure.
The computing has no way of knowing your creative purpose so the scene might not be rendered as you wanted..its far better to have full manual control,as you force the camera to do what you wanted rather than accept what it gives you.:)
 
The camera will try and average out darks and lights in the scene to find an overall compromise in exposure.)

how about adding ND grad then doing exposure lock on foreground.....?

yer I know, get out and try - have 2weeks off so will give it a try......:thumbs:
 
Hi

I'm also relatively new to landscapes and using filters, but I find it easier to use the metering exposure bar and setting the camera in Manual mode. Point to the ground and meter that part of the scene and set the aperture/shutter speed so that it exposures correctly, then keeping the same aperture/shutter/iso settings, point and meter the sky and it should show you on the exposure bar how many stops difference, and therefore which strength filter to use.

Is this an alright method? I came to this by trial and error really so not sure if this is a good accurate way.
 
Cheers for all the help so far chaps. I'm creating various word docs from all this and printing it off to read properly and take away with me.

On a (slightly) different note, can anyone recommend a good quality filter wallet thing? I've got a set of 3 Hitech NDs and 3 Hitech ND Grads that I'd like to store. At the moment they're just in their individual plastic wallet things
 
Cheers for all the help so far chaps. I'm creating various word docs from all this and printing it off to read properly and take away with me.

On a (slightly) different note, can anyone recommend a good quality filter wallet thing? I've got a set of 3 Hitech NDs and 3 Hitech ND Grads that I'd like to store. At the moment they're just in their individual plastic wallet things

eBay......."here"
 
Really? is there a difference? I've put some square filters in there and they fit fine.
 
Really? is there a difference? I've put some square filters in there and they fit fine.

sorry - only read the description which said 82mm filters...:bonk:

however long delivery and Simon is off next week
 
hmmm....kind of explains why there is a mesh netting type material on the inside of each slot.........can be quite troublesome with square filters sometimes as it can catch on the edges.

I have my Cokin P filters in there but not the Hi-Tech ones as I find the Hi-Tech plastic wallets are good and slimline enough to just dump inside my bag.
 
cheers for the help chaps. Ideally need to get it this week, so will do some searching around. Need something that will hold about 10 in total really, as I've got red, green and yellow ones too
 
There are quite a few about that can hold a lot, I just got that one because it was the cheapest one I could find that did the job. Definitely holds up to 10 though, maybe 12....can't quite remember off top of my head
 
this looks do-able. I've got 6 Hitechs, and 3 coloured Cokins, so will have to ditch one of the coloured ones. Just need to find out if they hold the Hitech rectangular '85' filters, as it states that they hold 'square' or round filters
 
wow i use to live there along with some big names like Jeni Bond and i think Kate bush has moved in just down the road

Kate Bush does indeed live round there. The fruit cake.

You may well have noticed the house we stay in when you lived down there. It's a massive white house with an outdoor pool and huge garden. Called Ash Park.
 
I use a cd wallet that cost 99p. It contains 8 filters (space for more) and a number of adapter rings no problem.
 
Back
Top