
- Messages
- 3,362
- Name
- Graham
- Edit My Images
- Yes
An interesting little video from Karl Taylor on lighting a red wine bottle. http://www.karltaylorphotography.co.uk/blog/in-our-next-broncolor-how-to-video-shooting-red-wine/



Must agree. It's OK showing off when you have a massive studio and loads of kit, but what about the rest of us?Interesting video, I would like to see a video of replicating his results with the kit that most hobby photographers have.

Interesting video, I would like to see a video of replicating his results with the kit that most hobby photographers have.
Must agree. It's OK showing off when you have a massive studio and loads of kit, but what about the rest of us?

The ceiling height is only a problem if you insist on the bottle being at table height; put it a foot off the floor and you'd have loads of space for a light above it. The width might be a factor though.Kit? 5D3 four speedlights and a small room to work in. Not much headroom for overhead stuff. Been messing with this sort of shot for years and never got anything that I'm remotely happy with.

This isn't actually all that hard to do with just one speedlight and a couple of modifiers - even homemade ones would suffice (softbox & scrim = blanket or two; top gridded light can be done with straws or an empty plastic drinks bottle)
You can easily take all the photos separately and provided the camera doesn't move, simply pop them into Photoshop and use the Lighten Blend Mode to control how they work together
As I see it the main problem, and its a big one, is space !!!
He's using an area at least 12ft x 12ft for this and higher than a normal house's room too - if I tried really hard I could do it like this in my conservatory, but would you really empty a room to shoot a bottle of wine ??? lol
Dave
Kit? 5D3 four speedlights and a small room to work in. Not much headroom for overhead stuff. Been messing with this sort of shot for years and never got anything that I'm remotely happy with.

At the top of the lighting forum, it's always been there, and unloved for years.20' x 10'? That's luxury.
I'm working in a boarded out loft so the middle is just above my head high, and the sides are non existent!!
Where's the thread you mention?
..
Could we use this as a reintroduction of the 'copy my lighting technique' thread, at the very least it's an excuse to crack open a bottle of wine mid-week.


I think the trick is to use a full bottle for the shot and another for filling the glass, what's left in the bottle should keep you going whilst the lights are sorted.I liked that thread - may even have posted in it
I'm not sure I could keep a bottle of red still (or full) long enough
Dave
Agreed. The red looks wrong, but it's getting there.Personally,I dont like the red on the bottle but...
This is more like it.
At the top of the lighting forum, it's always been there, and unloved for years.
Yes please, deffo interested.I use two flush guns with a pringle's tube mounted on each with a section cut out of the tubes to mimic strip lights. Then a third flash gun with softbox for main light. Works brilliantly. I'll post some pics of the set up later if anyone is interested.

i'd be very interestedI use two flush guns with a pringle's tube mounted on each with a section cut out of the tubes to mimic strip lights. Then a third flash gun with softbox for main light. Works brilliantly. I'll post some pics of the set up later if anyone is interested.


Yes please, deffo interested.

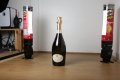

20' x 10'? That's luxury.
I'm working in a boarded out loft so the middle is just above my head high, and the sides are non existent!!
Where's the thread you mention?
I gave up trying to get the whole bottle and settled for this
which is shot in front of a flash mounted softbox with the middle blanked out.
Would like something more "visible"
Vin rouge by Frank Yates2010, on Flickr
 TP52-BLISS 107-January 11, 2015.jpg by Chris Heathcote, on Flickr
Now that is very interesting. I didn't think of reflecting the light back. I had my speedlight directly dehind the bottle with balck blanking. Was yours there too, with red blanking, or something else?I used a similar technique to light this
Only difference was I added a couple of pieces of white foam core board either side of the lens to reflect light back to the front. I also had a gelled speed light pointing at the background
I used a studio light with a softbox behind. A piece of black foam core in front as the background. To turn the background red I used a gel over a speed light behind the bottle aimed at the background. All done on a kitchen tableNow that is very interesting. I didn't think of reflecting the light back. I had my speedlight directly dehind the bottle with balck blanking. Was yours there too, with red blanking, or something else?
Agreed. The red looks wrong, but it's getting there.
Yes..I thought you did.Sorry, I meant in Carl Taylors shot.
Well that looks much better than anything I've achieved. Busy munching through two tubes of Pringles right now!
Once you popWell that looks much better than anything I've achieved. Busy munching through two tubes of Pringles right now!
Tell me about it. It's the only photo project where my wife actually agreed to helping me out with. I'm thinking about using some Quality Street tubs for another project. Something tells me I'll get offers of help for that one too!Well that looks much better than anything I've achieved. Busy munching through two tubes of Pringles right now!

That's one approach but a very hard work way of doing it, if the intention is to obtain a 'traditional' lighting effect as per the video, then it calls for studio lighting and not hotshoe flashguns and a lot of PPThis isn't actually all that hard to do with just one speedlight and a couple of modifiers - even homemade ones would suffice (softbox & scrim = blanket or two; top gridded light can be done with straws or an empty plastic drinks bottle)
You can easily take all the photos separately and provided the camera doesn't move, simply pop them into Photoshop and use the Lighten Blend Mode to control how they work together
As I see it the main problem, and its a big one, is space !!!
He's using an area at least 12ft x 12ft for this and higher than a normal house's room too - if I tried really hard I could do it like this in my conservatory, but would you really empty a room to shoot a bottle of wine ??? lol
Dave
But there are uncontrolled and, I suspected, unwanted specular highlights appearing all over the place that distract from the subject. If you really must use DIY lighting for something as complex as a bottle and glass, at least use something that's big enough, and it has to be close enough too, which it isn't.


 Champagne Bottle