

Noise at Low ISO

Messages
1,033
Name
Matthew
Edit My Images
Yes
Hi all, I've been doing a bit of night photography recently. Looking back at my images though some seem very noisy and they have been taken with low ISO, how is this? I think the more I look at them the more disappointed I get with them :(

This one at 200 ISO, the sky seems very grainy:
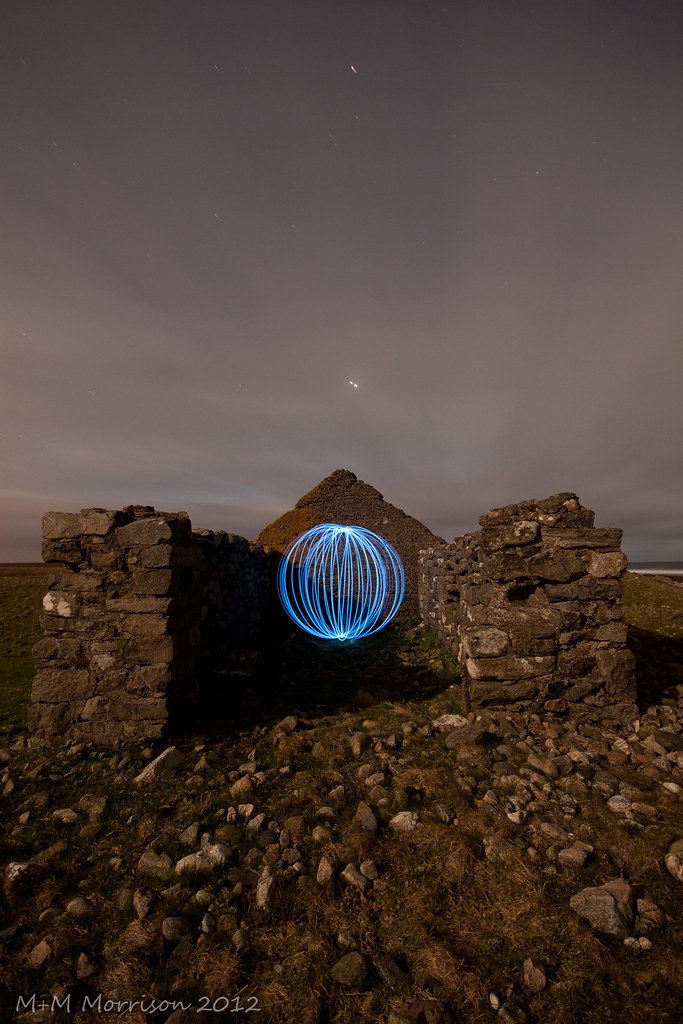
Ruined Orb by M+M Morrison, on Flickr

This one at 400, the sand (duh its grainy lol) but it seems very grainy as well as the sky:
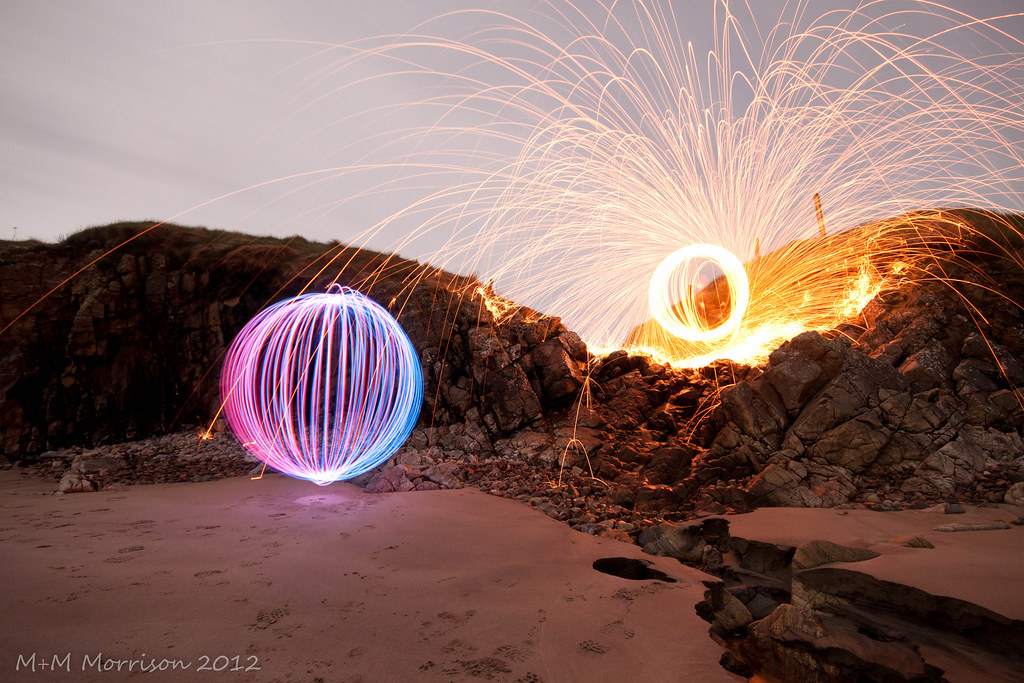
Orbing Fire by M+M Morrison, on Flickr

Its not so easy to see on Flickr, but when I have the original file open on screen it just seems not good at all. Any ideas of how I can fix this? I have put them through Lightroom, although I would have expected a clearer image straight off.
 
long shutter time?
 
Yes they were long exposures, however I would have still have thought with low ISO they wouldn't have been as bas as they are. Would it be a limitation of the 500d that I'm using?
 
To be honest I'm not seeing the problem, too much pixel peeping going on ;). Nice shots though :)
 
To be honest I'm not seeing the problem, too much pixel peeping going on ;). Nice shots though :)

Maybe your right, I feel when I use them (as desktops and the like) I'm maybe seeing more than I should?

Thanks

Should get out more and see what I can do with it, still learning photography in general and even more so night time stuff.
 
From my first glances, I have to say I really like the shots!
Did you have Long Exposure NR turned on out of interest?
 
Long exposures will always incur added noise the longer the sensor is exposed to the light. Sometimes you'll actually get less noise by upping the iso and shortening the exposure time than you would having a very long exposure at just 100 iso! It's about finding the right iso / exposure combination (then maybe a little NR in post!).
 
From my first glances, I have to say I really like the shots!
Did you have Long Exposure NR turned on out of interest?

Thanks, I don't actually use the on-board NR, I find after taking the shot it takes ages to 'store' the shot or what ever it does after the shutter closes.

Thanks Odd Jim, I had never thought of it that way... maybe have to experiment next time I'm out, take the same shot with ISO 100/200 and 4.30, then ISO 400/800 at 2 minutes see what happens...
 
Thanks, I don't actually use the on-board NR, I find after taking the shot it takes ages to 'store' the shot or what ever it does after the shutter closes.

Thanks Odd Jim, I had never thought of it that way... maybe have to experiment next time I'm out, take the same shot with ISO 100/200 and 4.30, then ISO 400/800 at 2 minutes see what happens...

The NR is basically a black shot, the exact same length as your exposure. It basically takes a shot of the back of the shutter. The camera can then compare the noise on this with your original image to determine what is and isn't noise. It can be quite effective but annoying if you're in a hurry to take the next shot or terrible if you're stacking several images.
 
some cameras have built-in NR for long exposures - might be worth turning that on.
 
I guess these were shot raw. Lightroom applies some sharpening by default, but no mask. It is often worth increasing the sharpening mask quite a bit to decrease the sharpening applied to smooth areas. I would think for these shots that around +30 to +40 should be in the ballpark. You could also try tweaking the luminance NR up just a tad, maybe to +10.
 
Oh right I didn't know that about Light-room. Will have to try that, I think I did up the Luminance NR up to 30ish I think, will have to check what settings it on just now and check out the mask.
 
Im still getting my head round how you make the light patterns lol
 
Press the ALT key before clicking the mouse on the slider for the mask. The picture will turn completely white. As soon as you increase the mask value you will see areas of the picture darken. The dark areas are having the sharpening reduced. You'll have to strike a balance, but when edges and detailed textures are still white and the sky and smooth regions are almost black then you will be in the right area.

20120418_151346_000.jpg
 
Last edited:
Im still getting my head round how you make the light patterns lol

Haha, check out My Light-painting thread and gives some detail on how I do it, and more shots :)

Press the ALT key before clicking the mouse on the slider for the mask. The picture will turn completely white. As soon as you increase the mask value you will see areas of the picture darken. The dark areas are having the sharpening reduced. You'll have to strike a balance, but when edges and detailed textures are still white and the sky and smooth regions are almost black then you will be in the right area.

Ahh nice one, think I really have to watch some tutorials for Lightroom, would never have known that!
 
Back
Top