

Outdoor Shot Settings

Messages
211
Name
Sarah
Edit My Images
Yes
Hiah - I am curently experiencing a baptism of fire after selling my Nikon D50 and replacing it with a D300... Now I am a hobby photographer, at the very bottom rung of the ladder so I was dismayed to see the lovely Automatic 'portrait' & 'sport' settings had disappeared!! lol sad I know!

Anyway, I have been practising lots and someone recomended a site by someone called Ken something, which was very basic and taught me a fair bit about the basics! But I have a question (or 3)!

I mostly take animal shots - both portrait types and of horses in action...

What I am struggling with is getting the crispness to the main subject that I was on the D50...now don't get me wrong I know it's pilot error as the D300 is such a better camera! But I want to learn what I'm doing wrong!

Here is a picture of my friend's dog I took today which I was pretty pleased with...it's in focus and look pretty crisp here..
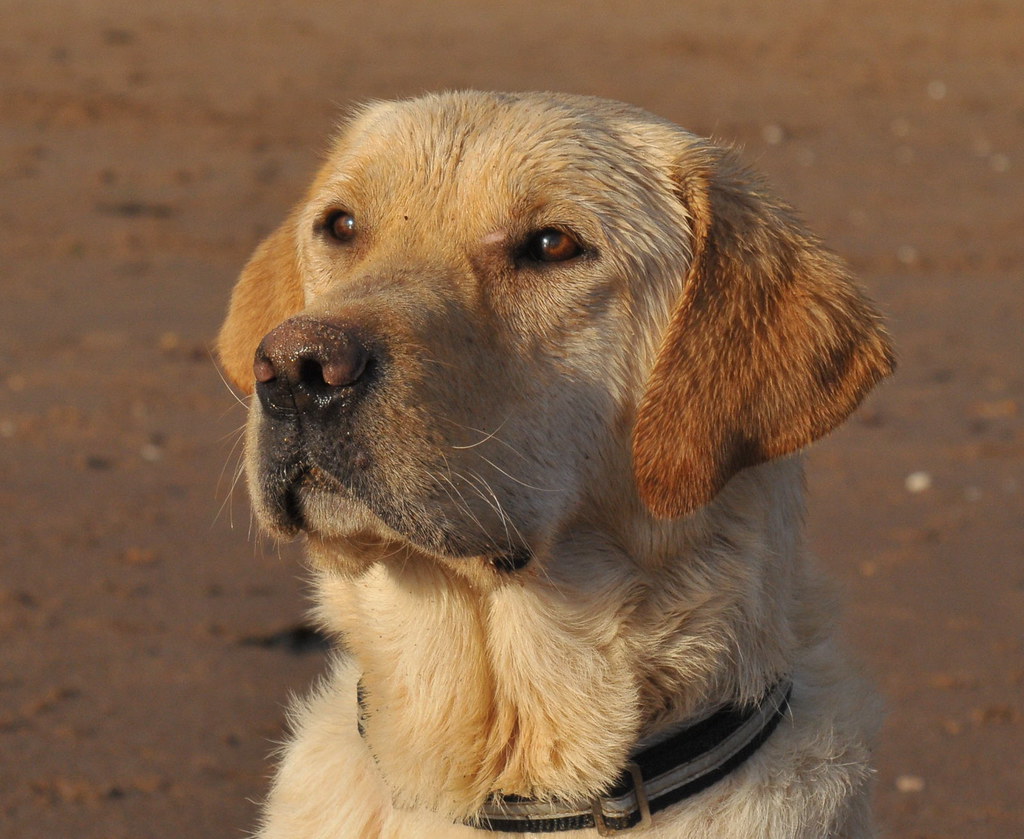
3207656622_414a01c0b4_b.jpg


And here's my cat last night - now I know it's not natural light in the second pic but I really don't like the fact that it is lacking in 'crispness' for lack of the technical word! What do I need to alter on the settings to improve that? BTW I know it's a crap composition - was purely playing last night trying to acheive an acceptable level of crispness! lol It also seems very 'noisy'/bitty - (I sooo need a glossary for technical terms!)
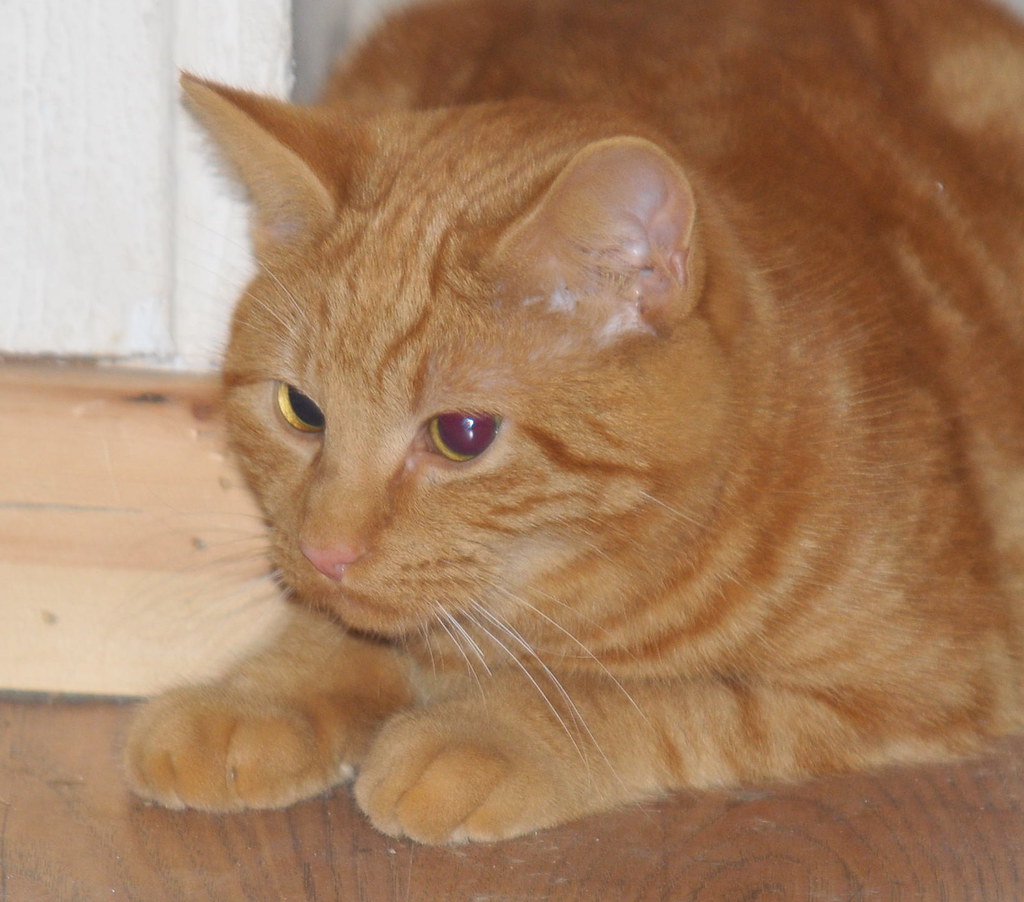
3206841905_f2990f5143_b.jpg


Thanks for any tips!
 
looks to me like you have it on P mode (programme) where the camera sorts it all for you for the best settings for the LIGHT.

Meaning, you have a fast shutter speed outside with the hound (as there is plenty of light), and no camera shake. The cat indoors will have gone to the bottom end of your Aperture settings being f5.6, f2.8 etc etc depending on kit.

To let more light in, it reduces shutter speed, so the hole is open for longer, increasing the chance of the blur by movement if handheld.

Without knowing exact settings this would be my guess.

How to solve it? Read up on F stops (aperture) and shutter speed 1/60th etc.

then start playing with your manual settings and learn that way :)

Hope that helps and makes sence.
 
Good guess - P mode was the closest I could find to Automatic...

F Stops and aperture, ok thank you - I will have a better look at those - I did read a couple of tutorial sites on them but found it a little hard to take in - I blame having children and lots of late night watching pregnant mares on cameras to see if they will ever actually produce foals for my lack of current brain power!

I shall keep trying though - thanks for the advice... Had a look at your site - some beautiful portrait shots there!
 
Thanks a lot, thats good to hear! :)

Simply ill try and break it down.

Aperture (F stop)

This is the size of the hole that opens when you press the shutter button. The higher the number F32 for example, the smaller the hole (less light can get in, darker photos).

The Lower the number eg F2.8, the wider the hole (more light can get in, the brighter the photos).

This is one way of controlling the amount of light onto your sensor and determining the Exposure.

Just to add to the fun, it also controls the Depth Of Field (amount of photo in focus), which you were saying about blurring the background. The Lower the number, The blurrier the background, as it will only get in focus, the area you focus on. (as a general rule)

So if you photo is too dark, turn the Aperture number down making the hole bigger, letting more light in. Too bright, do the opposite. Have a practice in A mode on your camera to see this effect for yourself.

Shutter Speed

This is how long the hole (aperture) is open for.
Again, longer the hole is open brighter photo will be.

As a general rule, anything under 1/60th or 1/80th second, you will struggle to get sharp, in focus photos if handheld. (again, there are many exceptions to this)

If you go outside on a normal overcast day, set camera onto M mode, 100th second (shutter speed), and Aperture at F8 you will get something you can see on the back of the camera, and just practice to see what works, and what difference it makes.

When you put it on your computer, right click on a photo, click properties, then summary, then advanced. This will tell you all the info about the F stop, Shutter speed and iso etc. Known as EXIF data.

Hope that gives you somewhere to start.
 
First off congrats on the camera ----nice one! Dont worry too much about using P mode get used to the feel of the camera and the menus.To move on though you will need to understand the relationship between Aperture (AV) Shutter speed (TV) and ISO.If you shoot in Aperture priority-- dial turned to AV you are taking control of the DOF(depth of field) of the pic.You will select the f/no---low number will give you a shallow DOF and a high number f/8 plus will put most/everything in focus.In this mode the camera will automatically work out the best shutter speed for you.In good light you will have a decent pic--but in poor light the camera may select a shutter speed to low to avoid camera shake.Enter the ISO part of the equation.By raising the ISO the camera will be able to operate at a faster shutter speed which will eliminate the camera shake.
Read and re-read the camera manual---it is a wealth of info.Dont be afraid to use P if it means you get the shot and experiment as much as possible---but above all have fun.
Pete.
 
Back
Top