What Size Film Scan to Get

Messages
2,438
Name
Gary
Edit My Images
Yes
Only just got a film camera and don't know very much about it at all. If I was to get my film developed and scanned what size prints could I expect to get from different res scans? I keep hearing low, med and high res but can't seem to find the info I want.

Cheers
 
Hi
Well higher the scan the better the quality, and assuming the people doing the scan know what they are doing, it then just depends for best results using a decent lens and film (e.g. not 10 year old film abused with heat for that time)... a medium scan for 35mm should be ok for a print 10X8, although you can just get away for an A4 print on your home printer for a low scan (about 1800 X 1200 px) if you want to save money.
 
Only just got a film camera and don't know very much about it at all. If I was to get my film developed and scanned what size prints could I expect to get from different res scans? I keep hearing low, med and high res but can't seem to find the info I want.

Cheers

Keep in mind that small, medium, and large scan sizes aren't standardised; you will need to determine sizing on a lab-by-lab basis.

Whether the file is originally from a digital camera or a film scan though, it's all just megapixels ultimately unless you decide to go to the dark room. If I wanted to digitally print my 6x6cm film at 8"x8" size, I would get a scan of at least 2400x2400px to ensure I had 300dpi.
 
Cheers guys, there's a bit more to this film shooting than I thought ! I thought I was just gonna take some shots, take them to be processed, job done [emoji16]
 
Cheers guys, there's a bit more to this film shooting than I thought ! I thought I was just gonna take some shots, take them to be processed, job done
emoji16.png

Most guys here combine using a digi camera and film so choose what's more convenient at times, for me I'm a committed film user (well do have a digi camera for use a few times) ....and also lucky so far to have an Asda (photome) still working...using same equipment as many labs, you get dev, low scanned to CD, thumbnail index card, all in a folder for £3.50 and most times can do it in 25mins while you shop. If I wanted say a 12 X 8 photo would scan the neg myself (best scan I could get) and post the jpg file off to the printers.
When I get round to it, I've got quite a few shots I would like printed and going to try these people http://www.aldiphotos.co.uk/prices/ click on say glossy and 12" X 8" is 32p...when you think 10 large prints for about £5 inc postage is very reasonable.
 
Last edited:
Yeah, at the moment the film will just be used as a bit of fun. I will look in the bigger Asda near me next time I'm in there. When you say scan the neg yourself, how do you go about it that? Do you have a dedicated scanner or do you have some other way? I have read somewhere about shooting it with a macro lens, would that be right?
 
Yeah, at the moment the film will just be used as a bit of fun. I will look in the bigger Asda near me next time I'm in there. When you say scan the neg yourself, how do you go about it that? Do you have a dedicated scanner or do you have some other way? I have read somewhere about shooting it with a macro lens, would that be right?

Some digi guys do take a shot of the neg and you should get plenty of help from here or the digi side on how they do it......for me I just have an Epson flat bed scanner that scan negs (not only 35mm) also prints, some guys do have a dedicated film scanner. Whether you want to buy one would depend on how interested you are in using film i.e. pointless for a few rolls a year. But if you do get one at a VG price S\H and find it boring, you can usually get your money back on resale.
 
Quickest/cheapest self-scanning is with a web-cam type scanner; Available of e-bay from between £20 & £50; basically an slide viewer, comprising an LED lamp that shines through the neg, with a web-cam at the top looking at it, to capture a digital copy. Optically prtty poor; the qouted Mpix out-puts are often hugely inflated by iterpolation; they are often just an 800x600 web-cam, just under 1/2 an MPix, then software quarters real sensor pixels and makes a best guess at the inbetweenie values they might be from whats around them, to claim anything from maybe 2-5 or even 10Mpix scans of a 35mm full frame.
They ACTUALLY aren't all, all that bad; I us one; It delivers aprox 12Mpix via interpolation from aprox 1.4 Mpix web-cam sensor; no SD card slots or on-box preiew screen; its a pretty basic one. Is limited by the dedicated software; BUT, it was cheap, it is pretty quick, it is pretty convenient, and for web-up-load, the image quality, sized back down to around 1Mpix isn't all that bad.
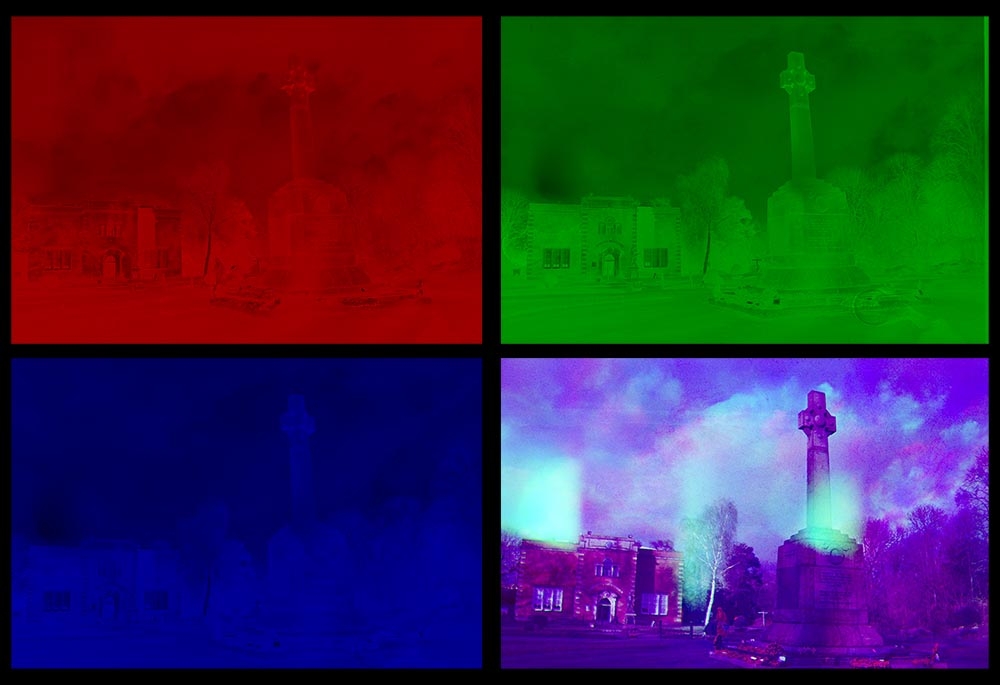
Just for example, this is a full frame scan via web-cam scan
1385120_682180365140217_1419526323_n.jpg


Moving on from that quick-and-easy solution; 'dedicated' 35mm film scanners, start to get some-what more daunting.

I still use an Acer Scan-Wit, I bought back in Y2K; it delivers, what was then a very impressive, 10Mpix, and driven by much more sophistcated software, can deliver fantastc scans; using multi-pass software. Mine is actually an SCSI interface version, that's rather faster than the more common printer-port versions... not that it is particularly 'quick'!!! Software will allow up to 20times multi-pass for 'best' quality; but a strip of four negatives will take maybe an hour to scan at just 12x over-pass! Which is the 'optimum I find best for speed/quality. Great scans, but very slow-going!

I paid £500 for that bit of kit 17 years ago; it was most ecconomical way to HQ digital images, for a decade! Now? You can pick such 'old' scanners up of e-bay for under £50. I bought another a year or so back, for the SCSI card, neg carriers & potential 'spare parts' for £30! Such 'bargains' are to be had, and would make a web-cam-scanner look false ecconomy.. BUT.. they are a bit of a mine-field; lots of Y2K era scanners on the bay; a lot have sat in lofts, as computer upgrades have rendered them incompatble with newer systems. The Parallel/printer port offerings were always dabolically slow; and modern 64bit perating systes often wont recognise 32bt SCSI cards plugged into the mother-board, IF there's even a slot for one. AND you get it with the scanner; oft left in the old PC, folk have the scanner, but not the interface card to plug it into anything! I run my 'old' Scan-wit on a stand-alone 32bit PC in the bed-room, 'saved' for that exact reason, and running other old 32bit software. This sort of 'niggle' might make an older dedicated 35mm scanner, partcularly an SCSI one some-what more vexing to get workng, and less of a bargan, IF you have to start buyng SCSI cards or even 'retro' PC to get an image off one. BUT.. they can be run off modern software, and return very high qualty scans for the money with it... but... NOT a way to make life easy for yourself; they are still very slow, and only a rival for a 'cheap' web-scan if you can actually make one work for you without spendng more.

I cant offer a example scan from mine; dont have any HQ scans hosted aywhere, and they would have been down-sized enormousely, and compressed to web-freindly jpg colour depth, so you wouldn't see much 'advantage' for it THB.

That then takes up into the realms of more contemprary dedicated film scanners; usually 'plug and play' USB offerings. Early ones, might be picked up for as little as £100-£150, to perhaps £500-600 for newer/better brands/models. You may find cheaper brand new ones for perhaps £250-300 up, into 4-digit regions.

Slightly safer bet, as far as plug and play compatability; and probably far more qualty than you likely need; but still not particularly quick or easy.

Slight skew in that is flat-bed scanners with transparency adaptors, like the well regarded Epsoms. These are NOT dedicated film scanners; they can be pretty good, particularly with more modern multi-pass software. Oft not that cheap; prices usually compare to those of dedicated 35mm scanners, to possibly a bit more; Main advantage is that they can take larger format 120 roll film or even cut sheet, in some cases. With the larger formats, looking at a much larger area, they can acheve enormouse Mpix counts. From 35mm they are on the boarderline, and in the margins whether they may return results equal to a dedicated 35mm scaner. Again you need look out for early examples that may be printer/parallel port or SCSI interfaced, and know what you are buying if 2nd hand. As a more cversatile flat-bed scanner, extra cost may be justified by the fact that you might scan letters or prints with one, as well as altrnative formats of film; you pays your money and takes yoru chances.

Beyond these; you are looking at more pro-grade reprographics equipment like drum scanners, which, err... yeah.. fantasc but for most folk, probably irrelevent. And so....

CAMERA SCANNING!

Basic principle is to take digtal photo of the neg/transparency. Bit like the Web-Cam-Scan idea, only instead of a cheap web-cam, over the light-box, you put a proper SLR.

1374047_668185736539680_338210879_n.jpg


That example shot was camera-scanned from a TINY little minox sub-minature negative; 8x11mm, aprox 1/10th the size of even 35mm, usng a 'slide duplicator lens' mounted on the Electric-Picture-Maker.

These might be picked up as legacy lenses from film era, for a few quid, when they were sold to photography 35mm slides onto print film. I actually bought mine around 1992, for that exact purpose, to 'cheaply' make prints the family could view of all my Grandad's hoarded old slides!

Mounted drect to the camera, and holding the slid or neg, saves a lot of 'faff' trying to set up a camera on a tripod over a light-box, with a 50mm lens on reversal ring or extension tubes, and keep it 'square' and avod shaddows etc. Slap duplicator on the camera; point it at window, or as I do, a computer montor with nothing but note-pad open, click the shutter!

Issue with these is the 'crop-factor' kicking in; they were designed to reprodue a 35mm slide 1:1 on 35mm film; on a crp-sensor EPM, you get a 'crop' section of the original, not the ful frame. This can beg making a serioes of sections and tryng to combine them with a panorama-stitch in something like photo-shop after... can result in HUGE Mpix images; using 24Mpix D3200, I have done it by taking six or eight crop sections to stitch, that has resulted in 100+ Mpix full-frame images.... on a pretty hit and miss basis! Depends whether the original iage is condusive to being stitched! A-N-D the amount of processing tends to result in something slightly less faithful; but down-sized back to more moderate Mpix, still pretty useful.

556846_668185753206345_339917285_n.jpg


That is a 1:1 pixel crop from above minox image. With a neg that small, the crop-factor and the 3x zoom facility of the duplicator meant I could make a full frame camera-scan in one shot, without stitching. Enlargement created optically, in that shot you can see the actual grain in the film, whih gives you some idea of the detail a 'good' film neg may contain, that you probably will NEVER lift off even 35mmlet alone medium format, in digtal, reporduced 1:1.

Oh-Kay.. duplicator lens has some covenience over a macro lens and light box; Main advantage of either is that they can be a 'cheap' ways about HQ scans; but disadvantage is first in the 'faff' of set up; which a duplicator lens makes a little easier than a macro and light-box set-up;

BUT.. you get a digital photo of the negative; to turn that into a digtal photo, you have to get it into a photo-enditor, invert it, THEN start diddling... that may mean going back to the camera, and re-scanning, with adjusted exposure settings.

Its a job you will do in manual mode; because metering is screwed by the orignal image being inverted; orignal shot was probably exposed for 18% grey average scene; inverted, it's now 82% almost 'black', and if you shot to meter, it would try brightenig that back up to 18%, and grosely over expose... A-N-D if a colour negative, the colour balence will be screwed by the blue-filter in the film-base.

Consequently, it's a job that will likely take quite a bit of trial and error, to get a camera-scan of the neg, and find best settngs to get something that you can then turn ito a digi-image in photo-editor, first nvertig to get positive image, that's the right sort of exposure, then more twiddling the sliders to get the white balence sorted out and get rid of the blue 'base filter' in the film; more still, sorting out your curves and contrasts etc. A-N-D dependng on how even or tricky your original, you may end up doing a LOT of work, scaning at alternatve exposures to HDR merge, or composite to get the shaddow and high-light dtal that is on the film.

A-L-L G-O-O-D F-U-N!!!.... not exactly quick or easy though! With practice, you can get some fantastc results though, that you possbly coldn't with more conventional scanning methods, particularly if you want to try recover shots from film, that were a bit iffy to begin with, or take good quality 'optcal' crop enlargements, of small sections of neg; as example above; taken from a minox negative aprox 1/10th the size of a 35mm, if you want to make a dig-crop, doing it optically at capture to get as many pixels out of the orginal crop zone, you can get pretty good quality 'sectons', where taking a more conventional 'scan' by the tme you have chopped down to that crop section, it is likely getting pretty fuzzy around the edges.

It can be a cheap way to start digtisng small numbers of film frames; if you have a macro lens already, or for the few quid to buy reversal ring or extension tubes, or duplicator lens.

Worth mentioning that most duplicator lenses were made as 'standard' with a T2 telescope mount to take an adaptor to suit different cameras. Mine was sold with an OM mount to do My grandad's slides twenty five years ago; took about three minutes and £3 to swap that for a Nikon F-Mount to fit to the EPM.

After that? starts to become a LOT of faff and a lot of trial and error, which may be great fun, and in the margins, let you recover from 'bad' film shots or get better crop sections; there's a lot of involvement and a lot of oportunity in the process to do things you cant really do or do well with more conventional scanning, but far from cheap or easy.

WHICH.. all leads to a conclusion... What's important to you?

1/ IF you just want to lift full frame images off film, into the digital doman, quickly, easly and at a 'fairly' reasonable quality level... the cheap web-cam scanner is the obvouse answer, and reasonably cost/time effective ways about it.

2/ If you want to start getting high quality scans, either for further editing or reproduction; thn a dedicated 35mm scanner, is the tool for the job. Slower, more expensive, will deliver pretty good and DSLR rivaling or even bettering image quality in the scan files... but not so cheap, and can be pretty time consuming.. ad limited in the formats you might scan, esentially to 35mm, maybe, if you accept the lesser quality, 220 or 110 cartridges.

3/ Flat-bed adapter scanning; bit more expensve than dedcated 35mm options; possibly not 'quite' as good quality scans at 35mm or smaller for it; but much more viable for medium or larger format sanning; and the added versatility of scanning paper or prints.

4/ Camera scanning; with macro set up or dupicator lens.... welcome to the asylum! It is a LOT of faff, both in camera and post process. Can be 'cheap' to get started, but as a way to make 'routine' scans, its a bit of a chore, or no real advantage.

Personally; I use all three methods; I use that cheap 'web-cam-scan, to get 'acceptable' web-display scans to file. I consider them rather like 'contant strips' from the dark-room days; they aint great, but they are quick, and let me see what I got and for most share/display urposes are more tha 'good enough'.

Multi-Pass scans from the dedicated film scanner, are Oh-So-Much 'better'... they are what I look at on screen, and would use to make hard-copy from... but big chore to make them.

Camera-Scans; yup, have/do make them. NOT a routine ways about it though. Have 'batch' camera-scanned the old 110 negs, because I didn't have very many; A-N-D, from such small neg, results from either web-cam-scan or even the 35mm multi-pass, tended to be pretty dissapointing. Using camera scan let me optically enlarge at source, then get something 'better' off the film. Few Minx Sub-Mini negs, t was a 'special' again, getting a good degree of optcal enlargement at soure, the scanners couldn't achieve. Then into other 'specials', making small section crops from 35mm, or scanning to HDR or stitch merge in post, to try and recover something 'awkward' off the film, as a 'special. THAT is how I choose to exploit the three methods of scanning, having all three available to me.

BUT, I would recomend; for the 'fun'; to keep it reasonably cheap, reasonably easy and reasonably cheap; a web-cam scan, is probably the better starting point for you... see how much film you shoot; decide whether any is worth a better scan, or scanner.

Meanwhile; you still need developed negs TO scan...

I get the odd roll of colour-print film 'Develop Only' done at ASDA. Costs me about a quid a time! No prints, no scans! I can scan better at home, wth the web0can, then decide whether I want prints of anything, and if something of the ink-jet will be good enough!

I could develop the films at home; B-U-T.. I would have to but the chems, I wouldn't save any money for it, I would probably waste money chucking away chems that went off before I had another film to run throgh it, and I'd have the faff and risk of cocking it up! Commercial dev is cheap and consistant.

B&W is a more expensive process to get done commercially these days; makes more sense to home soup them; and if I batched up films, could probably do it cheaper than even Colour-Print.

When I bought that dedicated scanner back in Y2K; Digital ameras were pretty dire, or pretty expensive or often both. It was cheaper than a then expensve DSLR, and I got far higher Mpix and qualty from scans; and did for a decade. Principle then was to stick to film rather than go digtal, and home develop slid film. Sort of worked; did get much etter digtal mages than I would have from then DSLR's.. and a hard copy for the archive! You can get a few extra films from an E6 chem-kit than you may C41 CP, if you batch up; but still ot exactly cheap, and shooting to scan? may as well keep it easy, shoot C41 and leave it to ASDA!

UNLESS.. you want to get into silly processing; usng home-brew cafinol type processes for B&W or cross-processing colour, or doing things like push-pull process.... all good fun.. but somewhat masocstic.

A Dev tank can be picked up for maybe £25 brand new; you can mprovise a changing back from a couple of pillow cases and a black T-Shirt; you can use pound shop kitchen jugs for mixing, cloth pegs for drying and old pop bottles for temporary chem storage after mix; You dont have to spend huge money to Home Develop, if you dont want to; and you can do it in the kitchen sink; you dont need a dedcated dark-room, or lots and lots of gear. Just time and patience, and a decent set of instructions! Oh, maybe a washing up bowl, thermometer and hot kettle f you want to do colour or slide!

That, though is an other adventure... if you want to go on it... but is sort of where you need start, before the scanning issue.

Have F-U-N!
 
Some labs have sample images at various resolutions you can download and play with. Here are the samples from FilmDev, a service I've used with very good results after previous recommendations on the forum:

http://www.filmdev.co.uk/?page_id=730

Your favourite image editor (including free utilities like IrfanView) should be able to show you the pixel dimensions, and the size in inches or cm at a standard setting like 300 ppi. I got 'large' scans from FilmDev, but I think 'medium' would be fine for most purposes.
 
Cheers @Teflon-Mike , again very informative

Some labs have sample images at various resolutions you can download and play with. Here are the samples from FilmDev, a service I've used with very good results after previous recommendations on the forum:

http://www.filmdev.co.uk/?page_id=730

Your favourite image editor (including free utilities like IrfanView) should be able to show you the pixel dimensions, and the size in inches or cm at a standard setting like 300 ppi. I got 'large' scans from FilmDev, but I think 'medium' would be fine for most purposes.

Cheers, just what I needed.
 
Think of it in megapixels, Gary. Most "small" scans are at 1200 pixels per inch; for a 1" by 1.5" image (135, more or less) that's 1200*1800 pixels ~ 2 mp. Pretty small. Using a 300 dots per inch guide (as for most printers), you're getting 4*6" prints.

The "medium" scans vary a bit but are generally in the range 1800 - 2000 ppi. Taking the latter, you get 6 mp images, which gives you a bit more to play with in terms of cropping, levelling etc. That's my go to scan size from labs. 2000 ppi off the negative at 300 dpi on the printer (it does get confusing!) gets you roughly a 7*10" print; in reality I can comfortably get 8*10 or A4 without noticing the difference. Some folk on here have greater acuity and might well notice (anyone who claims to have observed diffraction effects, f'rinstance!).

At home I scan a decent image at 2400 ppi, and scan a placeholder of technically ok but mediocre images at 1200 ppi for speed.

For process plus small and medium scan prices, have a look at the nifty price comparator, remembering that it's only a guide and you need to check yourself (you really ought to read the rest of the Film Developing in the UK thread, though who has time for that!). If you find errors, please let me know. These days I use Filmdev for process and medium scan of C41 and the occasional B&W, and Peak for process-only E6 (though scanning E6 I have found ridiculously much harder than I ever expected!).
 
Using the highest resolution scans from Peak, I've printed 35mm around A3 size and was very pleased with the quality. Could almost certainly go a fair bit larger still.
 
I tend to ask for the highest res possible.

This shot here was developed by FilmDev. I asked for "high res uncompressed tiffs" which gave me a file at 5382x3607 pixels. IE 19.4Mpixels which is pretty much the same as my Canon 6D.:
Perch by Alistair Beavis, on Flickr
 
I tend to ask for the highest res possible.

This shot here was developed by FilmDev. I asked for "high res uncompressed tiffs" which gave me a file at 5382x3607 pixels. IE 19.4Mpixels which is pretty much the same as my Canon 6D.:
Perch by Alistair Beavis, on Flickr

Well trying to avoid a digi versus film debate, IMO you can't compare say a 35mm film scan to a high end digi camera...only because the development of scanners in your normal lab stopped many years ago so the true scan is much lower and for more pixels per sq cm is done by software...but then a digi uses software.
 
Last edited:
Well trying to avoid a digi versus film debate, IMO you can't compare say a 35mm film scan to a high end digi camera...only because the development of scanners in your normal lab stopped many years ago so the true scan is much lower and for more pixels per sq cm is done by software...but then a digi uses software.

I think the resolution from the lab reflects the actual true resolution achieved by the hardware (i.e., scanner); I would highly doubt that they are using software to give you bigger scans.
 
I think the resolution from the lab reflects the actual true resolution achieved by the hardware (i.e., scanner); I would highly doubt that they are using software to give you bigger scans.

Well I always thought the resolution (detail you can get off the neg) was fixed by the type of scanner\lens etc and that just leaves pixels/sq cm and think the normal lab's scanners don't go above a certain true dpi without software help...so with this thinking, a low scan would give the same detail from the neg as a high scan, but the difference is the low scan would look crappier if you enlarge( as less px\sq cm). How this relates to a 6D and how the digi camera works can be explained by the owner to sort out the difference between film and digi:- does it work the same as scanning film i.e. is the resolution (detail in the shot) the same for low as high setting, and high setting just improves the quality of the shot OR if using a higher setting do you get more detail in the shot (and of course better quality).
 
Last edited:
Well I always thought the resolution (detail you can get off the neg) was fixed by the type of scanner\lens etc and that just leaves pixels/sq cm and think the normal lab's scanners don't go above a certain true dpi without software help...

I think that you are confusing some of the discussions on this forum regarding the home scanners, which can use some digital interpolation to go beyond constraints of the scanner, lens, etc.. What evidence do you have though that labs are using software to go beyond the actual optical resolution of their scanners?
 
What evidence do you have though that labs are using software to go beyond the actual optical resolution of their scanners?

None.... just going by memory on a few sites who reviewed the Fuji Frontier 3000 (quite a few labs have this model) and at the back of mind it didn't scan at a true 5382x3607 pixels..it would be nice if one of the lab guys, who pop in here now and again, would sort this out. (y)
Asda use a Fuji 3000 and do a low scan (1800 X 1200) and I can get close with the V700 for detail in the neg, and surpass it for quality by scanning at 4800 dpi (or even 9600) which gives about 3000 X 2050px img plus.....but the detail in the shot is the same before cropping (the more you enlarge the more pixels\sq cm you need)
 
Last edited:
Ha, cheers for all the help guys but you've well and truly lost me now :)

Well you can join in:- do you think a 35mm colour neg can match an excellent 20mp digi camera for enlarging or cropping (IQ debatable as many digi shots don't look natural to me) even though a 35mm neg can have up to 20mp of detail in it....if you think a 35mm can't match the digi then you can guess why not o_O
 
Well you can join in:- do you think a 35mm colour neg can match an excellent 20mp digi camera for enlarging or cropping (IQ debatable as many digi shots don't look natural to me) even though a 35mm neg can have up to 20mp of detail in it....if you think a 35mm can't match the digi then you can guess why not o_O

Now I'm even lost... who was debating 35mm versus digital? :thinking:
 
Now I'm even lost... who was debating 35mm versus digital? :thinking:

Well it all started with Alistair mentioning his 6D and how the film scan (assuming it was 35mm) was equal to it at high setting. ;)
But just refreshing my memory on the net and it's the optical (or equivalent system) resolution that is the basis of a scanner and claims by manufacturers for high resolution (over optical) are deceiving.
 
Last edited:
Now I'm even lost... who was debating 35mm versus digital? :thinking:

RJ, really not a good idea to try and follow Brian's 'train of thought', that way leads to madness. :D
 
RJ, really not a good idea to try and follow Brian's 'train of thought', that way leads to madness. :D

:D .......well Andy like most things:- you can accept the way it is or\and question WHY..and relates to scanning, film emulsions, 35mm, MF, LF and so on and can even throw in digi cameras o_O :eek:
 
:D .......well Andy like most things:- you can accept the way it is or\and question WHY..and relates to scanning, film emulsions, 35mm, MF, LF and so on and can even throw in digi cameras o_O :eek:

Or the kitchen sink. :)
 
When Lost unable to see the wood for the trees, my other would ignore the big issue.. being lost... and start studying the leaves.. so in a similar vein......
18545-1499896501-ca210a9ae03599599ac87b74ae4feb08.jpg


A montage taken from my Trichrome experiment last year; Trichrome is an antique process of making colour photos; As shown here, I shot three images of the same scene; one each through a rd, green and blue filter on monochrome (B&W) film ... kinked the film during dev.... and then over-layed each B&W separation into a separate colour layer in Photo-Shop to make a colour picture..... smart stuff hugh?

OK... this technique dates back to the 1800's, and was how the first colour photo's were produced... three separate photo's shot in sequence, when combined, you do get some 'fringing' effects where clouds and things have moved between the separate exposures, which was actually the 'effect' I wanted to reveal. It's also not a hugely faithful colour reproduction of the scene; but still, more of the 'antique effect'. HOWEVER.... it's the principle that's at issue here.

In the latter half of the 1800's; this was the only real way to make a colour photo; and whilst hard enough to 'capture' the three RGB seperations, even harder to re-combine them into a display picture. Making a print was nie on impossible, so they were usually projected, each layer projeced onto the same screen from a separate projector lens, filtered as the taking lens. This lead to some making 'colour' cameras that used four lenses mounted on a 10x8 plate camera, with coupled shutters, to take four pictures, on the same plate, much like the example pane. Other 'contraptions' used mirrors behind a single taking lens to reflect the image onto three separate plates individually filtered.... however... point is that the process was difficult, and by the inception of celluloid and Kodak's first Box Brownie in the 1890's, popular photography had pretty much side-lined 'colour'. Iterest in colour didn't pick up again, really until around the 1920's, spurred on by the movie industry, and the pioneering of the 'subtractve' colour method. Tri-Chrome is known as 'addative' colour.

In the subtractve colour method; three layers of emulsion were layered up on a pice of celluloid, with, instead of Red, Green and Blue filters 'blocking' all other colours of light, Cyan, Yellow and Majenta, filters between the layers, that passed all but thier own colour... NOW in one shot, the 'waste' light from each filter pasting through to make another exposure beneath; you could get the three colour separations, in one shot; all three exposures 'co-incident' on the film, accurately 'stacked' at creation..... brilliant innovation... and that is how colour photo's were made for the best part of 80 years on-wards.

Enter digital! Digtal has a small 'problem' just like Black and white film; the sensors can only record 'light' and 'dark', they don't 'see' colour. So we are back to the same 'problem' that to make a color photo, we have to make three image 'seperations' for Red/Green/Blue... Ah! we have a chunk of solid selenium or 'whatever' reacting to the light falling on it.... ALL the light falling on it! You cant put three sensors one behind the other, like they did with film in the 'subtractive' method, and filter each to record the light that is rejected by the filter on the top level... its DIGITAL which is 'on' or 'off' all or nothing.... So you HAVE to go back to the addative or Trichrome method, and make three separate colour separations again.

But HOW can you do that, if you wat to expose all three layers sententiously? This was a 'niggle' of the digtal-photo pioneers; and solutins were many; like tri-chrome using three seperate filtered senor arrays each revving the same image projected through a prism mechanism from one lens, was one solution; three lens cameras another, etc etc etc. All, like the Trichrome process with silver halide, in thier own way 'awkward'.

However, are slighty more obscure 'addative' colour procss had been pioneered in the 1890's called Dufaycolor; A single bit of B&W film was exposed through a single lens; BUT the clever bit was that on top of the film was a 'woven' filter.. now with red/green/blue fibres eah filtering their own colour, and holes passing all, what you got was the the three colour seperations... oooh! PIXILATED! you got a grid, of dots, one red filtered, one green filtered, one blue filtered, and the odd one betwee them unfiltered.... a mosaic... and with the dots REALLY Close together, optical illusion of a single full colour photo.

THIS is the basis of modern Digital-Colour photography

shapes7.jpg


That sort of honey-comb patern could be a Dufaolour mezoscreen to flter the image on the flm... OR could be the mezosceen used to filter a Digital sensor array..... IF it's the screen over a digital sensor array... pay heed, you DO NOT have one receptor on the cameras sensor per image pixel, even less do you have a receptor measuring co-incidental Red/Green/Blue values....

So, absolutely, from the top, first principles, in digtal, you do NOT have a 'sensor resolution' that is the same equal or even NEAR that of the consequent digital image pixel resolution.

The pixel grid, is painted in by numbers by the widget, that polls the different sensors for their light/dark out-put value; whether they are red/green/blue filtered.

shapes8.jpg


Widget, puts a 'virtual' grid over the hexagon array, each grid square 'covered' by at least three sensor receptors, one red, green and blue; it THEN starts using mathematical algorithms to make a best guess of the three RGB values it needs to define the colour and brightness of that 'virtual' image pixel.

Note that the pixel grid shown, manages to get a 'bit' of each colored sensor into it, but rarely equally; some squares are mostly red or mostly green or mostly blue, and a few are almost half two main colours and the little bit that isn't is coverng two of the third colour receptors..... The Widget then HAS to poll a number of adjacent receptors, and 'infer' from them what RGB values to sick in any particular 'pixel box'... even before quartering mage pixels to refine resolution, and use more maths to best guess values for them, by 'interpolation' a certain degree of mathematical guess work or 'interpolation' is happening to transcribe receptor out-put values to image pixel 'data'.

Now, we tend, looking at the specs of modern digital cameras to look at the 'maximum' pixel output those cameras might acheve, and assume that that is their 'sensor' resolution, and that cameras with higher Mpix outputs must have more sensor receptors to make them... and they probably do! B-U-T

My first Digi-Compact boasted a 1.3pix 'maximum' pixel output. It's lowest out-put though was just 600x800,px, barely 0.5pix... it probably HAD close to 1.3million sensor receptors, BUT, at its lowest 'native' resolution, it needed the out-put from three receptors, to get the RGB values for one mage pixel... it got the 'maximum' pixel output then by 'interpolation', mathematical guess work, to quarter its virtual grid, and define smaller image pixels that were 'almost' true sensor out-put for B&W, but 'coloured in' from data inferred from surrounding senors.

Oh-KAY..... scanning!

Making a conventional halide image at source; and subsequently scanning that 'fixed' static mage; you don't have to try and record ALL the scene in a single instant, and use multiple sensor receptors to try and cover the whole scene all at once... you can take your time, and use a far smaller umber of receptors that 'travel' accross the image rendition, AND in so doing, you can sample the same portion of scene three times with seperate red/green/blue receptors for a more accurate colour value, and less interpolation... but still, the widget is filling in a 'virtal' pixel grid with data, it measures as the receptor head travels across the scene and just how small a sample area may be is limited by how small a portion of the scene a receptor can see; and higher pixel cont pixel grids may be compiled from larger physical receptors by interpolation of the difference between values for over-lapping sample spots.

Hence the topic can get bogged down in a lot of technical detail very quickly, depending on the digitization scheme employed...

What MAY be interesting to note, is that scanning film, allowed the digitization process to be don much more slowly, with much cruder electronics, and that is one of the reasons that scanned 35mm film was able to achieve the sort of Mpix outputs direct digital cameras didn't achieve for almost a decade, even from more cheaply contrived 'consumer' scanners, and may still be able to deliver a more faithful and oft deeper colour resolution, from 'over-sampling', sampling the same scene spot three times for each colour, rather than making best guess from surroundng cells.

Bottom line, IS that there is no real 'optical' resolution of a scanner, or even direct digital camera, translation of real scene to virtual reproduction, has an 'effectve' resolution in the out-put, from the number of display pixels eventually produced; how much direct sampling goes into that 'optically', and how much mathmatical guesswork to turn those samples into pixel data, is very very much a matter of semantics and mathematics!

Ad the 'comparison' between direct digital and scanned film, very much gets lost in the woods for the trees of those different sampling schemes.... where a bit like putting a pixel grid over a honey comb, things 'don't' quite line up nice and simply!
 
Well that simplifies it Mike ;)

Well it all started with Alistair mentioning his 6D and how the film scan (assuming it was 35mm) was equal to it at high setting.
Sorry.
For those coming to film from digital, it helps to know what the equivalent resolution means.
The resolution is determined by the scanner. I personally want the highest resolution the scanner can offer for a couple of reasons:
1) I don't have a scanner good enough to do it myself at home, so I can't re-scan it at a later date.
2) I'm not going to be printing all the images, so I want good quality digital files for my archive (yes, I keep all my negatives too)
3) If I want to crop the file or use it for anything else, I want it in as high quality as possible. You can't add pixels and details if they weren't there in the first place.


This shot is from the Pentax Spotmatic again, but was my first test roll so I got it done quickly at Snappy Snaps and the scans were medium quality I think (at the time you paid more for higher quality scans) and the result is a file 1940 x 1287 eg 2.51Mpixel.

Flowers on film by Alistair Beavis, on Flickr

It looks file on screen and would probably print fine as a 6x4, but I wouldn't want to go much bigger.
 
I'll risk starting another long digression, but my post will be short and sharp. "Sharp" as in resolution. A perfect scanner that could even disobey the laws of physics can only get out detail from the film that was recorded there in the first place. Ignoring camera shake and subject movement, the weakest link in the chain to recording detail on film is the film itself - not the lens used. So, if you want to know how big you can go without things getting fuzzy, it's going to depend on the film. The slower the better; and black and white better than colour.

In practice, a lot more depends on you than the equipment - how much under "contact print quality" you'll accept before thinking it looks inferior.
 
so I got it done quickly at Snappy Snaps and the scans were medium quality I think (at the time you paid more for higher quality scans) and the result is a file 1940 x 1287 eg 2.51Mpixel.

H'mm IMO 1940 X 1287 is a low scan?
 
Well that simplifies it Mike ;)


Sorry.
For those coming to film from digital, it helps to know what the equivalent resolution means.
The resolution is determined by the scanner. I personally want the highest resolution the scanner can offer for a couple of reasons:
1) I don't have a scanner good enough to do it myself at home, so I can't re-scan it at a later date.
2) I'm not going to be printing all the images, so I want good quality digital files for my archive (yes, I keep all my negatives too)
3) If I want to crop the file or use it for anything else, I want it in as high quality as possible. You can't add pixels and details if they weren't there in the first place.


This shot is from the Pentax Spotmatic again, but was my first test roll so I got it done quickly at Snappy Snaps and the scans were medium quality I think (at the time you paid more for higher quality scans) and the result is a file 1940 x 1287 eg 2.51Mpixel.

Flowers on film by Alistair Beavis, on Flickr

It looks file on screen and would probably print fine as a 6x4, but I wouldn't want to go much bigger.

As mentioned you can just about get away with a low scan print A4 if you have a decent home printer...mind you it depends on the subject as a portrait face or sky shots might not be pleasing.
I had a faulty lens and wanted to send a print A4 to the repairer so I printed a low scan shot Asda 1800 X 1200...I then used a scanner to scan the print to show here.

Original Asda 1800 X 1200 jpg shot showing the faulty lens blurry bits L and R
LmcGrxA.jpg


The scanned photo A4 at 1000 X 727 (probably reduced the size for Photobucket in the past to post here)...in Photoshop the colours are OK but it's acquired a red cast? And interestingly the scanned photo seems to improve the blurry bits
4lfrj1C.jpg
 
Last edited:
Well that was a couple of years ago, but yes, by comparison to the high res scans I've had from FilmDev recently, it is rather low.

In the nifty price comparison, 1200 ppi is a small scan, 1800+ is a medium scan. I found the large scans were too variable to compare sensibly, so if you want them you generally have to ask. Note, Filmdev do a large and a very large scan, the latter only for 135 IIRC.
 
In the nifty price comparison, 1200 ppi is a small scan, 1800+ is a medium scan. I found the large scans were too variable to compare sensibly, so if you want them you generally have to ask. Note, Filmdev do a large and a very large scan, the latter only for 135 IIRC.

H'mm who is daft enough to send their film off for 1200 ppi (if the longer length for 35mm) :rolleyes:
 
H'mm who is daft enough to send their film off for 1200 ppi (if the longer length for 35mm) :rolleyes:

It's the same price as dev only, Brian, and it can act as a contact strip telling you what's worth a better scan... What the meaning of your parenthesis is, I don't know!
 
It's the same price as dev only, Brian, and it can act as a contact strip telling you what's worth a better scan... What the meaning of your parenthesis is, I don't know!

Well that's V good if thrown in with dev...re parenthesis:- if for rectangular images, it's handy to quote\know the pixels for the longest side thus Asda's scan is 1800 X 1200px.
Anyway Chris you have ruined my post above as if you say 1800 and above is medium scan that means Asda, Tesco etc over the years have producing medium scans (when I always considered them low), so if you are correct, it's not surprising you are going to get a reasonable print from A4 ;)

I said 1800 pixels per inch, Brian, is a minimum for 135 medium scan (ie 2700*1800 pixels approximately). Asda etc have been giving 1200 pixels per inch (1800*1200 pixels approximately); that's a small scan.

Don't think I can say it any clearer than that.
 
Double post....
 
I said 1800 pixels per inch, Brian, is a minimum for 135 medium scan (ie 2700*1800 pixels approximately). Asda etc have been giving 1200 pixels per inch (1800*1200 pixels approximately); that's a small scan.

Don't think I can say it any clearer than that.

Oh well.. when I select a jpg in windows file explorer it gives dimensions as pixels, when I use Photoshop it uses pixels. And most people have a size of print in mind for say 35mm camera, then all they need to know is low, medium and high scan in dimensions in pixels which relates to what size prints respectively. Of course it's only a guide assuming a decent lens and film is used, but then if you want a 20 X 16 print from a 35mm Kodak brownie h'mm what ever turns you on :D
 
Back
Top