Why is this effect/blurry happening in my photos?

Messages
16
Name
Katye
Edit My Images
Yes
I have been noticing a blurry effect in trees/vegetation mostly in some of my photos. Would anyone know what the issue is? I use the camera Lumix gx80/85 with the kit lenses 12-32mm.

Regarding the shutter speed, I always made sure to take with a fast one. In all these photos it was with at least 600s.

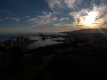
Link: imgur.com/a/2VfXzvw
 
Hi @sthwild,

All photos had ISO200, except for the first one, which was ISO400.
I just went through the camera settings and found that the noise reduction was set to 0. I have moved to -5 now.
Do you think this could have been the issue?
 
Maybe a combination of compression artifacts (what are your jpeg settings on camera, in regard to is the maximum file size?)

Plus of you are talking about the trees in the mid distance, maybe some heathaze effect reducing how sharp they might have been & not forgetting that (I think it was pic #2) you are focused on the nearest tree so the ones in the BG are actually OOF and the look would be exacerbated by the file settings I ask about above!
 
Hi @Box Brownie,

I am using the max capabilities, size is L (16MP), and image quality is maximum as well, but I am shooting in JPEG. In average, the a photo file is around 7/8 MB. What else I can do? Could it be an issue in the lens itself?
 
Cannot see fuller exif data
Can you tell us the:-
Shutter speed
Aperture
ISO

Also are these crops or the full frame?
 
Sure @Box Brownie

1) F/8 1/320s ISO400 32mm
2) F/9 1/640s ISO200 12mm
3) F/8 1/250s ISO200 22mm
4) F/7.1 1/400s ISO200 12mm

These are the photos straight from the camera, no editing or cops.
 
I haven't looked at your files (I'll do so now) but f7 or f8 and smaller is getting into extremes on MTF and into diffraction territory.

I use my f3.5-5.6 lenses wide open and only stop down when making a conscious decision to do so. When using my f1.8 primes I usually stay between f1.8 and f5 again unless making a conscious decision to do otherwise.
 
Hi @woof woof, thank you for taking the time to help me.

What is MTF? Should I have taken with a narrower f-stop?

Please let me know what you think the issue is.
 
Sorry, MFT is Micro Four Thirds and is the sort of camera you're using. I have a GX80 too :D

If you're not sure what diffraction is I'm sure you can Google your way to a clearer explanation than I can give but basically it can cause a loss of contrast and limits the resolution you can achieve. It could I suppose be at least partly the issue you're seeing.

Happy Googling on that, I'm sure you'll get it :D

Diffraction is caused by the size of the aperture and as larger f numbers mean a smaller aperture the bigger the number the more likely that diffraction could be an issue.

The next time you're sat in front of a nice scene it may be worth taking a series of identical pictures of the same scene changing nothing but the aperture, starting at the largest aperture (the smallest number) and stopping at the smallest aperture (the biggest number.) If you then look at the results on your pc you may see the effects the depth of field and diffraction have.
 
Hi @woof woof, thank you for the suggestions, I will do it.

Have you ever came across something similar in your camera? Do you think that it is only diffraction then?
I have set the NR to -5, hopefully it will help. Do you also think that shooting with f15-22 would be better in this scenario?

Sorry for all the questions.
IMO forget setting NR from anything but default of zero(if the default is zero?)

As for f15-22 it will far worse....as @woofwoof do read up about "diffraction" ;)

Tell us why you picked the aperture(s) that you did..what was your aim in using those settings?
 
Hi @woof woof, thank you for the suggestions, I will do it.

Have you ever came across something similar in your camera? Do you think that it is only diffraction then?
I have set the NR to -5, hopefully it will help. Do you also think that shooting with f15-22 would be better in this scenario?

Sorry for all the questions.

f15-22 is an even smaller aperture and will lead you further into diffraction.

Just to be clear f3.5 is a bigger aperture than f8.
f8 is a smaller aperture than f3.5.

Diffraction is more likely to be an issue at smaller apertures, bigger numbers. If diffraction is an issue for you or not will possibly depend upon the scene and how closely you look at the picture. You may also make a picture affected by diffraction look better by adding contrast but of course you can not cure it and any resolution lost by diffraction is just gone.

I'd recommend that you shoot a series of pictures of the same scene and focusing on the same point changing nothing but the aperture. Start at the largest aperture (the smallest number, like f3.5) and keep changing the aperture until you get to the smallest (the largest number) which may be f16 or f22 or something like that depending on what lens you have. You should then see the effect this has on your pictures as the depth of field changes and as diffraction becomes an issue.

I'd also recommend that you think about shooting raw instead of jpeg and process each picture for best effect. If you haven't done this it may seem daunting but it isn't really and once you get into it you'll probably get it in no time at all.
 
@Box Brownie and @woof woof,

I thought that a smaller aperture (f4) would mean more blur, and the background would not be crisp sharp that way. For that reason I always tried to find a common ground. So then the issue with my photos is due to the aperture? I have had other cameras in the past and none of them generated such effect.

Have you both never come across something like this before?
 
The only way to discern whether there is a possibility of an issue with the camera and/or the lens is to do what @woof woof says and take a series of photographs under 'controlled' conditions.

But as s first step I can only suggest you read up about Depth of Field (DoF) and how it works & how to make use of it in your photography.

Here is one guide for you:-
https://photographylife.com/what-is-depth-of-field

And an online DoF Calculator:-
https://www.dofmaster.com/dofjs.html

Handling DoF is a fundamental concept you need to appreciate and use to best effect.

HTH :)
 
@Box Brownie and @woof woof,

I thought that a smaller aperture (f4) would mean more blur, and the background would not be crisp sharp that way. For that reason I always tried to find a common ground. So then the issue with my photos is due to the aperture? I have had other cameras in the past and none of them generated such effect.

Have you both never come across something like this before?

I'm uncomfortable commenting too much on other peoples pictures :D especially jpegs on line so it's difficult for me to comment on your pictures. I gave up on jpegs a long time ago and now only use them for taking test shots when I'm cleaning my sensor and other than that I don't set my cameras to save jpegs, only raws. For everything other than test shots I shoot raw and process for best effect.

As well as shooting a series of shots at different apertures I'd also suggest shooting the exact same picture as both a raw and a jpeg and comparing the processed raw to the jpeg and seeing if you think it's worth shooting raw. Shooting and processing raws may be a bit intimidating but it isn't really difficult and it could be a way of getting more from your kit. The theory is that your pc and photo processing software is probably more powerful and better than the cameras jpeg system and by shooting raw and processing each picture for best effect you'll end up with technically better pictures. That's the theory.

Another thing to remember is that if you look at a magnified picture you're looking at a really BIG picture and any problems you see when looking at a magnified view on screen might be much less of a problem in a whole picture viewed normally or even quite closely.

I hope all this helps :D
 
Last edited:
Thank you both.

For you @woof woof, one of the things that kept me away from RAW is that the file is much larger, and normally the photo is not "ready", meaning it looks too bright or too dark, and would need editing later. In case I take some nice photos and just want to show to my friends, the RAW files does not really help me that much.

How do you deal with this? Do you edit each one individually? I have taken JPEG and RAW photos, but the RAW always seems to need so much work in terms of editing, and I would spend way too much doing so.

Would appreciate some info about it.

Just for comparison:

Here is a shot in JPEG (the details in the trees again, sadly) , and RAW (print, as I cannot attach) (dark).
 

Attachments

  • P1050682.JPG
    P1050682.JPG
    96.5 KB · Views: 37
  • raw.jpg
    raw.jpg
    59.6 KB · Views: 38
Hi Katye

Something to think about?

A camera that allows you to record RAW files is giving you the opportunity to edit the file in a more creative manner.

The cameras 'incamera' JPEG engine is like you driving an automatic car rather than a manual one ~ this is of course a very loose analogy but hopefully it does get the idea across that you are giving up control to the whims of the designer of the camera!

All jpegs, whether the incamera produced one or the one that you create from the RAW file are lossy. That means a lot of data is thrown away thus reducing how much you van do with the file(s)

In the past I used to shoot RAW & jpeg because I uploaded for sharing more pictures but the RAW allowed me the time to produce a more pleasing image when I wished to do so.

IMO a good starting place to edit your RAW files is if Panasonic included such an Editing Program, because typically these programs designed by the manufacturer have the same presets that the camera has......................the advantage to you is that you still have the original RAW file to go back to if you don't like one preset but prefer another.

HTH on your road of discovery :)

PS though a bit misleading is the RAW can be considered to be a little like the negative from the days of film and the serious amateur back then (and most professionals) saw the neg as the starting point of creating the final print!

PPS I found ref to this software version as applicable to the GX80 and GX85
https://av.jpn.support.panasonic.com/support/global/cs/soft/download/d_pfs99pe.html
But not clear to me if it is just for handling video files or stills as well??? I have yet to find a downloadable manual for the software :(
 
Last edited:
I had a look at the jpg(first one) in DxO. It seems to me that the dark part of the trees look blurry as there isnt enough contrast for your image processor . I can clean it up using microcontrast controls, but a raw file should be able to produce better results, as all the information will still be there.
 
Just a quick thought - Some cameras allow you to save a raw+jpeg. I can't remember if the GX80 does but if it does it'll be in the menu and would offer a good chance to compare a camera made jpeg to a raw processed on the pc. If not just take two pictures, raw and jpeg, as quickly as possible so the light doesn't change.

In raw processors there's usually an option to save your settings so I've saved some basic settings as a starting point. I import my raw files and apply my basic settings to every picture and then I open every picture in turn and apply any additional changes I think are necessary. Once the basic setting have been applied the amount of time I spend on each individual picture can vary from less than a minute to several minutes if there's more to do and fiddle with. I then save the pictures as jpegs or very occasionally as tiff files. Sometimes some final tweaking needs to be done to the jpeg as the tools in the jpeg processor are slightly different to the raw processor tools.

All this probably sounds like a right faff on but once you get into it it's all relatively simple really and it's a good way to make sure that you get as much out of your camera as possible and make the end result picture as good as possible.

If you decide to do this I hope you see an improvement and you can always ask more questions if you get stuck :D
 
Hi @Box Brownie, thank you for all the suggestion. I will try that program. Is it something that would run over my RAW files on my computer and alter their image to mirror the JPEGs? Thank you! :)

Hi @Pete B, why would it be then? Is it a camera setting or simply the photo condition? I would rather not have this weird effect at all. I found my photos to be pretty dark in the camera. Therefore in the Highlight Shadow setting, I went for Brighten shadows, which helped a little, but not that much. Then with the i.Dynamic set to high, my photos got more clearer, with better balance. Could this be the issue then?

Hi @woof woof, indeed, the GX80 has RAW + JPEG, but still for some reason the RAW is way darker then the JPEG. What program do you use to process your RAW? So just to make sure I understood correctly, the majority of photographers take their photos RAW, then export to their computers and run a RAW processor to apply the changes they want to all the photos? Thank you!

I have also made some tests and took this photo:

Full resolution here: https://ibb.co/6P07LW1, just noticed the quality below is not the best.

P1100178.JPG

I have moved the NR to -3 as some people suggested, focused to the background and took it with f3.5 to avoid diffraction. ISO400, 1/3200s.
However, on the left part of the wall I can still see a LOT of noise and even some diffraction there. Why is that the case? I took a RAW as well, but it is much darker, and I am not sure how to edit it.

Thank you again.
 
Last edited:
The point is the photo should look right in jpg. Introducing the issue of RAW is just muddying the water. The camera should not need to shoout RAW to overcome a quality issue in jpeg.

It's a small sensor so shoot at low ISO 400 is too high for detail in those trees. Also shoot at a larger apperture like f3.5/4 and a slower shutter speed.

The settings you are using are more suited to a larger sensor. Use the benefits of the small sensor.

Don's start faffing around with RAW in order to correct an issue regarding the settings on the camera.
 
This is almost certainly a processing issue. It looks most like color noise reduction to me; primarily in green/yellows.

What mode are you using? Make sure it's not the creative control mode (art filters). Change the photo style mode back to standard... it's what Panasonic thinks is generally the best for most images. How are you getting the images off of the camera? Try direct download to a folder instead of using an image editing program like LR; which may apply default edits on top (if you're not already).
 
Hi @sk66, thank you for your input.

I have always used the standard mode, with saturation set to -1. The only thing I changed now was the noise reduction to -3. I export the photos directly from my SD card to my computer, and I also use the maximum size, and resolution.

I am not sure anymore what the issue could be.

Hi @shapeshifter, I totally agree. I would not mind using RAW if I want to really put the effort, but it wouldn't be on a daily basis. When I got this camera I expected to have at least some OK photos whenever I felt the need. I have been trough the settings already, and I do not know anymore what to do. The lowest I can get in ISO is 200, and f3.5, without zooming, with my current kit lens. I would need to carry an tripod with me just to take some normal photos?

Here is one more example of the issue:

P1010282.JPG

I do not think that this issue would keep repeating itself, if it was simply the photos condition, right?
 
Last edited:
I have just put a little bit of sharpen on that pic and the detail comes out OK on the trees. You are adding some sharpening to your pics arn't you?P1010282ss.jpg
 
The point is the photo should look right in jpg. Introducing the issue of RAW is just muddying the water. The camera should not need to shoout RAW to overcome a quality issue in jpeg.

It's a small sensor so shoot at low ISO 400 is too high for detail in those trees. Also shoot at a larger apperture like f3.5/4 and a slower shutter speed.

The settings you are using are more suited to a larger sensor. Use the benefits of the small sensor.

Don's start faffing around with RAW in order to correct an issue regarding the settings on the camera.

No it isn't. Would you say the same to someone with more experience and a top end DSLR or mirrorless? I guess you wouldn't so why mislead a relative newbe with dubious advice?

Panasonic jpegs have rarely been viewed as the best but even so with any jpegs you're relying on someone elses one size fits all decisions. At least with raw you get to process the image for best effect and taste.

The only reasons I can see for shooting jpegs are for time saving and for applying in camera filters and effects.
 
Last edited:
Hi @sk66, thank you for your input.

I have always used the standard mode, with saturation set to -1. The only thing I changed now was the noise reduction to -3. I export the photos directly from my SD card to my computer, and I also use the maximum size, and resolution.

I am not sure anymore what the issue could be.

Hi @shapeshifter, I totally agree. I would not mind using RAW if I want to really put the effort, but it wouldn't be on a daily basis. When I got this camera I expected to have at least some OK photos whenever I felt the need. I have been trough the settings already, and I do not know anymore what to do. The lowest I can get in ISO is 200, and f3.5, without zooming, with my current kit lens. I would need to carry an tripod with me just to take some normal photos?

Here is one more example of the issue:

View attachment 274902

I do not think that this issue would keep repeating itself, if it was simply the photos condition, right?

To get the best out of these camera you really need to take more control and IMO that includes shooting raw and also avoiding very small apertures (the larger f numbers.)

If you want to shoot jpegs and not bother with raw, and that's a perfectly valid approach, I'd suggest the following...

- Try to stay away from small apertures unless making a deliberate decision to use them and when doing so accept that diffraction could be an issue and could cause a loss of resolution.

- Take a lot of pictures of the same scene but with different in camera settings, stepping through them methodically and changing one thing at a time, and see what works best for you.

- Lastly. When you look at pictures at large magnification on screen you may see problems that will not be visible in a whole picture viewed normally so try and view pictures at the size you want to use them. If you want a 3m wide picture then view it as a 3m wide picture but if you want a picture to fill your tablet screen then view it as just that, a picture filling the screen.

I hope you can find a way forward and be happier with your pictures. The GX80 is quite a capable little camera and should get you some lovely pictures. Good luck with it all :D
 
Last edited:
No it isn't. Would you say the same to someone with more experience and a top end DSLR or mirrorless? I guess you wouldn't so why mislead a relative newbe with dubious advice?

Panasonic jpegs have rarely been viewed as the best but even so with any jpegs you're relying on someone elses one size fits all decisions. At least with raw you get to process the image for best effect and taste.

The only reasons I can see for shooting jpegs are for time saving and for applying in camera filters and effects.
Get the jpeg right. Raw is not a tool for correcting errors made in jpeg. That is the point.

All he needs to do is sharpen the photo as I have shown.
 
Hi @sthwild,

All photos had ISO200, except for the first one, which was ISO400.
I just went through the camera settings and found that the noise reduction was set to 0. I have moved to -5 now.
Do you think this could have been the issue?

I use an MFT camera, it's small, light and pocketable, so it's my go to walkabout camera. I don't really have a problem with diffraction, I try to use apertures of no more than f8. The depth of field on an MFT camera is quite deep anyway so there's no need to. Most of the time, if possible, I leave it on f6.3 which I have found is the ideal aperture for MTF system.

Looking at your photos I'd say it's the noise reduction set too high, as you've discovered. On the earlier MTF cameras, it was even more of a problem having fewer pixels to play with.

As has been suggested, take several shots of one scene and play around with the settings. I'd use a tripod and make notes as you go. Once you find your ideal settings stick with them.
 
Last edited:
Thanks everyone. So you all believe it is not an issue with the camera or lens itself?
 
Thanks everyone. So you all believe it is not an issue with the camera or lens itself?

I don't, just the in camera jpg settings need a tweak. Just have a play with them and see.

As we're stuck at home just now, get out in the garden and have a go.
 
Hi @shapeshifter, I do sharpen my images, these I am sharing are SOOC. However, even with sharpening, the blur effect is still there, that is the main reason why I came here for help. I have tried tweak all the settings in the camera, but haven't changed much since.

Please if anyone could take a look again at this photo (https://ibb.co/6P07LW1), and tell me why it is so grainy? As you can see the details in the wall, are sometimes what I see in the trees as well. I did not use any zoom for this photo and here is the info: f3.5 to avoid diffraction. ISO400, 1/3200s. But I am still not happy with it.
 
Last edited:
I don't see anything wrong with the quality of that photo at all for the camera you are using.

You have the settings wrong for that type of photo which has reduce quality slightly. 1/3200 sec was not required it would have given slightly better quality to go to 200 ISO not 400 ISO at f5 ish at 1250 sec.

Also with a zoom lens both extreems reduce qulity 12mm and 32mm. So optimum qulity is mid range of the zoom at about f5/f5.6.
P1100178crop s.jpgHaving said that as I said there is nothing wrong with that photo. Just sharpen your photos. When I have sharpened them the detail is there.

Your not using a Nikon D850 you know.

The wall is sharpened AND cropped. it looks OK to me.

My advice would be go and take photos, don't get into all this pixel peeping (it's not photography it's science) it's never ending you send yourself mad.

What is the resolution of the screen that the photo is being viewed on?
What ppi was the photo printed out at? did you use the manufacturers ink?
Oh you need RAW!
What software did you process the RAW photo with? That's not as good as....blah, blah
it just goes on and on.

Take photos. See the light.

P.S you might want to have a look at the exposure traingle. So as to know how to keep your ISO low.
 
My advice would be go and take photos, don't get into all this pixel peeping (it's not photography it's science) it's never ending you send yourself mad.

:plus1:
 
Thanks everyone. So you all believe it is not an issue with the camera or lens itself?
I'm not convinced, it seems to be predominant in greens/yellows/trees; but there are a lot of variables like air quality/distance/wind/etc.

I would do some test with trees at shorter distances with a SS high enough to freeze any motion (camera shake/wind) and enough light to allow using a lowish ISO.
 
You shouldn't need to sharpen jpegs...they are already sharpened (unless you turn that setting down/off).
You do with a small sensor and 16mp . That camera is renowned for needing jpegs sharpening see the reviews. And it's not got an AA filter!

I always have to sharpen jpegs with a Nikon D7100 24mp D5300 24mp on crop sensor.

On my Nikon D3's 12mp on full frame I hardly had to sharpen the pics. But my Nikon D850 needs sharpening.

It's the same with all my cameras the denser pixels require more sharpening.

All cameras are at default settings re: sharpening.
 
Back
Top