- Messages
- 9,183
- Edit My Images
- Yes
Hi Nick sorry about yesterday was worn out busy day at work
I work 4 on4 off which is great for the time off but 12 hours shifts can be hard going!
Anyway I hadnt thought about the effective aperture, to be honest I don't go into the technical side of photography that much or even experiment very often I like to keep things simple and just concentrate on the subject
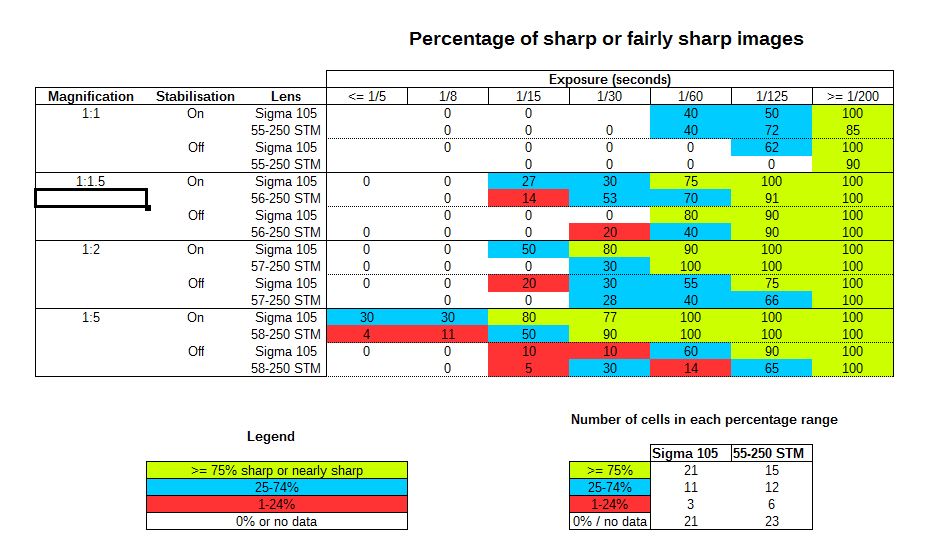
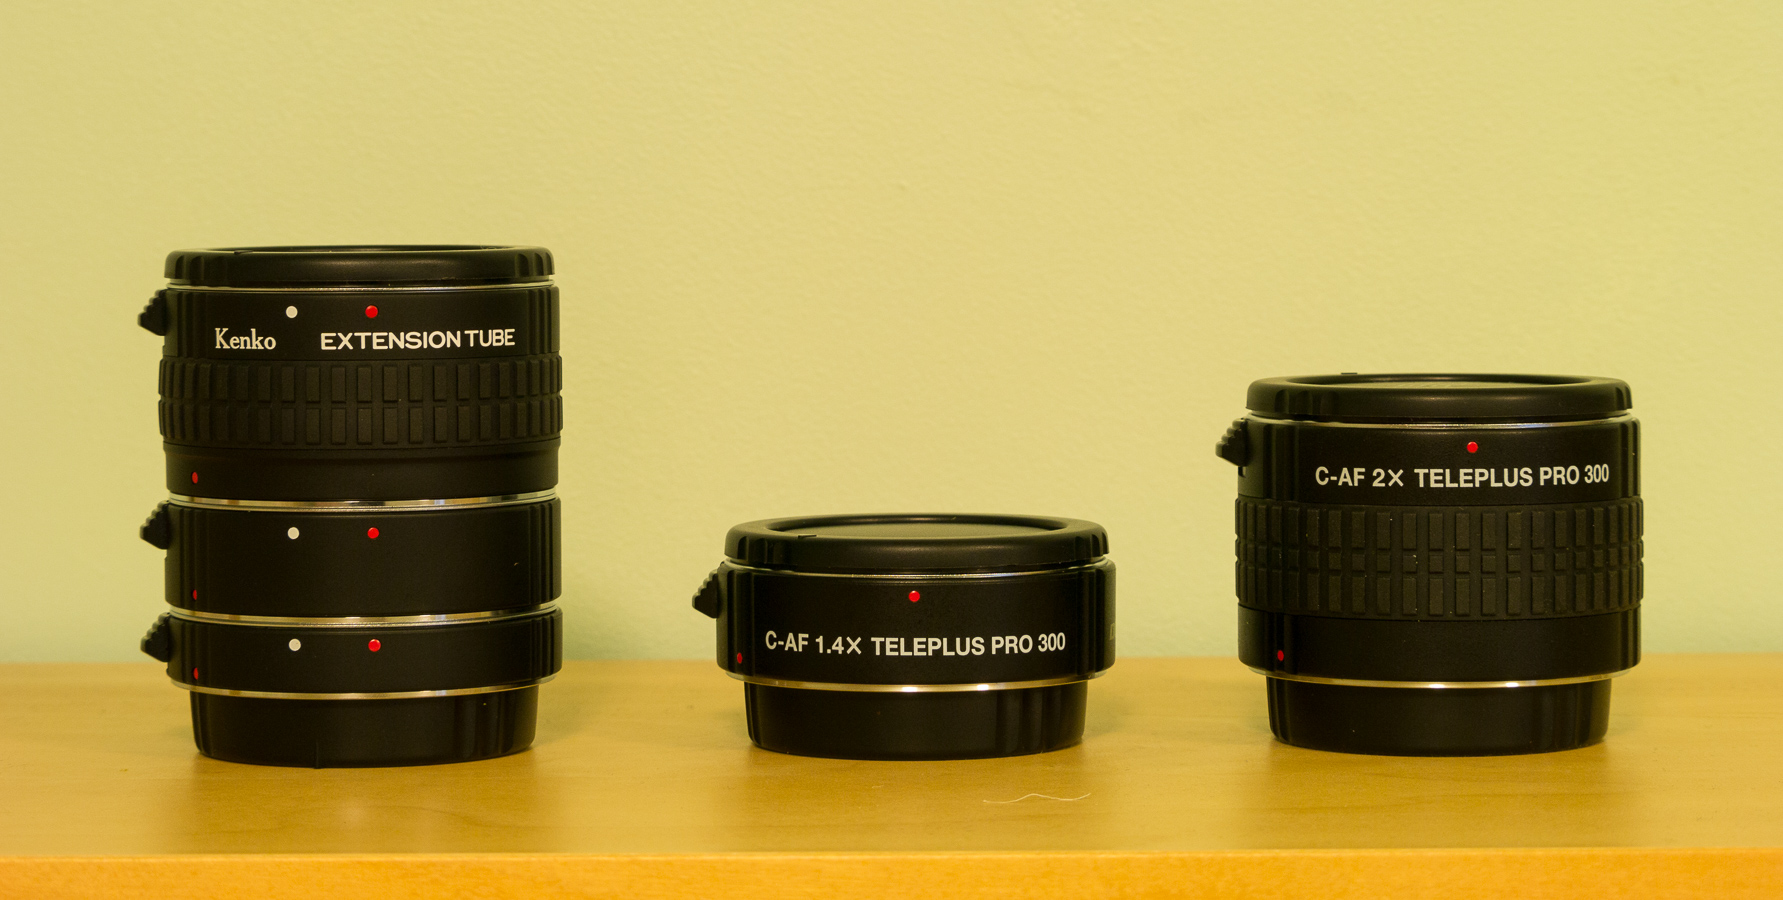
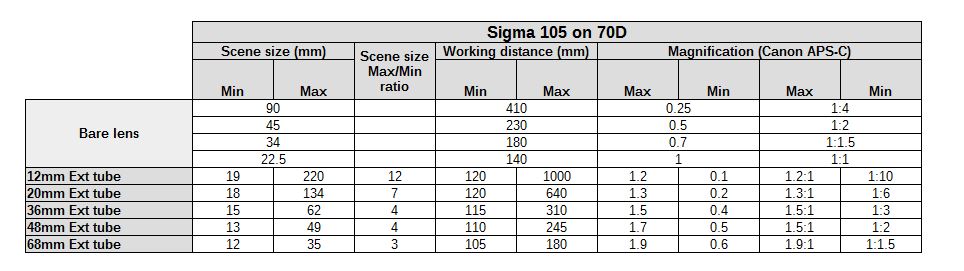
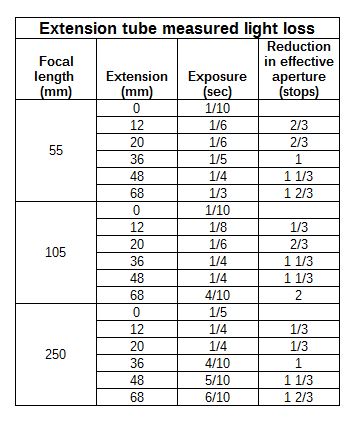
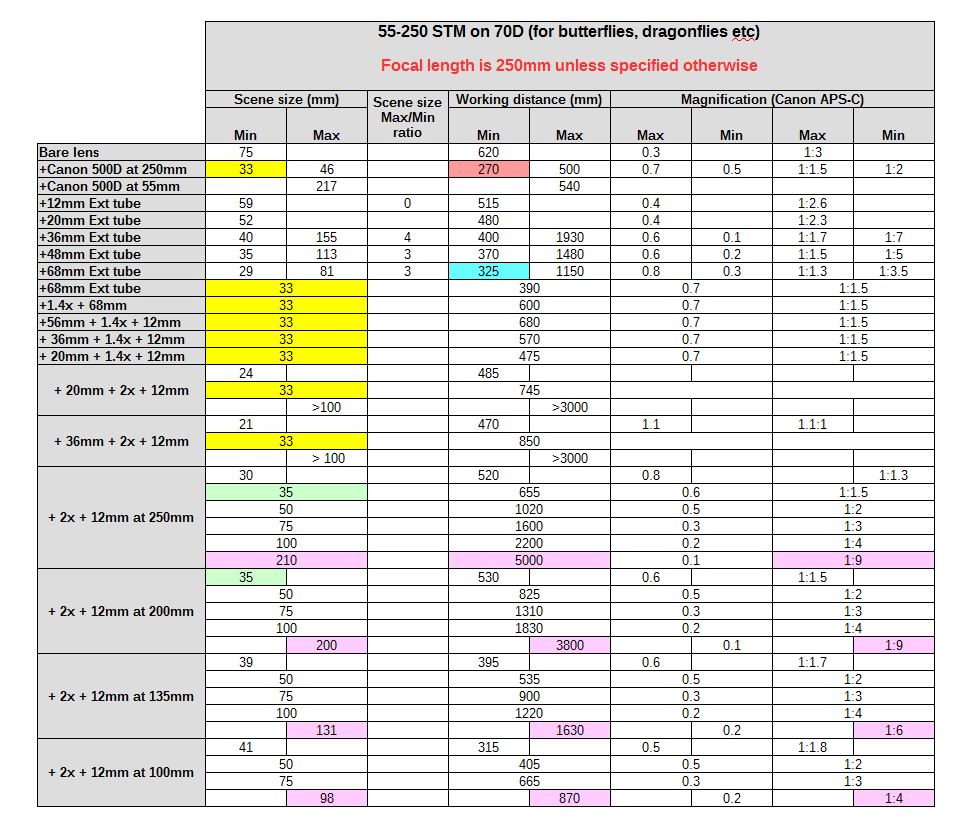
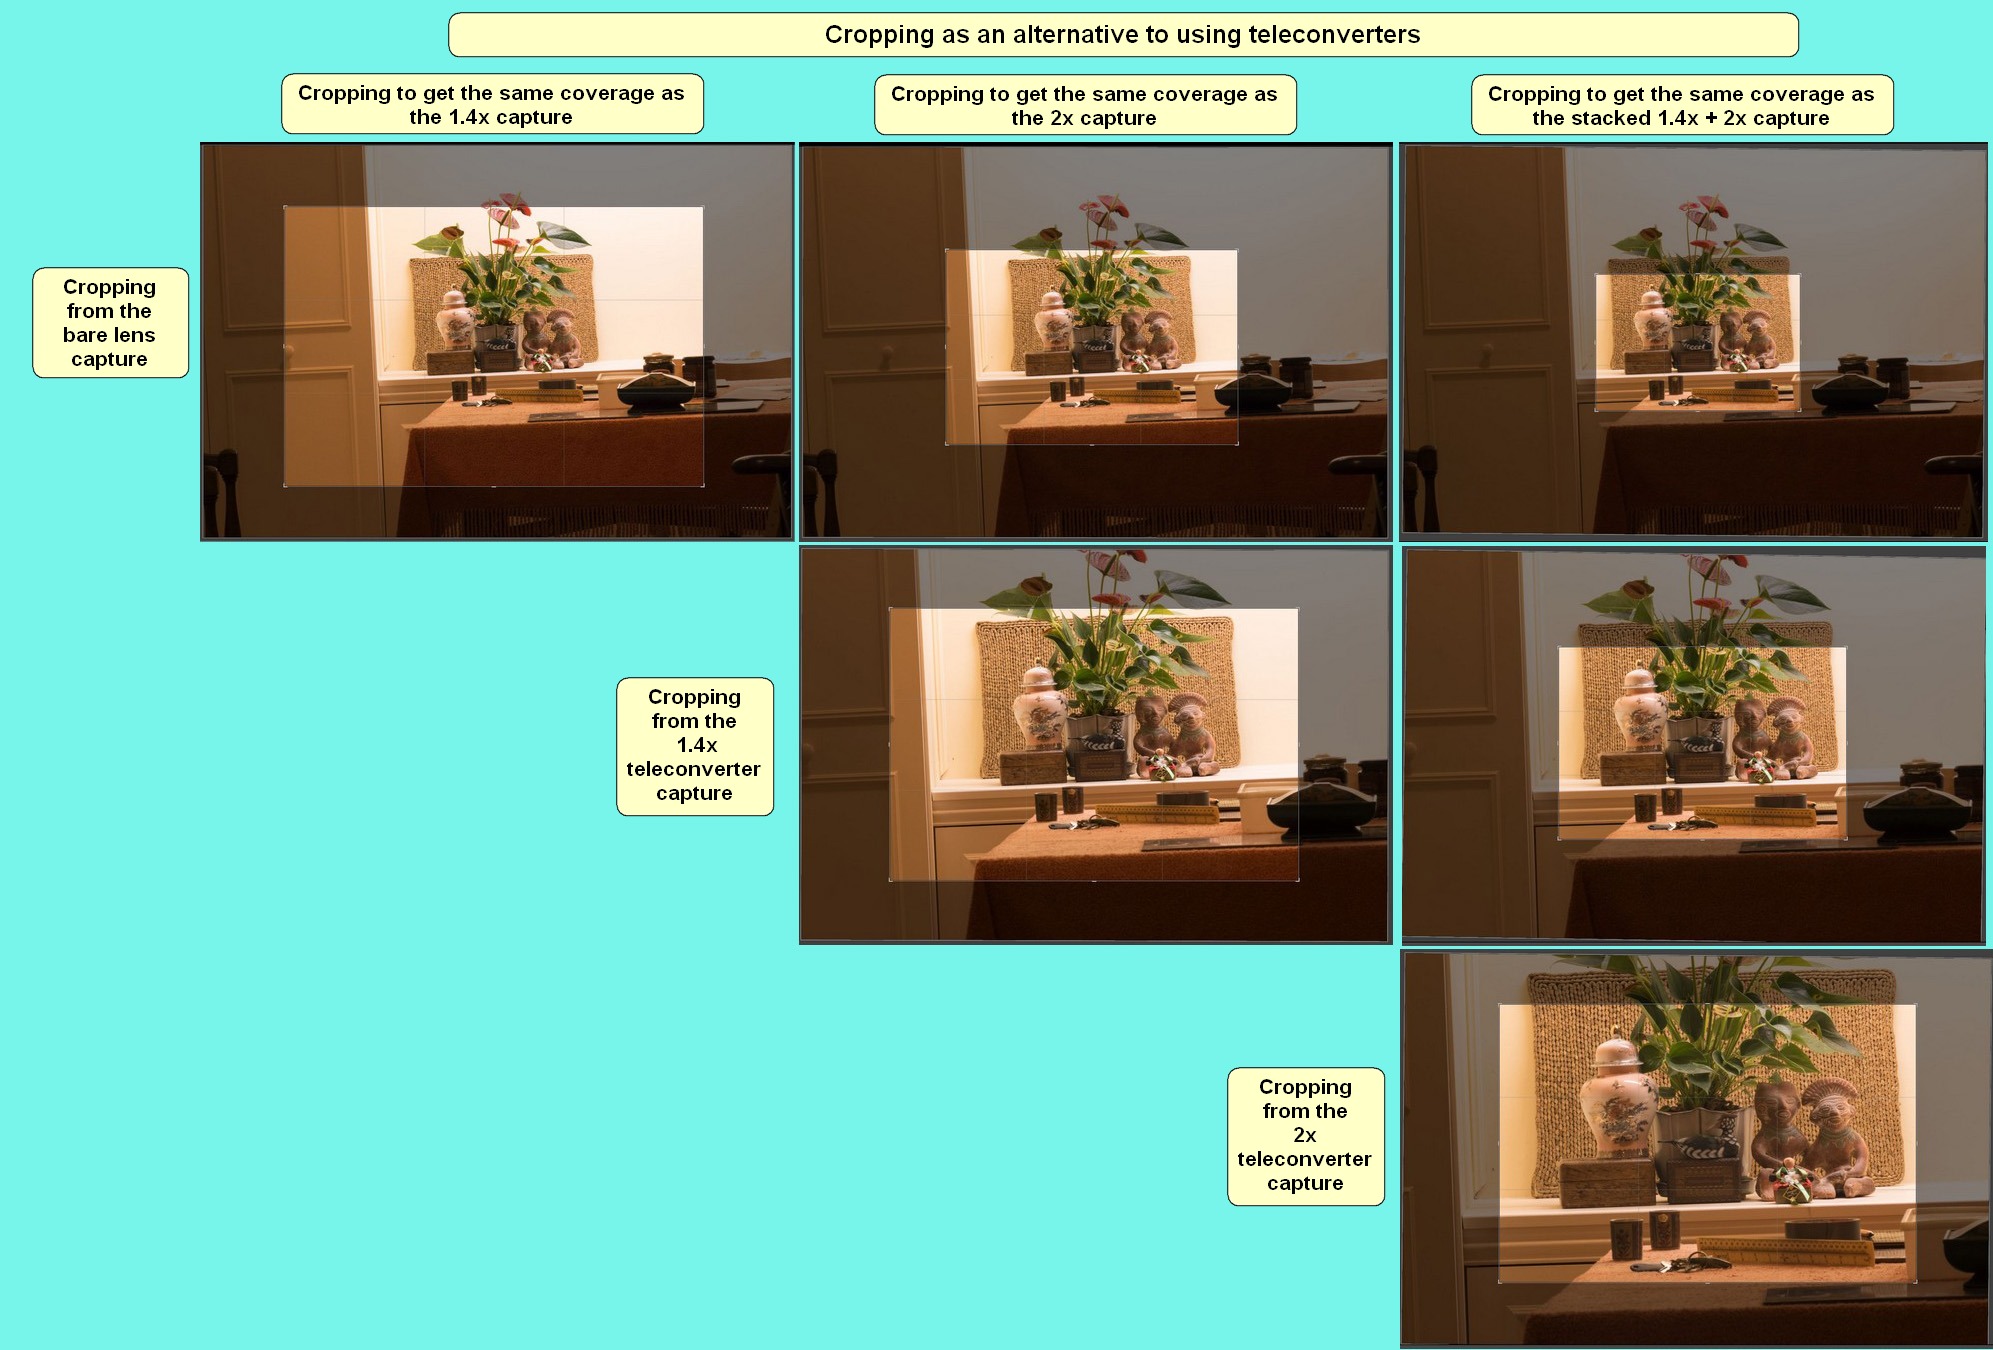
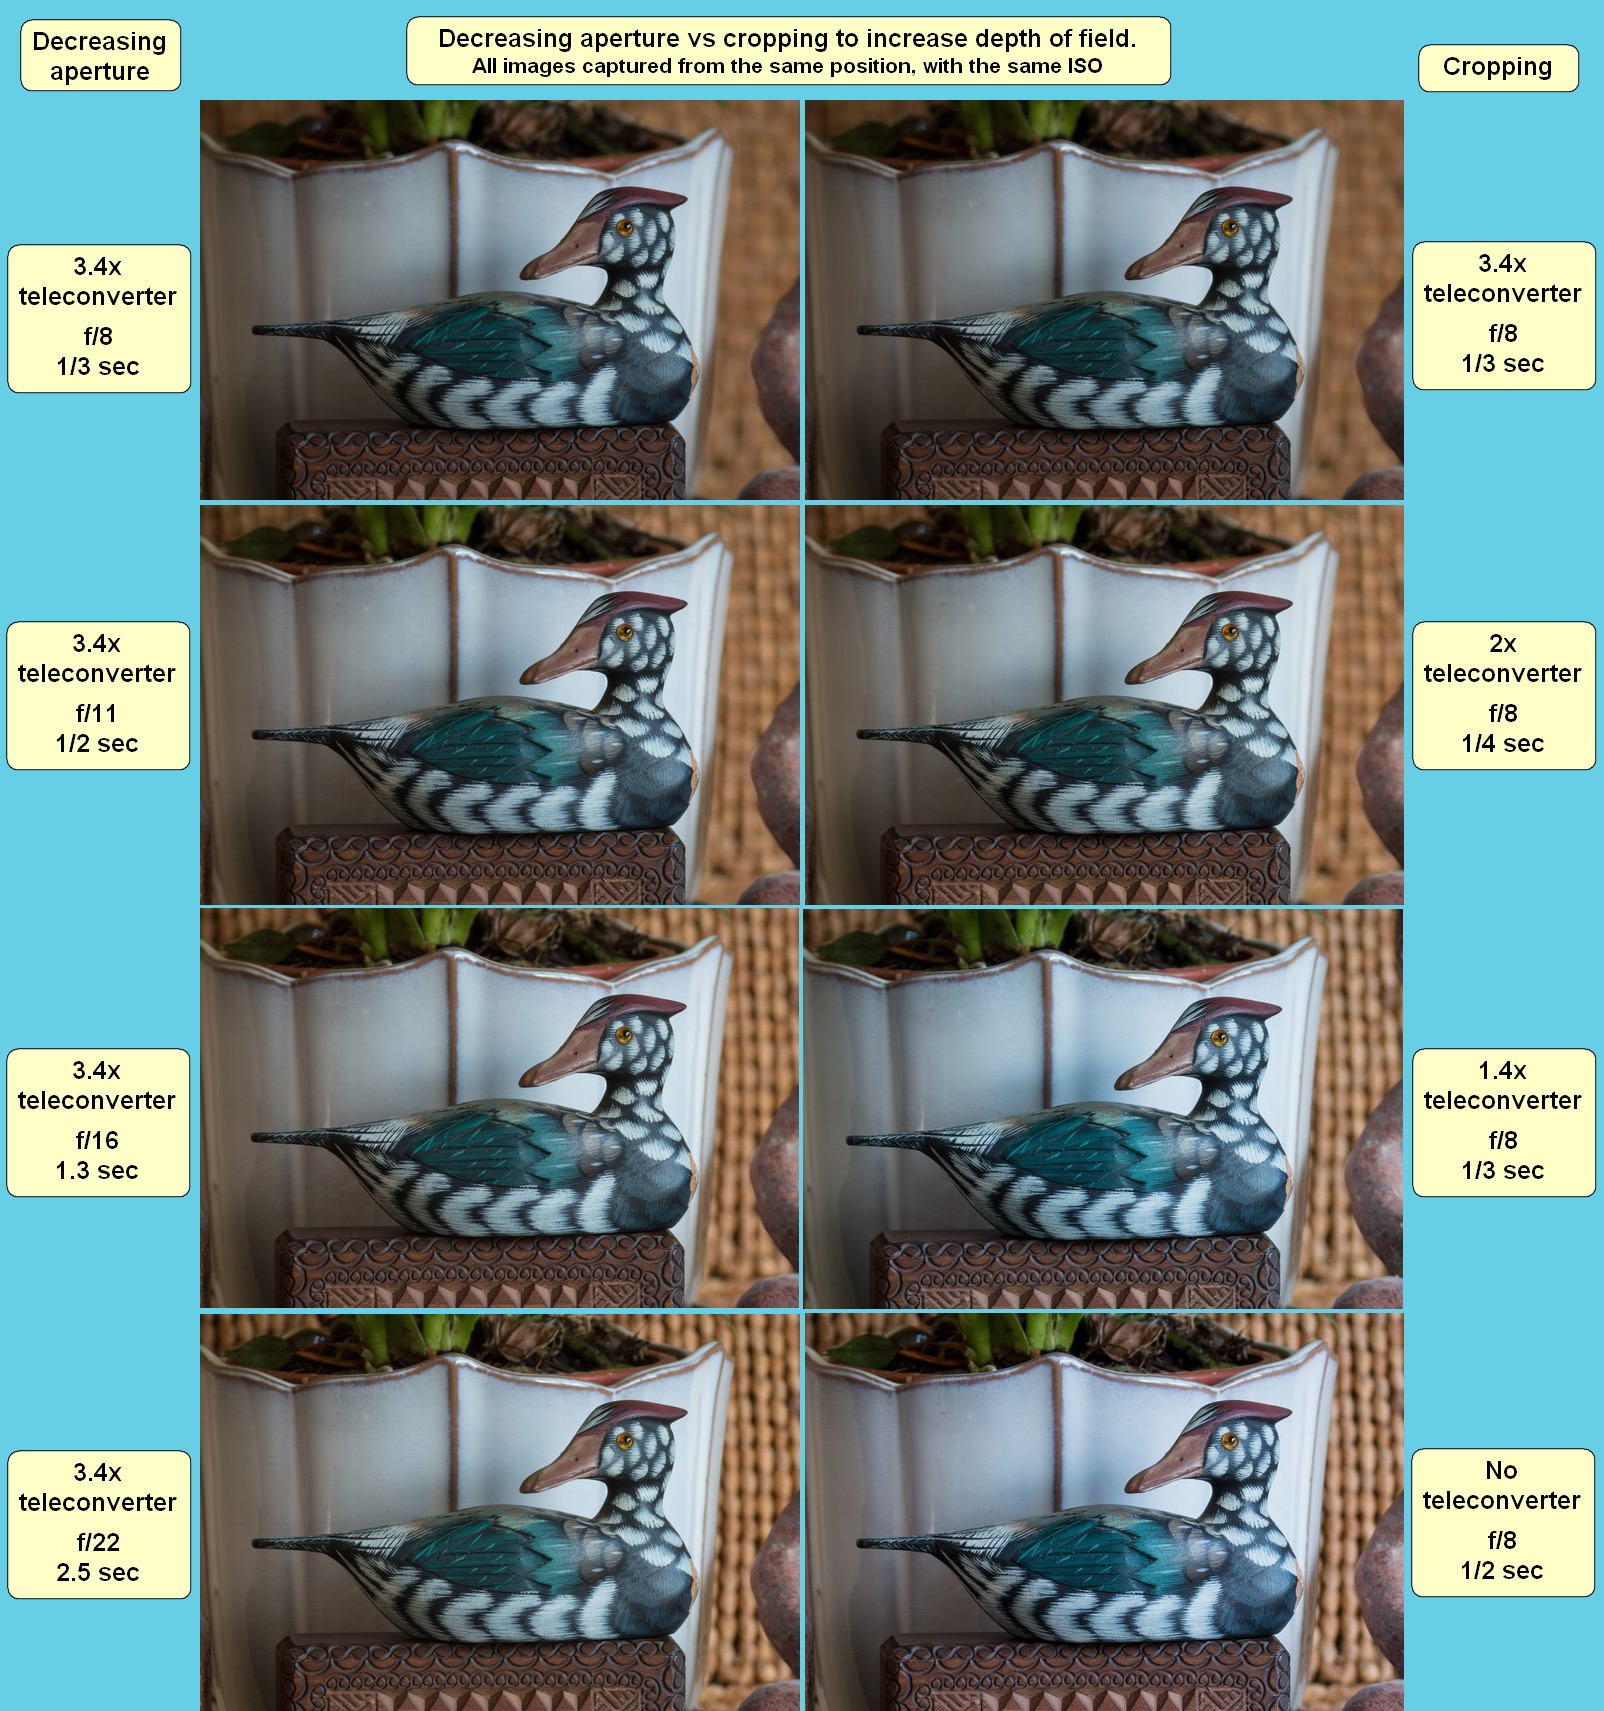
I wonder if the effective apeture effect at the minimum focus distance is why my Marumi shots didn't come out that sharp as I was using a smaller apeture than I thought but to be honest I set the apeture to 8 so the effective apeture would have been about 16 So should still be ok
I do remember that my friend who uses the MPe 65 for close shots said that he never uses an apeture smaller than 5.6 as you get diffraction softening at high magnification
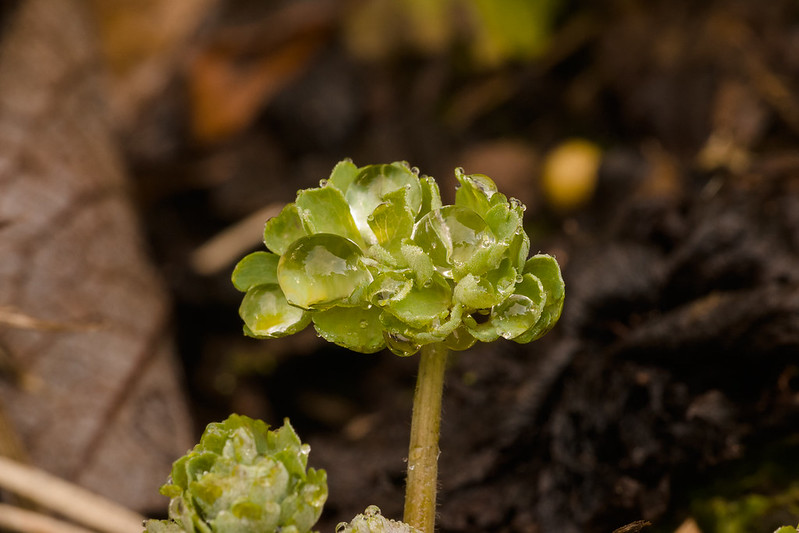
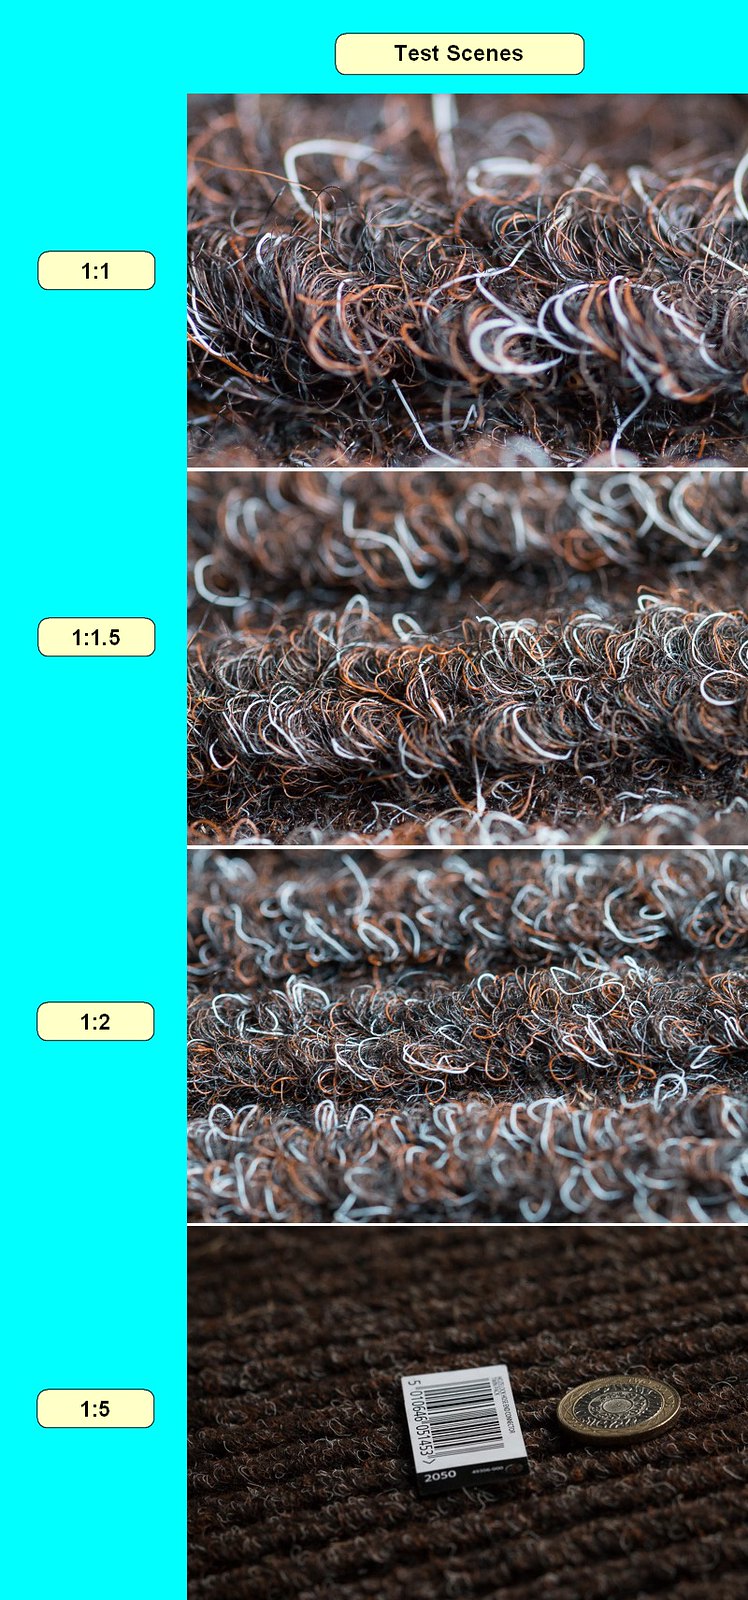
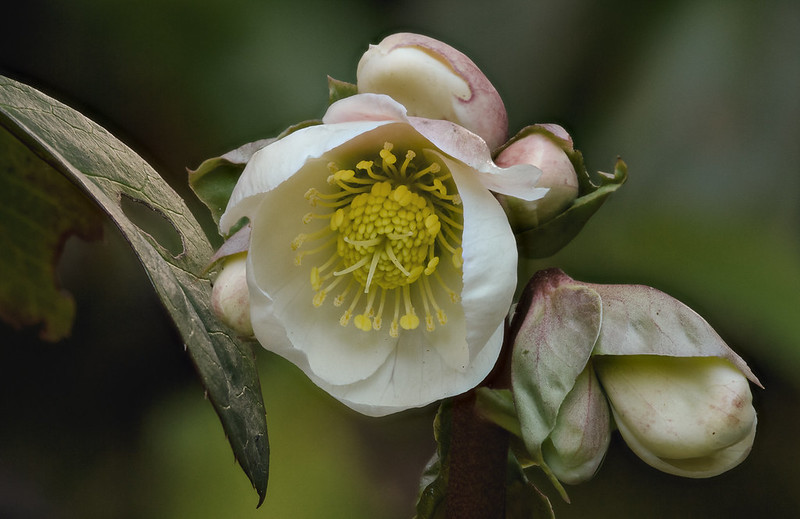
I do still wonder if there's something that I'm not doing right with the Marumi achromat as the online reviews for it are very good , I will try again with it in the spring when the flies and hover flies etc are out, maybe photographing coins isn't that relevant to shooting insects
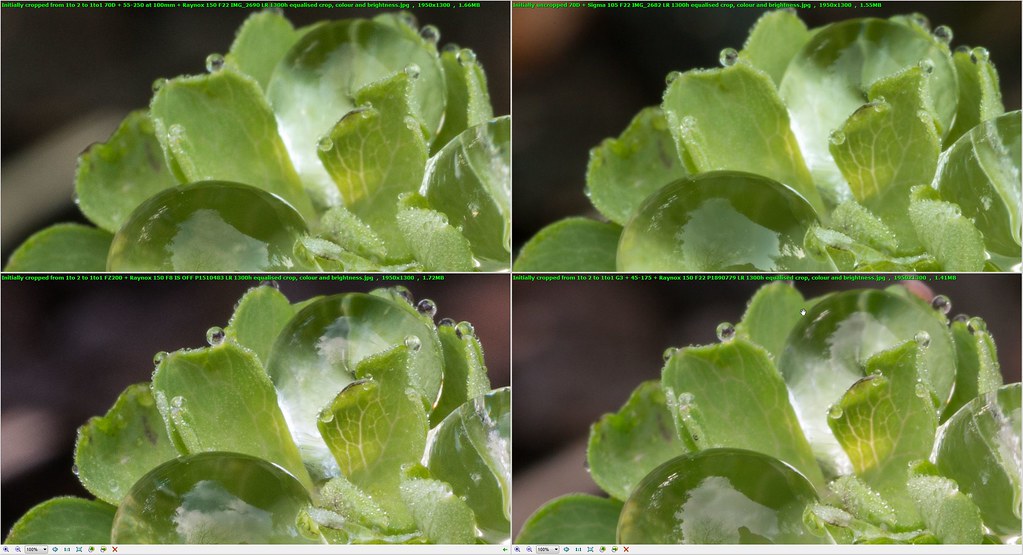
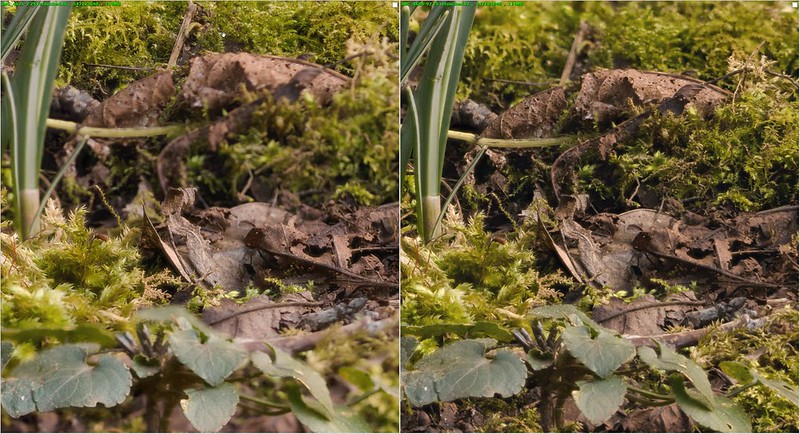
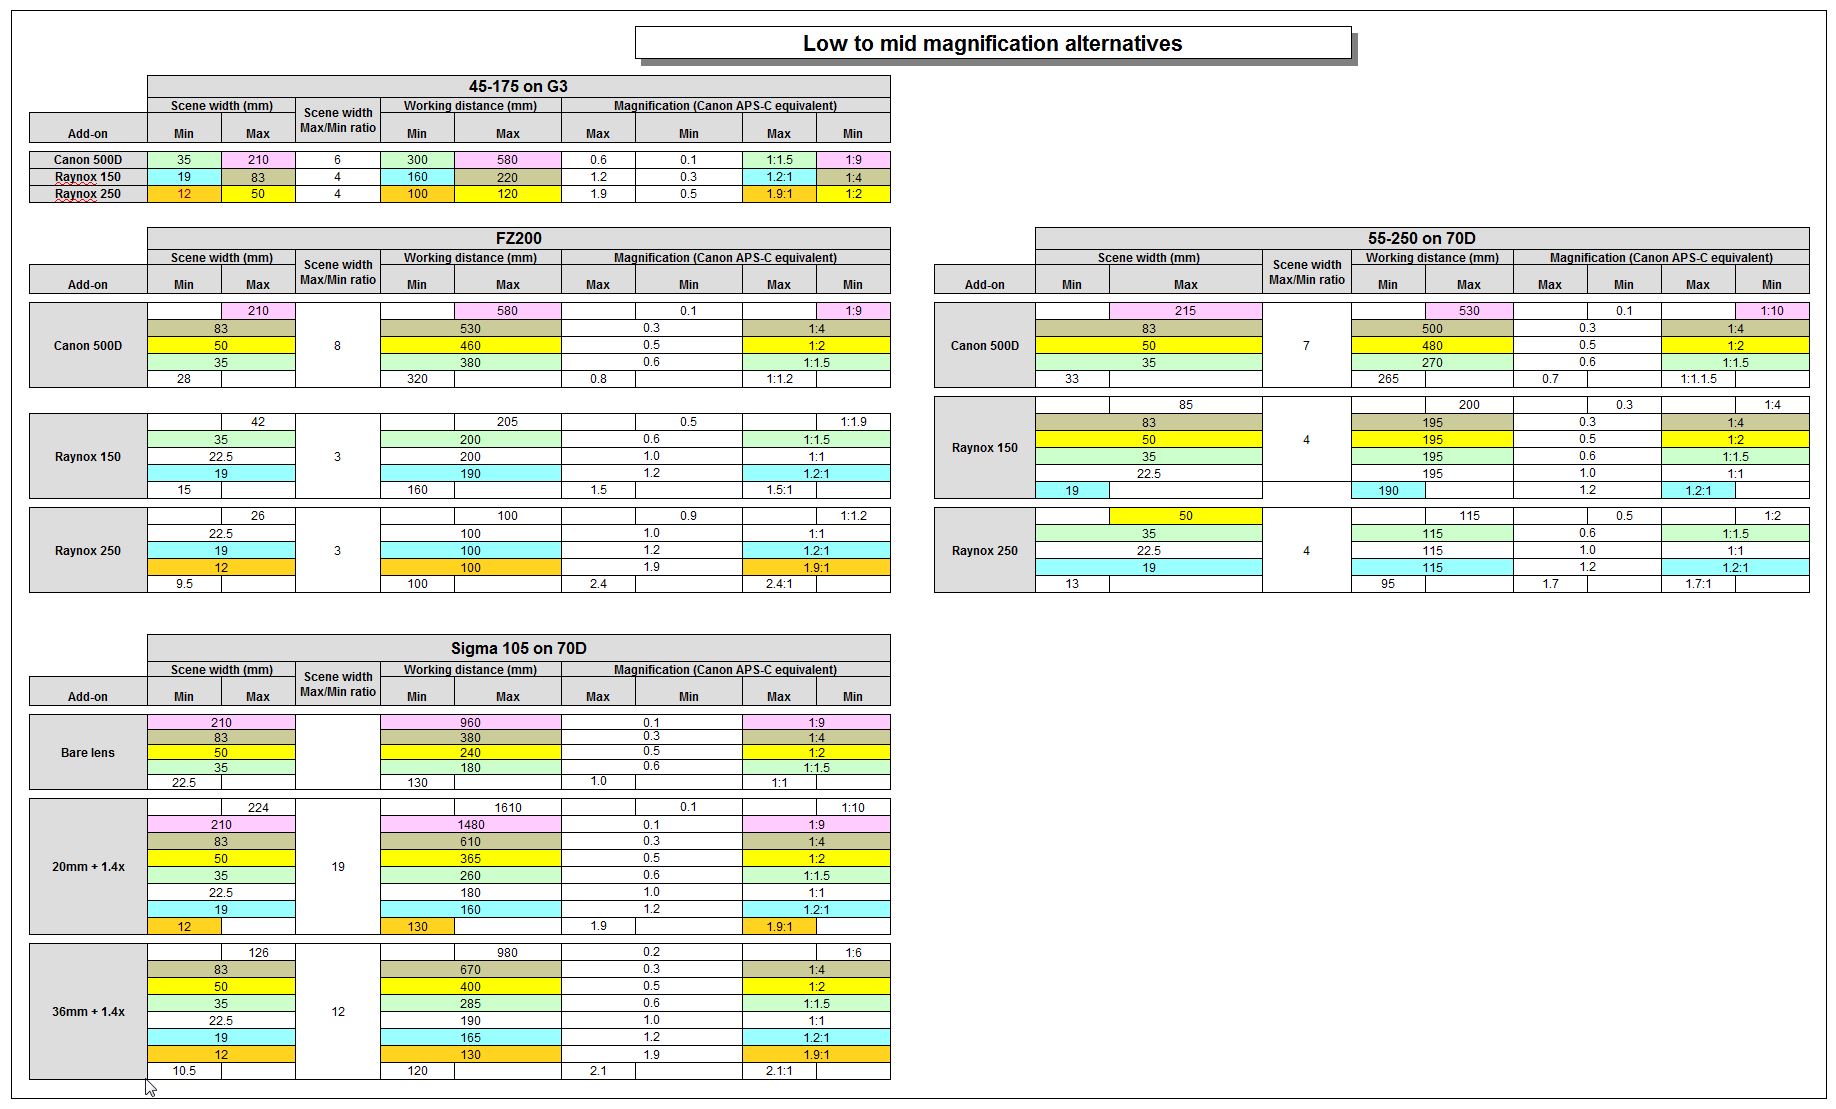
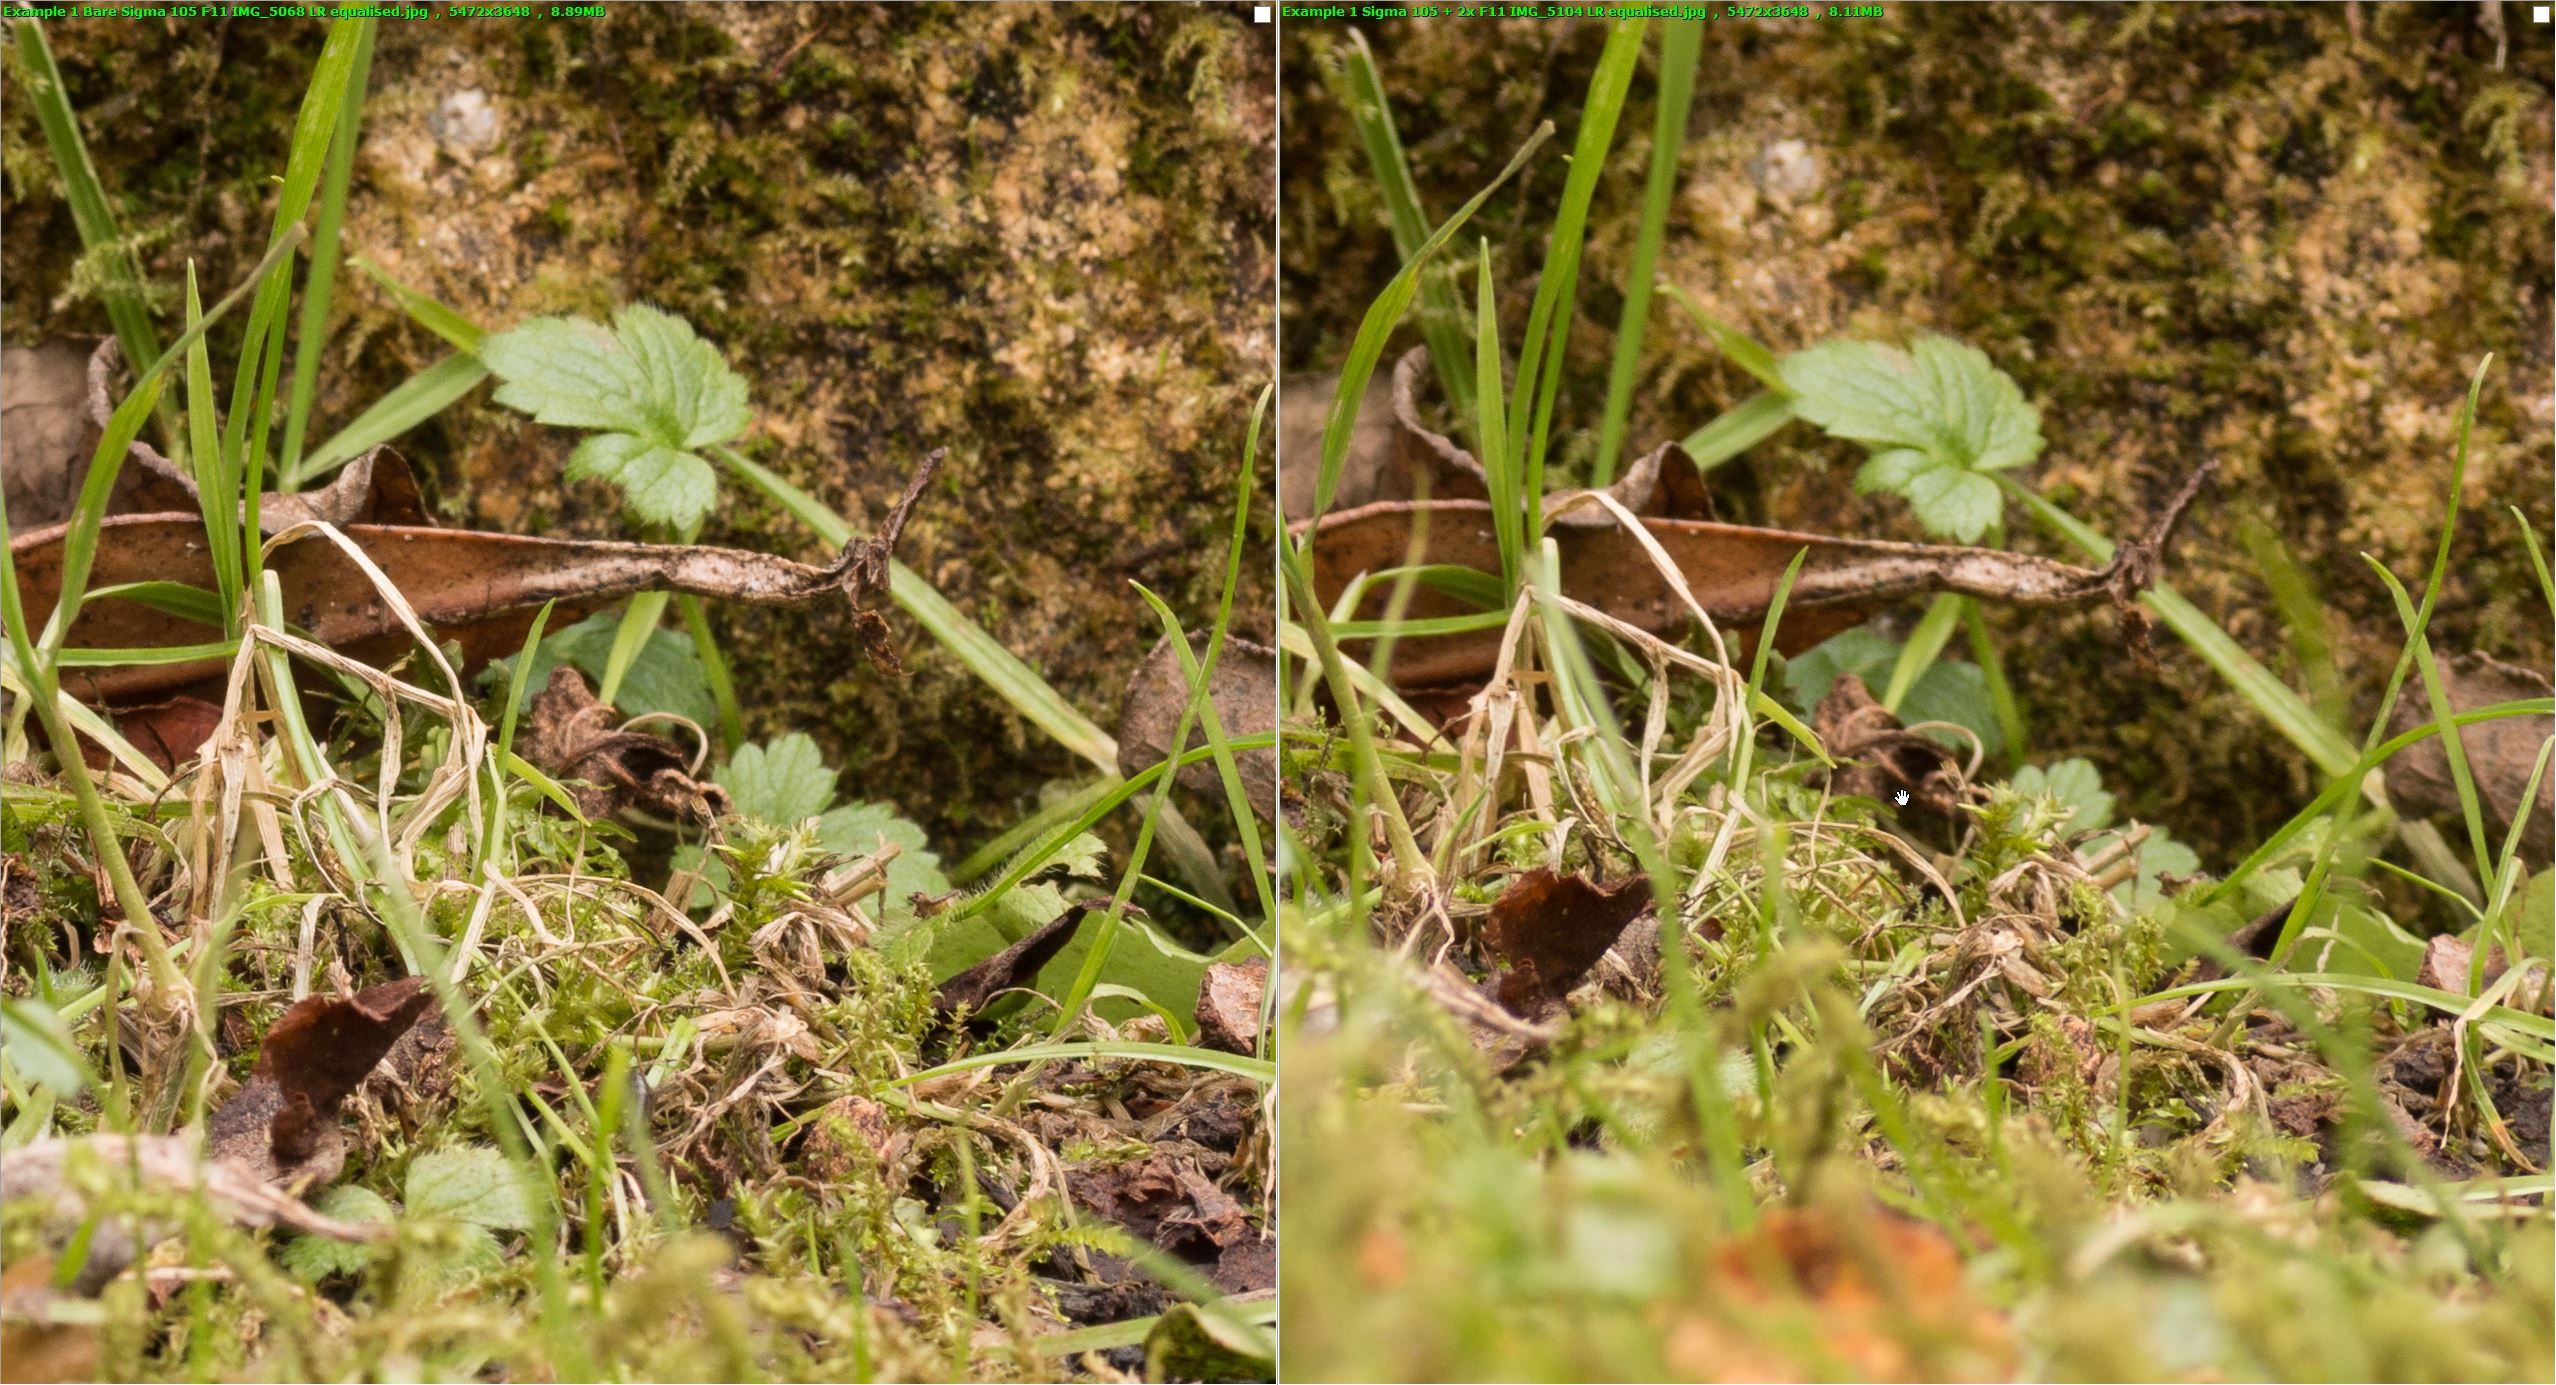
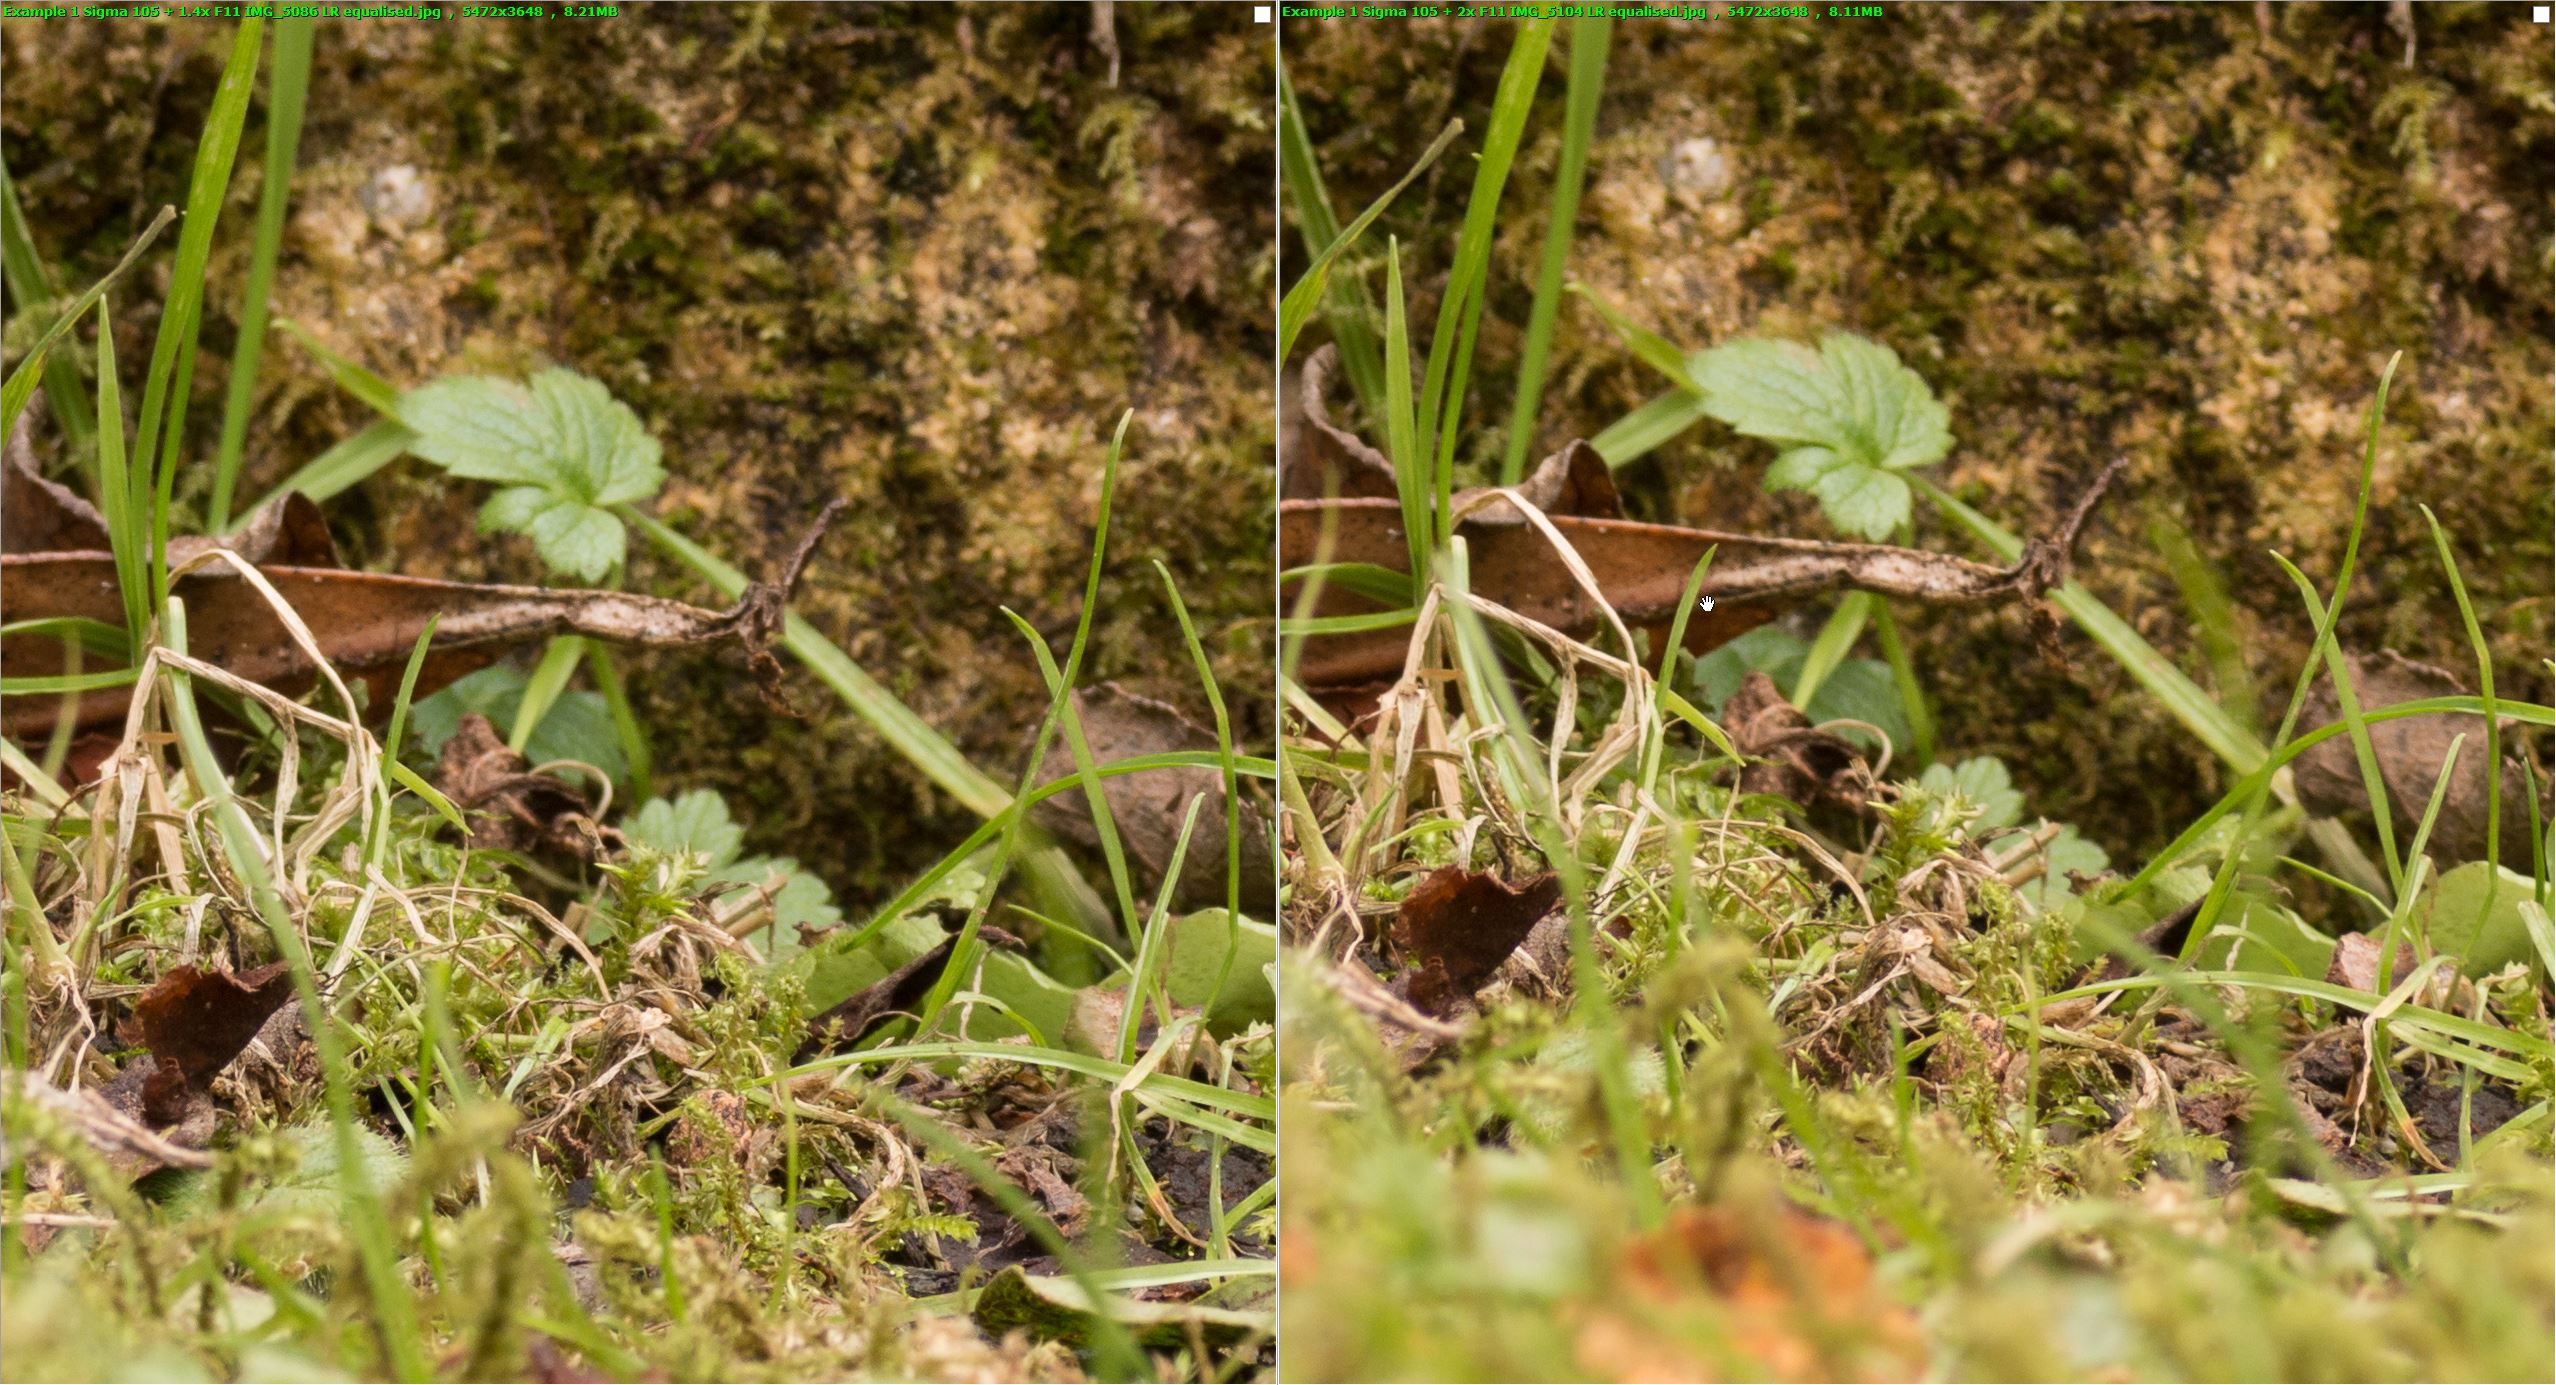
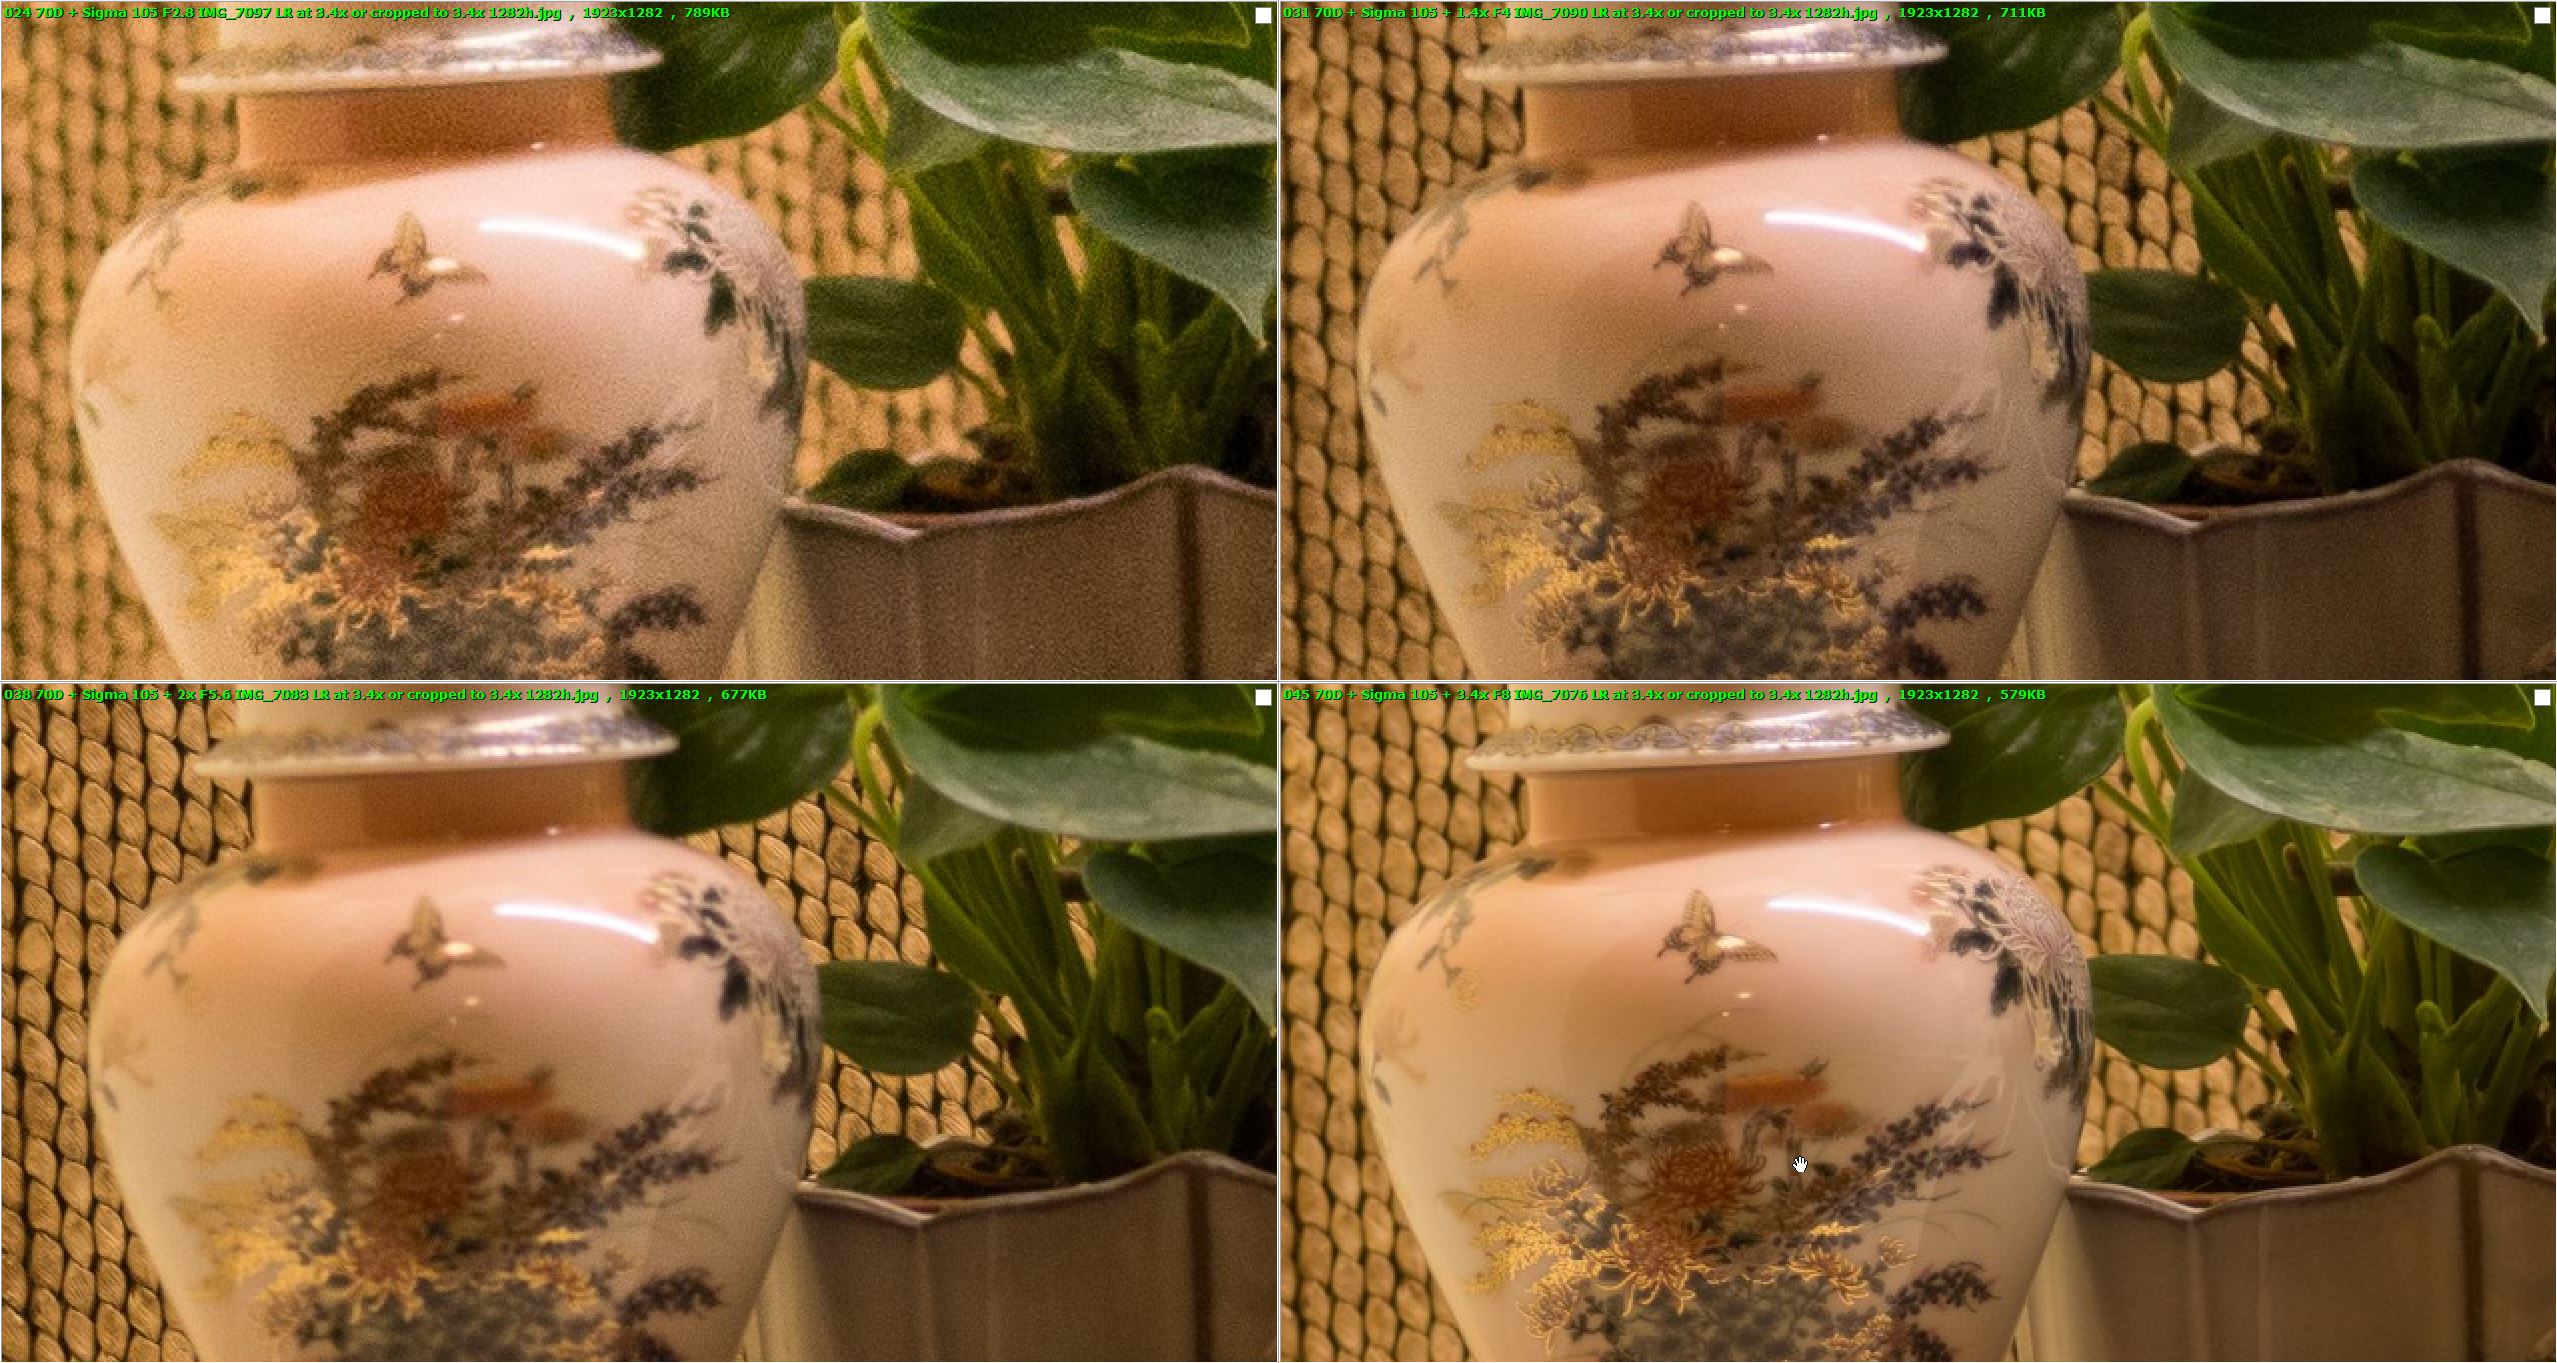
Looking at your shots starting at the sigma 105 at f22 and 11 the f 11 ones are sharper probably F11 is close the the sweet spot for that lens when you go smaller than that you start to see softening in theory anyway!
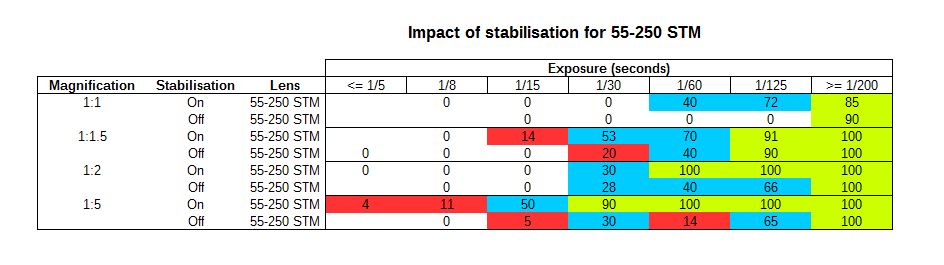
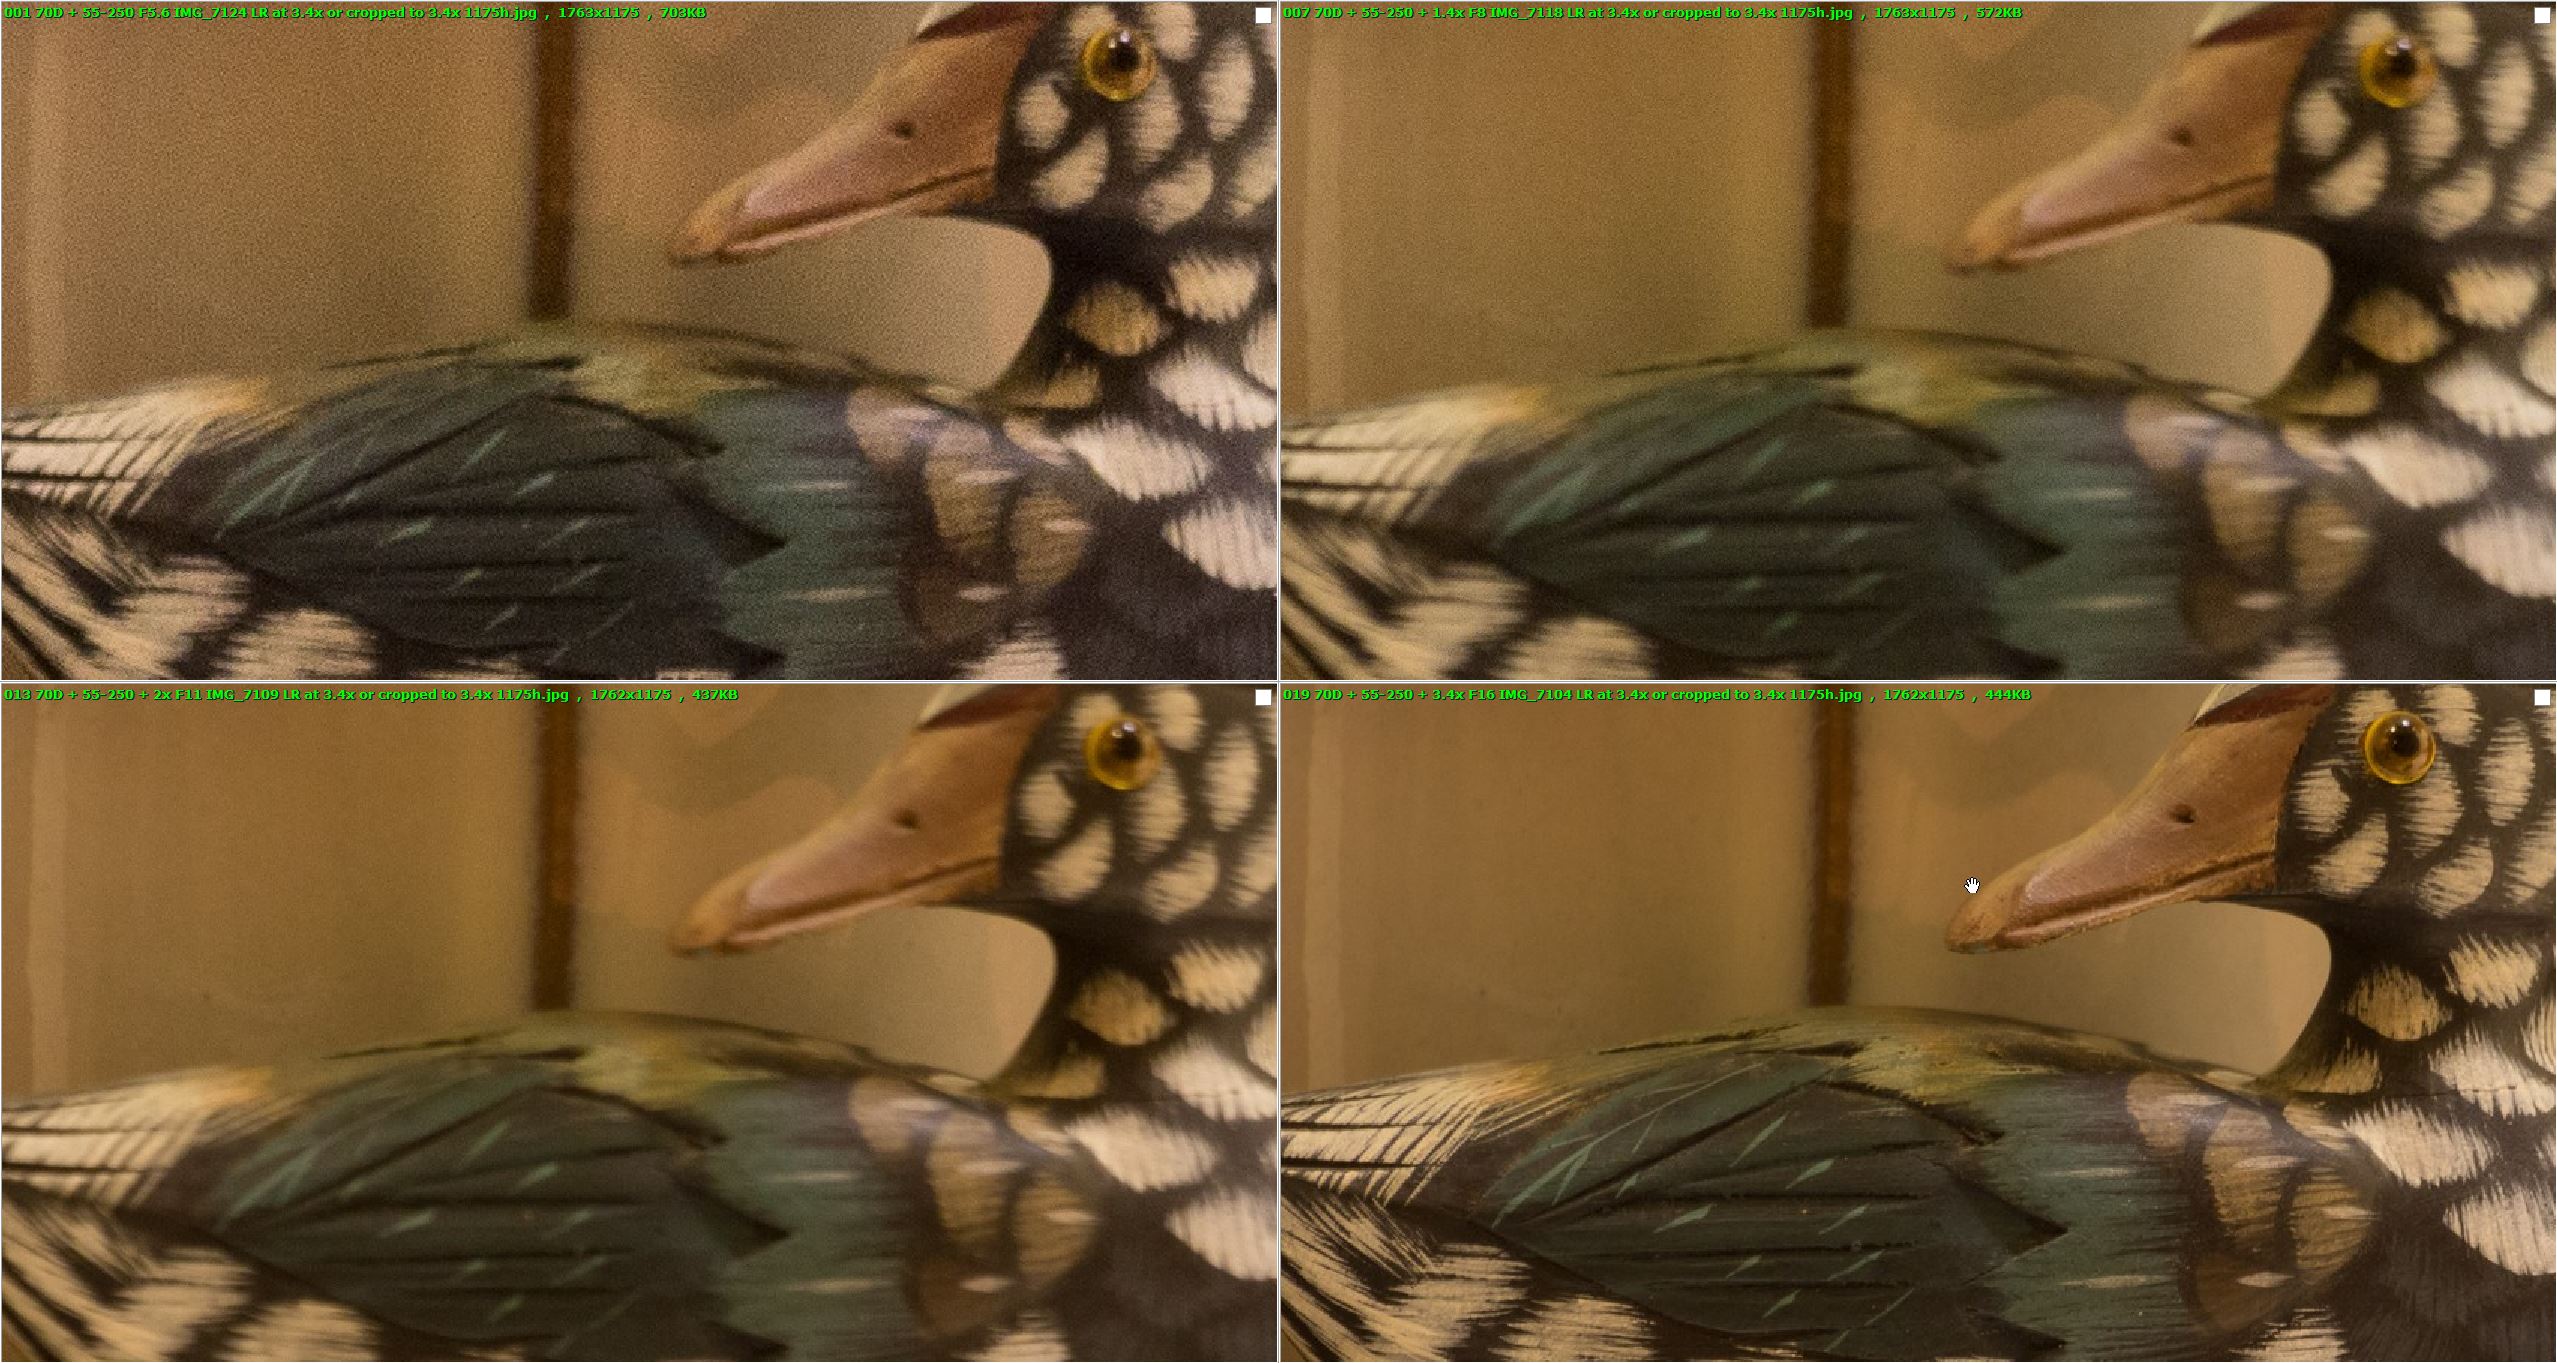
With the next 4 with the different cameras
they all look good any of them on its own would be ok
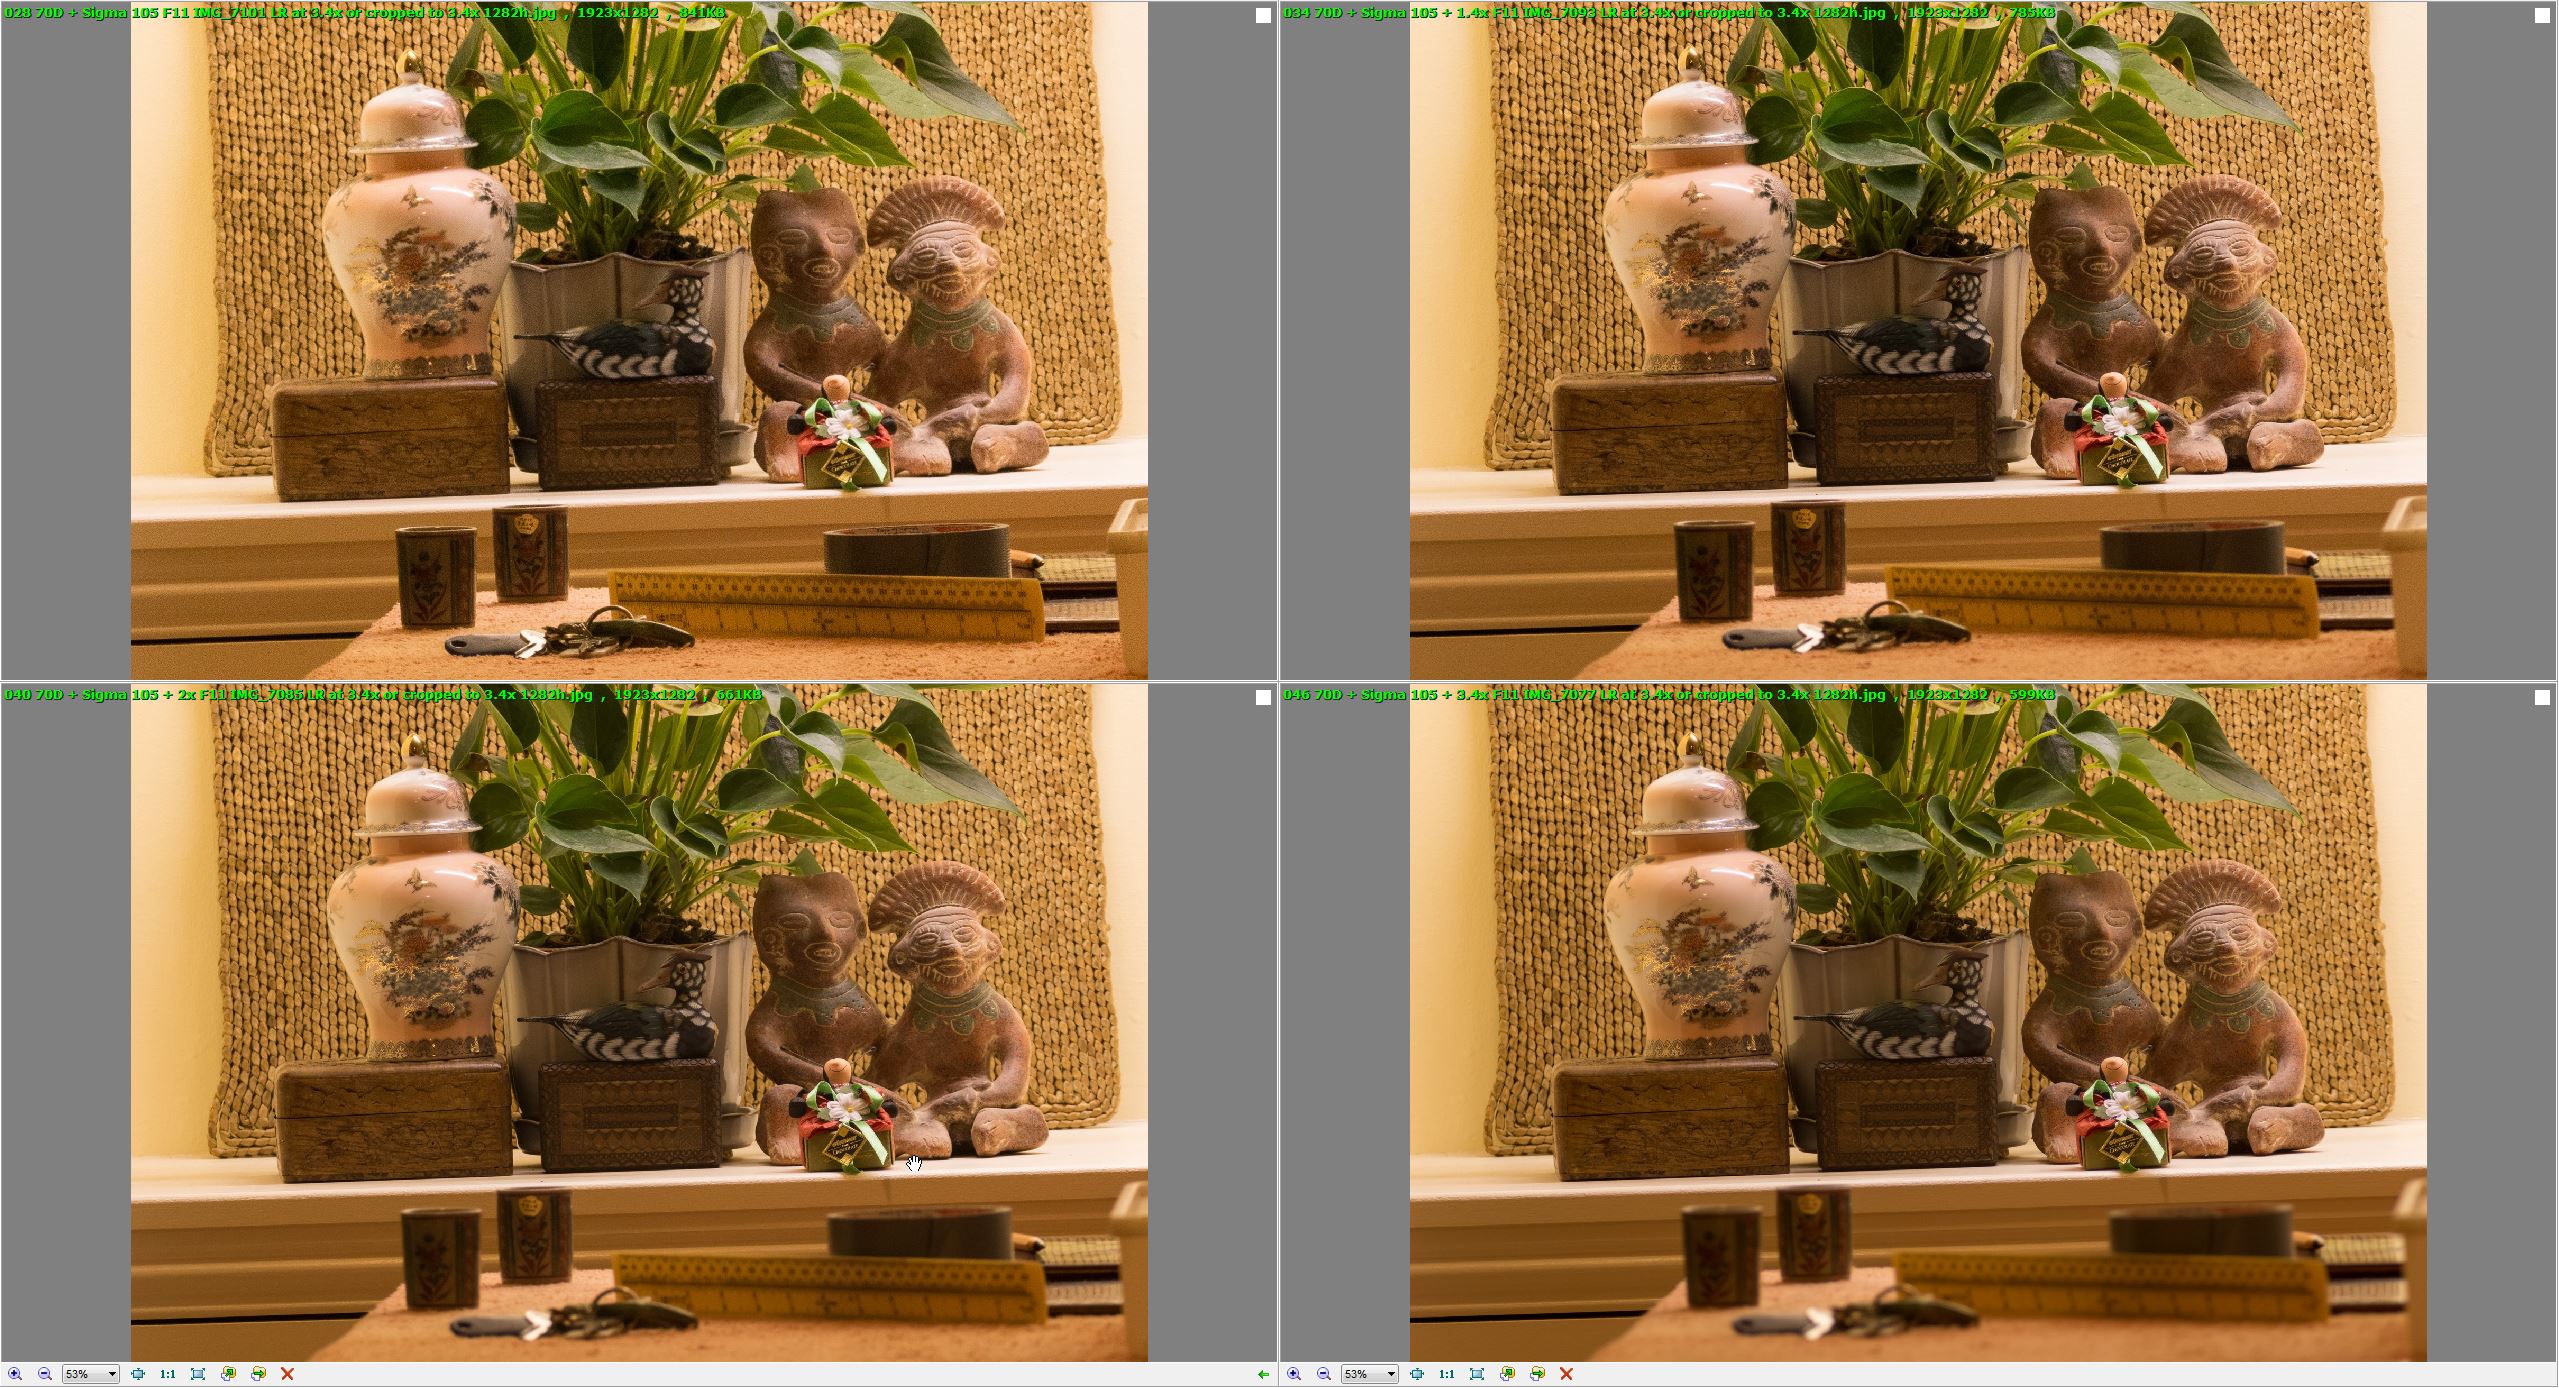
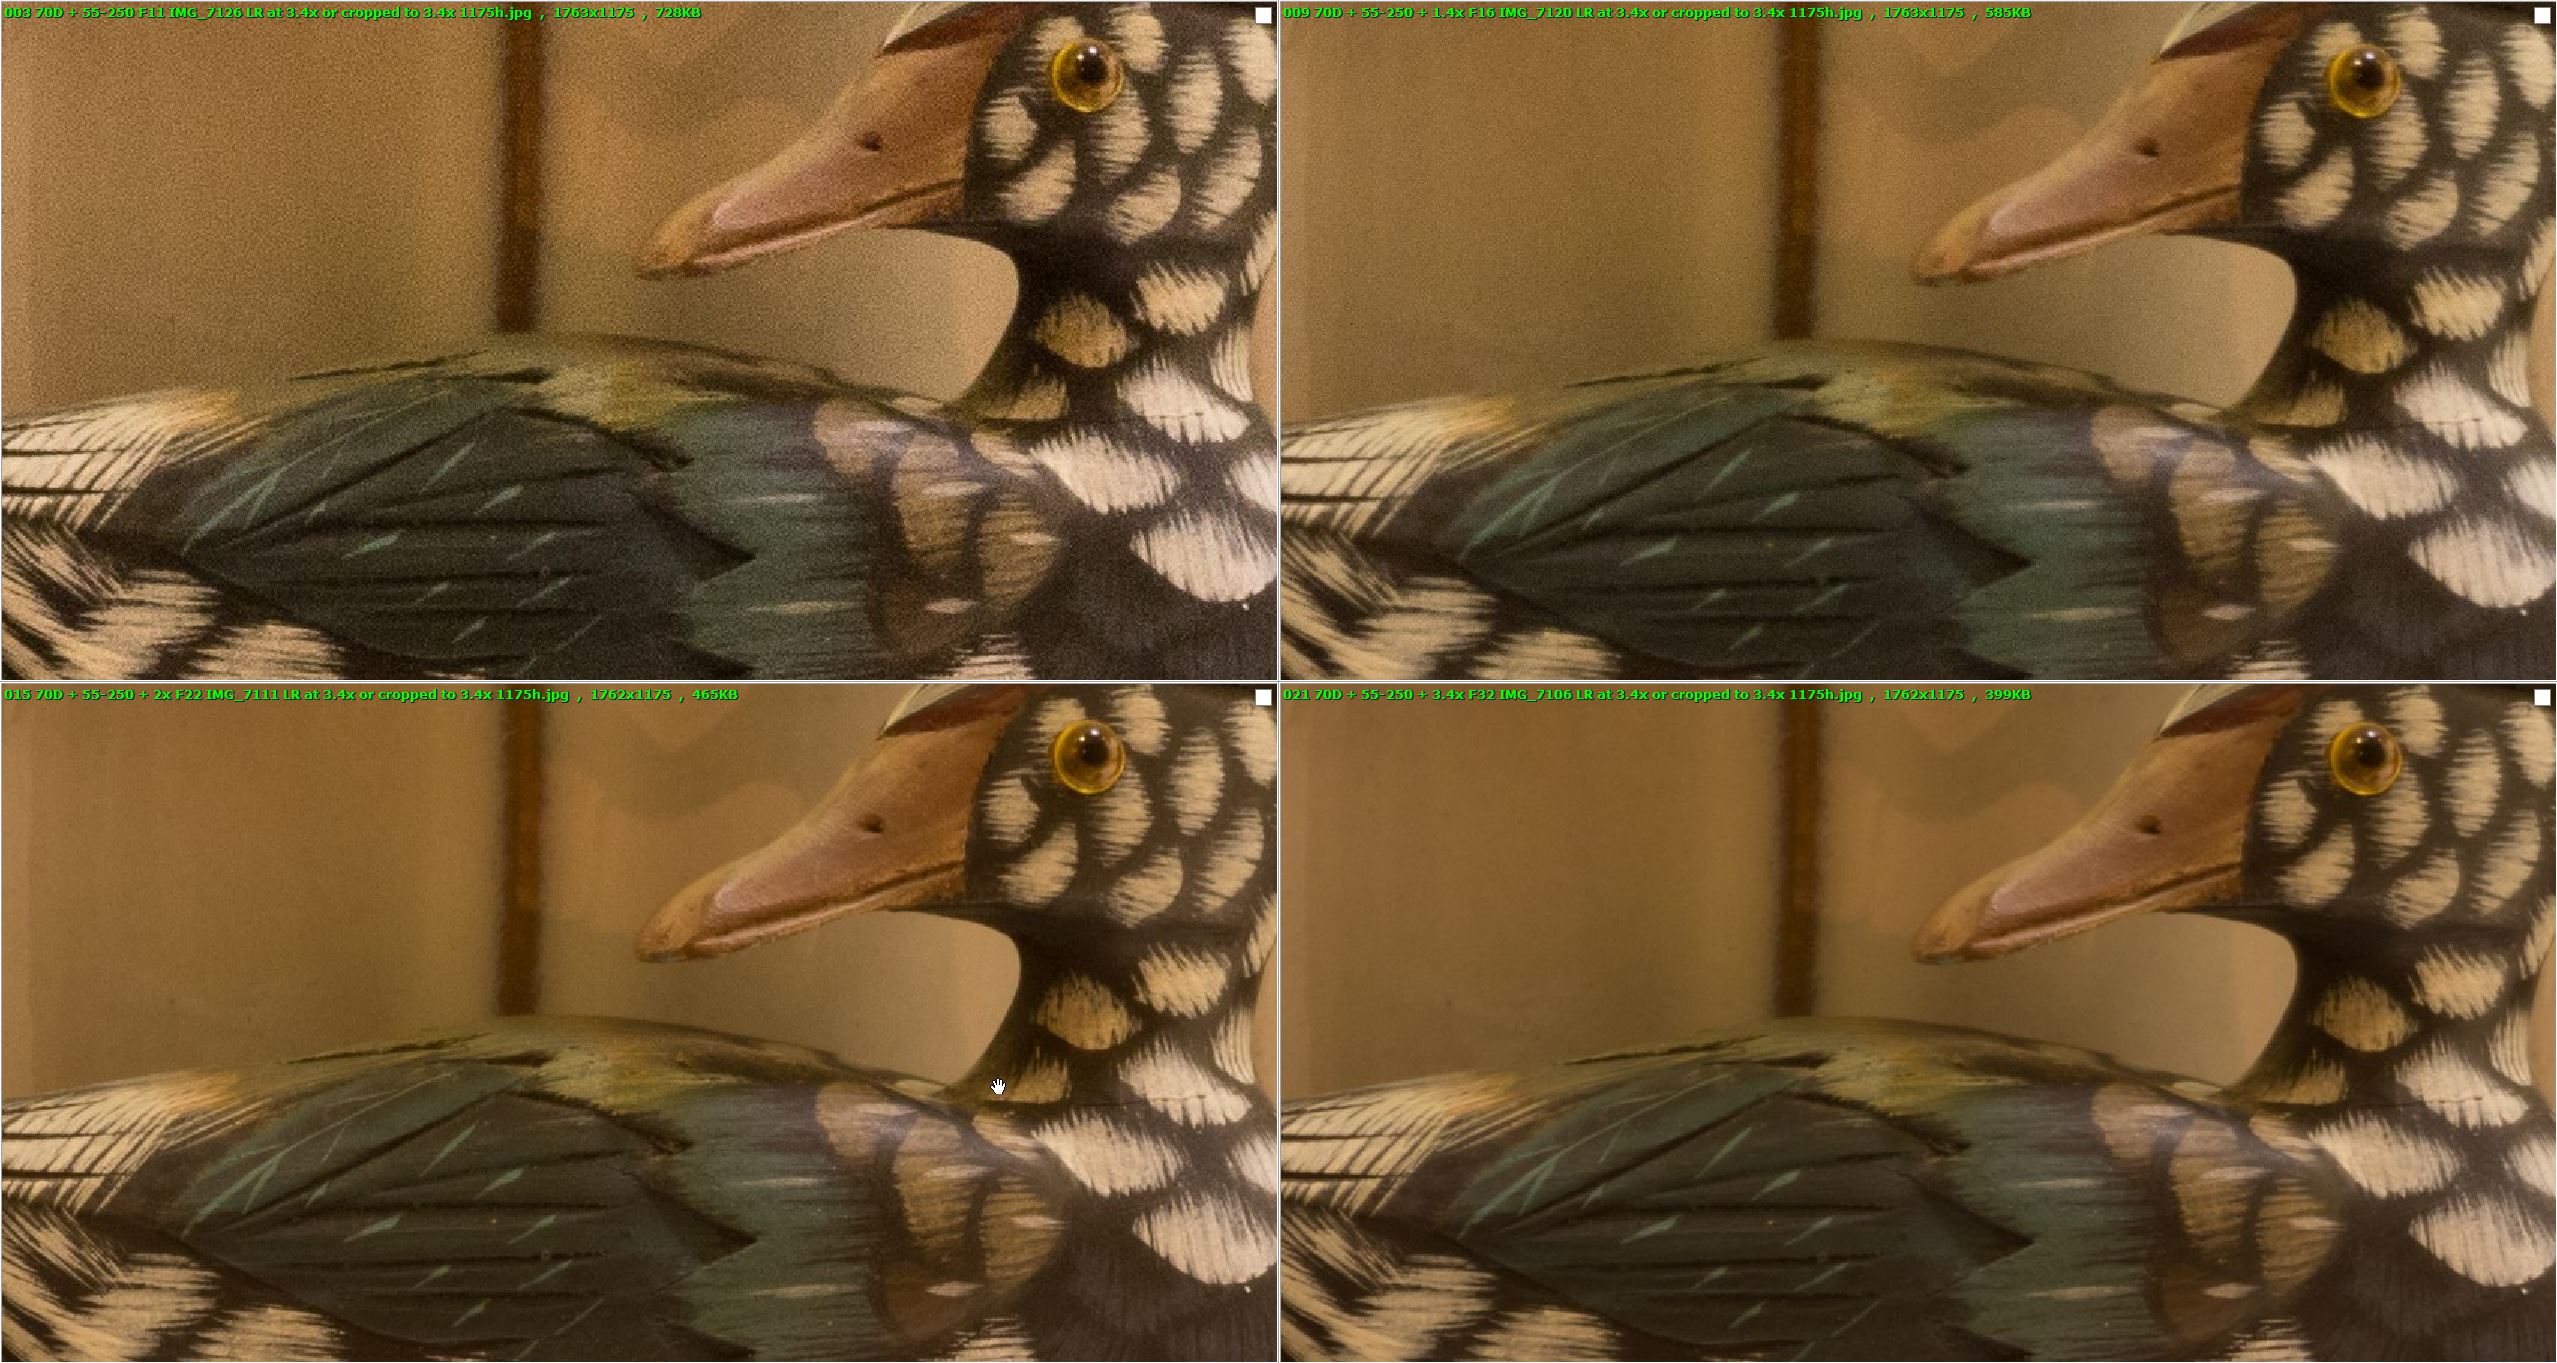
On the last 4 the two 70D setups
I agree the difference between the Effective F 45 and 22 is the same for both the f22 ones are sharper
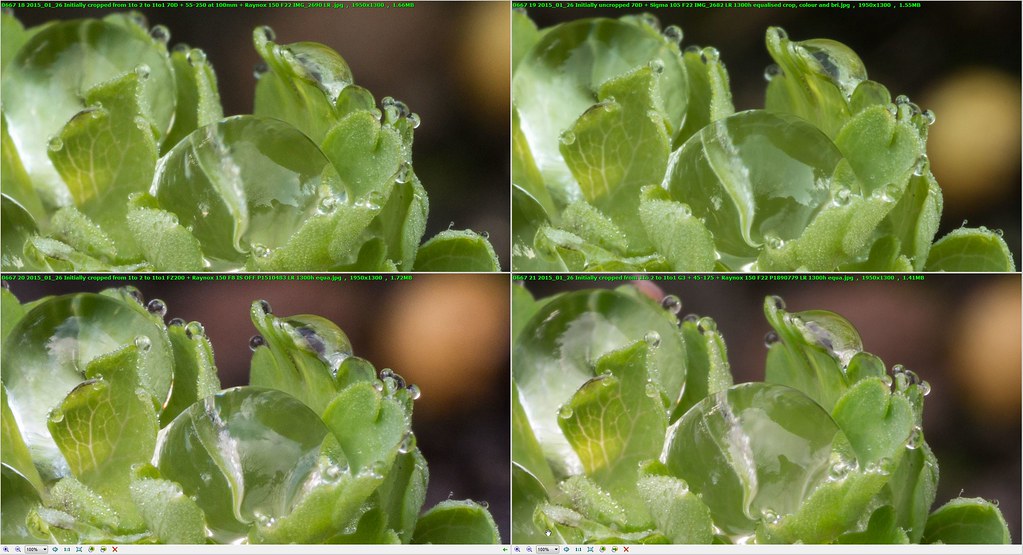
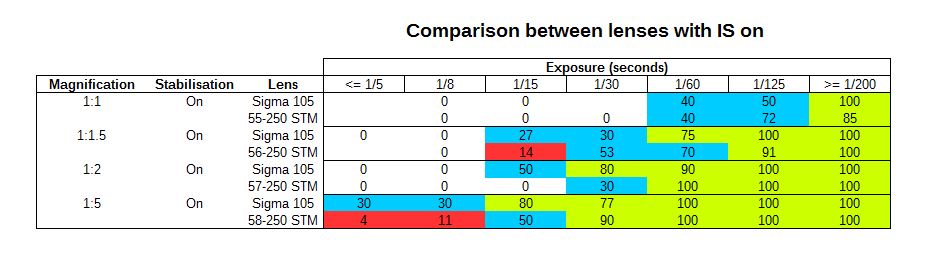
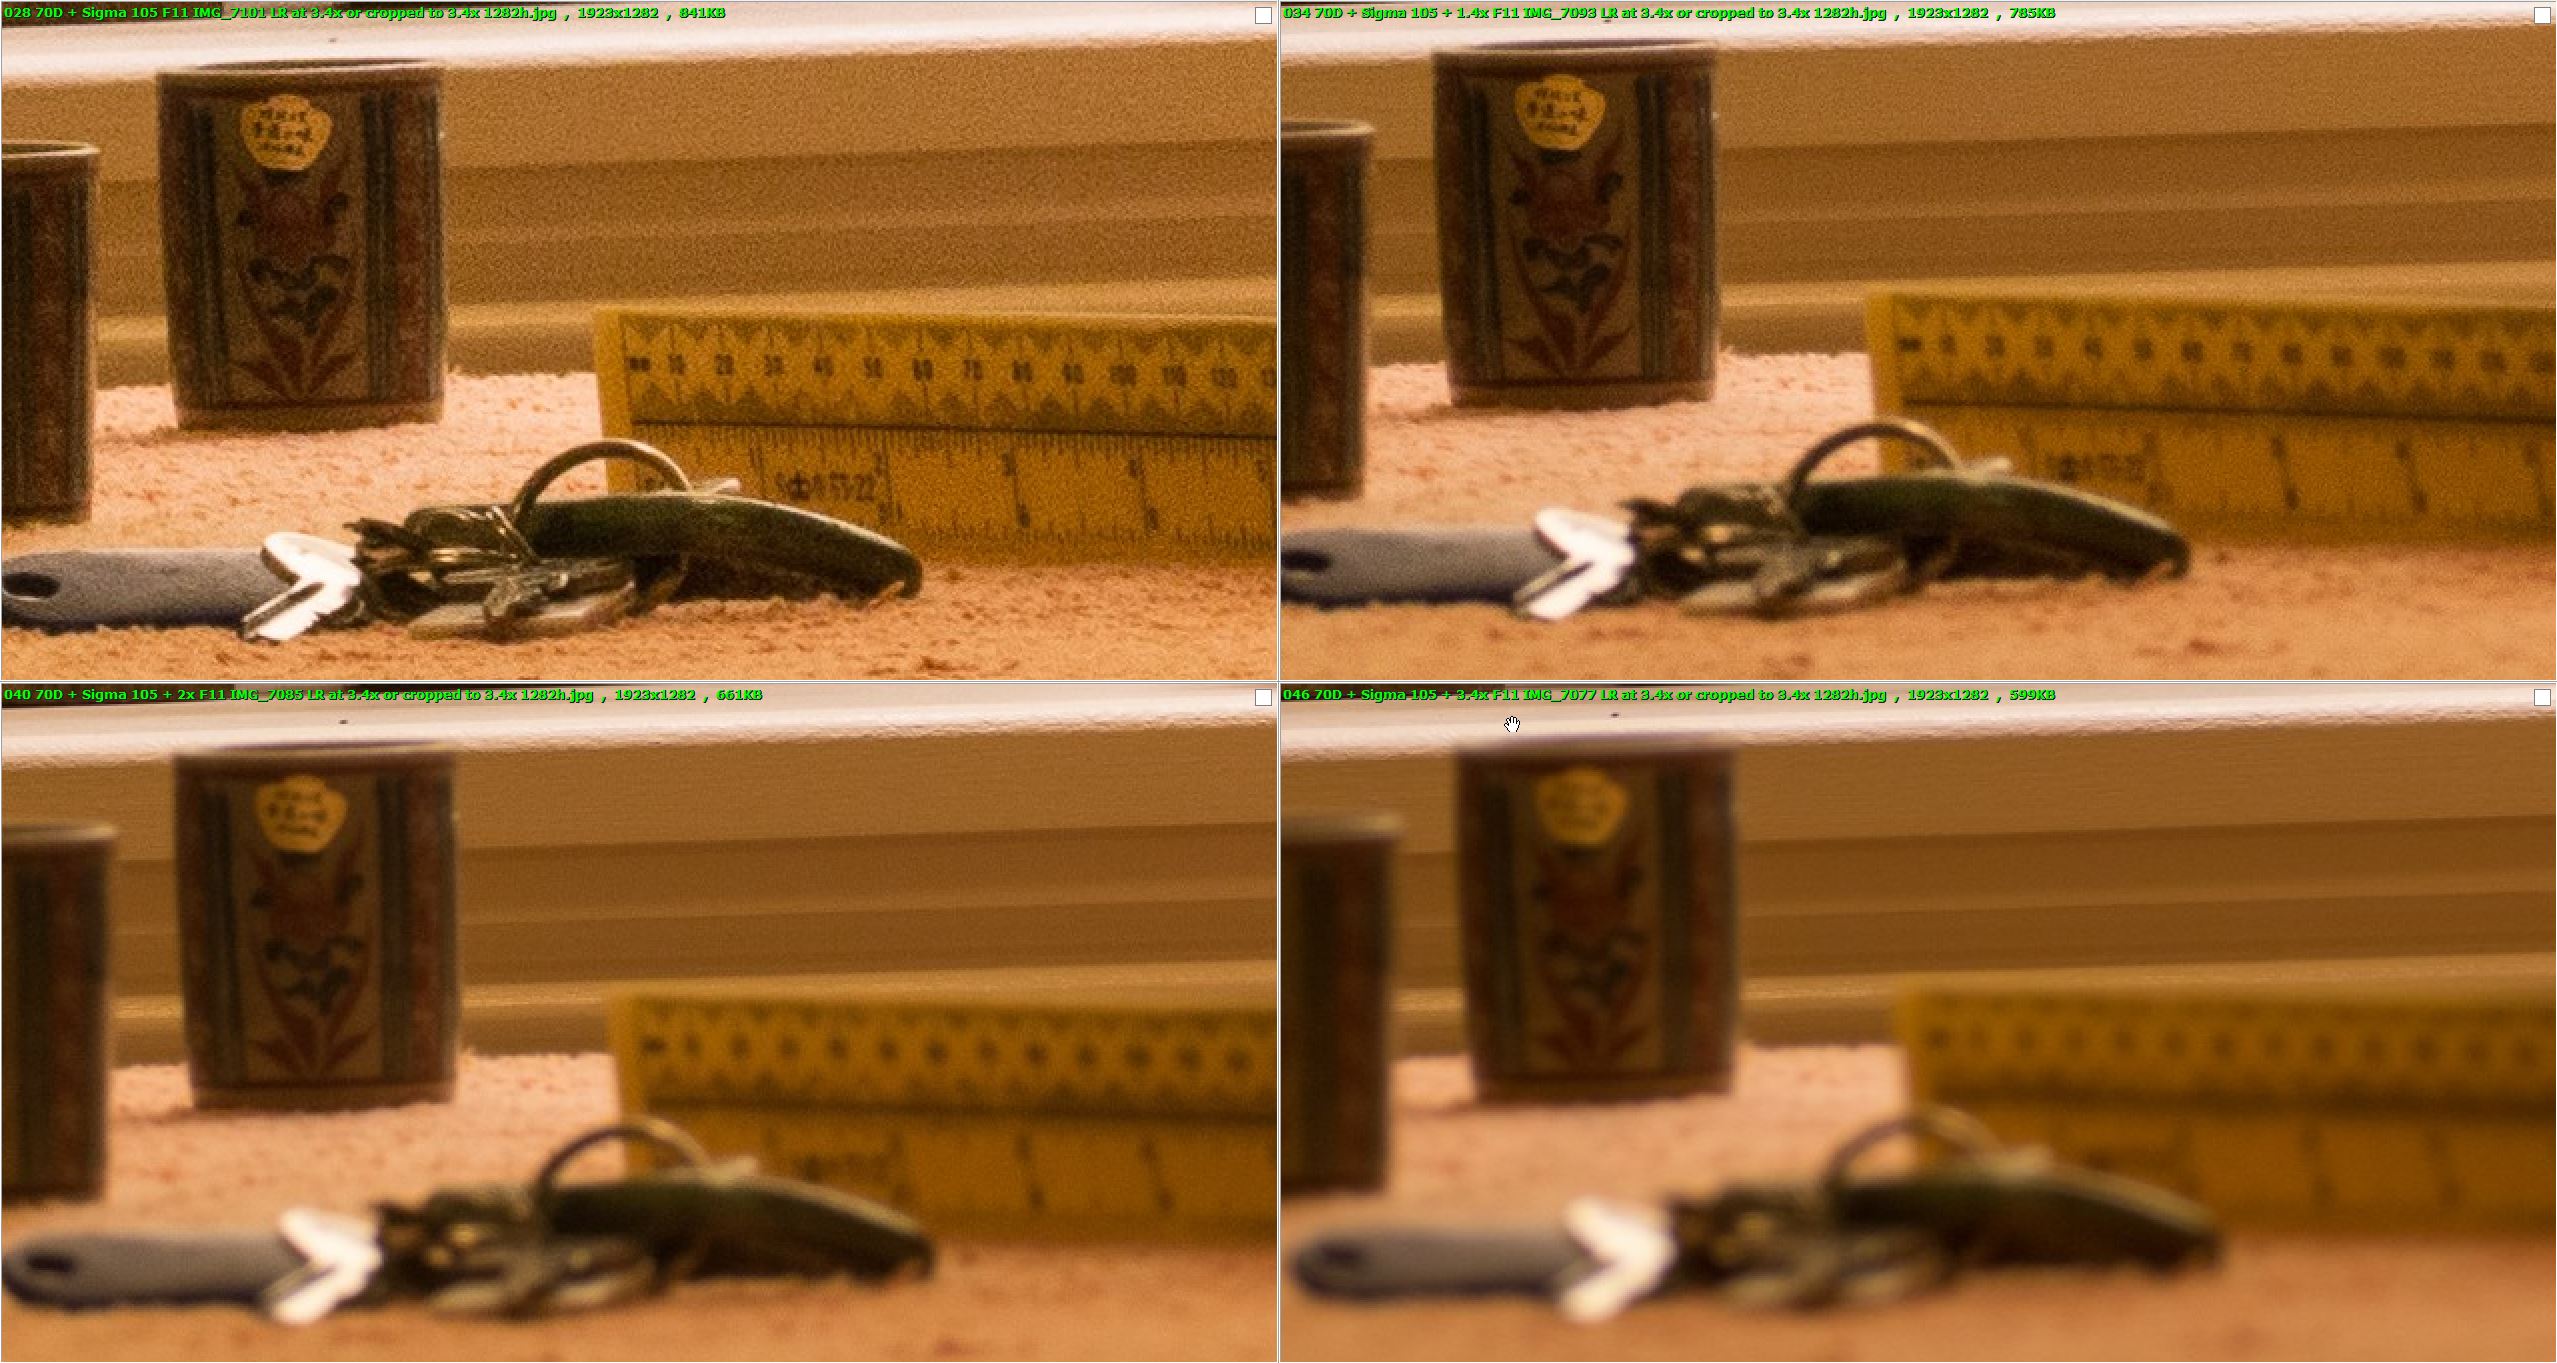
I do prefer the look of the Sigma shots I think that the colour is more accurate, looks better
I know shooting in raw and setting up the colour profiles should make it possible to get the correct colour I think that the sigma lens in your shots just seems to gives better colours
I first thought that the sigma shots were sharper but now think that it's a contrast difference
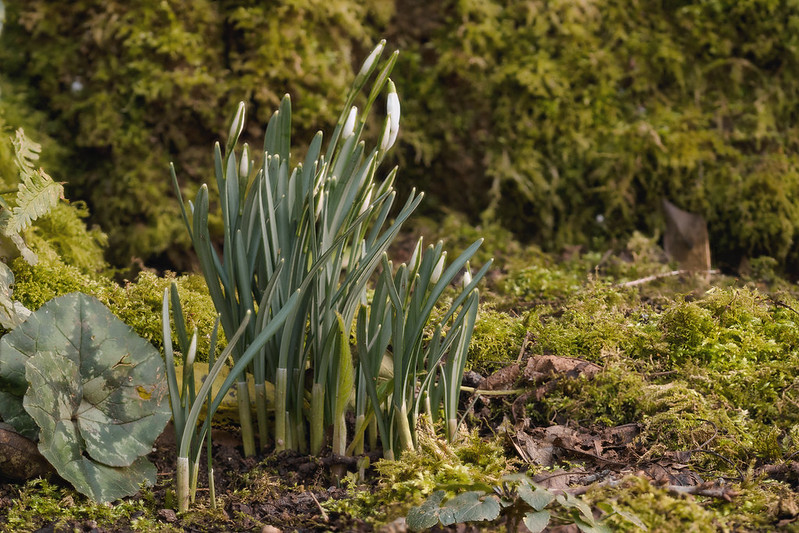
As for my original idea about if it was possible to do higher magnification shots without flash I will just have to try it and see in the spring
Will probably have to use a higher ISO tho
Bye for now")
I work 4 on4 off which is great for the time off but 12 hours shifts can be hard going!
Anyway I hadnt thought about the effective aperture, to be honest I don't go into the technical side of photography that much or even experiment very often I like to keep things simple and just concentrate on the subject
I wonder if the effective apeture effect at the minimum focus distance is why my Marumi shots didn't come out that sharp as I was using a smaller apeture than I thought but to be honest I set the apeture to 8 so the effective apeture would have been about 16 So should still be ok
I do remember that my friend who uses the MPe 65 for close shots said that he never uses an apeture smaller than 5.6 as you get diffraction softening at high magnification
I do still wonder if there's something that I'm not doing right with the Marumi achromat as the online reviews for it are very good , I will try again with it in the spring when the flies and hover flies etc are out, maybe photographing coins isn't that relevant to shooting insects
Looking at your shots starting at the sigma 105 at f22 and 11 the f 11 ones are sharper probably F11 is close the the sweet spot for that lens when you go smaller than that you start to see softening in theory anyway!
With the next 4 with the different cameras
they all look good any of them on its own would be ok
On the last 4 the two 70D setups
I agree the difference between the Effective F 45 and 22 is the same for both the f22 ones are sharper
I do prefer the look of the Sigma shots I think that the colour is more accurate, looks better
I know shooting in raw and setting up the colour profiles should make it possible to get the correct colour I think that the sigma lens in your shots just seems to gives better colours
I first thought that the sigma shots were sharper but now think that it's a contrast difference
As for my original idea about if it was possible to do higher magnification shots without flash I will just have to try it and see in the spring
Will probably have to use a higher ISO tho
Bye for now
Last edited: