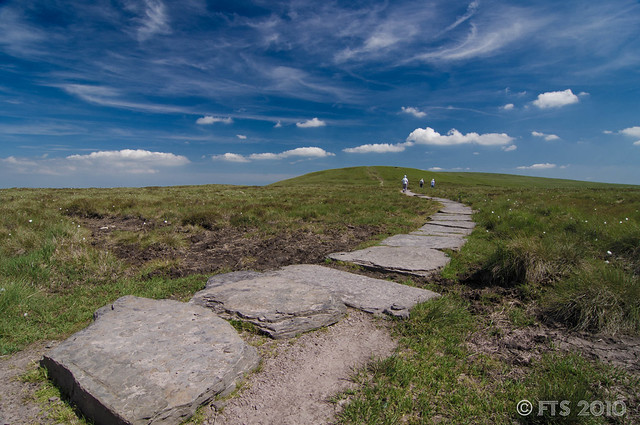
Bracket Exposure for landscape

Messages
927
Edit My Images
Yes
Hi there, quick question if you don’t mind.

I want to make the most of this weekend and pop up into the peak district to play around at taking a few landscapes however I expect the sky to be quite bright and overcast giving that horrible blown out effect.

I don’t yet have any filters so I was thinking of taking a bracketed exposure. I have a 450d and it allows you to set an exposure then allows you to set a point above and below that exposure, this gives three images. I’m assuming that is what is meant by bracketed exposure.

Now could I take these three images and layer them up in Elements 9? That is have the foreground exposure image and the sky exposure image overlaid blending between the two?

Thanks
 
Yes, that would do it, but you have to be sure the camera does not move between shots - solid support or tripod.

But a quick look on the Net at your camera's specs shows it can do auto exposure bracketing, up to +/- 2 stops. All you have to do is select it and and choose the steps and when you press the sutter the camera will take three shots with different settings.

I've found that with AEB if you get a reasonable support while taking the photos you can manage to do it handheld.

I don't know Elements but I'd guess you could combine the thre photos.

You could also try HDR. Photomatix is easy to use, but not free - there is a freel version that produces photos with a watermark, but it is free for ever, so you are not forced into trying it in a limited time.

There are other HDR program, some of which are free - just Google for free HDR.

Dave
 
Yeah, I was going to take my tripod up with me.

What should i set the middle exposure on, the sky of the foreground?

Hi, I'll keep an eye on this one as I'm always after more information...

I usually expose from that which I want most detail and then bracket from there.

Cheers and let us know how you get on...
 
Try -2,0,+2, -1.5,0,+1.5
-1,0,+1 etc etc and see which comes out the best.
 
Metre on and set the correct exposure for a midtone ( a bit of blue sky is always useful ). I'd shoot a set of +/- brackets, to be honest, rather than just one. Try and get a set that puts the lowlights in the bottom third of the histogram without underexposing and the highlights in the top third of the histogram without overexposing. The subsequent photomerge should then retain a good contrast and not turn out flat and crap like a lot of HDR does ;)
 
Thanks chaps, Hopefully I should get chance to get out and about.

I think I will have to play about with a few test shots and see what sort of exposure I should be getting, then use the AEB. Will be taking a tripod and cable release as well.
 
Don't use a CPL with a wideangle lens.

In fact don't use a CPL at all unless you really need it.

Sorry, without trying to be too rude - that is complete rubbish.

A CPL is the best thing you can use if you are taking pictures with a lot of sky in. The punch and reduction in flare it gives the sky is almost essential.

As for wide-angles and CPL...yes clearly they don't work....12mm and CPL, no PP, and look at the sky:whistling:

5056802540_9b6f404817_z.jpg
 
Not with a wideangle it aint.....

Ok for a wide-angle a Grad ND is a valid (if not as flexible) alternative. Although a grad filter in Lightroom/PS is pretty damn effective if you shoot RAW...

But my example photo makes it quite clear that a CPL does work with a wide-angle lens. Not in all circumstances or POV, but that's the nature of a CPL, which is why you fiddle with them...and at least you can immediatly see if they are helping or not, and if not, you could always take it off and gain a stop of light (although on a bright day this might not be helpful anyway...)
 
ChrisGilbert said:
Not with a wideangle it aint.....

I use a cpl to good effect with my 10mm...
 
But my example photo makes it quite clear that a CPL does work with a wide-angle lens.

At the end of the day it's just art and subjective but the physics of light mean that a CPL produces a dark patch in the sky at 90 degrees to the sun, and that effect is emphasised by the increased perspective lent by the WA lens. If you don't mind that dark patch being there then that's the end of the conversation. Personally I think that it detracts very badly from a shot and there are other ways to achieve good skies without trashing your in-camera image using a CPL.
 
And do you notice that it produces a dark patch at 90 degrees from the sun ?

Why do folks say that you can't use a polariser with wide angles? Sometimes it does produce a dark patch (usually when the sun is low) but not always, and sometimes it doesn't matter if the effect is concealed by clouds for example.

If you don't like the effect with a polariser, then you can rotate it and tone it down, or just take it off. I use one with a super-wide a lot (today, for example) and more often than not, it works great.
 
You don't need a tripod when using auto bracketing. It all happens so fast the images are virtually simultaneous and the software synchronises them. Even with moving subjects, clever software can reduce most ghosting when you merge the images.
 
....and if bracketing, remember and keep the aperture constant and let the shutter speed change...
 
Auto bracketing can be a bit hit and miss. My advice, if you're going to the trouble of a tripod and cable releases is to:

- Set the camera to Manual mode, then Spot Metering, around f11, ISO100 (or whatever the lowest is)
- Meter the brightest area. Note the shutter speed required for proper exposure.
- Meter the darkest area. Note the shutter speed.
- Set up your shot for composition with tripod & cable release.
- If you've got a 450D, I think the scroll wheel on the top alters shutter speed in Manual operation. I'm not sure what the default "stop" is between clicks. It's probably 1/3 of a stop.
- Start at one end and take a sequence of shots, clicking the scroll wheel on the camera from the lowest shutter speed through to the highest.

For example:

Darkest area needs 1/10 sec to expose correctly.
Brightest needs 1/125sec.

1st shot at 1/10, then 1/13, 1/15, 1/20, 1/25, 1/30, 1/40, 1/50, 1/60, 1/80, 1/100, 1/125.
Or, if your camera is set up in full stops, it'll be 1/10, 1/15, 1/30, 1/60, 1/125 sec.

This will capture the full range of images needed to get a good exposure. You can then blend in Photoshop, Photomatix, or manually, or just pick the photo you like best from the sequence.

If you shoot the above example auto-bracketing, and meter for the "middle ground", you'll end up with a shot at 1/15, 1/30 and 1/60 which will still leave you with blown highlights and black shadows.

If you're doing this, I'd really recommend Photomatix for processing. If you take a full range of images across the light spectrum, it won't have that "HDR look" that a lot of people bemoan.

Once you get used to doing it this way, it doesn't take much time at all, but it does force you to think about composition.
 
ChrisGilbert said:
And do you notice that it produces a dark patch at 90 degrees from the sun ?

Yes sometimes, not always, but when it does I either turn slightly or use it as part if the composition which more often than not works nicely. Though I tend to use nd grads more than polarisers on my wide lenses now.
 
Last edited:
Auto bracketing can be a bit hit and miss. My advice, if you're going to the trouble of a tripod and cable releases is to:

- Set the camera to Manual mode, then Spot Metering, around f11, ISO100 (or whatever the lowest is)
- Meter the brightest area. Note the shutter speed required for proper exposure.
- Meter the darkest area. Note the shutter speed.
- Set up your shot for composition with tripod & cable release.
- If you've got a 450D, I think the scroll wheel on the top alters shutter speed in Manual operation. I'm not sure what the default "stop" is between clicks. It's probably 1/3 of a stop.
- Start at one end and take a sequence of shots, clicking the scroll wheel on the camera from the lowest shutter speed through to the highest.

For example:

Darkest area needs 1/10 sec to expose correctly.
Brightest needs 1/125sec.

1st shot at 1/10, then 1/13, 1/15, 1/20, 1/25, 1/30, 1/40, 1/50, 1/60, 1/80, 1/100, 1/125.
Or, if your camera is set up in full stops, it'll be 1/10, 1/15, 1/30, 1/60, 1/125 sec.

This will capture the full range of images needed to get a good exposure. You can then blend in Photoshop, Photomatix, or manually, or just pick the photo you like best from the sequence.

If you shoot the above example auto-bracketing, and meter for the "middle ground", you'll end up with a shot at 1/15, 1/30 and 1/60 which will still leave you with blown highlights and black shadows.

If you're doing this, I'd really recommend Photomatix for processing. If you take a full range of images across the light spectrum, it won't have that "HDR look" that a lot of people bemoan.

Once you get used to doing it this way, it doesn't take much time at all, but it does force you to think about composition.

That sounds a bit complicated. No tripod or spot metering is necessary.

1) On Av, establish the brightness of the sky by shooting a couple of test pics. Adjust with minus compensation until the sky just stops flashing with blinkies enabled (highlight over exposure warning, in the menu - should always be on anyway ;)).

2) Then from that point, increase the plus compensation by two stops.

3) Shoot a sequence with auto-bracketing set on +/- 2 stops. It takes less than one second to do the lot.

You will then have a set of images where the sky is held, and two more with shutter speeds two stops and four stops longer than that. Just make sure that your aperture and/or ISO are set so that the longer exposures don't get any subject movement or camera shake. Bumping the ISO up a bit and using IS is usally enough to ensure that.

That weird HDR look is created when you use extremes of exposure levels, like +/- 4 stops, not by how many exposure increments you use.
 
Thanks for the input people.

When I do an AEB I have to press the button 3 times, plus I don't think that I have a flashing highlight indicator on my 450D.

I must add that playing with the filters in Lightroom 3 is easier than I thought.
 
Thanks for the input people.

When I do an AEB I have to press the button 3 times, plus I don't think that I have a flashing highlight indicator on my 450D.

I must add that playing with the filters in Lightroom 3 is easier than I thought.

Yes, you do have blinkies (see handbook) and if you set the drive on continuous it will take three bracketed shots in succession.

It's really easy. And really fast when you get the hang of the controls. Let the technology do the work :thumbs: One guy on here uses auto-bracketing and HDR technique for absolutely everything (you can always bin the extra exposures if you don't need them).

Since you mention Lightroom, if you shoot Raw and are careful with your exposure settings (particularly using expose to the right technique - search on here or google it) then you can get very effective faux-HDR that looks pretty good just from one image. One of the upsides being that it can never be too extreme on the effect.
 
Back
Top