- Messages
- 485
- Name
- Chris
- Edit My Images
- Yes
Took a trip to the moors at the weekend with camera in hand and amongst the shots I took I had a go at doing a bracketed panoramic with my Nikon D3300, which doesn't have an auto-bracketing feature, and using the kit 18/35 lens. I felt the shots I wanted, what with the position and brightness of the sun would benefit from bracketing to avoid too much shadow/lost detail.
This is the process I used, I've no idea if it is right/wrong or could be improved...
Firstly, I wasn't sure what to do about 'focusing', so used the AF to focus mid-frame (infinity) then switched to MF so that the focal plane (?) would stay constant as I panned the camera. I left the aperture at f11 and ISO at 100 and took three shots in each of the three 'panned' positions. I used the 'exposure' meter to set the shutter speed to get a 'normal' exposure and then 1-stop over and under. As I panned away from the sun, the shutter speeds changed in order to get the 'normal' exposure - as expected.
When I came to merge/join it all together, I wasn't sure whether I should merge each bracketed set first and then 'stitch' them or the other way around. I opted to stitch them first and then merge them - right way or not?
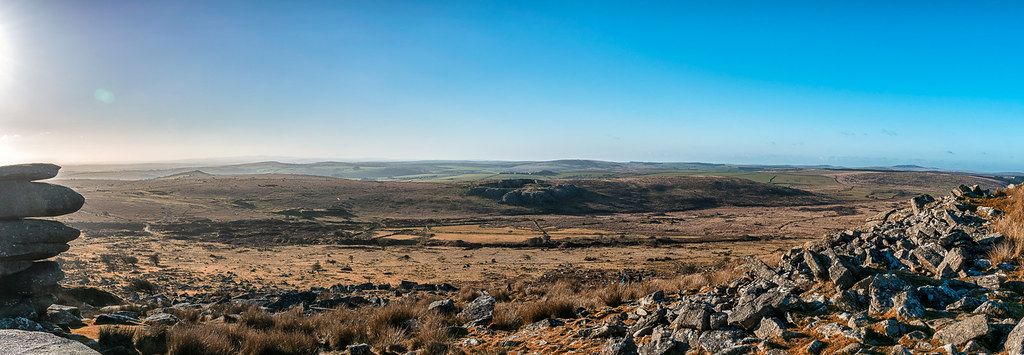
At this stage I ended up with this (IT HAS GLARING ISSUES - excuse the pun) and it probably should just be binned, but as a learning experience I wanted to see what I could make of it...

Ignoring the glare on the left, the shading/coloration of the sky is all haywire. The original images show this too and I guess it's to be expected or could I have done anything at the time of capturing the shots to reduce this effect? I applied a graduated filter from the right which seems to have toned it down.
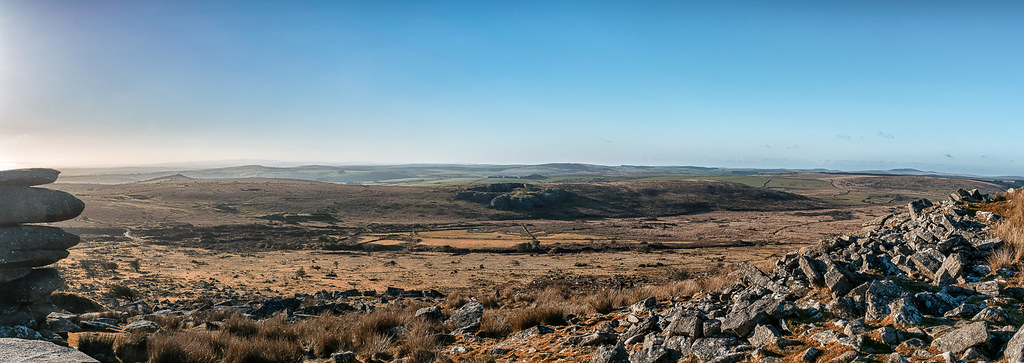
The sun glare, it didn't seem too bad on the back of the camera at the time and I couldn't reposition myself much to have made much difference whilst keeping the pile of rocks in-frame. A different time of day would have avoided this, so I guess that's the real answer here. Since that is unlikely to happen anytime soon, I've tried some PP. I first tried to 'blend' it out, but I wasn't happy with the results. Cropping that side of the image left too little of the rocks so I had a very quick and rough go at moving the rocks themselves and then cropping that side and I think with a bit more care that could work. It would also help with the halo'ing along the edge of the top rock. lens flare artifacts and people (arghh!!) can easily be pp'd out.
Finally, what you probably won't be able to tell for sure from these images is that nothing really seems to be as sharply focused as I would have liked. This seems to be a recurring theme in my 'big landscape' photos
And so, this is the rough edit of where I'm up to with it, the one big thing I'm still not happy with is the sky on the left....

Any tips or ideas on how I could have captured the image better/sharper etc or on the PP side greatly appreciated.
Chris
(In hindsight, I'm not really sure if I needed to bother with the bracketing. The 'left' end was the worst leaving the pile of rocks almost silhouetted. I could probably have just 'pulled' out the shadows on them, and shot it slightly underexposed but then I think when stitched the exposure differences would mess up the sky)
This is the process I used, I've no idea if it is right/wrong or could be improved...
Firstly, I wasn't sure what to do about 'focusing', so used the AF to focus mid-frame (infinity) then switched to MF so that the focal plane (?) would stay constant as I panned the camera. I left the aperture at f11 and ISO at 100 and took three shots in each of the three 'panned' positions. I used the 'exposure' meter to set the shutter speed to get a 'normal' exposure and then 1-stop over and under. As I panned away from the sun, the shutter speeds changed in order to get the 'normal' exposure - as expected.
When I came to merge/join it all together, I wasn't sure whether I should merge each bracketed set first and then 'stitch' them or the other way around. I opted to stitch them first and then merge them - right way or not?
At this stage I ended up with this (IT HAS GLARING ISSUES - excuse the pun) and it probably should just be binned, but as a learning experience I wanted to see what I could make of it...

Ignoring the glare on the left, the shading/coloration of the sky is all haywire. The original images show this too and I guess it's to be expected or could I have done anything at the time of capturing the shots to reduce this effect? I applied a graduated filter from the right which seems to have toned it down.
The sun glare, it didn't seem too bad on the back of the camera at the time and I couldn't reposition myself much to have made much difference whilst keeping the pile of rocks in-frame. A different time of day would have avoided this, so I guess that's the real answer here. Since that is unlikely to happen anytime soon, I've tried some PP. I first tried to 'blend' it out, but I wasn't happy with the results. Cropping that side of the image left too little of the rocks so I had a very quick and rough go at moving the rocks themselves and then cropping that side and I think with a bit more care that could work. It would also help with the halo'ing along the edge of the top rock. lens flare artifacts and people (arghh!!) can easily be pp'd out.
Finally, what you probably won't be able to tell for sure from these images is that nothing really seems to be as sharply focused as I would have liked. This seems to be a recurring theme in my 'big landscape' photos
And so, this is the rough edit of where I'm up to with it, the one big thing I'm still not happy with is the sky on the left....

Any tips or ideas on how I could have captured the image better/sharper etc or on the PP side greatly appreciated.
Chris
(In hindsight, I'm not really sure if I needed to bother with the bracketing. The 'left' end was the worst leaving the pile of rocks almost silhouetted. I could probably have just 'pulled' out the shadows on them, and shot it slightly underexposed but then I think when stitched the exposure differences would mess up the sky)

