... as with the Mini2 diffusers, it may be that when I examine the results [from the new Midi 2.5 diffusers] on the PC and see how they respond to post processing I find that it was a nice idea, but not something I'd want to use again.
To be continued.
")
I haven't looked at those results yet. I got sidetracked. Having done a daytime and a nighttime session in the garden with the new Midi 2.5 diffusers, and thinking that what I had seen on the LCD looked promising, I went off the next morning to one of the local nature reserves. I had a short, but not very good time. I didn't find much to photograph, and it was obvious from what I could see on the LCD that nothing was working right. Loads of dark backgrounds that my clever background illumination did nothing whatever for, while the subject illumination looked horrible. I cut the session short, went home, looked at the images on the PC and confirmed that they were indeed dire.
That knocked me back a bit. I had been really positive about the new diffusers, but did this session mean I had misled myself about their usefulness? I didn't have the heart to look at them. I didn't want to know. I sulked for a while instead.
And then I fell to thinking about concave diffusers, yet again. I keep coming back to the fact that some of the best macros I have seen have been produced by people using concave diffusers. But this has tended to be relatively high magnification work, with short working distances. I use lower magnifications quite a lot, and these have longer working distances. I have never been able to work out how I could build a concave diffuser large enough to deal with working distances of up to half a metre, which is the working distance of my least powerful achromat, the Canon 500D.
After doing some measurements and cutting up pieces of paper I realised that I might be able to use the 160 gram frosted plastic sheet as a concave diffuser. Not for the 500D, but for the others. The Raynox 150 is the one I use most and that has a working distance of around 16 to 20 cm. A piece of A4 paper is about 30 cm long, and the frosted plastic sheet comes in A4 sheets. So it might be long enough. The thing is though, how could you fix it to the lens in a way that would be practical to use?
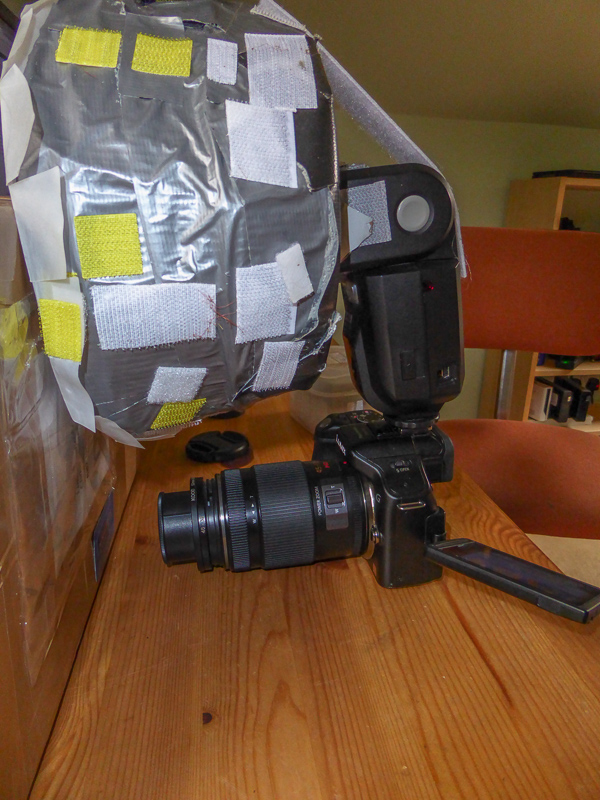
With an ordinary lens, I couldn't imagine this would be possible. But the FZ200 doesn't have an ordinary lens. The way I have it configured the lens sits inside a fixed adapter tube. So perhaps I could mount a concave diffuser on the adapter tube.
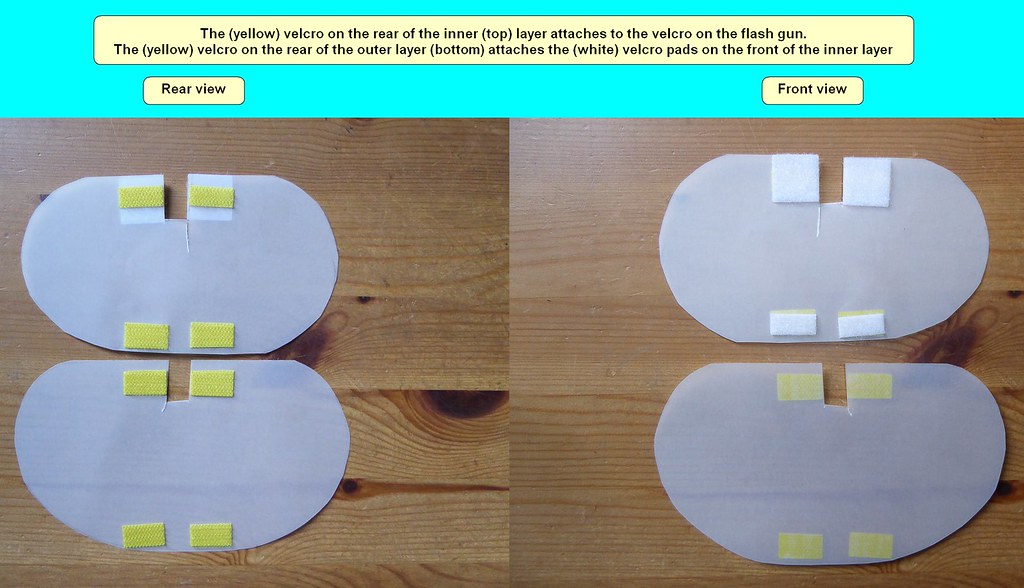
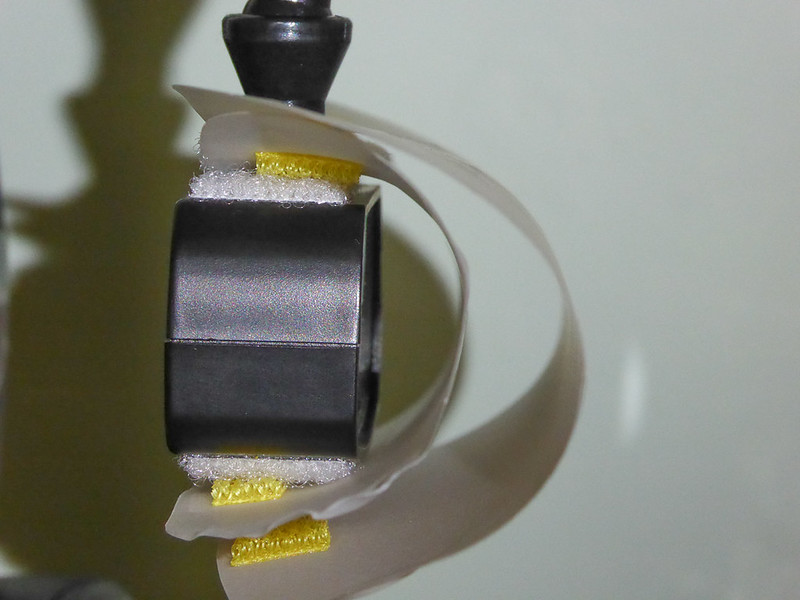
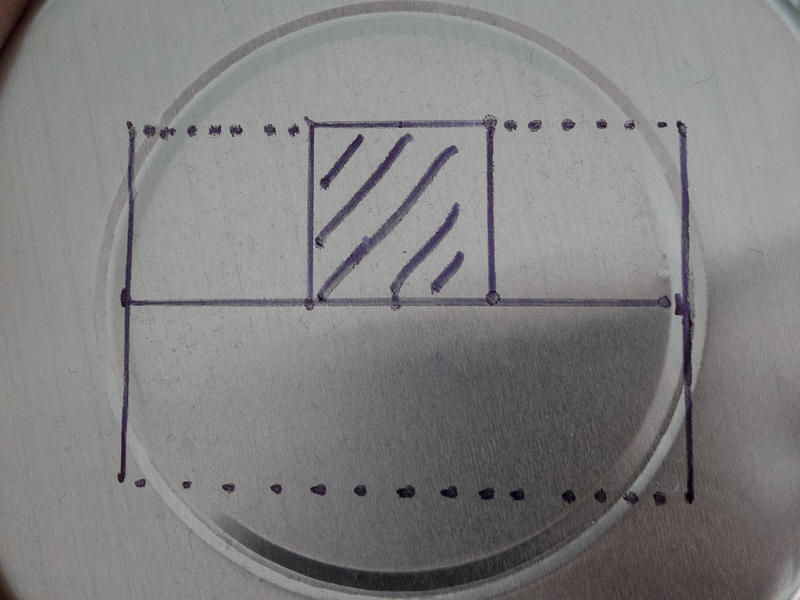
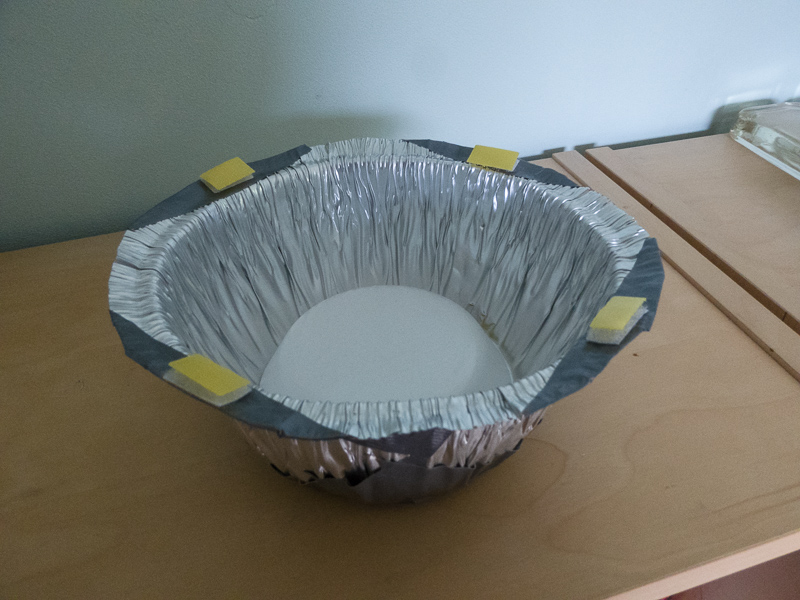
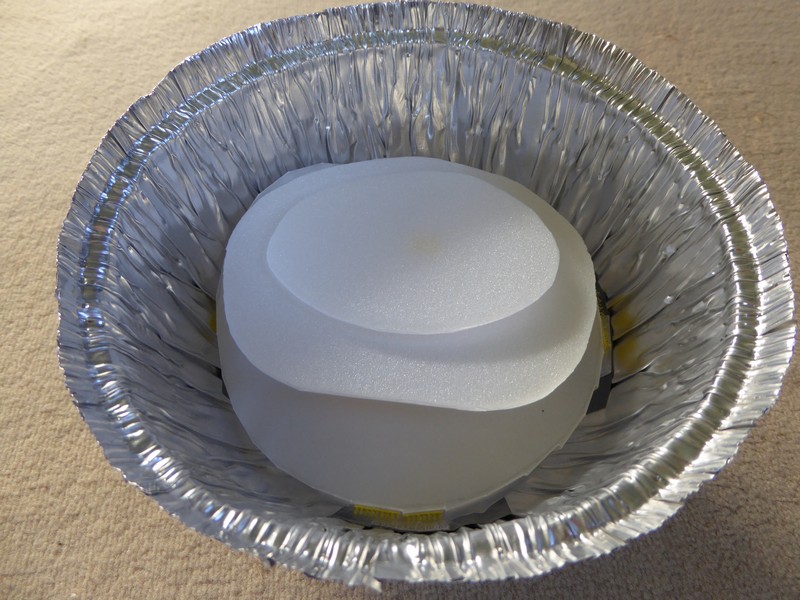
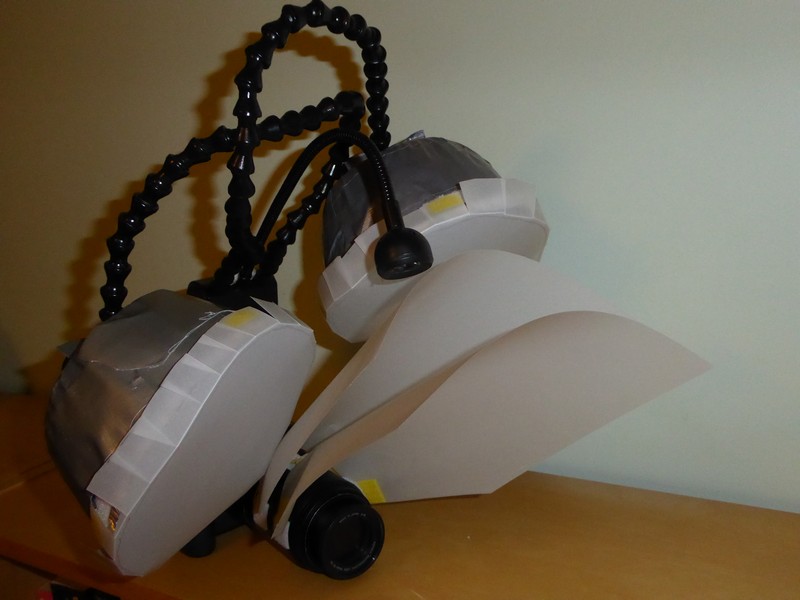
It turned out that I could, with velcro. (The two yellow velcro pads on the long straight edge and the little white pad in the middle are explained later. At the moment we're just looking at the velcro pads on the left.)

0789 01 Single layer, background illumination arrangement by
gardenersassistant, on Flickr
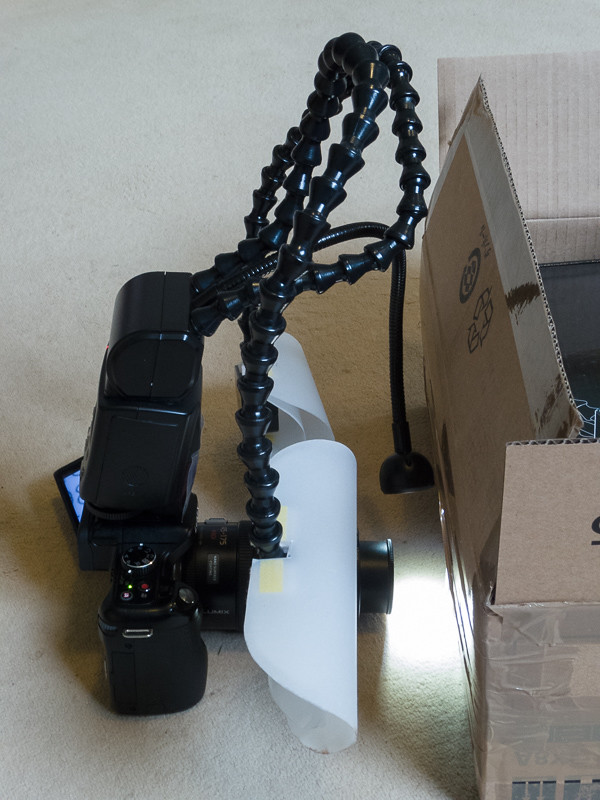
The configuration shown here is an "illuminate the background" setup, which gives a clear view of the diffuser. To my delight I found that it was fairly easy to take the diffuser on and off, and the angle could be adjusted too. It was possible to use the camera pointing somewhat downwards, with the diffuser acting like a light tent. (And by adjusting the diffuser so it is at a more extreme angle to the horizontal, you can increase the downward pointing angle at which you work.)
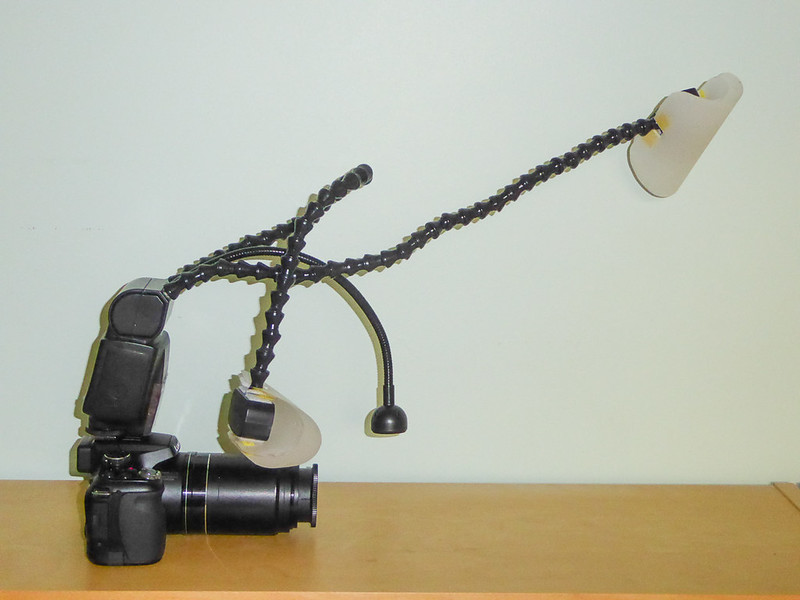
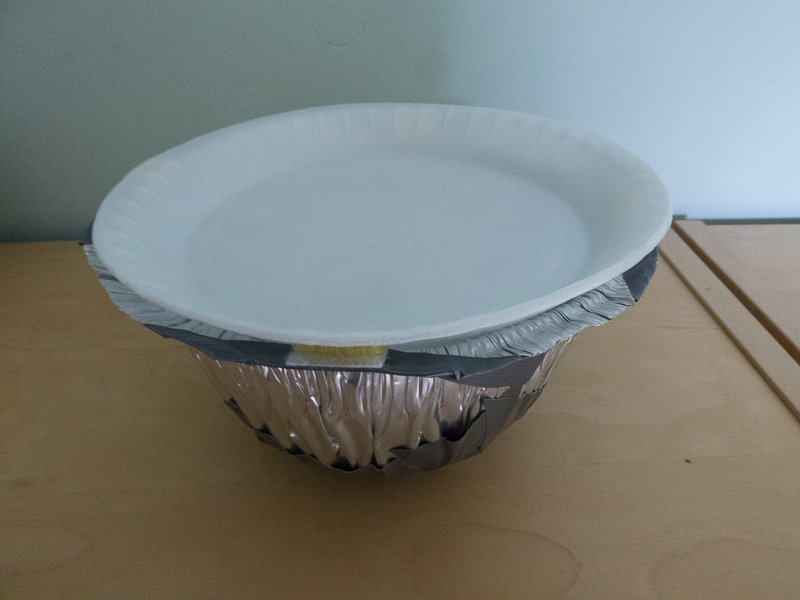
Here is what it looked like from the front. The flashgun diffusers are shown here very close to the concave diffuser, but they don't have to be, and in fact are probably better further away.

0789 02 Single layer, subject illuminated from both sides by
gardenersassistant, on Flickr
Does it work? I did a nighttime session.
The diffuser stayed in place all through the session, despite coming into contact with foliage etc.
I probably had to use a bit more flash power, but it seemed to work ok, although at times I was getting close to using maximum flash power. (I have become much more aware of how much flash power is needed because the KX800 is manual control only - no TTL flash. And I continue to be surprised at what variation there is in how much power scenes need. Quite often I have been working at 1/8 power or so, but sometimes less for one or occasionally both of the flash guns, and sometimes full power for one or very occasionally both of the flash guns. It isn't surprising that full power is needed when trying to illuminate a distant background, but I did find it surprising to need so much power sometimes when both guns were pointing directly at the subject. I think though that this was when the subject was significantly shielded by surrounding foliage. In general though, the power level needed was ok, and I didn't have to wait around for the flash to recycle.)
The focus light shines through the concave diffuser and still provides enough light for focusing even on the lowest setting almost all the time.
Quality-wise, on the LCD things looked promising, but of course that can be misleading. You need to work on them on the PC.
I haven't. Yet. Because in the morning I had another idea.
If one layer of concave diffusion is good, then why not two, or more?
I tried putting another layer of 160 gram frosted plastic on top of the first one. It was too heavy. It made the underneath one sag. No good. However, I have some thinner, 90 gram frosted plastic, and I could use that as a second layer and it stayed in place.

0789 03 Dual layer, subject illuminated from top and side by
gardenersassistant, on Flickr
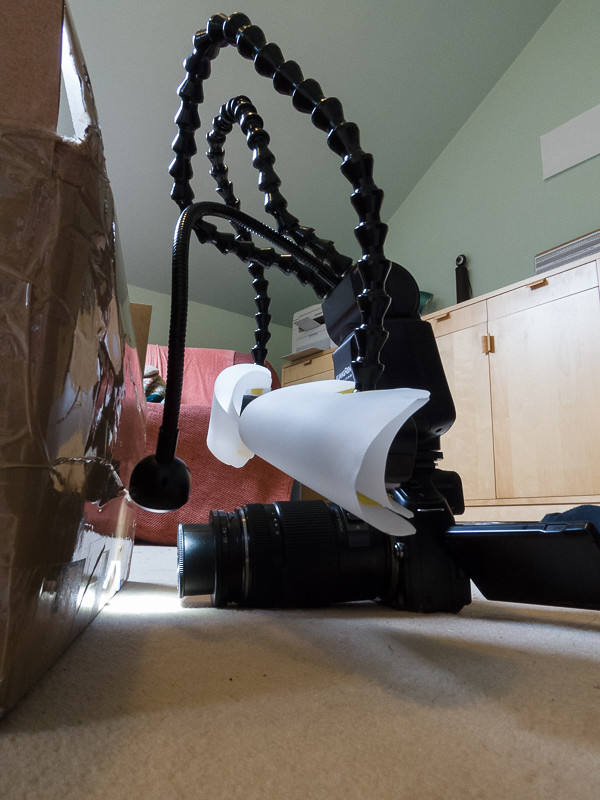
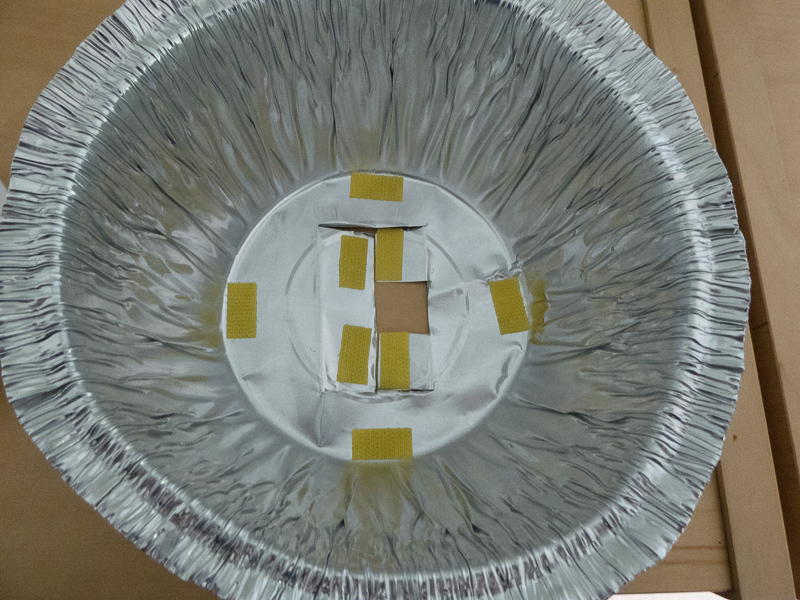
Here from the front you can see the air gap between the two layers. The gap at the top is created by the position of the fixings at the side. At the bottom, in the middle, there is a pile of three pairs of little velcro squares stuck to one another, on the little white velcro pad we saw earlier.

0789 04 Dual layer, showing air gap between the layers by
gardenersassistant, on Flickr
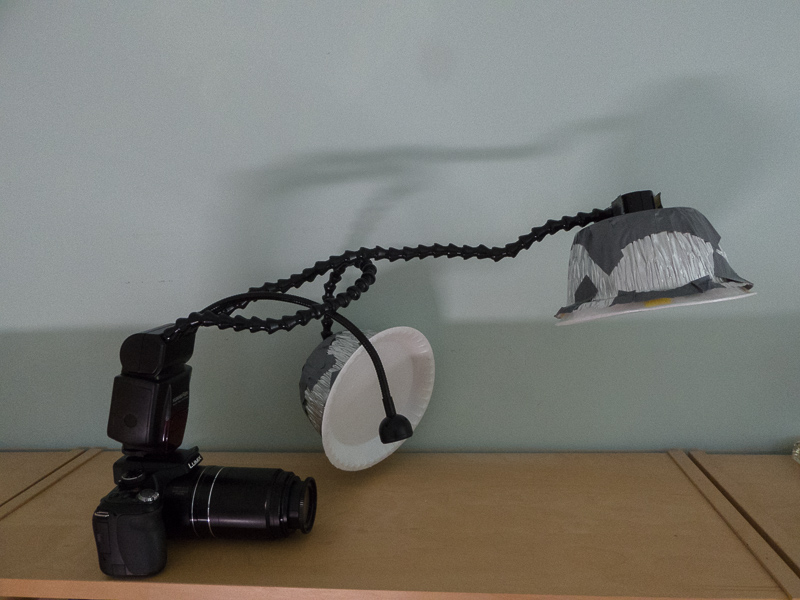
Here it is from the front.

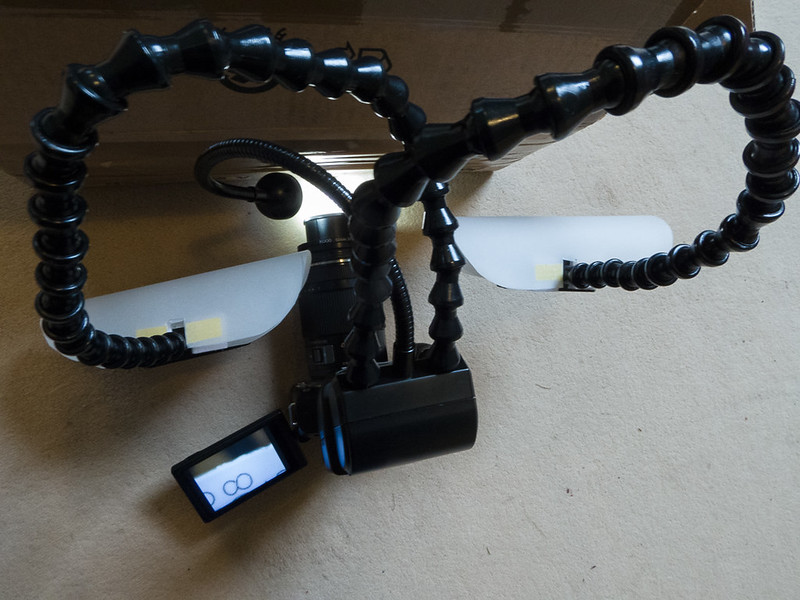
0789 05 Dual layer, illuminated by pair of Midi 2.5+ diffusers by
gardenersassistant, on Flickr
And from the top, which shows the curvature of the diffusion layers.

0789 06 Dual layer, showing curvature by
gardenersassistant, on Flickr
I spent an hour and a half testing it in the garden this afternoon.
And the results? Don't know. I got sidetracked.
I was a bit concerned about the amount of flash power needed. I think I actually needed maximum power once or twice. So I decided to take off the second layer and spend some time using just one layer. I spent about 50 minutes using the single layer, and I have looked at the 170 or so images that I captured. I did my normal selection and processing workflow, and ended up keeping 30. At 17%, that is a rather higher hit rate than normal, but because I was testing the illumination I kept some which I normally would have rejected because of their having insufficient DOF for my taste. Even so, especially given the fact subjects are a bit thin on the ground, that keeper rate was quite promising. The 30 images that I processed and kept are in
this album at Flickr.
One thing that was very noticeable with the images I worked on was that they were much easier to handle than I'm used to. The FZ200, with its small sensor, can deliver results that can be quite taxing to bend into shape. The images from this session seemed very straightforward to handle, which I take to be a good sign.
In terms of usability, I was pleasantly surprised. I was expecting the concave diffuser to get in the way a lot. It didn't. It was obviously in the way sometimes, but not much, and I didn't take it off in either the double or single layer session in order to let me get at a subject. I did squash it against foliage etc and bend it a bit once or twice in order to get the position I wanted, but for such a flimsy looking thing it proved surprisingly robust (or flexible, which in practical terms amounts to much the same thing). I'm sure it will get damaged, but fortunately it will be very easy to make replacements as needed.
The concave diffuser also didn't get in the way of my handling the camera, both in terms of handling the camera to take shots, including some at very awkward angles, and also in terms of changing achromats. The one way in which it did get in the way was making it difficult to get a direct view of the subject. But I worked around that without too much difficulty.
I have only tested the concave diffuser with the Raynox 150 mainly, and briefly with the Raynox 250. And the shots of a cranefly in the single layer session used the Canon 500D, which rather to my surprise worked fine. (It needed pretty much full power, but given the working distance of the 500D I didn't find that surprising.) I'll try some higher magnification stuff at some point. I might make a separate, much shorter concave diffuser for that.
And the image quality? I'm not displeased.
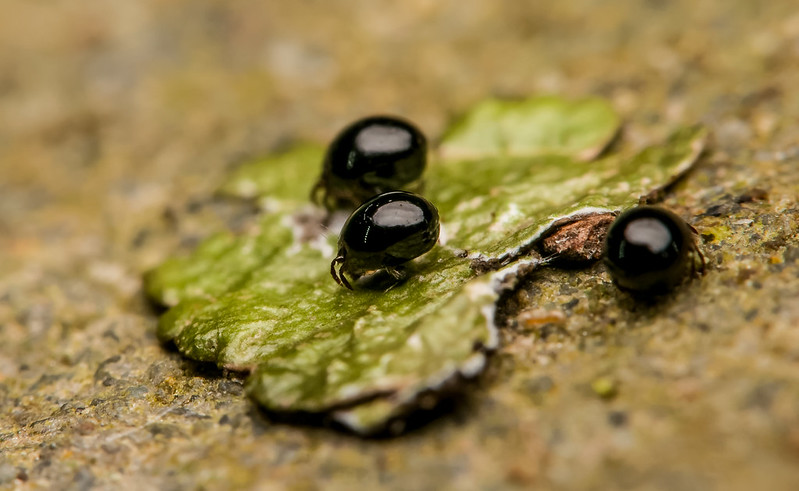
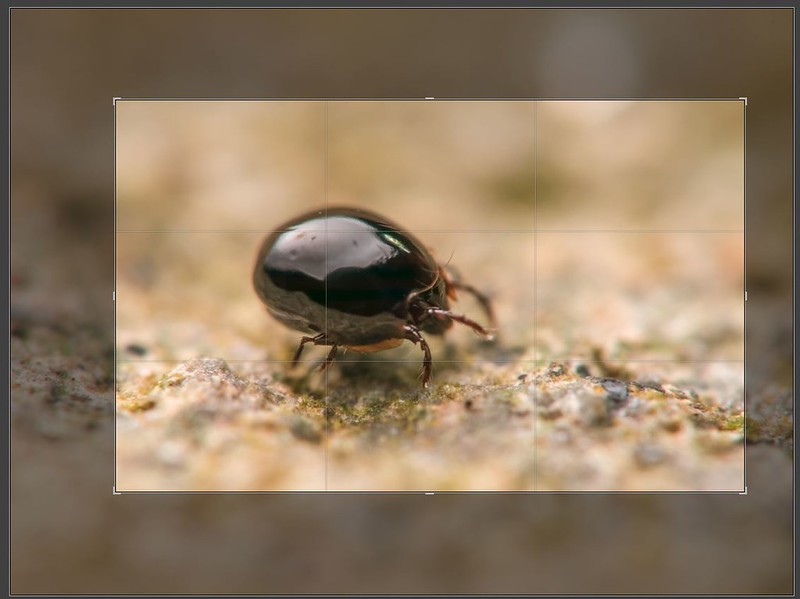
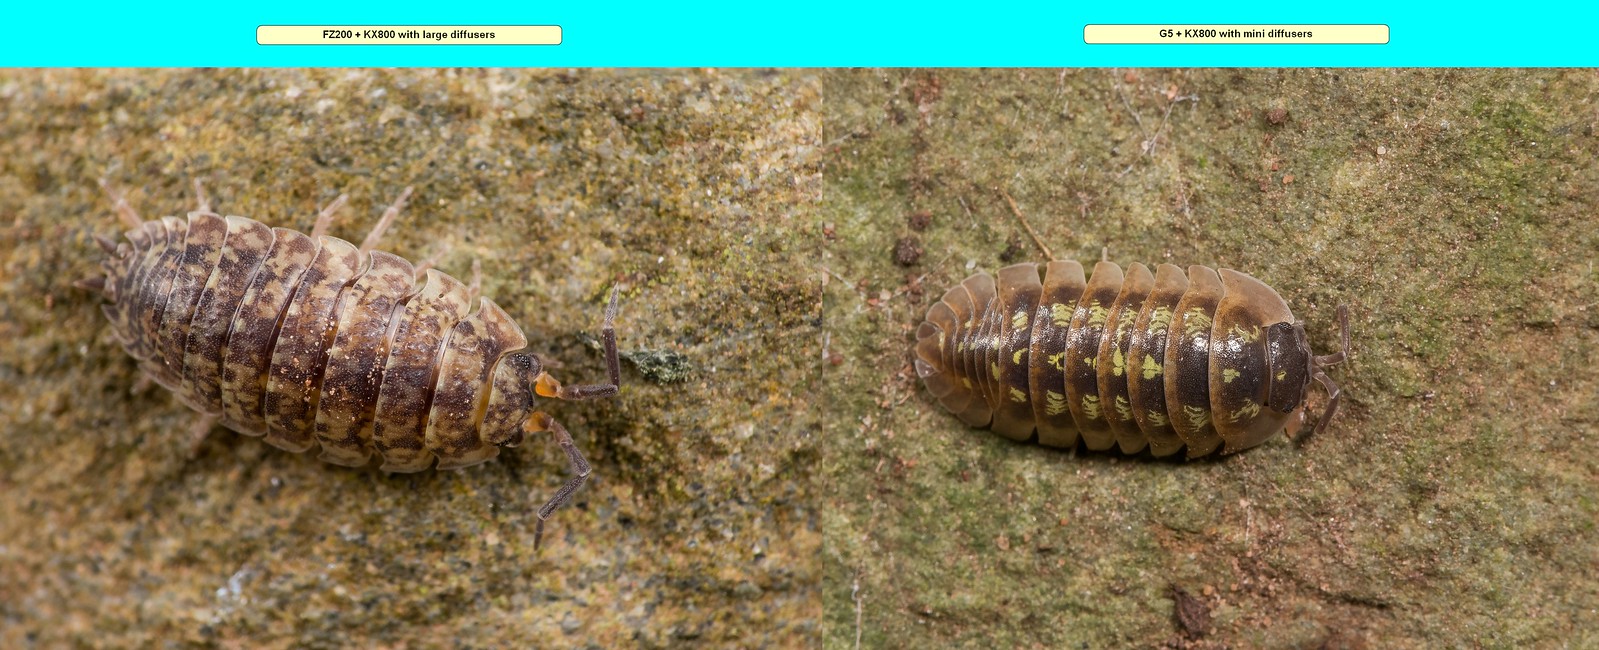
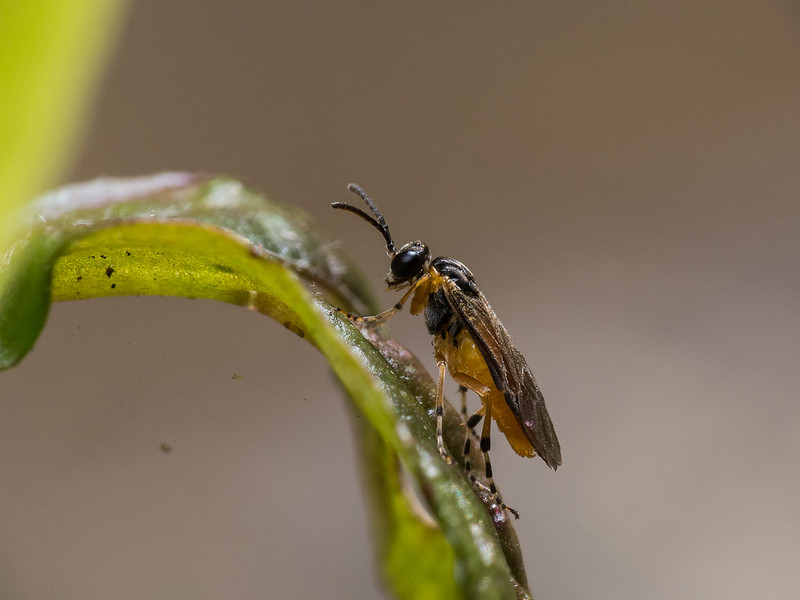
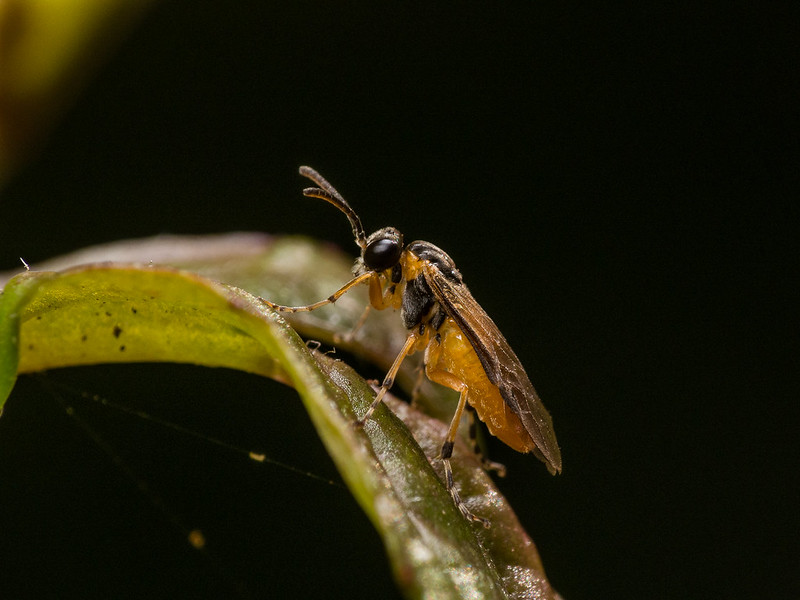
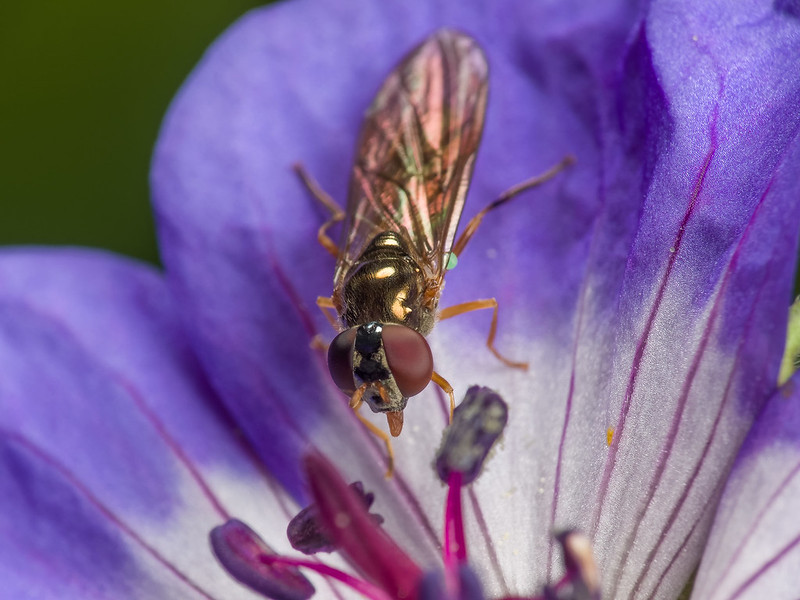
I'll post some images from this session in the main forum, but here are a couple that I find quite informative, and promising. In the absence of there being much else to photograph by way of invertebrates at the moment, especially during the day, I have been photographing this particular species of spider quite a lot recently. They always tend to have rather bright flash reflection lines along some of the legs, and troublesomely bright areas on the body. These examples have the lines and the bright areas, but in comparison with previous shots they are I think relatively mild.

0790 01 P1150848_DxO LR by
gardenersassistant, on Flickr

0790 03 P1150854_DxO LR by
gardenersassistant, on Flickr
As I get round to processing them, I'll post examples (assuming there are any that are good enough) from the other sessions, for example using the dual layer concave diffuser, and using the Midi 2.5 diffusers without the concave diffuser.


 Ivy Bee (Colletes hederae) garden photo (uncropped). 15th-September-2015.
 Ivy Bee (Colletes hederae) garden photo (uncropped). 15th-September-2015.
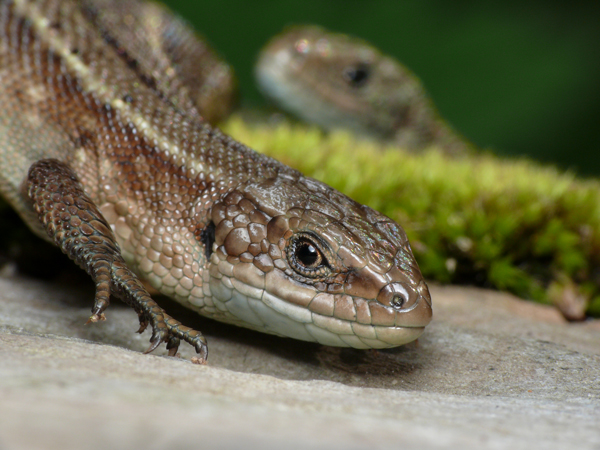 Adult and Juvenile Common Lizards (uncropped). 20th-September-2015.
 Common Darter Dragonfly, on my hand (uncropped). 19th-September-2015.
 Common Darter Dragonfly (uncropped). 20th-September-2015.
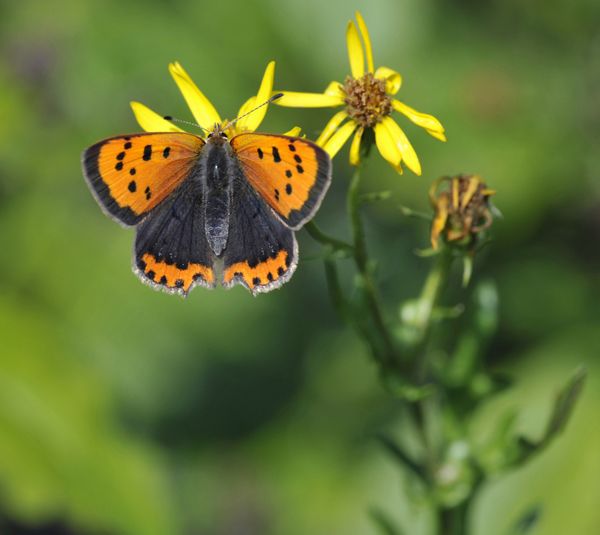 Small Copper Butterfly. 20th-September-2015.
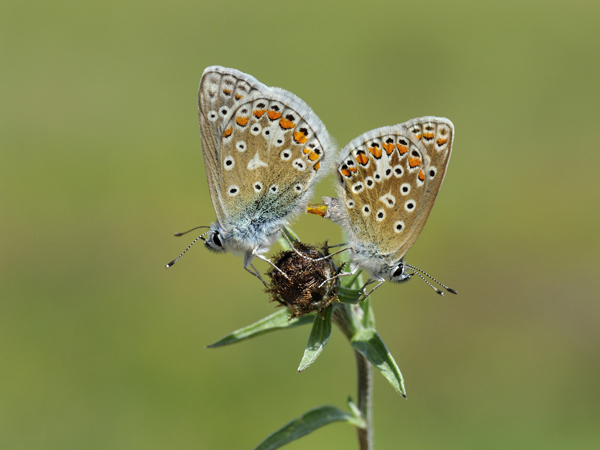 Pair of mating Common Blue Butterflies. 25th-July-2015.
 Dark Green Fritillary Butterfly (male). 21st-June-2015.
 Common Blue Butterfly (female). 14th-June-2015.
 Adonis Blue Butterfly (male). 30th-May-2015.
 Chalk-Hill Blue Butterfly (male). 4th-July-2015.
 Mating pair of Chalk-hill Blue Butterflies. 31st-July-2015.