Cheap light meters?

Gareth, this is well worth a look starting at 37 minutes in.


The method he shows for pointing the incident meter at the light, is one way to bias the meter for over and under exposure. however It will not give the correct full range exposure. which is only obtained by pointing the meter from the subject towards the camera.
Used in this way you will not burn out the highlights, but you may not get usable details in the darkest blacks.
but this is a better starting point for both film and digital raw shooting, or any time retaining highlight detail is important.
when shooting film the resultant negatives can have their shadows opened up during printing. and the tonal range adjusted to choice during post processing in digital.
 
The only cameras I use with built in meters, in preference to hand held, are my EOS 3 and 6D, even though some other film cameras I own have TTL or other metering options.
Same here (appears we have the same taste in cameras!), and I find my EOS 30 and 30v are even better than the EOS-3, as they have a 35 zone metering system, so it's only the strongest backlit subjects that will catch them out, providing the photographer uses a bit of nouse (where necessary) if shooting mostly sky type landscapes and wants to keep some detail in the strip of land at the bottom.

Either I've been very lucky, or you very unlucky. The five Lunasixes (Lunapro in America, I think) I have agree.

I don't know which of the two it is either, but none of the three agreed with each other. I kept the one that appeared most accurate and sent the other to be recalibrated and keep it as a spare. Even the recalibrated one and the 'accurate' one don't quite agree when using the low light scale! They're probably near enough for print film though - I'll have to use them both and see which exposure I prefer, perhaps a mildly interesting lockdown/winter mini-project if I get really bored?!

The reason I bought the third one was because it was going cheap and came with a silver-oxide battery/voltage adaptor (which are quite expensive for what they are), a clip on tele lens adaptor and virtually mint leather case. I wasn't accurate when I tried it though and is sitting in a cupboard for 'spares or repair' if necessary.
 
Last edited:
I don't know off hand if this counts as a recalibration, but according to the manual (my first Lunaxix was bought new in 1965 - still going) that came with it, if you remove the battery there is a mark that the needle should reach when you use battery check. The screw on the back is to shift the needle to this mark if the needle isn't in this spot. N.B. disclaimer, this is from memory. I've never done it.
 
I don't know off hand if this counts as a recalibration, but according to the manual (my first Lunaxix was bought new in 1965 - still going) that came with it, if you remove the battery there is a mark that the needle should reach when you use battery check. The screw on the back is to shift the needle to this mark if the needle isn't in this spot. N.B. disclaimer, this is from memory. I've never done it.
Thanks. I'll have a look tonight, I think it might be to 'zero' the needle, but I'm not sure. I'll download a manual (which is annoying as I know I had one knocking about once but couldn't find it when I (re)bought a Lunasix - typical!) and see if it tells me anything.
 
Thanks all! Information overload , there's a lot to take in and a few different methods to get my head around and explore!

I've just Googled the spot view 10 and seen one on eBay for sale that I might pull the trigger on as it'll go on my polaris and it can become multifunctional.

I've also downloaded this app (see attached images) and as my phone has 3 lenses on the back I can choose in the app which lens to use. The 3 phone lenses cover wide, standard and tele and the app also can freeze the camera to lock in the exposure and you can touch to spot for highlights or shadows.

Will watch the videos tonight when the kids are in bed and I can concentrate!
 

Attachments

  • Screenshot_20201113_083948.jpg
    Screenshot_20201113_083948.jpg
    45.8 KB · Views: 11
  • Screenshot_20201113_083637_com.willblaschko.android.lightmeterv2.free.jpg
    Screenshot_20201113_083637_com.willblaschko.android.lightmeterv2.free.jpg
    42.8 KB · Views: 11
  • Screenshot_20201113_083806_com.willblaschko.android.lightmeterv2.free.jpg
    Screenshot_20201113_083806_com.willblaschko.android.lightmeterv2.free.jpg
    57.9 KB · Views: 10
  • Screenshot_20201113_083819_com.willblaschko.android.lightmeterv2.free.jpg
    Screenshot_20201113_083819_com.willblaschko.android.lightmeterv2.free.jpg
    58.9 KB · Views: 11
  • Screenshot_20201113_083824_com.willblaschko.android.lightmeterv2.free.jpg
    Screenshot_20201113_083824_com.willblaschko.android.lightmeterv2.free.jpg
    52.3 KB · Views: 12
  • Screenshot_20201113_083836_com.willblaschko.android.lightmeterv2.free.jpg
    Screenshot_20201113_083836_com.willblaschko.android.lightmeterv2.free.jpg
    46 KB · Views: 12
  • Screenshot_20201113_083846_com.willblaschko.android.lightmeterv2.free.jpg
    Screenshot_20201113_083846_com.willblaschko.android.lightmeterv2.free.jpg
    58.2 KB · Views: 11
So watched them videos thanks and also now subscribed to that channel ;)

Well the roll of film was finished today in the Bronny! Popping down to the lab on Saturday hopefully to have it processed and scanned! Fingers crossed there are no issues with the camera or the back and all is well.

I found that using the Polaris light meter, if I moved the dome off the light sensor and pointed in the direction of the subject and then straight away slid the dome over and walked into the scene and stand by the subject and point back to camera to take another reading, I could get 2 very different readings.

Also if I used the app I also would get different readings to what the light meter was giving me, so as a test, and stupidly I didn't write down the order, I shot the same scene either 2 or 3 ways. One with the dome off and the light meter pointed at the subject, being held in front of the camera and the other with what the app was telling me, or I shot it as above but also with the dome over and pointing at the camera.

Be interesting to see the results!

I also have seen a seller with the 10 degree attachment for the Polaris, but hanging off getting it as I don't want to over complicate things if the standard Polaris meter and/or the app are working fine and giving me decent results.
 
I found that using the Polaris light meter, if I moved the dome off the light sensor and pointed in the direction of the subject and then straight away slid the dome over and walked into the scene and stand by the subject and point back to camera to take another reading, I could get 2 very different readings.

one result was reflective , the other incident.
The two readings are not forced to be the same ( often the reflective will offer a faster shutter speed .

imagine a white dish

Reflective reading will give a shutter speed to ensure the white dish is exposed as 18% grey thus the neg will likely be underexposed and your photo of a white dish will be a photo of a pale grey dish .

Same dish, same light, incident reading.

The meter reads the intensity of the light falling on the object.
The reading will ( often) be a stop or two slower than the reflective, thus the shutter speed suggested will be slower but your photograph of the dish will be of a white dish and not a pale grey one.
 
So if I've got my head around it, cameras with TTL metering meter reflected light and when I point the light meter at the subject from in front of the camera, this also is metering the reflected light?

So in theory then that should be right but as you said, this is metering for 18% grey so metering the mid tones. If that's the case then the whites should be white and blacks black?
 
Not sure I understood the last part of your last post, Gareth. But on another point, don't forget that with negative film you get 2 stabs at the exposure. It's always best to get the exposure right in camera, but if it's a bit out you can often correct it when going negative to positive (eg making a print). This contributes to the, erm, exposure latitude (?) of negative film.

I didn't have a light meter of any kind for the first 4 years of my photography, with my Werra 1 (95% black and white). Film boxes in those days had some exposure guide information printed inside, which were basically Sunny 16 for that film speed, I suppose. Looking back at them, it's clear that some were wildly out, but many came out very nicely, thank you.

Nowadays I mostly go with my TTL meter; occasionally I'll make a point of metering off the ground and sky and averaging (using exposure compensation if in aperture priority), or else metering off the shadows, ditto.
 
So if I've got my head around it, cameras with TTL metering meter reflected light and when I point the light meter at the subject from in front of the camera, this also is metering the reflected light?

So in theory then that should be right but as you said, this is metering for 18% grey so metering the mid tones. If that's the case then the whites should be white and blacks black?

First paragraph .....Yes!

second paragraph.......I fully understand your thinking and tbh it would seem logical that the meter was metering midtones thus rendering whites white and blacks black BUT light meters are not very intelligent ( unlike us) cos regardless of analogue, digital , handheld or TTL, all reflective meters want to render the whole scene that they are reading as 18%grey so black can come out asgreys and whites as greys.

spot metering helps as the meter is very limited to its field of view , thus not influenced by other areas such as a bright sky but even then, the meter will want to render whatever it is reading ( white, black or mid tone) as 18% grey.

‘This is why when photographing snow scenes with TTL , it’s imperative to open up a stop or two to get white snow in the final image.
 
So is it worth getting that 10 degree spot meter add on for the Polaris? I watched a video where they spot metered for a shadow and then for a highlight and had the EV readings for both and worked out the exposure but that fried my brain!
 
So is it worth getting that 10 degree spot meter add on for the Polaris? I watched a video where they spot metered for a shadow and then for a highlight and had the EV readings for both and worked out the exposure but that fried my brain!

It depends I think.

10 degrees is quite narrow, but not as narrow as a spot meter which is usually 1 degree. This allows you to get perfect exposures for different parts of the scene. My Minolta spotmeter will also take two readings and average them for you which saves on the brain cells.

That slightly larger circle is fine if you have a relatively large patch of the same tones to measure. Imagine a white room with the sun illuminating through a window where you have white walls and black shadows and nothing else. Easy to find a dark spot and a light spot to get measurements from. However, bung a tree in front of the window so that you have lots of shadows and highlights from leaves, then ten degrees is going to be doing a certain amount of averaging for you because no part of the scene will be wholly one tone.

If I have understood this thread correctly, that's where Incident metering will help because it's not trying to read millions of bits of the scene, it's looking at the light that's falling on the scene and basing the exposure on that.

So I guess, 10 degrees will be good for some scenes, but not for others. And if you're going to use incident metering when it's not good, why not just use incident metering for it all?

I'm still going to carry a spot meter for large format work (well, 6x17) where each frame is expensive, but for portable, on the go metering in complex lighting situations when you don't want to spend the time fiddling with a spot meter, I think Incident metering would be more accurate than reflective. Be it ten degrees or thirty...

My (current) opinion of course...
 
If I have understood this thread correctly, that's where Incident metering will help because it's not trying to read millions of bits of the scene, it's looking at the light that's falling on the scene and basing the exposure on that.

(y)
if you're going to use incident metering when it's not good, why not just use incident metering for it all?
(y)
 
Let's photograph a chess board, close up. There are an equal number of black and white squares. Measure the whole board, it will average to grey, and a reflected meter will give you a reasonable exposure. Now move in close, so that you're just metering one square. The indicated exposure will definitely be either well under or well over, because that white or black square is being exposed to come out grey. Probably not what you want.

An incident reading is subject independent, so it doesn't matter whether the subject is a black cat in a coal cellar or a white cat on snow. One will come out black, the other white.

Spot meters are wonderful things if you know exactly what you're doing. Measure a mid tone? Great, but how good are you at identifying a mid tone? Measure the deepest shadow you want detail in, and brightest highlight similarly, then work out the number of stops difference, factor in what the film can handle and then adjust development to suit if black and white, or use it to decide what to sacrifice.

I have a big caveat on that last paragraph. Walk up really, really close if you want an accurate reading. I experimented years ago with my Sekonic spot meter taking a spot reading from a black seed tray placed against a white PVC window frame in a north facing bay. There was (from memory - I can look it up if you like) about a 2 stop difference depending on whether the frame was included in the meter viewfinder or not. Move in close enough that the frame was out of view and the difference between the longer view was obvious. I assume flare in the meter optics. Hence, spot meters might have less accuracy that you expect.

I am rather slapdash, and just take a palm of hand reading and leave it at that.

Edit to add. It's a commonplace to say that hard cases make bad laws; but I could suggest a case where even incident light measurement would get it wrong. I won't elaborate - just making a point that light meters are not exposure meters. They measure something; you have to interpret the reading.
 
Last edited:
Snip:
And if you're going to use incident metering when it's not good, why not just use incident metering for it all?

That's because it's not always possible to go over to the subject and meter how much light is falling on it; a lion lying under a tree on a sunny day in partial shade for instance. Now I know Asha likes cats, but even he would probably draw the line at doing that!

If getting mauled or eaten isn't your thing, perhaps a nice bit of landscape photography is? Then how about trying to take an incident light meter reading of a mountainside across the other side of a lake in stormy weather when the clouds part for a few seconds, bathing the mountainside in light while you're still standing in moody shadow?

Incident light meters have their place, but it's just another tool in the photographer's kit. The knack is knowing how and when to use those tools... or, for that matter, whether you need them at all in some situations. :)
 
Last edited:
I used to use an incident meter for everything. If I wanted a picture of a lion laying in the shade under a tree, I could usually find or simulate a lion-free tree nearby and take the reading there confident that my tree shade was pretty darn close to the lion's tree shade.

The only time I ever used a spot meter was the few times I played with zone system stuff. With that, you'd measure the darkest dark and the lightest light, then expose for the average. But then you also use those readings to determine the dynamic range in the scene. You want your negative to show 9 stops of DR. If your measured DR is less than that, you increase the development time to stretch the contrast. More than 9 stops, decrease the development time to flatten the contrast. That's the zone system in a nutshell: expose for density, develop for contrast.
 
I used to use an incident meter for everything. If I wanted a picture of a lion laying in the shade under a tree, I could usually find or simulate a lion-free tree nearby and take the reading there confident that my tree shade was pretty darn close to the lion's tree shade.

precisely this which I mentioned in one of my earlier posts about finding a similar lumination nearby to that of the scene that one wishes to photograph.
‘Finding another lion to mimic the scene closer is of course optional Lol :ROFLMAO:
 
precisely this which I mentioned in one of my earlier posts about finding a similar lumination nearby to that of the scene that one wishes to photograph.
‘Finding another lion to mimic the scene closer is of course optional Lol :ROFLMAO:
That's the beauty of an incident reading. You don't have to mimic the scene, only the light.
 
Here's an example of how to use an incident meter.

IMG0016_web.jpg

When I made this shot, I wanted his face. Bright overhead light. A little bit behind him. Smoke filtered, but still throwing shadows.

His face was on the shady side of his head. Open shade. Great portrait light. I set up a reading for that from across the street. 2 or 3 frames shot, a few words exchanged. Whole experience took less than a minute, including the few seconds it took to set up the right exposure to get his face.

Everything except his face is shot to hell. Didn't care. I tried to fix it as much as I could on the print. My arms got tired burning his hands. Didn't matter. On the negative, I got his face.
 
Last edited:
am rather slapdash, and just take a palm of hand reading and leave it at that.

Well I used to do that for many years (but preferred taking a reading from a slightly sun tanned hand) until I bought a kodak grey card and found many things in a scene were near Kodak grey from darker yellows, light reds, blue sky, and other colours, grey pavements and roads, grass, lighter green shrubs etc etc...if you take a reflected reading from any of those and your subject is in the same light it all works for me...erm well on tricky light shots can still make mistakes but it's my fault because I'm in a hurry and don't stop and think about the exposure needed, for what I want, for a scene\subject.
More complicated for exposure is using a flashgun for fill in e.g. sun is behind a person to stop them squinting...some advanced cameras and matching flashguns can work out ambient light and exposure using the flash gun this solves the problem trying to work the exposure out by trial and error.
 
‘Finding another lion to mimic the scene closer is of course optional Lol :ROFLMAO:

:LOL: 
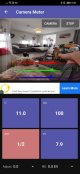
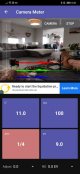
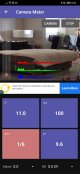
Ah, so that's what was going on here... it was just Asha getting ready to take a reading for a vehicle shoot!

36961983311_6868009ea5_b.jpg


Joking aside, that's the point I was making, no matter what type of meter you have, getting good results from it will be down to leaning how to use it, and sometimes having to rely on your own experience and interpretation to get the results you want.
 
Last edited:
oking aside, that's the point I was making, no matter what type of meter you have, getting good results from it will be down to leaning how to use it, and sometimes having to rely on your own experience and interpretation to get the results you want.

Well yes but to digi guys who think filmies are using cameras from the ark, film cameras like the T90 can take eight spot readings of a scene\subject hold in memory and average the readings until you click the shutter......erm I suppose digi guys reading this will say my digi can do 24 plus readings :D but how many do you want to get the correct exposure o_O
 
Well yes but to digi guys who think filmies are using cameras from the ark, film cameras like the T90 can take eight spot readings of a scene\subject hold in memory and average the readings until you click the shutter......erm I suppose digi guys reading this will say my digi can do 24 plus readings :D but how many do you want to get the correct exposure o_O

8 spot readings or 24 spot readings.....use the human eye ( eg sunny f/16) and I suspect you will have all the spot readings you could ever wish for.
 
8 spot readings or 24 spot readings.....use the human eye ( eg sunny f/16) and I suspect you will have all the spot readings you could ever wish for.

...and praise a supreme being for the latitude of neg film :D
 
I've almost only ever used incident measurement, especially with slide film, but an article I read in the last couple of days put a new spin on it, if you like. It argued the merits of flat incident modifiers vs domed modifiers. Apparently flat covers are more accurate in the sense that the acceptance angle is smaller than a domed cover and the metering tends not to be influenced by side light. This is particularly important to film makers where exposures have to be very, very precise. That's not to say a domed incident attachment wouldn't be appropriate in some circumstances. Sekonic light meters have interchangeable incident light modifiers, a school friend of mine had to buy a Sekonic studio meter when he studied at the London School of Film Technique, so there can't be a better recommendation for exploiting the characteristics of different modifiers. My baby Sekonic 308 has a clip on flat modifier, I wasn't sure why until I read the article.
 
I thought you only used the white dome for reflected light when pointing back to the camera from subject area and for incident light when pointing to subject from in front of the camera, you would use it without?

For reflective meter readings the modifier/dome isn't used and you point the meter at the object/area you want to measure reflected light from. For incident meter readings you always use the modifier/dome, as fitting the modifier is how most meters become incident light meters. (y)
 
Last edited:
I've almost only ever used incident measurement, especially with slide film, but an article I read in the last couple of days put a new spin on it, if you like. It argued the merits of flat incident modifiers vs domed modifiers. Apparently flat covers are more accurate in the sense that the acceptance angle is smaller than a domed cover and the metering tends not to be influenced by side light. This is particularly important to film makers where exposures have to be very, very precise. That's not to say a domed incident attachment wouldn't be appropriate in some circumstances. Sekonic light meters have interchangeable incident light modifiers, a school friend of mine had to buy a Sekonic studio meter when he studied at the London School of Film Technique, so there can't be a better recommendation for exploiting the characteristics of different modifiers. My baby Sekonic 308 has a clip on flat modifier, I wasn't sure why until I read the article.

I have a flat modifier suppliedwithmy selon ic l308s

Without digging out the destructions, iirc it’s specified use was for document metering ( i may be mistaken!)
Either way your are quite interesting and indeed make sens to a degree.
Thé stand done without doubt picks up light from a 180 degree coverage which for the best part of scenes would be correct as light arrives on a subject from all angles .

I might have a play to see what differences I obtain in readings but tbh, given that the standard done incident metering works , I’m reluctant to try fix it ;)
 
I've been using mine all wrong and backwards then!
Ooops! :facepalm: Mind you, if you've been getting acceptable results it probably illustrates just how often a totally 'accurate' light meter reading is actually required (rather than a point in the right direction). :giggle:

That should bring the puritans out from behind the curtains! :LOL: :exit:
 
Last edited:
Well, you know how Kodak originally set their film speeds, don't you? I think it was Kodak...
 
Well, you know how Kodak originally set their film speeds, don't you? I think it was Kodak...
Don’t you be mentioning Kodak ..... they probably set their film speeds in a similar manner to how they have set their film price increase ....... lucky dip draw! :exit: :LOL:
 
You're not far off. The original methodology was to photograph a typical scene running through all the possibel exposures. The best print was then made from each negative, and the film speed decided as that used for the negative which was made from the briefest exposure that gave a print not noticiably worse than the next one in the series with more exposure. Note - not the best print - other exposures could give equal ones. Basically, the fastest speed you could away with.

Empirical methods did give way to more reproducible (and arguably less real world) ones, and now depend on your using the same developer in the same way as the labs to get the same speed.
 
Had one of the Polaris ones. It worked OK for flash but the only thing you had to bear in mind was that the shutter speed increments were not as numerous as modern cameras (it went from 1/75, to 1/125 and then 1/200 and nothing in between those). No 1/100 or 1/160 for example. Never had the spot attachment for it, although having used a separate attachment on a Sekonic meter, they have not always proved reliable (integrated ones seem to work better). That could just be my experience or a defective unit though.
 
That then would account as to why some films render a better negative if exposed slower than box speed.

A discussion on that question belongs somewhere else. I may either post or PM.
 
Back
Top