- Messages
- 245
- Name
- Simon
- Edit My Images
- Yes
Well the Satori showed up in the post yesterday, not bad - 7 days from order to delivery from the States and no Customs charges to be seen 
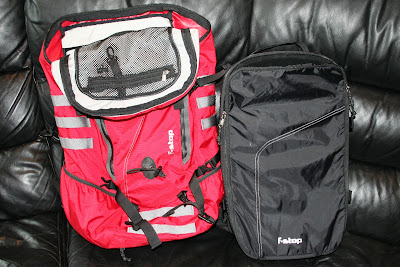
This thing is huge, and will last me for a looooong time in terms of expansion room for kit and build quality, it is very very well built and I am somewhat happy with it
I ordered the Satori with the XL Camera Pack - this comes as standard, but will take the Large Camera Pack that they do, but you would have to talk to FStop directly to order in this configuration I think.
The pack cost about £200 delivered with no customs charges
(Excuse the crappy photos, but my decent camera was packed in the bag)
Outside Front
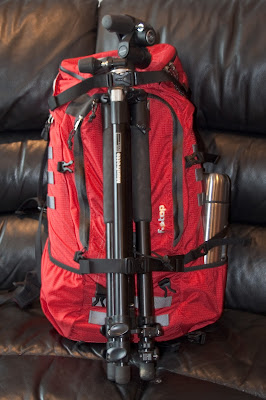
This is the bag fully packed, with my 1L Thermos in the side pocket and a Manfrotto 055XB legs and 804RC head combo strapped to it, the front has Ice Axe loops on it, with top and bottom straps to hold the legs in place, and they are quite securely held once strapped down. There are also straps on either side of the bag above the pockets (where the coffee is) to hold things in place there, so you could put your legs on the side if you wanted. I did try this, but it unbalances the bag when you do.
There is also a set of loops on the bottom of the bag, so if your tripod is shorter, then you could easily strap them to the bottom of the bag - again I tried this, but the legs overhung the edges of the bag by quite a way, and I would no doubt get stuck trying to negotiate a style or something....
Bag Back
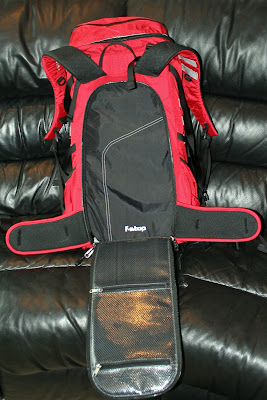
The back of the bag is quite padded and contains a rear access panel to the Camera pack inside the bag, on the reverse of the access panel are 2 see through storage pockets for anything slim (CF cards, batteries, filters...)
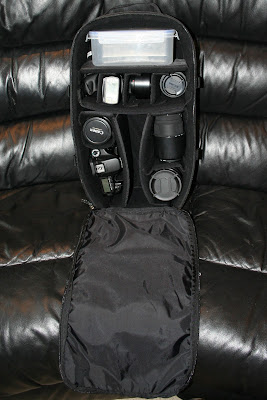
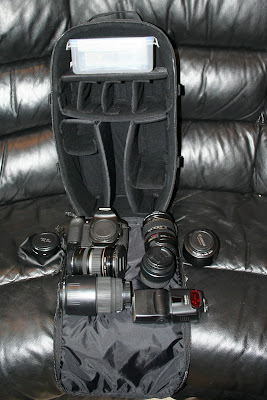
Once you unzip the cover of the Camera pack, you get full access to the contents
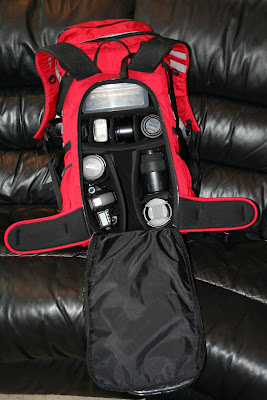
The Camera pack itself has velcro loops on the side of it, which fasten through plastic clips on the inside of the bag to hold it in place inside the frame. My only gripe about the access with the XL pack is that it is sometimes difficult to unzip the interior cover as the pack is larger than the rear access, but I guess with practice this will become easier.
The waist straps are really strong as well, so you can actually slip your arms out of the shoulder straps and sping the bag round to the front to access the kit, I've tried this and it does work
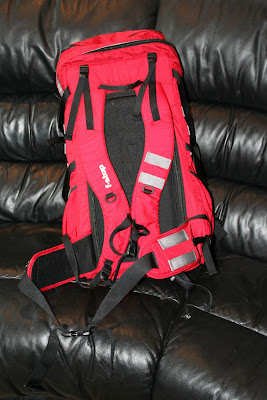
The straps themselves are very well padded and walking round the village last night with everything strapped in was very comfortable, I will be taking it out this weekend to test it on a hill, but the weight distribution seems very good, and there is an internal metal frame like all good hiking bags that helps with this.
Top Pockets
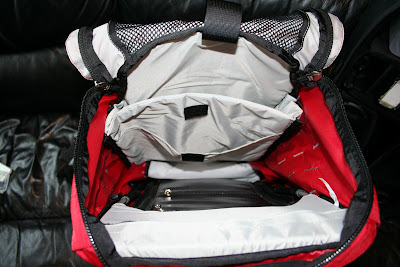
If you open the top of the bag to access the Camera Pack, there is lots of space above it to hold a rolled up jumper, or trousers, or anything else you want to store in there
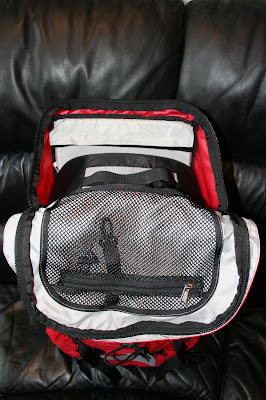
With the smaller Camera Pack, this would obviously be a bigger storage space, but I think it is sufficient for what I will need (and lets me store more camer kit)
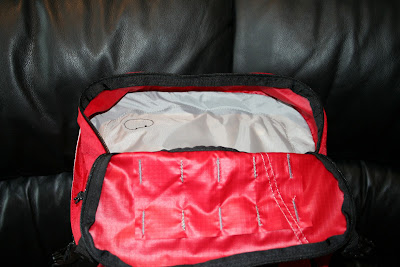
At the very top of the bag is another large pocket that will take a lunch box (I stuffed my Large Tesco Quick Clip box in there and it closed no problems)
This thing is huge, and will last me for a looooong time in terms of expansion room for kit and build quality, it is very very well built and I am somewhat happy with it
I ordered the Satori with the XL Camera Pack - this comes as standard, but will take the Large Camera Pack that they do, but you would have to talk to FStop directly to order in this configuration I think.
The pack cost about £200 delivered with no customs charges
(Excuse the crappy photos, but my decent camera was packed in the bag)
Outside Front

This is the bag fully packed, with my 1L Thermos in the side pocket and a Manfrotto 055XB legs and 804RC head combo strapped to it, the front has Ice Axe loops on it, with top and bottom straps to hold the legs in place, and they are quite securely held once strapped down. There are also straps on either side of the bag above the pockets (where the coffee is) to hold things in place there, so you could put your legs on the side if you wanted. I did try this, but it unbalances the bag when you do.
There is also a set of loops on the bottom of the bag, so if your tripod is shorter, then you could easily strap them to the bottom of the bag - again I tried this, but the legs overhung the edges of the bag by quite a way, and I would no doubt get stuck trying to negotiate a style or something....
Bag Back

The back of the bag is quite padded and contains a rear access panel to the Camera pack inside the bag, on the reverse of the access panel are 2 see through storage pockets for anything slim (CF cards, batteries, filters...)
Once you unzip the cover of the Camera pack, you get full access to the contents

The Camera pack itself has velcro loops on the side of it, which fasten through plastic clips on the inside of the bag to hold it in place inside the frame. My only gripe about the access with the XL pack is that it is sometimes difficult to unzip the interior cover as the pack is larger than the rear access, but I guess with practice this will become easier.
The waist straps are really strong as well, so you can actually slip your arms out of the shoulder straps and sping the bag round to the front to access the kit, I've tried this and it does work

The straps themselves are very well padded and walking round the village last night with everything strapped in was very comfortable, I will be taking it out this weekend to test it on a hill, but the weight distribution seems very good, and there is an internal metal frame like all good hiking bags that helps with this.
Top Pockets
If you open the top of the bag to access the Camera Pack, there is lots of space above it to hold a rolled up jumper, or trousers, or anything else you want to store in there

With the smaller Camera Pack, this would obviously be a bigger storage space, but I think it is sufficient for what I will need (and lets me store more camer kit)
At the very top of the bag is another large pocket that will take a lunch box (I stuffed my Large Tesco Quick Clip box in there and it closed no problems)


