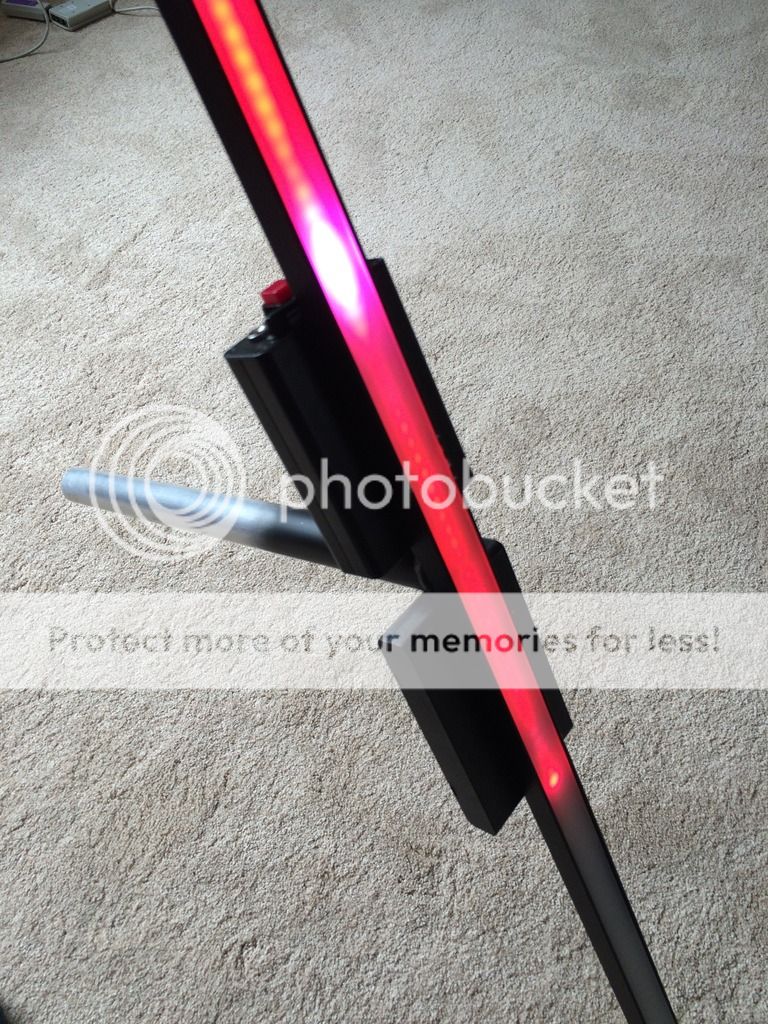
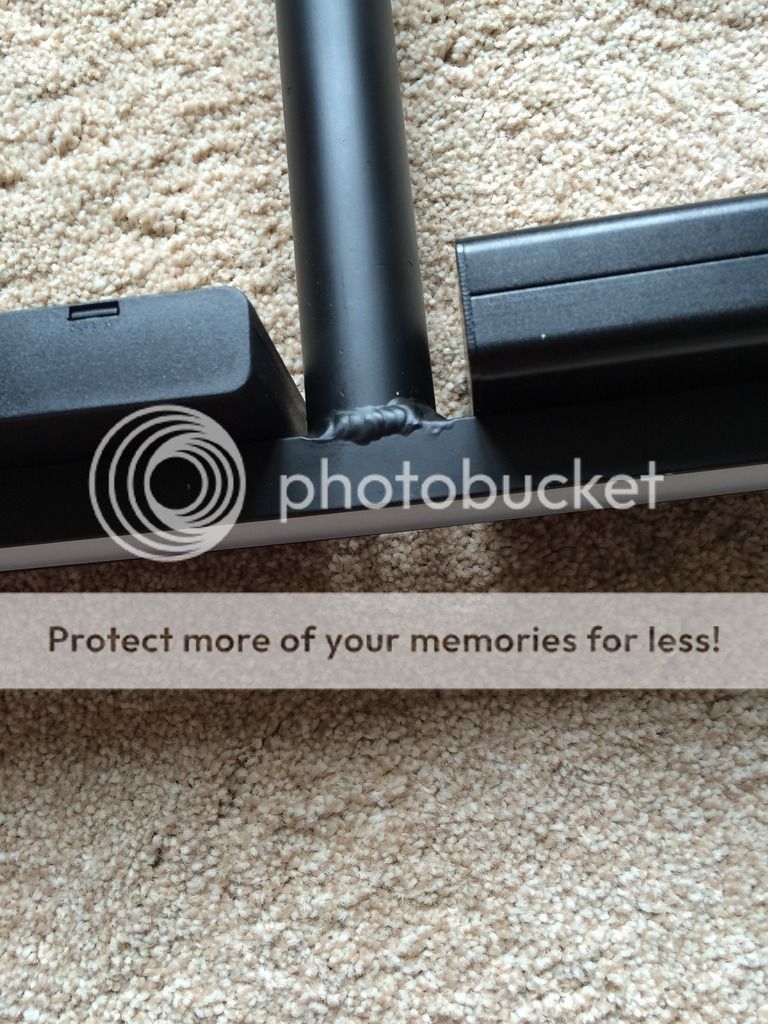
First Attempt With Home-Made Pixel Stick

Now building my third incarnation of this:)
First version, wasn't happy with the frame or elastic diffuser.
Second version, frame too heavy and rushed but diffusion spot on.
Am now in the process of building an aluminium frame and using diffusion method from version 2.
Hopefully this will be the one:) Nice lightweight but good looking frame with just the right diffusion.
Might just buy a new battery box and control box to finish it nicely too.
Which version did you build, the original from the thread or the later one from mrossphoto?
Any opinions on if one is better than the other or if one is much simpler software wise?
 
I did the original from the thread.
Just wasn't really happy with the frame as it looked a bit too much of a homebrew job for me.
Now I've spent some time sorting out some proper material for the diffusion I thought it best to do a proper job on the rest.
 
Must stop looking on ebay!
Just bought a new battery box and found a lovely black aluminium box just the right size to hold all the control equipment.
Found a local business that can weld aluminium for me too for the new frame (was considering rivets but decided against that)
Think that once I've got all the new bits that I'll rewire it to tidy that up a bit too.
Would love to get the new aluminium frame anodised but will settle for a can of matt black spray.


EDIT - ooh, just found a local anodisers - no harm in asking for a quote is there? ;)
 
Last edited:
Well that's around £45 spent on eBay. While I'm waiting for it to get here from China I guess I'd better start reading up on Arduino.

I think so far mines cost about £100 with all the changes I've made - still some more to go yet too.
 
@rpsmith79 - can you tell me which version of Arduino you used? I'm trying to get it all to fit in a smaller box and with the module suggested its going to be tight (very tight).
You mentioned you used the nano but I cant find a SD card module that fits those.
Thanks

Julian
 
@rpsmith79 - can you tell me which version of Arduino you used? I'm trying to get it all to fit in a smaller box and with the module suggested its going to be tight (very tight).
You mentioned you used the nano but I cant find a SD card module that fits those.
Thanks

Julian

Yes i used a Nano, but i used a separate SD card and wired it together, rather than the sandwich method used in the tutorial

Basically one like this

http://www.ebay.co.uk/itm/SD-Card-M...193307?hash=item258ec6f45b:g:OVkAAOSw7NNUGVIv

But used wires to connect the pins, this allowed me to fit it where i wanted it, i also have access to a 3D Printer, so i modelled all the boards and printed my own enclosure to make it nice and compact ;)

Thanks - my aluminium frame is being welded this weekend so can pick it up tomorrow. Local anodiser has let me down so I've contacted another - if that fails its another can of matt black spray.
Got a lovely small black aluminium box for the controller and buttons and a different battery case.
Can't wait to build up this version - this should be the last one [emoji849]
 
Third version nearly ready:)
All made up and working - just finishing touches to tidy up and its all good to go. Managed to hide all the wiring inside the frame too. Also put a socket on there so I can plug a remote release in to it.
Think this version is a keeper(y)
 
Here you go - its now tidied up a bit with some vinyl carbon wrap over the handle and also around the ends to tidy it all up :)


Got an Arduino Nano in there now instead of the Uno - much smaller and easier to fit in the new control box. Only thing I had trouble with was the fact the Nano didn't seem to like 2 gig SD cards so its back to the old 512meg one - still plenty of room on it though.
Also I didn't go down the anodising route - seems its not so easy to get something this size done - too big apparently for most to fit in their bath. Matt black spray it was then - aluminium isn't the best thing to spray though as it doesn't stick very well - will soon have that "worn in" look.

Thanks @rpsmith79 for all the advice and help (y)

Edit 1 - there's now a small push button on the front of the control box near the handle so I can press it with my thumb whilst using it one handed (as well as either the red button on top or the wired remote)

Edit 2 - Am now wondering if its possible to add another 10k pot to the led power line to adjust brightness on the fly rather than being stuck at one level?
 
Last edited:
Wow, that looks really nice Julian, and finished just in time for the longest day of the year, lol

I really must get some photos up of my setup, mine looks positively industrial by your standards, but i wanted mine to be reasonably heavy duty as my original flavour wooden one didn't last 2 trips out, what with people tripping over it in the pitch darkness
 
Last edited:
Excuse the poor photos, i've never been one for product photography, but here a few snaps of my build

Quite a chunky beast, but as said above, it generally takes some stick out in the field

A2psBf43Pwi4N3npCSLJPMhjDAmF8nf_YRs8qbX0DUVlCs-44FGAc59pO9HHQCyQtfE6zOqZAZ0tVKj1QCNj51zVuNscyAY2w4sq9DDuMHGW_0gRaOXRefECevUchc8Nb62hLsgKkRH4UosVmwi846wGfyOORTzTIiFKTT3jYkDbNQR8Up7Ic6OKAQLNRp3fzYjHtV_J5r2vQZcYCoguPKvT-knu4u9Yw6FUb3LRyZCQ74RBvSTuhbiF59DU41Kx62n5Ej_q7yRonAH31QspSw-_TFq1GEdYfUx0zu56MACHksJe_L2ab52Luz_zqSG8Q7Fb7DxsIA5eJWlzDa36LRvLBiFyZMiUU7_6ZDX1uedxmqmp_GA9DvKdPBMUWG9MrK_nvYNmRrqFF1PMSxJogltTHVtkxlSeP4VdngVsPTV2VwSXG-zWwhHK5ndIO1sA69o-KXbWo8XN86H0M3_JETyR2OEmxhqmIxDZZuvlyzDnNrCOFBiK0l7rpSIUWAGKySud0sZKeNSwOQ2_KKyZd4OwHM_Wc7EINOK8L5aUNT9aVAk6Te-mPN0FVHkbfwJpfILWGavPSMURs308tLQdKjluPNvBKNjb=w1163-h775-no


3D printed control box, and a slightly out of focus view on the end, showing the Aluminium Box section i used, you might also just be able to make out the removable Elastic Diffuser which clips into each end of the extrusion (still somewhat untested yet)

Nf53-2uck-7ttJwBi1CyLi4eCF7xiy9cF3N-3G8ZDnaUyIxJP5UbEJl6dwR6RMSxfNar68ZVnOOzgwqOKvJhV2QZr9qERAH0D2UcK1sliB5ILQg2BA1_pPO2WJpRfIoiwwZ2OL3F26PfjDdTubmLQ0Eb-rpOzOc-ZTaPgys2-8Oq1cozaNlc_NmGlTUcZHfkSGfeXfxGZt_Hqy-lfnO0WV-8OH4yQXxO0oVC1oxZzHpWd5FJAndd0snHX041Vl-3Qgfx3mrehNtxlLf2FS_1Woy12aPqHKo2_yOwqLwzCV8omOMCkp6k-_QmKNRjvTzBuPbm3ai3OKca9vnJU-xgUiJ3RwyVwFOOLQTINEqKYie_k7WgUb0GXd34ASg1sMqMRgQaJPg6XcY4JdIDSPtTP9qXBv9ONBuvg12ngo5mZ2qoQW977GRmeUBFkJYXMCXwMwmMDRPe2KYj1xMeNlBOh9aUP4K_MBum6Tr2QaXftGvtPWrRJuccmqsfhCSKKKgn6Xj9QXVZyuNpVDVqli3dDtJKjMShzlBRfOzdxwk4tnyGi_kWnto-5x9UkdMobr0XM14wzzYzarOU0xZo-o1uKbdVuxVwfC3a=w554-h775-no


And another view of the diffuser removed, and showing the opaque plastic diffuser underneath (again, currently untested)

Also note the Tripod thread, allowing to attachment of a Monopod to help paint things like Rainbows ;)

_7aLHT8l4-BinSl8Uk5fOeLYineBzUCXDN5OMiUp7yYHCM672_be5b57TnSgW-IdwTeIhSajKr68yhDBbkMIIUVuUmDsgsWuWs6NolxQI5TbM5v1qdK-vP5hsGOST2KKZMug3I_oExIlr3zecYEVRzikXL3dwlaFunOmOXOfCDRBWGR59XYaS6Crr6hbEa7NKliTxDrwHvAHvCbePyLFFXV7nMHKzxVOM6vRVMamM_kfzAxn07i200Znqsx4cVMdlKzgqBe5iSwvrrvJCGZRvz6FyTzn4UYcrW9EGWJyPC1Id_LdnFE_wRz2z83iq3S9Cjf7Nqo36qIj8tcKrGpeck8gTMsTj_CUtGiPVuiVEYgkuDD0idZdVRzc3Z8Ep45yNlJqS4gSiQcfonnjgODJUIwobrjWuDDeceodseygjrFBnI8L0tx72l0EruPPeE4U1lq8Fx0Qwy57tVzSUBf1mAvemuZ1Xv-PbWNAmkRx0jsFRIftz69fYwSdehO22n4DPUtPaCl5WvD_l0LsP5_Xq3H8e32alxflnLUFFSkJO5ImGDgvDd5eJbR8YiE4Sgn1SxGksJbJYTiOMI_u1vDFc2I6T0lKgGqd=w1085-h775-no


Shown with Monopod attached

05E6cx0xp3zxgXvNb_y1RPWRKS1lFAAbTyQzcqygmXvbaCFu33k4kpC51WlLhvV_lrRQeZlqS7L601EpnBSzOV0ZSn-h9HDNSvCivJOZmKGCPrEsRbiNdVmeIGkqR0koq6ewL8hfkwuw7iZOt3a1uRfw3bwGaFmE6QL52CEZa3Kx6lQlfgkqkc62EJchR08lSoc50TCh6RPACkfJ6DK-qcAhSfj_tI-Fvn3DdrUPUR_mNFc32Kx8cfeALSfQ1nFIAWs9KKed9Vs6kBsx-7mMq5ekawsXAuP-ZRN0K7cGJipE-V4lpnYwlCJbhMmR9Ef-DUIPeHnE1MTAPPpMxI1PSDHSbrOMwpBelRooLDvQ0oJC7n8nOl_9fZbaZ3uqGZs5bL9vu0OBGveeEY9EWfBTdrpS4m7n6uP-56vyVKLp7QHbAiSllbIa9qAt1H9cVJzvO8sbT_7qjoVXXvvjs8wZBSR24L0btQ8SITDn1zc1wktRVrcTG4lhdhJdqQB6Vzz8dxeX2xr12KhqQvfAjfi6WI9Iuey8BLQsb8e1f2-ETktupywGv-I071eUsEXozo7eXIcy1gBkv70V_0sqIxNz7KjAU0RRhKlt=w517-h775-no


z9fsu_MbtCn3Cv84GHhyX0Nf6sGBCQ8cXoDHWo2acjXPjTcgQYyTCmrcpGwEreLc4PjcLC7P2rB7IWmeQNchHgAoCZCVhb5SJglZWcpTSQHjcpqX7GvHfHYCKC9iBN9a36p2A2108wels0TpIpBrV0y97h10B3UC7EeT-fR7Pl5k7cUX2lFEJVWLswLPUI73v6RrmVVMMZTba9XbAoFfhqlzNsAEln-12XfwlUouJ8LUL7l8zfMWF_xoBx_I5_4LweoZi6PZmcFyd9IAD1aryBYLhYIGz1GYPvnTKB8RudISL13jBslS_VVk4kAtiVq-NUrjx7SpeAFAQ-zljJxPnUIdnrd7js-OWMF8N1W2IyHisEZTR7o2ko7ZDxTYS4cishUD2zsF6c6G6OQpFIJzLmn1ARZBPjO5WlTK1SgRkbLNvGMeCpnDg9K1unXQQQs3JapjAN51qeE8UWcallg-cTGiedRJ8_80TkIZEPxRyrZMDbpK9R-pvo_faQQCNbkOzLzkXdulDT4KqKZIc0bkyAIhYQn3FSA7gNdtUZrjFEENse6DHFs_gCVJu4bMX94LvEBMywHdMJ4co7oqwbA4jeHH3949dkAi=w517-h775-no
 
WOW! Nice looking sticks, mine looks archaic compared to these :) Couple of pieces of wood and LOADS of wires hanging everywhere lol :)

Sounds just like my first one, still worked a treat though, but when taking it out into the countryside with a bunch of mates all wanting a go, it didn't last too long
 
Hey that's not bad at all :) I like the idea of the strap - handy for lugging it around. Also like the idea of splitting the battery pack into two to distribute the weight better. Short handle is nice too - I think mines a bit too long. Like the idea with the clips to hold the elastic in place too.
Never thought about using that section of extrusion though - seems perfect for holding the LED array in place. Monopod thread is a cracking idea too (y)

Interesting to see other peoples takes on it - maybe if we combine all the good ideas, we'll come up with the perfect stick:D
 
Last edited:
Hey that's not bad at all :) I like the idea of the strap - handy for lugging it around. Also like the idea of splitting the battery pack into two to distribute the weight better. Short handle is nice too - I think mines a bit too long. Like the idea with the clips to hold the elastic in place too.
Never thought about using that section of extrusion though - seems perfect for holding the LED array in place. Monopod thread is a cracking idea too (y)

Interesting to see other peoples takes on it - maybe if we combine all the good ideas, we'll come up with the perfect stick:D

We use this aluminium extrusion at work, so i have reasonably easy access to it, the other nice thing about it is it has a tee slot running the whole length, so the idea was i can add attachments if needed, extra handles etc, and the LED strip just slips down the slot almost perfectly

Yeah the strap was a must as it's not the easiest thing to carry along with all my other equipment

The handle rotates too, so splitting the batteries gave me a perfect weight distribution to allow for twirling and swirling ;)
 
First test shots with the new build - happy now :)
All SOOC.
Wasn't properly dark when doing these so could probably have opened the aperture a bit to get them brighter but hey ho.


Last edited:
Very nice indeed, looks like you nailed the diffusion, thats spot on

Do you mind running down exactly what you used again for the diffuser
 
Thanks :)
I got hold of 3mm thick acrylic - one piece frosted white and the other frosted clear. On this one I used both pieces as I couldn't get a big enough gap between the LED strip and diffuser - seems to work ok so far.
 
All good and well ... but how much would you charge to develop your version to someone of the public. hint ... I'm interested :)
 
All good and well ... but how much would you charge to develop your version to someone of the public. hint ... I'm interested :)
Sorry bud - mines not for sale - too much fun:)
They really are quite easy to build though if you follow it step by step. A little pre planning for the frame and where the wires go and its not too bad.
 
With dark sky season approaching I've just ordered a load of RGB LED's and various controllers and stuff. Time to get building more toys :)
 
Well, it's that time of year again, dark evenings, so the Pixel Stick was dragged out of it's Summer slumber for the inaugural light painting session of the season

Still not totally happy with the diffuser, so i may need to make some minor adjustments before my next outing, but fairly pleased considering i haven't touched it in months


Lumsdale Light Painting
by Richard Smith, on Flickr
 
Just stumbled across this, very tempted to have a go myself. Anyone got any additional tutorials or is the first one in the thread still a good go-to?
 
There are a few tutorials around but the one on this thread is fine - not too complicated and fun to build.
You can really make it as basic or complicated as you like really - just take your time and follow the steps :)
 
This thread revival has just given me the kick up the ar$e i needed to get back out with my stick, not used it in months now

I have a few other friends who have made this stick now using the same tutorial, so as far as i am aware it is still good and up to date
 
Back
Top