Free VueScan Tip For Better Shadow Detail

Messages
856
Name
Ian
Edit My Images
Yes
VueScan on the whole does a very good job at creating a black and white digital file from a black and white negative but on the odd occasion, I feel that the auto exposure system it uses can and does get it wrong with certain negatives.

It can produce a scan that clearly show loss of highlight and or shadow detail as well as tonal compression in the shadows making it extremely difficult to separate those values in post production.

I have put together a FREE PDF showing a simple TIp which can help to produce a better scan when using VueScan.

 
My tip, set black and white point to 0.1% instead of default.
Both to 0.1%?

TBH without Vuescan open I wouldn't know how to do this. AFAICR I set the left hand point (black?) usually to zero, ie against the left axis. The right hand point (white?) is usually set to the point where the histogram goes to zero; Vuescan seems generally to do a good job of matching this whatever the negative. Sometimes I'll tweak one or other of these.

Now to look at Ian's PDF...
 
OK, very interesting, thanks @ianbarber . Lock exposure etc has come up a couple of times recently, and I probably do need to investigate more.

The particular technique that Ian is suggesting (effectively, scan a small area of unexposed film, lock exposure, lock film base colour, then scan the target frame and manually adjusting the film base colour to move shadow areas away from the left axis... BUT, read the little ebook!) would be slightly trickier for me, using the Plustek 7500i as (when things go well) there are no unexposed areas visible via the film holder. So I'd need to deliberately load the film holder wrongly, lock the exposure and film base colour, then reload the film strip and scan away. I guess it's worth a try; I certainly do have problems with dense shadows sometimes!
 
@ChrisR the black and white set points are in the 'Color' tab. The black point is normally 0 and the white 1%. That means you get no full black and 1 in 100 pixels can be burnt out white. I have found the black and white at 0.1% so that 1 in 1000 can be full black or full white is a good starting point. Adjusting the histogram end points and 25% and 75% curve points if needed is the next step. All this done with the generic film profile.
 
OK, very interesting, thanks @ianbarber .BUT, read the little ebook!) would be slightly trickier for me, using the Plustek 7500i as (when things go well) there are no unexposed areas visible via the film holder.

I just sacrifice a blank frame then you have lots of room to select the film base and fog
 
The ‘adjusted’ tree photo shown upon opening the link does indeed offer more tonal seperation but tbh it looks unnatural.

Fair enough, the original scan has blacks/ shadows that are a little blocked but overall , to me , it’s the more pleasing image.

I actyally don’t use vuescan, nonetheless thanks for sharing the pdf for those who may be able to benefit from it .

The adjusted scan like you say has better separation but no compressed shadows which to me allows greater flexibility in post production.
The scan is a straight scan which will always need some contrast adjustment but at least we are dealing with a full tonal scale.
 
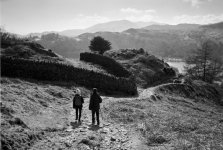
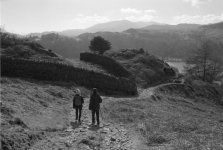
This morning I printed off an image taken in the Lake District above Grasmere in rather contrasty conditions, that I thought might benefit from @ianbarber 's treatment. This was the image as imported from the scanner:

2203CPMXBW30 First scan.jpg

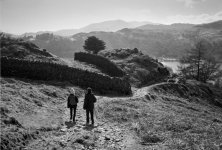
And this is what I printed from (my processing has apparently pushed the histogram over to the left a bit here):

2203CPMXBW30 first processed.jpg

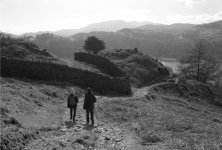
I thought that wall looked too blocked out, and there did appear to be some detail in the negative (though close examination of the print with a loupe suggests there was much less blocking of shadows than I'd thought). So anyway, I got the negative out again, and set up to scan it according to my understanding of Ian's method. As uploaded to Capture One, this is what I got:

2203CPMXBW31A Barber scan.jpg

The histogram was indeed nicely separated from the left edge. I have lightly processed this (mostly the Auto button, bit of Clarity and vignette):

2203CPMXBW31A Barber processed.jpg

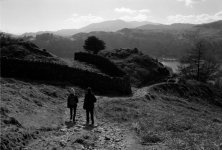
While the negative was in the scanner, I thought I would try @dmb's technique (see above). As from the scanner:

2203CPMXBW31B dmb scan.jpg

The histogram this time is still blocked up at the left edge, so I suspect it will suffer from the same problems as my first effort.

Looking at the final print from Ian's approach, I think it is indeed slightly better. There's lots more detail in the wall, and in the central tree. The cost is that the trees on the other side of Grasmere lake itself are quite a bit lighter, although this seems acceptable to me given distance haze. Overall, I think the method did its job. It was however quite a faff, and I wouldn't generally try it unless I fell it was needed (and another time I would check the un-processed variant before deciding that the image was too blocked up!).

As always, YMMV!
 
Last edited:
Back
Top