How much post processing?

Messages
437
Name
Shaun
Edit My Images
Yes
Evening F&C crew

Quick question that is probably going to get a wide and varying response.

How much editing do you do and how much adjustment do you usually make to your film shots?

For example, the first shot below has a few minor adjustments/sharpening and white balance correction applied, and the second is just minor adjustments and sharpening. I feel I should leave it as shot, as it I feel it shows the character that it was shot on film, and that's the way it came out and should be left as is.

Thoughts?

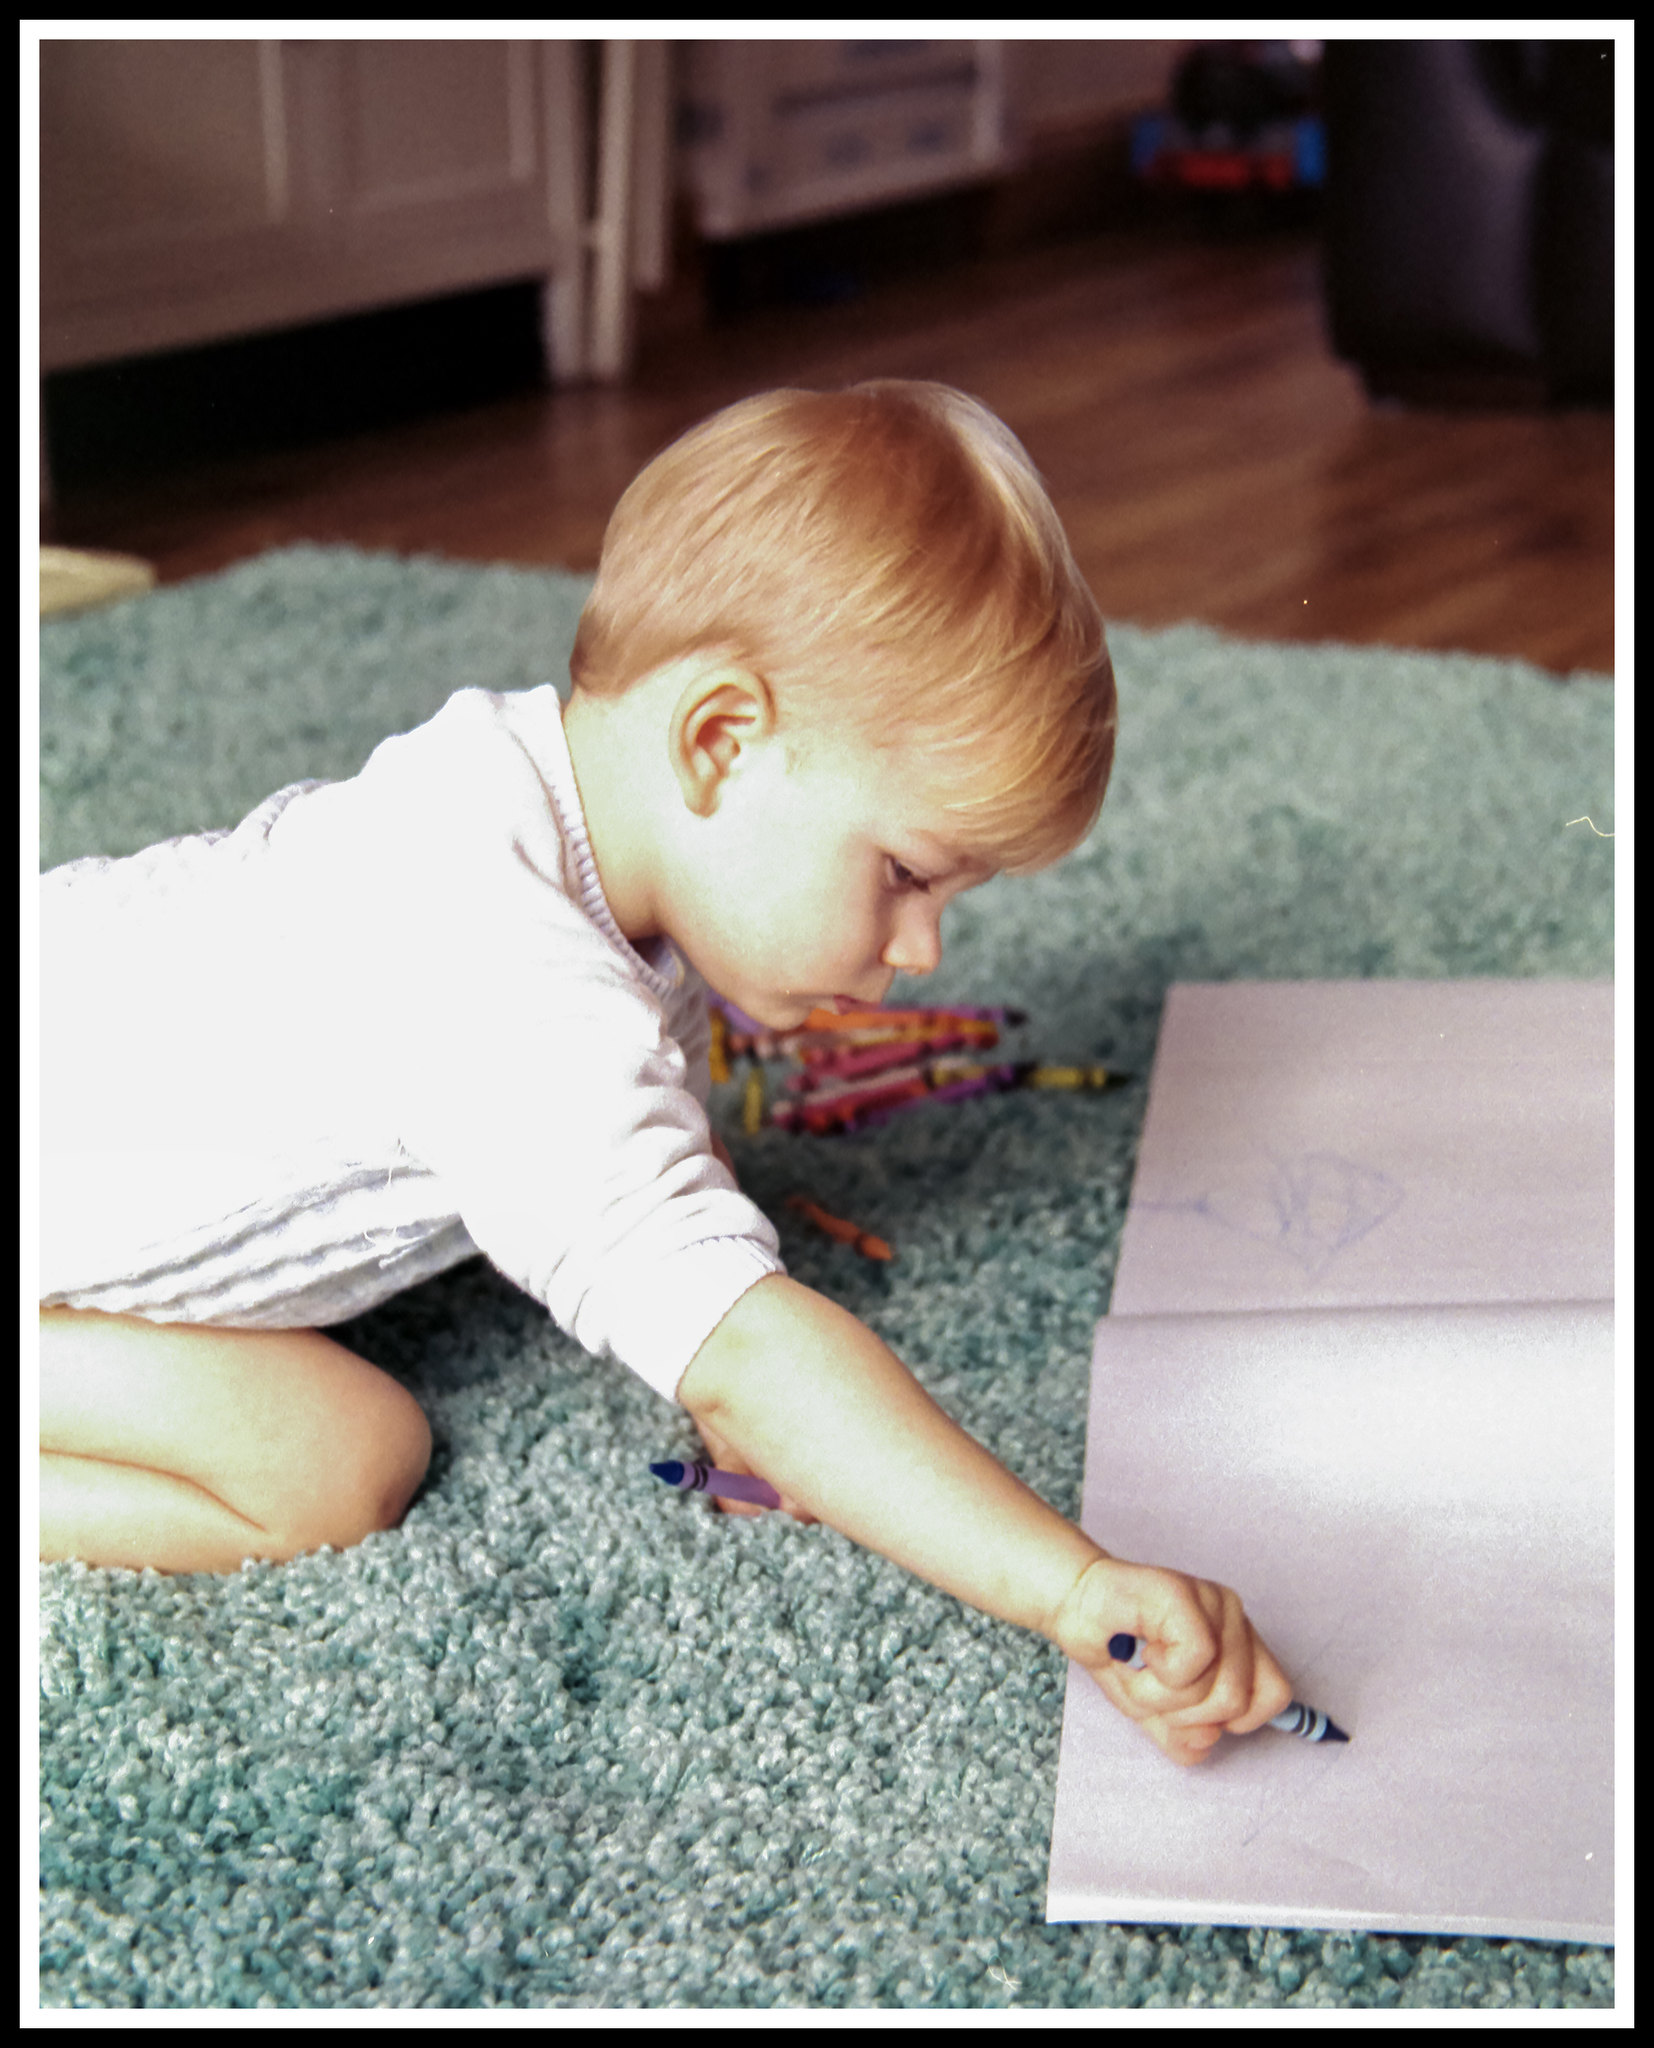
ToAdjust by Shaun Palmer, on Flickr

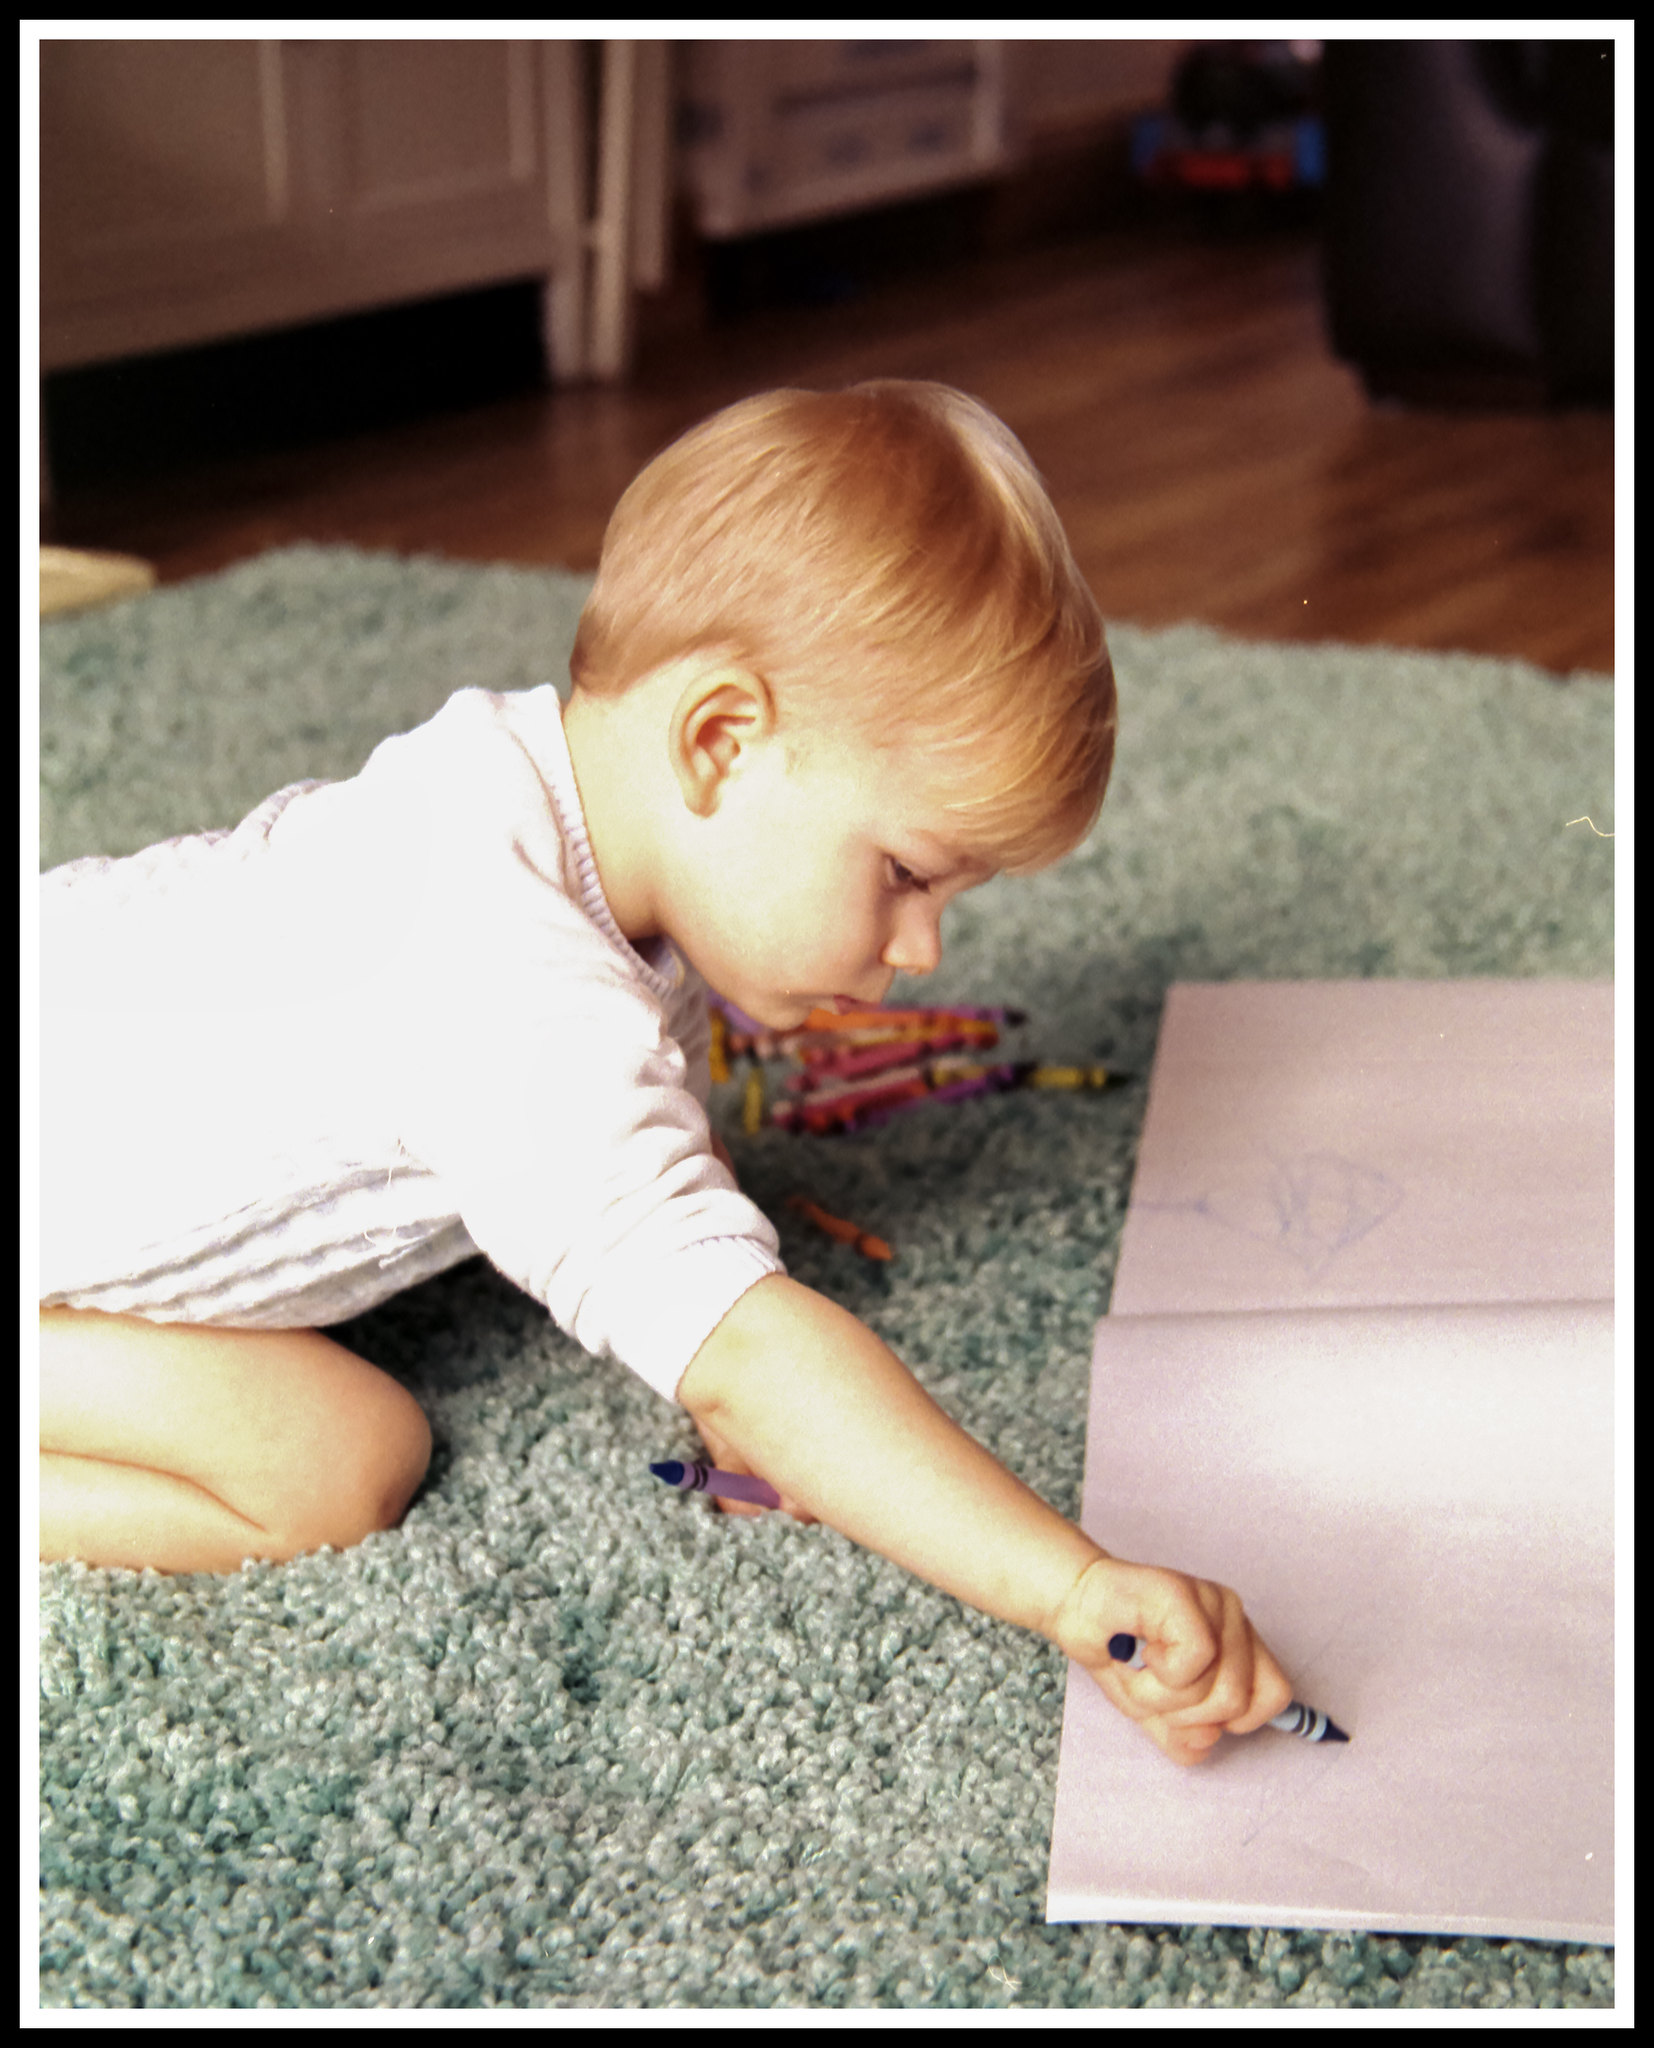
OrNotAdjust by Shaun Palmer, on Flickr
 
Last edited:
I do as much or as little as the mood takes me. It also depends on how I want the image to come across.
 
I do very little... straighten (nearly always!), spotting, crop, levels, maybe pull back highlights/pull up shadows/adjust mid-tone, definition/sharpening. All in Aperture. Sometimes a vignette in Affinity Photo. But most of that only gets down with images I'm interested in. Sometimes I'll come back and look at the roll again and do some more... I use star ratings a lot to help guide subsequent decisions.
 
whatever floats your boat really. i tend to do as little as poss as if i wanted to spend lots of time doing pp i would of keep my digi kit. it sort of defeats the purpose and joy of using film for me, but that aside i dont think its wrong to pp it within an inch of its life. (well apart from in your face hdr that's always wrong digi or film:p)
 
As little as I can, that's why I like film. Adjust the black and white points to bring back the contrast and some sharpening and cloning is all I tend to do. If it's colour I sometimes tweak those a bit but not much, usually just to remove some of the orange ness'.

With that one though, the highlights are completely blown, was there anything in the negative that you could pull back?
 
whatever floats your boat really. i tend to do as little as poss as if i wanted to spend lots of time doing pp i would of keep my digi kit. it sort of defeats the purpose and joy of using film for me, but that aside i dont think its wrong to pp it within an inch of its life. (well apart from in your face hdr that's always wrong digi or film:p)

That was my thinking lol

As little as I can, that's why I like film. Adjust the black and white points to bring back the contrast and some sharpening and cloning is all I tend to do. If it's colour I sometimes tweak those a bit but not much, usually just to remove some of the orange ness'.

With that one though, the highlights are completely blown, was there anything in the negative that you could pull back?

Nah, I just blew them out unintentionally lol. I think it metered for the full scene and he was quite close to the window with pretty intense light. Not my best photos but just put them up for an example
 
I feel I should leave it as shot, as it I feel it shows the character that it was shot on film, and that's the way it came out and should be left as is.

For what it's worth, in the darkroom, I have spent many hours working on a single photograph to get my print just right. I can't see why you wouldn't be allowed to do the same when scanning and following a digital workflow. My darkroom hand prints aren't any less film by having spent many hours working on them.

Further to this, flatbed results are questionable at best, particularly with regard to colour and highlight retention. I wouldn't consider anything that comes directly from a scanner any truer to a scene or any more representative of any particular film or characteristic of film than a photographic that has been appropriately edited.

Nah, I just blew them out unintentionally lol. I think it metered for the full scene and he was quite close to the window with pretty intense light. Not my best photos but just put them up for an example

The detail is likely there in the negative; it's hard to completely blow out negative film. Flatbeds won't be able to pick up the wide subject brightness range though in one scan, I don't think.
 
Last edited:
For what it's worth, in the darkroom, I have spent many hours working on a single photograph to get my print just right. I can't see why you wouldn't be allowed to do the same when scanning and following a digital workflow. My darkroom hand prints aren't any less film by having spent many hours working on them.

Further to this, flatbed results are questionable at best, particularly with regard to colour and highlight retention. I wouldn't consider anything that comes directly from a scanner any truer to a scene or any more representative of any particular film or characteristic of film than a photographic that has been appropriately edited.


The detail is likely there in the negative; it's hard to completely blow out negative film. Flatbeds won't be able to pick up the wide subject brightness range though in one scan, I don't think.

Thanks very insightful. When you say in one scan, is there a particular technique where you would scan multiple times at different settings to get a wider range?
 
Some dedicated film scanners had (have) an optional multi-pass setting for difficult originals. This could help to reduce shadow noise, for instance.

Regardless of that, I would recommend tweaking the image as far as possible in the scan software, setting white and black points and contrast (and colour balance), so that what the scanner then outputs requires the least further processing. And maybe output as a 16-bit tif.

You will find that with average equipment, some originals are in effect un-scannable, and you have to know when to give up.
 
Last edited:
Some dedicated film scanners had (have) an optional multi-pass setting for difficult originals. This could help to reduce shadow noise, for instance.

Regardless of that, I would recommend tweaking the image as far as possible in the scan software, setting white and black points and contrast (and colour balance), so that what the scanner then outputs requires the least further processing. And maybe output as a 16-bit tif.

You will find that with average equipment, some originals are in effect un-scannable, and you have to know when to give up.

Thanks droj. What I’ve been doing, which I think maybe wrong is opening up the histogram thing in the software and setting the point back to 0 and 255, thinking I’d be scanning more detail. This may not be the best approach by the looks of it.
 
I used to be quite precious about not editing film shots (other than straightening, cropping, dust removal and other minor edits), but I’ve since decided that I’ll do whatever I like in order to get the shot looking how I want it. For me, the initial scan is akin to a RAW file.

I try to keep the characteristics of the film I used as much as possible, but sometimes bigger changes work - converting colour shots to black and white, for instance.
 
Nah, I just blew them out unintentionally lol. I think it metered for the full scene and he was quite close to the window with pretty intense light. Not my best photos but just put them up for an example

I've not 'done' film to digital - I used film seriously pre-digital and used to spend a lot of time getting an image the way I wanted it in the darkroom, carefully doging & burning, applying masks and filters under the enlarger. I would encourage you to work things a little more as
skysh4rk suggests - an image can be excellent when shot on film, just as it can be on digital.
 
Well I think the question has been answered in that it is what you and your wife like to hang on the wall....but you might not get away with it say for inter camera club comps with very critical eyes.
 
Thanks droj. What I’ve been doing, which I think maybe wrong is opening up the histogram thing in the software and setting the point back to 0 and 255, thinking I’d be scanning more detail. This may not be the best approach by the looks of it.
You're actually on the right track - generally, this should maximise tonal range and distribution, and is the thing to do first. I would also most likely invoke a curves adjustment, which is basically about the amount of contrast but more particularly about how contrast is mapped within the image. Colour neg can be the trickiest thing to scan because of the orange mask and reversed colours - a black art!
 
Last edited:
Editing and processing? As little as possible but as much as necessary, that's how much! :D Years ago it was done in the darkroom when printing, these day's it's done on a computer when 'post processing', it's the same principle so I don't think people can get too precious about it. Also, converting colour shots to black and white... Once again, it's something that could be done in the darkroom, so I don't think anyone can turn their nose up at someone doing that digitally.

I do try to get things right in camera first time, as you can't turn a total sow's ear of a shot into a silk purse, plus I don't have the time, patience or knowledge to spend ages working on an image in Lightroom or PShop! For me it tends to be a bit of a tweak of levels, brightness, contrast and sharpness, crop the image if necessary, then clone out any dust marks, etc. I might spend 5 or 10 mins on a shot I really like, and I'm slow as I'm not all that good at post processing! :whistle:
 
Zero.

Its because I'm odd (well the wife thinks so...) and reflect upon the quality of the image, and look to make the necessary changes/improvements to any future shots.

If I wanted to post edit I'd go over to the dark side and take up the evil practice of digital photography :)exit:), where you can post edit images unto they almost become completely unrecognizable form the original captured image, and that appears to be an acceptable practice in some quarters.........
 
I think in years spent developing and wet printing I once had a negative that didn't require any dodging/burning or what have you to make the print. But I might be mistaken about that :D. As far as black and white goes, there's a terrific compression of tones made going from scene to film, and an even bigger one going from film to printing paper. It would be in the highest degree unlikely that these severe (and automatic) compressions would work in exactly the way that gave the final image you actually wanted.

My aim with the negative is to give myself the best possible starting point for the final image.

The older books on enlarging always used to start along the lines of "the darkroom is where the real magic begins" and if you use Photoshop et al instead nowadays, just change the word "darkroom" because the principle is the same. I'll normally spot, adjust brightness and contrast (usually different amounts in different areas), sharpen before printing, crop etc. And the best advice I've been given is to make a print and have it up for a week before you decide that it's as good as you can make it - so the elapsed time on making a print should be at least a week.
 
Thanks for all the reply’s and input everyone. I guess the more I get to know my cameras and how film reacts to different situations I’ll get closer to a more refined image straight from the camera which is obviously very important.

It’s good to hear how other people process their film etc. I think what I’ll do is do a bit more research and reading up on scanning in negatives, to be honest I hadn’t done much and have just been doing it and see what happens (I know that’s bad :D)
 
Then take a look at Examples - The Making of 40 Photographs by Ansel Adams and discover what an exceptionally poor craftsman and incompetant photographer he was, with all the afterwork he found necessary to produce a decent print from his negatives :D
 
Right, so after reading through everyone's comments properly and taking them all on board. I decided to try VueScan again after getting frustrated with it a few weeks ago to see if it was my scanning technique, or maybe even my developing technique, that was causing the image to look so bad. So I decided to do some quick comparisons against the Epson software. I made my mind up after the first scan with Vuescan after taking some time to read up on it and set it properly. I didn't even need to compare as the following scan is pretty much how it cam out of the scanner, I literally can't believe the difference!

Needless to say I'm going to buy the full licence for it

vuetest4jpgversion by Shaun Palmer, on Flickr
 
I make as much adjustment as it takes to give me the shot I want. When I first started photography back in the 70’s I was often disappointed in my photos but that was often because they were printed with an ‘average’ setting and I didn’t have the experience to realise that so many of my shots could be improved with a little judicious tweaking in the darkroom, I’ve revisited some of those shots since and rescanned them and tweaked them in LR and I’m far happier with the results.

It wasn’t until I started processing my own b&w at home in the 80’s and printing my shots that I realised the importance of the print.

Mos professional photographers have always spent time in the darkroom getting the best from their negatives, just look at the processing notes for this famous shot by Dennis Stock of James Dean https://goo.gl/images/F7iUFc

So do what is necessary and enjoy the freedom that we get from the clash of the film and digital worlds.
 
Right, so after reading through everyone's comments properly and taking them all on board. I decided to try VueScan again after getting frustrated with it a few weeks ago to see if it was my scanning technique, or maybe even my developing technique, that was causing the image to look so bad. So I decided to do some quick comparisons against the Epson software. I made my mind up after the first scan with Vuescan after taking some time to read up on it and set it properly. I didn't even need to compare as the following scan is pretty much how it cam out of the scanner, I literally can't believe the difference!

Needless to say I'm going to buy the full licence for it

vuetest4jpgversion by Shaun Palmer, on Flickr

...and in time it will only get better with experience in developing and scanning and choosing the film you like for the subject..well done in achieving all this after using about 5 rolls of film (y)
 
I make as much adjustment as it takes to give me the shot I want. When I first started photography back in the 70’s I was often disappointed in my photos but that was often because they were printed with an ‘average’ setting and I didn’t have the experience to realise that so many of my shots could be improved with a little judicious tweaking in the darkroom, I’ve revisited some of those shots since and rescanned them and tweaked them in LR and I’m far happier with the results.

It wasn’t until I started processing my own b&w at home in the 80’s and printing my shots that I realised the importance of the print.

Mos professional photographers have always spent time in the darkroom getting the best from their negatives, just look at the processing notes for this famous shot by Dennis Stock of James Dean https://goo.gl/images/F7iUFc

So do what is necessary and enjoy the freedom that we get from the clash of the film and digital worlds.

I’ll have a look at that when I’m on my desktop it won’t open on mobile for some reason. I like that last statement

...and in time it will only get better with experience in developing and scanning and choosing the film you like for the subject..well done in achieving all this after using about 5 rolls of film (y)

Thanks, I felt I’d hit a bit of a wall after this roll, this has give me a boost again lol. New 35mm body should be here today so going to test it out and get a good few shots through vuescan and try to refine my flow a bit
 
Right, so after reading through everyone's comments properly and taking them all on board. I decided to try VueScan again after getting frustrated with it a few weeks ago to see if it was my scanning technique, or maybe even my developing technique, that was causing the image to look so bad. So I decided to do some quick comparisons against the Epson software. I made my mind up after the first scan with Vuescan after taking some time to read up on it and set it properly. I didn't even need to compare as the following scan is pretty much how it cam out of the scanner, I literally can't believe the difference!

Needless to say I'm going to buy the full licence for it

vuetest4jpgversion by Shaun Palmer, on Flickr
Definitely a big improvement..
 
Despite it’s quirkiness it became my go to scanner software when Nikon stopped supporting scanner software updates.

I may have persevered with Silverfast but they wanted me to buy three different versions for the scanners I had and Silverfast certainly isn’t cheap. That and the fact that it’s a complete pig to use drove me to VueScan and I haven’t looked back since. The lifetime updates help too.
 
Back
Top