Lockdown Blues... Cyanotypes, anyone?

ChrisR

I'm a well known grump...
Messages
11,026
Name
Chris
Edit My Images
Yes
A few people I follow on twitter have been showing cyanotypes (otherwise known as blue-prints), and they do look interesting. To back that up, I got an email from Stills in Edinburgh about their "Elementary blueprints" project (https://stills.org/learning/projects/), where they give away a sheet of cyanotype for users to expose to the elements any way they like, and contribute the results back. The sheet is free, except for the postage, so actually turns out to be a rather expensive way to get started! I've got mine, but have yet to decided what to do with it.

Sometimes this kind of media is described as "camera-less photography". You take a coated sheet, expose it to UV light (usually with some objects on its surface to make a design), then wash it to create the blue on white look. Some people stain it in tea and other liquids. See for example:
View: https://www.instagram.com/p/B_eqIrcHIyl/

(Made and (C) by Hilary Clarke, from Instagram... didn't really mean to include this in the post, rather to link to it, sorry!)

Anyway, I wondered if in this time of Lockdown, when it's hard to get out for a proper shoot and the best we can do is carry a camera on our daily exercise, whether folk would be interested in trying and comparing some cyanotypes.

AFAIK you can get started on this in two ways. The simplest is to buy already coated paper, and jump straight in. The other alternative is to buy a "kit", which includes the chemicals to mix together and then coat and dry your own paper. I'd have to call this blueprints to avoid lighting my OH's blue touch paper about dangerous chemicals! One advantage of this is that the unevenness of coating, and the ability to not coat all the paper, give additional creative possibilities, eg: View: https://www.instagram.com/p/B_MqnlSnIp6/?utm_source=ig_web_copy_link
(Also made and (C) by Hilary Clarke, from Instagram... ditto, sorry!)

It's probably cheaper in the long run as well, but more expensive to get started.

(I was surprised, when I did a search, that there didn't appear to be a thread about cyanotypes. They have however popped up from time to time in other threads, eg the "Show us yer film shots" IIRC.)

Anyway, watcher think?
 
Last edited:
Always wanted to try cyanotypes.... I'll have a look at your link when I have some time.
 
I forgot to mention, you can also put negatives over the paper, and get a positive contact print as a result. People apparently also upscale their negatives by making a larger digital negative on transparency paper, then exposing that.

It was hard to get a good result from searching with "cyanotype paper" on fleabay, but just a general G$$gle search seemed to bring up some reasonable options, including a 20 pack of 8x10 for about £17 (plus p&p, not cheap) from Parallax Photographic. Other options are available...
 
That's very interesting Chris, pack of 10 pre-coated paper ordered from Cyanotype.co.uk, £12.00 + postage. (y)

I've watched another couple of vids about it and I like the look of toning, I think portraits would look good so I'll probably print off some shots on transparencies and give it a go.
 
I've done some, and I've probably posted on here about it, from 120 and 4x5 negs. If you are coating your own you need to get the right sort of paper to get the best results and brightest blues. I do like the hand coated effect.

This is an early one from 4x5
CyanotypePlant.jpg

and you can just about make out some yellow staining because the paper has held on to some of the coating.

This was a set from 120 that I mounted and framed

Cyanotypes.jpg
 
Silverprint also have quite a good stock under alternative processes, but I too have ordered a pack from cyanotype.co.uk, plus a pack of transparencies for digital negatives.

I've discovered a massive book on the process, Cyanomicon by Mike Ware written in 2014, apparently freely available at http://www.alternativephotography.com/download/Cyanomicon-Mike-Ware.pdf . It might be just too much, but I enjoyed a browse through the early part.

I think it was @sirch 's row of peppers that I was thinking of in the first post. Nice stuff as per usual, Chris. Did you get a kit or just buy the chemicals separately?
 
I just bought the chemicals but then it took a lot of trial and error to get a suitable paper, even then it's a bit hit and miss but I find that to be part of the fun.

I hadn't come across the Cyanomicon, thanks for the link

Edit to clarify: when I said I bought the chemicals, I bought a two part set, not just the raw chemcials, perhaps that's what you meant by a kit.
 
Last edited:
...Edit to clarify: when I said I bought the chemicals, I bought a two part set, not just the raw chemcials, perhaps that's what you meant by a kit.
There seem to be a variety of kits, ranging from the two part set to kits including paper, chemicals, brushes etc. Somewhere I saw a single chemical offered, already mixed.
 
I ordered some raw chemicals and have just had a go. First attempt was a photogram...

Cyanotype 01.jpg


Exposure was done with a home-brew UV lamp housing...

UV Exposure Box 01.jpg


Second attempt was a contact print from a 5x4 neg, here being exposed...

UV Exposure Box 02.jpg

I left it for 15 minutes, and when I took the neg off, there was a somewhat faint image. Unfortunately, it all but vanished when I washed it...

Underexposed Print 01.jpg

There's a faint mark at the top-right of the image (the vertical line), but it's clearly massively underexposed. Based on that, it looks like a few hours will be needed.

Things I found out...
The raw chemicals both dissolve easily in cold water, and there's virtually no smell.
A cheapo dish-washing sponge mostly worked fine for coating, but I did get some pooling on a couple of sheets (see underexposed 5x4 print above).
A little goes a long way - the sheets are A4 and I did 4 with the dregs left over from making up two 250ml bottles of the base solutions, and I still had some left.
Watercolour paper seems to work quite well.
If making a batch of coated sheets, prepare space beforehand.
Working in dim light is a good idea.


I got the impression that they're quite sensitive when wet - my first sheet was starting to darken a little while I was doing the others. I decided I didn't like that and quickly rigged up the dark blind I have for the kitchen window to cut down the ambient daylight. Although it had darkened more than the others, the sheet seemed fine after exposing and washing (it was the photogram one).

I suspect the pooling I got on a couple of sheets had more to do with how I was laying the sheets out to dry (badly, basically, because I didn't prepare space or think about method). That said, an improved technique with the sponge might result in less excess fluid to begin with.

The paper I used was Canson XL cold pressed, for no particular reason other than it was watercolour paper and was relatively cheap (11 quid for 30 A4 sheets). Cold pressed paper is slightly textured, and probably not ideal for photos. So-called 'not' is less textured, and hot pressed is the smoothest.

Something I'd like to try is toning to see if the blue colour can be altered. I'll use the duff 5x4 print for a bit of that and see what happens.
 
Last edited:
Excellent start, NZ. Very strong tea has been suggested for toning (5+ teabags!)...
 
IME the image washes off it is under exposed but if there is no yellow staining left behind then the paper is probably good. I usually mix up about 50 ml (IIRC) to do around 4 - 6 papers for 5x4 contact printing. I coat in a dimly lit room using one of those sponge brush things, let them dry for a few hours and then put them in envelopes and use within 12 - 24 hours. I have a piece of MDF that I use for coating and spreading out to dry on.
 
Found this PDF, which seems to be pretty good...

https://www.christopherjames-studio.com/materials/The Book of Alt Photo Processes/SAMPLE CHAPTERS/CyanotypeProcessSm.pdf


Also had another go with the 5x4 neg (which I now realise was emulsion up in the first attempt). This time, I left it under the lamps for 3 hours.

Here's what it looked like before washing...

Cyanotype 02 pre.jpg

There's some reflection from the paper's surface, but there is clearly an image of some sort. This is much darker than the first attempt. In that, there was an outline of the horizon and the dark lines (which are field boundaries).

After washing...

Cyanotype 02.jpg

The tonal range is much better than I was expecting - there's even cloud detail. The dark line in the first attempt was the nearest horizontal field boundary in this one. Overall, I'm really impressed. However, since taking the above shot and writing most of this post, the image has lightened a bit. I had left it in a tray of water, but I don't know if that was a factor. In the PDF I linked to, he says that the image will darken over the next day or so as the blue colouring oxidises, so hopefully it will come back toward the above.

Something else mentioned in the PDF was that it's apparently quite hard to over expose a cyanotype, meaning it's safer to err on the side of extra exposure than to chance it and start the wash too soon. Maybe I didn't need to expose for 3 hours.
 
Last edited:
Looking at your lamp set-up I'm a bit surprised at the length of exposure. I have a single 8" old-fashioned fluorescent lamp in a box with the tube about 1.5" from a glass surface on which I contact print and exposures are normally around 20 minutes.
 
Apparently a few drops of hydrogen peroxide in the water will darken the image.
 
Inspired by this thread and not having done a cyanotype for a year or so I thought I'd give it a go but it turned into a bit of an epic!

I coated a few sheets of paper, left them to dry and knowing that exposures on my light box are usually around 15 - 20 mins I thought I'd give a sheet seventeen and a half minutes and see how it came out - massively under exposed is how it came out. So time for a test strip, 20, 22, 24, 26 mins, still well under. Another test 30, 35, 40, nope still under :thinking: another test 40, 45, 50 mins, still under but starting to get there.

Time to coat more paper, left that to dry.

60, 70, 80 minutes, starting to get there so finally 90 minutes got me this

CyanotypeFarleton by Chris H, on Flickr

It looks like the chemcials do go off over time. I have to say I hadn't take any particular precautions with them.
 
Last edited:
At least you got there in the end, Chris @sirch. I did read somewhere that pre-coated paper should be used within a few weeks, but I'd have assumed the chems were OK...

OTOH @Nomad Z also had problems with exposure using a negative... maybe they just cut out a bit of the infra-red light? If you've got a spare coated piece, maybe you should try a photogram (or whatever they're called) tomorrow?
I'm sure the neg cuts out a lot of UV, the border exposes fully in a few minutes but the area under the neg takes a long time. This neg was of similar density (by eye) to those I've done in the past.
 
I happen to have a UV meter, and got the following readings with my test neg, in microwatts per square centimeter...

2800 - lamps direct, no negative
80 - land/foreground of negative
28 - sky area of negative

So, about 5.1 stops between the lamps and the land area of the image, and about 6.6 stops between lamps and sky area. The neg is of decent density, but nothing extreme - it scanned fine in my V700 without having to do anything special. I think it's Fomapan 100.

Other info...
  • The meter is a Tenmars TM-213.
  • Distance from lamps to paper is about 5" (to get even lighting), and about 4.5" to the sensor in the meter.
  • The lamps are 15W each with a diffusing reflector above.
  • The chems were supplied as dry powder, made up using distilled water, and the paper was coated immediately. All at ambient temperature.
  • Paper is Canson XL cold pressed watercolour paper.
  • The exposure through the neg was started within a couple of hours at most.
  • My photogram was exposed for 15 minutes, and the directly-exposed blue areas are quite light compared to the same bits on the contact print. I would say that the photogram was under-exposed - I'd give it longer next time (probably double).
  • The sky detail in the contact print hasn't returned - still plain white.
  • The difference in exposure time between the photogram (15 mins) and the contact print (180 mins) is about 3.5 stops. Not sure if that's significant, but I'm starting to wonder if both are under-exposed.
I got the meter from this eBay seller in Singapore. About 60 quid, took a week or so, didn't get stung for taxes or duty. I went with that because it was the cheapest I could find that gave an actual quantified reading rather than some sort of sun tan rating. Can't vouch for its precision, but it seems to work convincingly for comparative readings (day to day readings outside are consistent within themselves - sunny is stronger than overcast, etc). It's starting to become a very handy bit of kit.
 
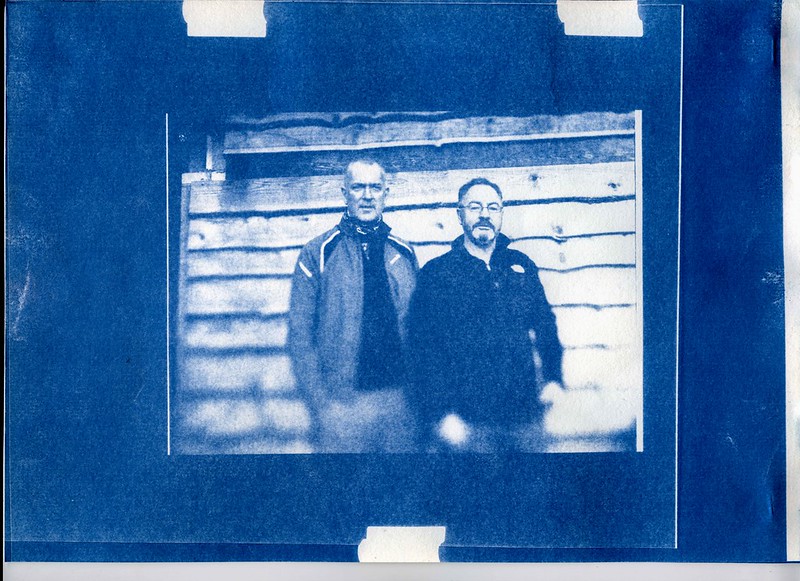
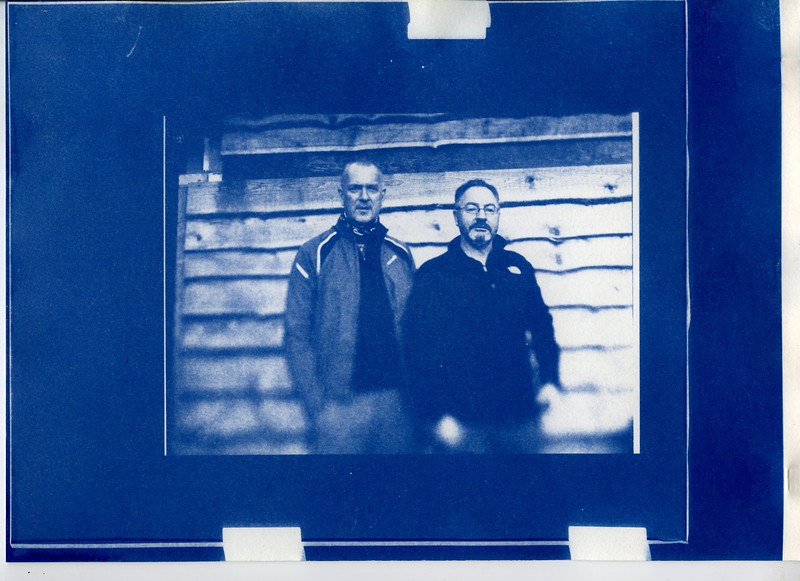
Ok, a few from me.

Day 1
60 second exposure (it was a perfectly cloudless day with the sun almost directly aimed at the paper)
Dave and Nick by Andy, on Flickr

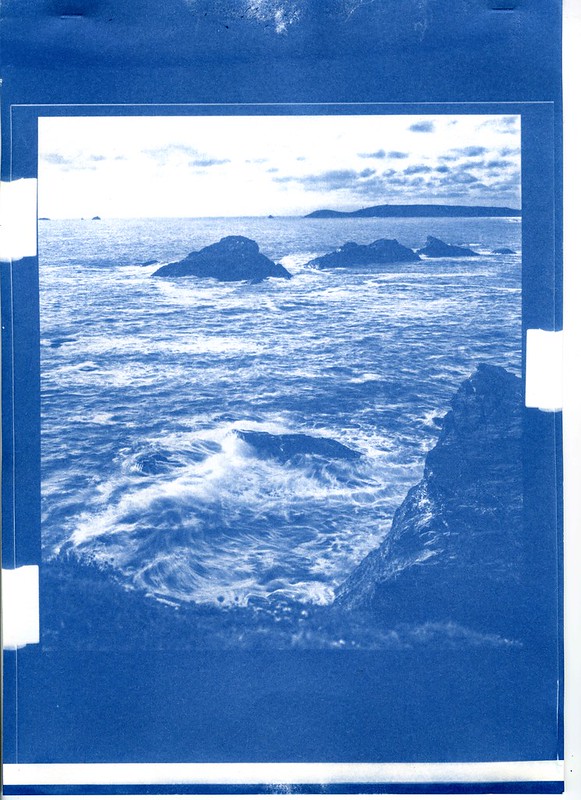
75 second exposure
Cornwall by Andy, on Flickr

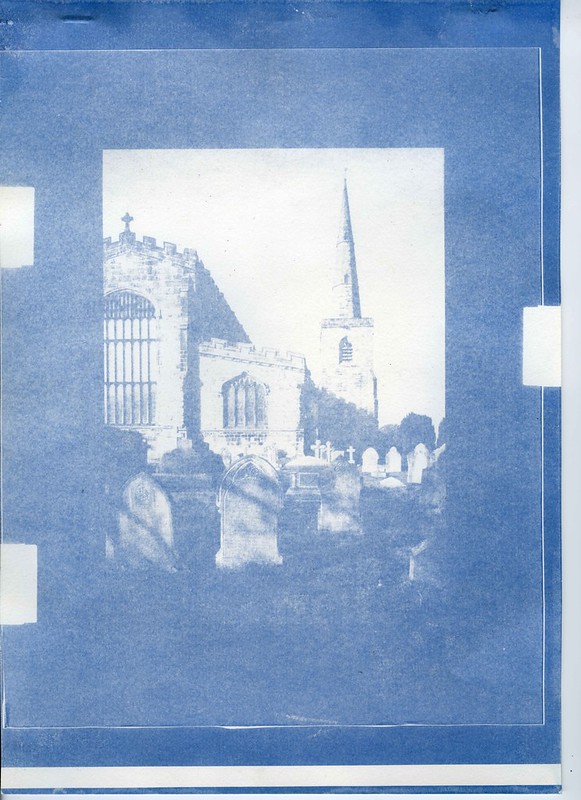
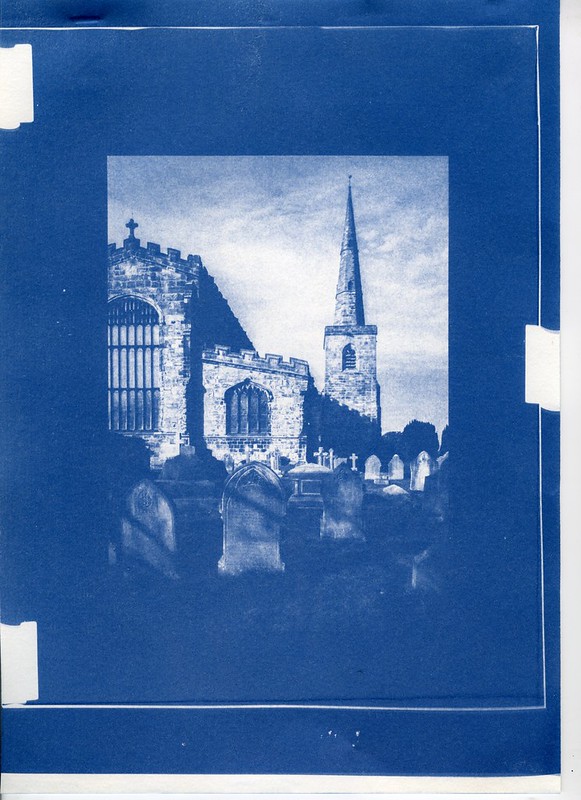
50 second exposure
Astbury Church by Andy, on Flickr

Day 2
Traditional 60 second exposure (same conditions as previous day)
img032 by Andy, on Flickr

90 second exposure
img033 by Andy, on Flickr

75 second exposure
img035 by Andy, on Flickr

I've enjoyed the process of this and the results are better than I expected. I will probably buy a kit of chemicals and have another also try some bleaching and toning. The originals are much better quality then flick r allows.
 
Some lovely images on this thread, and I really like the mix of experimentation as well. A parcel arrived while were out for our exercise this afternoon, which I expect contains my pre-coated sheets and some transparencies for inter-negatives. I won't open it for a couple of days because of The Thing... unless I get too impatient that is. Weather looks good for it, better than next week, maybe that's my excuse!
 
I'm struck by the difference in exposure times for Andy's compared with Steven's and NZ's!
 
I assume that Nz's are a longer exposure as he used a lamp but I can only assume like yourself that Chris's are due to the age of the chemicals. I left one of the first ones for about (sorry I'm bloody useless at being precise) 2 minutes and it was very dark indeed, you could only just make out the highlights and sky everything else was blocked out.
 
It might have something to do with the wavelength of the UV. I think my bulbs are likely mostly UVA with a bit of UVB, while sunlight will extend further into UVB.
 
@Andysnap what time of day was that, I assume UV varies quite a bit with the height of the sun. If I get time tomorrow (and some sun) I might try some outside just to see if it makes a big difference
 
I happen to have a UV meter, and got the following readings with my test neg, in microwatts per square centimeter...

2800 - lamps direct, no negative
80 - land/foreground of negative
28 - sky area of negative

So, about 5.1 stops between the lamps and the land area of the image, and about 6.6 stops between lamps and sky area. The neg is of decent density, but nothing extreme - it scanned fine in my V700 without having to do anything special. I think it's Fomapan 100.

Other info...
  • The meter is a Tenmars TM-213.
  • Distance from lamps to paper is about 5" (to get even lighting), and about 4.5" to the sensor in the meter.
  • The lamps are 15W each with a diffusing reflector above.
  • The chems were supplied as dry powder, made up using distilled water, and the paper was coated immediately. All at ambient temperature.
  • Paper is Canson XL cold pressed watercolour paper.
  • The exposure through the neg was started within a couple of hours at most.
  • My photogram was exposed for 15 minutes, and the directly-exposed blue areas are quite light compared to the same bits on the contact print. I would say that the photogram was under-exposed - I'd give it longer next time (probably double).
  • The sky detail in the contact print hasn't returned - still plain white.
  • The difference in exposure time between the photogram (15 mins) and the contact print (180 mins) is about 3.5 stops. Not sure if that's significant, but I'm starting to wonder if both are under-exposed.
I got the meter from this eBay seller in Singapore. About 60 quid, took a week or so, didn't get stung for taxes or duty. I went with that because it was the cheapest I could find that gave an actual quantified reading rather than some sort of sun tan rating. Can't vouch for its precision, but it seems to work convincingly for comparative readings (day to day readings outside are consistent within themselves - sunny is stronger than overcast, etc). It's starting to become a very handy bit of kit.
It might have something to do with the wavelength of the UV. I think my bulbs are likely mostly UVA with a bit of UVB, while sunlight will extend further into UVB.

Great bit of info, @Nomad Z . Have you tried metering for UV outside in strong sun? We may get some over the next couple of days... It would be interesting to know what the readings are. Does the meter measure into UVB?
 
@Andysnap what time of day was that, I assume UV varies quite a bit with the height of the sun. If I get time tomorrow (and some sun) I might try some outside just to see if it makes a big difference

About 13.00 ish, it was cloudless and very bright.
 
Great bit of info, @Nomad Z . Have you tried metering for UV outside in strong sun? We may get some over the next couple of days... It would be interesting to know what the readings are. Does the meter measure into UVB?

The spec says it does 290 to 390 nanometers, which is about 71% of the UVB band, and 88% of UVA, based on the boundaries given here...

https://en.wikipedia.org/wiki/Ultraviolet#Subtypes

I've been taking readings, but only a few so far. Direct readings of the sun are are similar to my light box, or a bit higher. In sunny conditions, I have 2.8 to 3.73mW (or 2800 to 3730 microwatts). One, with the sun behind a cloud was 2mW, and and an overcast reading got just 0.12mW.

I've been taking readings in other directions as well to try and get an idea of how things vary in different conditions. The eventual plan is to try and establish a guide for determining exposure for in-camera alternative materials by correlating exposure under the lamps (through a negative) with exposure outside for a typical landscape or architectural subject. The readings I've been taking are...
  • Directly towards the sun (or my estimate of its direction if overcast).
  • Horizontal - looking directly upwards at the sky.
  • Towards a typical subject (grass and trees), with the sun to the side and the meter tilted down a bit, and ensuring that the recessed surface of the sensor has no direct sunlight on it.
  • Towards my face (caucasian), again with the sun to the side and with the sensor shaded.
As mentioned, only a few readings so far, so I'd avoid drawing general conclusions for now., other than to say that, apart from overcast, the order of strength is the same as above. In the one overcast reading, the overall sky was brighter than pointing towards where I reckoned the sun was (same location for all readings, and usually same time of day).
 
Bit of a rushed job at lunch time, I did a test strip outside, the light was metering at sunny 16, f16 - 1/125 at 100ISO on my meter. As soon as I uncovered the paper in full sun it was obvious that this was going to go quickly so I decided to try roughly 2, 4, and 6 mins. The neg moved quite a lot but this it gives an idea.

CyanoOutdoorTest.jpg

So I picked 5 mins and got this

EllieScan (4).jpg
 
Last edited:
How long do you wash the prints for Chris? I only gave mine 3 or 4 minutes but I've seen 20 minutes mentioned.
 
I usually do a minute or so under running water and then probably leave face down in a bowl of water for 5 to 10 minutes, pretty much until the yellow staining has gone. I think you can see from the slight yellow tint in the test strip that I didn't bother washing that fully. I suspect that it depends to some extent on paper type.
 
Been playnig with the UV meter and a couple of UV filters.

Baseline reading under the UV lamps...

UV Filter Comparison - No Filter.jpg


With a Hoya UV filter over the sensor...

UV Filter Comparison - Hoya UV(0).jpg


And with a Jessops UV filter over the sensor...

UV Filter Comparison - Jessops.jpg

That doesn't look terribly good.

One could conjecture that, if both filters were placed upon a suitable UV dosimeter of sorts, the differences in their UV transmission rates would be apparent.

Scientific test of hypothesis - filters on cyanotype paper, under UV lights...

UV Filters on Cyanotype Paper.jpg


After a 15-minute exposure and a wash...

Cyanotype UV Filter Comparison.jpg

Hoya was on the left, and Jessops was on the right. The hypothesis appears to have been empirically strengthened.

Quite a difference, and it's interesting to note that the paper still got a fair bit of colour in it under the better filter.
 
I had a coated sheet left over from Thursday so I thought I might was well use it. I have generally tried to use the coated sheets within a day or so but this seems to have worked ok, it's an ice cube with reflecion, the little blob is a water drop on the original image.

Cyanotype-icecube.jpg
 
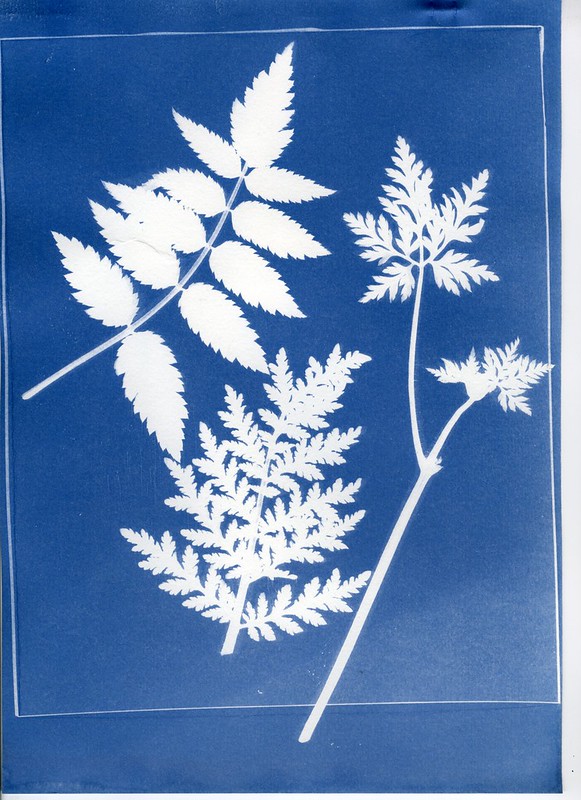
Managed to get a design done and out in the sun!

I was amused by the first paragraph of the information sheet that came with my paper:

"This paper is coated with chemicals so should not be ingested or put in the mouth. Use latex gloves or tongues when handling the paper..."

Eventually managed to work out what it should have been!
Well, that was a disaster! I don't know what came over me, in my excuse it was cloudy when I put it out, and each time I looked to check... but in the end I exposed a sheet for an hour! Some of the plant bits are almost invisible, I can confirm that white flower petals transmit quite a lot of UV.

I should say, however, that the whole exercise would be worth while even just to see the absolutely gorgeous blue from a cyanotype blueprint! Perhaps because so severely over-exposed, it is the deepest royal(ish) blue I can remember seeing, ever!
 
Ok, a few from me.

Day 1
60 second exposure (it was a perfectly cloudless day with the sun almost directly aimed at the paper)
Dave and Nick by Andy, on Flickr

75 second exposure
Cornwall by Andy, on Flickr

50 second exposure
Astbury Church by Andy, on Flickr

Day 2
Traditional 60 second exposure (same conditions as previous day)
img032 by Andy, on Flickr

90 second exposure
img033 by Andy, on Flickr

75 second exposure
img035 by Andy, on Flickr

I've enjoyed the process of this and the results are better than I expected. I will probably buy a kit of chemicals and have another also try some bleaching and toning. The originals are much better quality then flick r allows.

These are very nice, Andy, but where the heck do you live, Malta? I tried your exposure time of 75 seconds with a 4x5 negative and got an almost white central image. Next go was test strips at 2, 3, 4, 5 and 7 minutes... enough to convince me to expose for 10 minutes, and even so the demarcation between building and sky was weak.

I'll show that image when it's scannable... I tried this afternoon after it had been drying for 3-4 hours, and the scanner picked up some discoloration in the lighter parts that are not visible to my naked eye, I think because of some residual dampness in there.

Also, do you and @sirch have to flatten your sheets before scanning? Mine have dried very bumby!
 
OK, after some serious drying and flattening (though sadly not completely flat), here's my first reasonably successful blueprint from an early 4x5 negative taken inside Kenilworth Castle...

Cyanotype Castle inside.jpg

Chroma, Fujinon 135/5.6 lens, Fomapan 100,, printed onto pre-coated cyanotype paper, with an exposure of 10 minutes (maybe not quite enough).
 
Inspired by this thread, I got hold of some Cyanotype Store Mixed Color paper not so long ago (from Silverprint). I tried it out with leaves and stuff like that first of all but got more interesting prints from black and white laser printed internegs. It took a couple of attempts to realise that the internegs have to be quite dark and very contrasty but altogether it was an interesting experiment. I'll post a picture of the decent ones pasted into an album in due course. This precoated paper, which is a nice weight, needs a longish exposure even in the bright sunlight we had this weekend, 20-25 minutes.
 
OK, after some serious drying and flattening (though sadly not completely flat), here's my first reasonably successful blueprint from an early 4x5 negative taken inside Kenilworth Castle...

View attachment 280004

Chroma, Fujinon 135/5.6 lens, Fomapan 100,, printed onto pre-coated cyanotype paper, with an exposure of 10 minutes (maybe not quite enough).
Really like that Chris, some great details in the walls
 
Back
Top