My Film Digitising Rig project

Messages
577
Name
Alex
Edit My Images
Yes
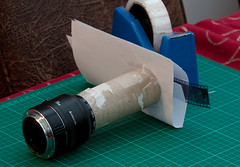
decided to build a rig to be used with my A7II instead of buyng a scanner.

This is what i came up with:

Camera will be mounted on a macro rail and on a lab jack. This will allow for adjustment in all directions, so that i can center my sensor over both 120 and 35mm film. Also I will be able to take multiple shots of 120 film to achieve higher resolution if I need it.
Film holder consists of a light diffusing panel on the back and two pieces of black acrylic welded onto it.
Film will be held flat by 100x100mm anti newton glass (in the middle)

It will be backlit by either a flash or a led lamp - I will see what is better

Will try to build it over the weekend and report back with results :D

digi-rig.png
 
Last edited:
Looking forward to seeing the end results here. Don't forget to take photos as you go. And also the blue prints and step by step build instructions for us. ;)
 
I kinda want to put a tube between the lens and the film holder.
I used to shoot my mf slides on a light box, I found that stray light from the box found its way round the front and in to the path of the copy, this would also happen if I'd used flash.
I ended up masking the light box entirely bah a square hole tight to the confines of the frame, a 56mm x 56mm hole, and then shooting the thing in the pitch black.
Tubing it, solves a lot of problems, but it has to be light tight and that isn't simple in itself but it is doable.
I think what you have is a device to hold and maneuver the camera, and hold the film, unless you isolate the lens from stray light, shooting only the light coming through the slide, its gonna be a bit iffy...:)
 
Last edited:
joxby, yes, I will prbably have to build some kind of light tight box around it.

I have a couple of other ideas as well - will try them out and see what works
 
I kinda want to put a tube between the lens and the film holder.

Like this?


Neg Scanner
by Ian, on Flickr

I was pleasantly surprised to discover that a toilet roll tube, a (canon) 50mm lens (52mm filter ring size) and a 20mm extension tube put everything at the perfect focussing distance. Just so happens that the tube is the exact same size as a 52mm filter ring. I just had an epic fail with the neg carrier.

It also won't win any points for prettyness or sturdiness and doesn't work with anything other than 35mm. Useless to the OP, but I was proud of it for a while.
 
Last edited:
ok, here we go

Step 1: Backlit panel

A 9W 145x145 slim led panel from ebay wired into + a 3 pin power socket from Wickes
DSC_0003.jpg

Attached it to a light diffusing acrylic panel size A4 so that the bottom of the led is roughly in the middle of the sensor when camera sits on the lab jack and the macro rail


DSC_0006.jpgDSC_0005.jpg

It already works as a light table :)


DSC_0007.jpg
 
Quickly digitised a couple if shots with my mobile phone
Project is over for today, need to take moi bebe for a walk :)


20170429_145746.jpg 20170429_153253.jpg 20170429_154625.jpg
 
Looks like it works, although all the sea is running out of shot to the right of the frame! :p (Even more so when the edge of the film is straight!)
 
OK, managed to (almost) finish it :)

Step2: Film holder
Black cardboard cut to allow around 62mm for the film and 100x100 window for the ANR glass
Attached to the panel with 3M double sided tape
DSC_0008.jpg

Now top panel (doesn't have to be transcluent)
Cut a 100x100 window + side windows to make it easy to feed the film in and out.
All done with fretsaw, so it's quite ugly, but works.
Extra holes are becasue I miscalculated their position first

DSC_0011.jpg

Now top panel attached to the base pabel with 3M tape.
The entire thing mounted onto a shelf using balustrade clamps.
Also added an inline switch and a longer flex

DSC_0013.jpg

Finally, macro rail is attached to the lab jack (using guess what :D)

Next part will depend on your lens:
Mine is Sony 55mm. It's min focusing distance is 50cm and max magnification 0.14
Using calculator here http://www.cambridgeincolour.com/tutorials/macro-extension-tubes-closeup.htm I found that:
1:1 magnification will be achieved with 52mm extension which will reduce min focusing distance to around 22cm
0.4 magnification which is ideal for 6x9 film requires 16 mm extension, which makes minimum distance 26cm

My macro rail allows 10cm longtitudal adjustment, so my optimal sensor position with macro rail all the way in is 21.5cm.

Here is the entire thing in action:
DSC_0015.jpg
 
Last edited:
I'm quite satisfied. But there is still room for an improvement: toggle clamps to hold the glass down and probably a hood of some sort, although I haven't noticed any interference - I shot at F16 which pretty much eliminates all ambient light
 
Good work Alex but a good test would be to use a known V good\sharp neg and see the results.
 
Grade of your acrylic sheet (Perspex)? I have used 3mm thick opal for light boxes in grade 040 = 40% transmittance.
 
Thanks! But your light source is fairly diffuse (even) to start with, so less risk of hotspots ...
 
This first one was shot just a bit rough and ready on a light box with no baffles or cone or anything, you can see how the light from the box leaks across the frame lowering contrast and just generally washing it out.

2s00q5w.jpg


This one was very shortly after the first when I'd got my arse in to gear and blocked all stray light out


domfy8.jpg


I'd post more but its all turning in to red cross forest down there at the beginning of show us yours, these are the only 2 left that were shot with a digital camera on a light box, I got my scanner working soon after this.
 
I'm quite satisfied. But there is still room for an improvement: toggle clamps to hold the glass down and probably a hood of some sort, although I haven't noticed any interference - I shot at F16 which pretty much eliminates all ambient light


I'd use f/8 rather than f/16 to reduce/eliminate diffraction softness - and clean either the sensor or the neg/slide.
 
I am so glad I picked up a scanner for film. I was starting to go down this particular route, but am much happier with the results and workflow I get using my scanner.

It's good to see people are getting results using this method though :)

Keep the the good work!
 
Back
Top