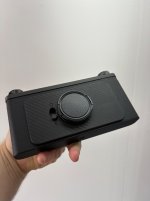
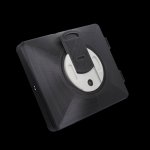
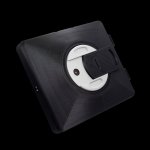
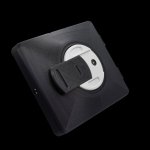
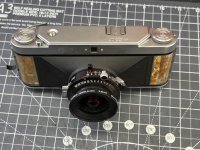
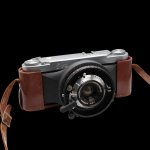
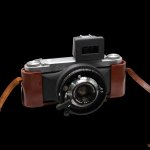
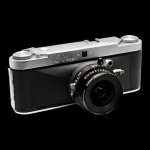
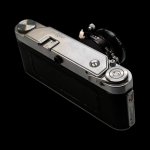
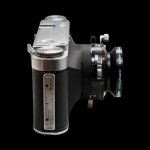
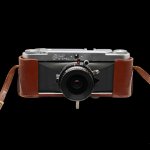
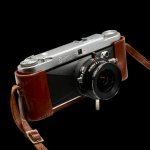
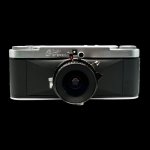
Official Chroma Camera Thread - All questions/suggestions/feedback appreciated

Double Glass m39/139 mount lens now available for immediate shipping!

If you've been waiting to pick up your own Double Glass lens, I now have a small batch of 60 available on my website. There is a link in my bio to the page.

All lenses now come with a 49mm pinch cap and a custom-designed twist lock hard case to protect your lens during those rare times that you don't have it mounted on a camera. The hard case measures 60mm diameter and only 23mm thick so can be easily kept in your pocket or bag so you will always have an ultra-compact symmetrical element 24mm F11 snapshot lens to hand.

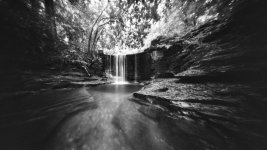
l've also added the option to include a 24mm accessory viewfinder (coldshoe mount) with your lens to make composition simple either for cameras that don't have 24mm trame lines or simply to tocus your view instead of using the screen on your digital Mirrorless body. I took all of these example images with my Sony A7 mk1 camera.
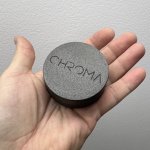

IMG_8104.jpeg


Cheers
Steve
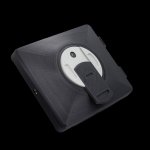
 
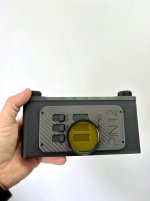
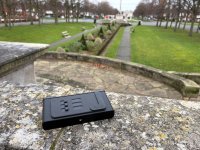
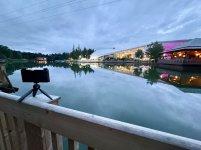
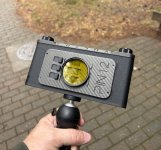
My Chroma Click arrived yesterday. I've only had a couple of quick looks at it but first impressions are that the manufacture and design is of extremely high quality. Some nice touches especially the winding on mechanism and the associated frame spacing.

I'll start a mini thread about it in the next couple of days.
 
My new "FX-Six" multi format 120 system.


1776586480107.png

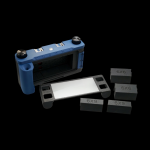
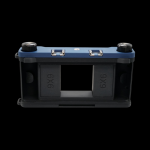
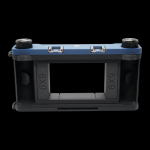
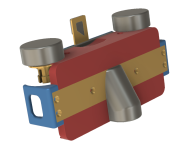
After launching the 6x17 format “FX617” in 2025, with its’ simplified fixed body design, I’ve been working on a smaller version that offers three different frame sizes; 6x12, 6x9 and 6x6 in one compact system and am happy to announce that my new FX-Six is now available to order from my website HERE
The FX-Six shares compatibility with the lens cones from the Six12 camera system, offering options from ultra wide to telephoto as well as pinhole. The FX-Six also comes with 4 slot-in frame masks to switch between formats. As the camera is a fixed body design, the frame masks are fitted before loading film and left in place until the film is complete.

1776586557075.png

1776586564284.png

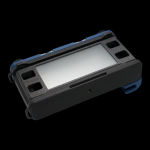
The camera also comes with a drop in ground glass which can be fitted in place before loading film to check composition/focus, and to set your own preferred focus distance markings on the focusing helicoid.

1776586572827.png

Like my other cameras, the FX-Six comes as a ready to go setup, including the lens cone/lens board of your choice and ground glass. You just need to mount your lens to the lens board and load film. Available in a range of colours and built to order, ranging from £295 to £340 depending on the helicoid size required.

Cheers
Steve
 
Last edited:
My new "FX-Six" multi format 120 system.


View attachment 479615

After launching the 6x17 format “FX617” in 2025, with its’ simplified fixed body design, I’ve been working on a smaller version that offers three different frame sizes; 6x12, 6x9 and 6x6 in one compact system and am happy to announce that my new FX-Six is now available to order from my website HERE
The FX-Six shares compatibility with the lens cones from the Six12 camera system, offering options from ultra wide to telephoto as well as pinhole. The FX-Six also comes with 4 slot-in frame masks to switch between formats. As the camera is a fixed body design, the frame masks are fitted before loading film and left in place until the film is complete.

View attachment 479616

View attachment 479617

The camera also comes with a drop in ground glass which can be fitted in place before loading film to check composition/focus, and to set your own preferred focus distance markings on the focusing helicoid.

View attachment 479618

Like my other cameras, the FX-Six comes as a ready to go setup, including the lens cone/lens board of your choice and ground glass. You just need to mount your lens to the lens board and load film. Available in a range of colours and built to order, ranging from £295 to £340 depending on the helicoid size required.

Cheers
Steve
Ooh, interesting. I'll have a look at that later on your website.
 
They're not massively exciting but I've just uploaded 4 short videos showing how to disassemble my Six17, along with others showing how to mount the ground glass, how to load film and how to focus using the helicoids that I use on all of my cameras. They're all on my Youtube Channel;

https://www.youtube.com/@chromacameras1715/videos

 
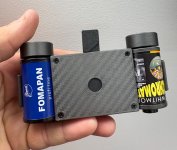
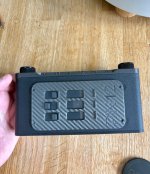
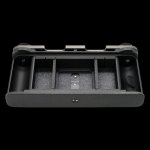
I had an idea a few days ago to design a modern version of the humble matchbox pinhole camera. I always try to keep my designs simple, but wanted to strip back entirely to see how compact I can build a 24x36 pinhole camera.

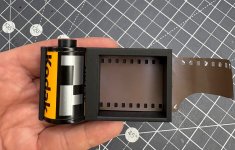
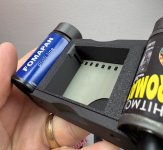
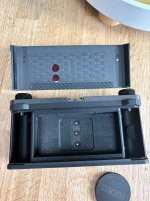
I started by designing a simple film path to keep the film flat without needing any pressure plate/rear door etc. The simplest way to do this is to use two 45 degree rebates to retain the film.

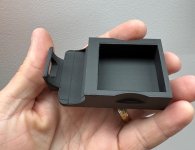
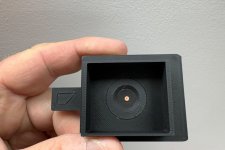
I then took that basic film path and integrated it into a simple box design,;

IMG_9014.jpg

The film canister is secured with friction and the film opening slots into a light-tight rebate in the box. Once I was happy with the fit/finish I then worked on the retaining tab for the film canister to slim it down and keep the camera as compact as possible;

IMG_9024.jpg

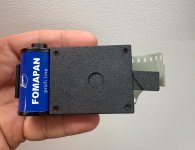
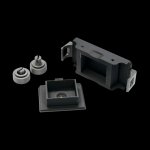
Next up I needed a removable pinhole/shutter unit so that I can feed the film through the camera and a similar light tight slot on the other side then fit the light tight shutter over the top;

IMG_9027.jpg

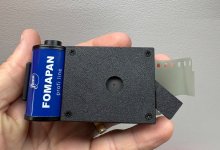
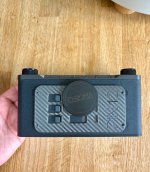
It's the simplest shutter possible (other than your hand!), with a friction mounted arm that covers/uncovers the pinhole with a 45 degree movement and stays in place whether open or closed.

IMG_9037.jpg

The pinhole is the one I use for all of my cameras, 0.2mm from James Guerin at Reality So Subtle, held in place with a friction fit locking ring from behind.

IMG_9035.jpg

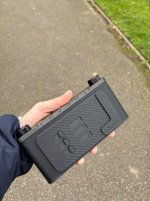
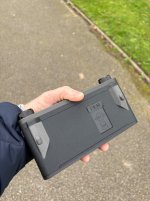
Once I was happy with the lock for the film canister and shutter design I then mirrored the camera in my 3d modelling software (Fusion360) and built the finalised body. I ended up rotating the shutter by 90 degrees to move it away from the take up film cartridge and keep the camera as compact as possible;

IMG_9066.jpg

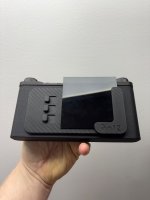
I've also added in a simple clicker for frame spacing. As you wind on just count 9 'clicks' and the spacing will be spot on for the 24x36 frame. The clicker moves both ways so you can also rewind the film back into the canister at the end! (There's no tension in the film here, hence the slightly wobbly looking film path)

IMG_9070.jpg

I'm just drawing up a simple removable bracket to mount the camera to a standard tripod now and it will be finished. Current total weight, with both film cartridges in place, is 94g so I think that's as light as I can possibly make it whilst still delivering decent pinhole results.

With a 0.2mm pinhole and 15mm 'focal length', the camera has an effective aperture of F75 so should be relatively easy to use in normal daylight. I've got some reloadable 35mm cassettes on the way so I'll put a film through it as soon as I can.

Not bad for 2 days of design/iteration work, and a pile of test prints!
 
Last edited:
After the matchbox pinhole camera how about a Holga 120 wide pinhole clone that doesn't allow the back to fall off and is nice to use? It's 6x12 as well which is unusual. Doesn't need a lens or darkslide either so it's very simple.
 
After the matchbox pinhole camera how about a Holga 120 wide pinhole clone that doesn't allow the back to fall off and is nice to use? It's 6x12 as well which is unusual. Doesn't need a lens or darkslide either so it's very simple.
Like this one :0)

6x6, 6x9, 6x12 and interchangeable pinhole plate, 20mm ‘focal length’ as standard and 40mm with the deeper plate. Probably both single central pinhole and a version with three positions rise/fall.

Bracket on the front of the rise/fall plate to mount Cokin P filters, standard 49mm filter thread on the standard plate.

I’m still working on the rise/fall design, and am looking at using the rotating style plate I originally used on my SnapShot 4x5 pinhole, which only uses a single pinhole disk in 4 different positions, rather than using multiple disks.
 

Attachments

  • IMG_7236.jpeg
    IMG_7236.jpeg
    241.4 KB · Views: 6
  • IMG_7237.jpeg
    IMG_7237.jpeg
    235.1 KB · Views: 6
  • IMG_7228.jpeg
    IMG_7228.jpeg
    165.2 KB · Views: 6
  • IMG_5506.jpeg
    IMG_5506.jpeg
    126.7 KB · Views: 5
  • PhotoRoom_004_20230526_165408.jpeg
    PhotoRoom_004_20230526_165408.jpeg
    111.8 KB · Views: 5
  • PhotoRoom_005_20230526_165408.jpeg
    PhotoRoom_005_20230526_165408.jpeg
    106.8 KB · Views: 5
  • PhotoRoom_003_20230526_165408.jpeg
    PhotoRoom_003_20230526_165408.jpeg
    99.9 KB · Views: 5
  • PhotoRoom_001_20230526_165408.jpeg
    PhotoRoom_001_20230526_165408.jpeg
    106.2 KB · Views: 5
Last edited:
Like this one :0)

6x6, 6x9, 6x12 and interchangeable pinhole plate, 20mm ‘focal length’ as standard and 40mm with the deeper plate. Probably both single central pinhole and a version with three positions rise/fall.

Bracket on the front of the rise/fall plate to mount Cokin P filters, standard 49mm filter thread on the standard plate.

I’m still working on the rise/fall design, and am looking at using the rotating style plate I originally used on my SnapShot 4x5 pinhole, which only uses a single pinhole disk in 4 different positions, rather than using multiple disks.

Yes that kind of thing :) I assume it has a cable release. Also film loading needs to be idiot proof for me :ROFLMAO:
 
Yes that kind of thing :) I assume it has a cable release. Also film loading needs to be idiot proof for me :ROFLMAO:
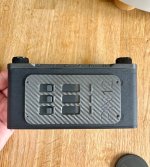
No cable release, just simple light magnetic shutter. Film loading is very simple, it’s basically a slimmer version of my Six12 camera with the same removable rear door.
 
After the matchbox pinhole camera how about a Holga 120 wide pinhole clone that doesn't allow the back to fall off and is nice to use? It's 6x12 as well which is unusual. Doesn't need a lens or darkslide either so it's very simple.
Thanks for asking about this, it’s made me put some more time into the design and I’ve now figured out (at about 1am this morning!) a much neater way to mount a standard 49mm filter than the original Cokin P design.
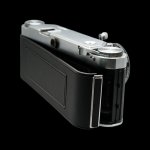
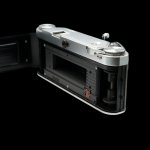
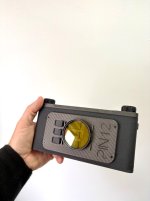
I was trying to design a compact mounting setup that didn’t need magnets/bulky brackets etc and came up with the idea below, which is three different positions to mount any 49mm filter with a compact snap fit. The 10mm high curved clips on each side of the pinholes are strong enough to push fit the threaded section of a standard screw on filter into place (I’m using a 49mm threaded lens cap because I couldn’t find a filter).

The fit is solid enough that the filter won’t fall off mid-exposure but it’s easy to unclip the filter if you don’t want to use it.

IMG_9925.jpegIMG_9926.jpegIMG_9924.jpeg

There’s 15mm of rise and 15mm of fall, which is more than enough for most situations. The shutters are magnetic so stay opened or closed without any risk of opening when you don’t want them to.

The rear has the same removable door design as my other medium format cameras, this is based around my FX-Six body so is robust/light tight. There are two red windows and two slot in frame masks (fitted before loading film), so the camera offers 6x6, 6x9 and 6x12.

IMG_9930.jpeg

‘Focal length’ is 25mm, with a 0.2mm pinhole, giving an F125 aperture. The whole camera is around 30-35mm deep so easy to slip in a pocket/bag and there’s a standard 1/4” tripod mount on the base.

I’m not sure about keeping the coldshoe, I originally put it in the top plate to allow for a viewfinder to be used but I’ve drawn up another version without it as a simpler camera.

I’ll put a roll through this one and see how it handles before getting a finalised version released.
 
Last edited:
I’ve got a 49mm yellow filter coming tomorrow and have loaded a roll of Fomapan 100 to test the Pin12. Annoyingly, I’ve only got one 0.2mm pinhole disk here so I’ve got that in the centre position and a pair of 0.4mm pinhole disk holes in the upper/lower positions. The 0.4mm pinhole gives an aperture of roughly F64 so it will be interesting to compare results.

I’m away this weekend in the Lake District so I’ll get the roll shot and develop it next week.
 
Last edited:
I finished the roll of Fomopan 100 in the Pin12 at half time of the Norway/Brazil earlier. I’ve shot a mix of central 0.2mm and upper 0.4mm pinholes, with and without the yellow filter, so it will be interesting to see the results later this week once I develop the film.


IMG_0132.jpegIMG_0115.jpeg
 
I finished the roll of Fomopan 100 in the Pin12 at half time of the Norway/Brazil earlier. I’ve shot a mix of central 0.2mm and upper 0.4mm pinholes, with and without the yellow filter, so it will be interesting to see the results later this week once I develop the film.


View attachment 486807View attachment 486806
I’ve just realised that I didn’t come back to update the results of the test roll….they weren’t great

IMG_0218.jpeg


I discovered after developing the roll of overexposed/low contrast images that the outer disk that the brass pinhole plate is fitted to is basically transparent plastic…not ideal! I’ve used the same pinhole plates since my fist Baby Cube but the design was slightly different to this very wide 6x12 setup as there needs to be as little camera body as possible mounting the pinhole so there isn’t any clipping of the frame.

I’ve now updated the setup by adding a light tight black vinyl trim on either side of the pinhole disks so it should mean that I get a little more contrast, and less light ingress, on the next roll :0)
 
On another note, I’ve currently got about a dozen cameras waiting to go out of the workshop because I don’t have any ground glass for them, A package of new glass was shipped to me on the 2nd July from Eastern Europe then sat in Estonian Customs from the 3rd July until it was apparently found under someone’s desk on the 28th! Hopefully it will appear here soon.

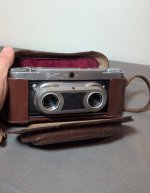
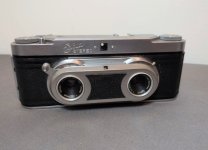
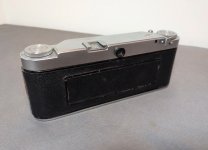
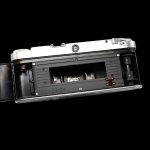
Whilst I’m stuck for glass I decided to put some time into a custom one-off camera conversion, something I haven’t done for a while. I came across a spares/repair Wirgin Edixa Stereo that was shredding film when rewinding and had a stuck shutter so I took a chance on it;


IMG_0642.jpegIMG_0629.jpegIMG_0636.jpeg

After taking the top plate off I could see that a small steel tab that should lift a pawl away from the wind on gear had been bent (suggesting someone has been in there before), so a careful adjustment with pliers fixed the rewind issue so I could get on with the fun part.

I’ve seen another camera builder using one of these to make a very wide panoramic format camera (24x96mm) by cutting out the middle of the original film gate and mounting a Schneider 47mm wide angle lens. I didn’t want a frame that wide so, thanks to the design allowing the original film gate to be removed entirely with 6 screws, i’ve designed my own film gate with a 24x84mm frame;


DSC05192-Photoroom.jpeg

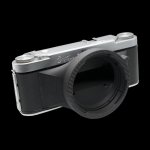
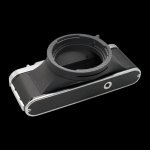
I removed the original lens plate and took a cutting disk to the cast body to clear out the front face, allowing me to design a new inner throat section and a Mamiya Press mount front plate;


DSC05194-Photoroom.jpegDSC05193-Photoroom.jpegDSC05190-Photoroom.jpeg

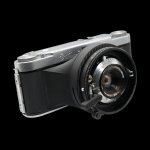
The front skin sections are just rough pieces at the moment, I’ll cut them properly tomorrow, but I’m happy with the overall look/feel and am ready to put a roll of film though it. The Press 65mm lens is one of my favourites but I’m also currently printing up a fixed mount cone for my Schneider 47mm f5.6 so can switch between lens options between films.

IMG_0626.jpeg

The original never-ready case (lower half) still fits too;


DSC05196-Photoroom.jpegDSC05197-Photoroom.jpegDSC05199-Photoroom.jpegDSC05198-Photoroom.jpeg
 
Last edited:
I finished the updated cone for my Schneider 47/5.6 today so I’ve got two options for the camera.

DSC05209-Photoroom.jpegDSC05210-Photoroom.jpegDSC05211-Photoroom.jpegDSC05208-Photoroom.jpegDSC05207-Photoroom.jpeg

The 47mm setup is much lighter and more compact, whereas the Press version is more flexible in terms of different focal lengths. I still need to finish the new skin and tweak the rear door locking latch because it’s pretty tight.

I’ll get a roll of film through it, eventually, and see how it looks.
 
I’m not sure about keeping the coldshoe, I originally put it in the top plate to allow for a viewfinder to be used but I’ve drawn up another version without it as a simpler camera.
I’ve got an updated top plate on the Pin12 now, with integrated slots to secure the internal frame dividers so they don’t get lost when you’re shooting the full 6x12 format;

DSC05227-Photoroom.jpegDSC05232-Photoroom.jpegDSC05231-Photoroom.jpeg

I haven’t had chance to put a roll through this updated design yet, and probably won’t get chance for another few weeks, so if anyone in the UK is up for putting a test roll through this, I’m happy to ship it out to you and cover the return postage too.

If you’ve got time to shoot some film, in any or all of the available formats, let me know and I’ll get it packed up.

Cheers
Steve
 
  • Like
Reactions: zx9
I’ve got an updated top plate on the Pin12 now, with integrated slots to secure the internal frame dividers so they don’t get lost when you’re shooting the full 6x12 format;

View attachment 489343View attachment 489344View attachment 489345

I haven’t had chance to put a roll through this updated design yet, and probably won’t get chance for another few weeks, so if anyone in the UK is up for putting a test roll through this, I’m happy to ship it out to you and cover the return postage too.

If you’ve got time to shoot some film, in any or all of the available formats, let me know and I’ll get it packed up.

Cheers
Steve

I'm game for that! I have a few rolls of 120 hanging about that need using up.

Do you have a rough exposure guide for it like the diana one eg sunny is X seconds, Cloudy Y seconds etc? Makes it much easier to test with a rough guide like that. I assume there are basic instructions for it too so I can test those at the same time.
 
I'm game for that! I have a few rolls of 120 hanging about that need using up.

Do you have a rough exposure guide for it like the diana one eg sunny is X seconds, Cloudy Y seconds etc? Makes it much easier to test with a rough guide like that. I assume there are basic instructions for it too so I can test those at the same time.
Great, thanks for that.

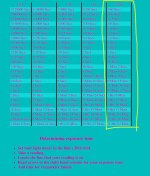
It’s F/125 aperture and there are guidelines for the width of each format (6x6, 6x9 and 6x12) on the top plate. I’ve always used a Pinhole metering app on my phone to calculate the shutter speed but you can also use this quick table so you can meter for a ‘traditional’ aperture (F2.8/F8/16), using the ISO of the film you have loaded, then read across the line from the metered shutter speed to see what you would use for the pinhole;

Untitled.jpeg

For example, if your scene meters at F8, 1/30th second, that would be an 8 second exposure with the pinhole.

There are three different pinholes/shutters on the camera, giving you a central frame plus 15mm rise and 15mm fall depending on your scene. There’s also a bubble level on the top plate so you can make sure the camera is level.

Being a very simple manual pinhole shutter, there’s always a bit of guesswork in terms of shutter speed, but that’s the fun of a pinhole camera.

I’ll include a quick guide for backing paper numbers and which window you read from, depending on format, but it’s pretty self-explanatory once you’ve got the camera in your hand. I’ll put a 49mm yellow filter in too so you can see what you think about using that with the clip on design.

I’ll send you a PM to get your address.

Cheers
Steve
 
Last edited:
The Pin12 is packed, labelled and ready to ship. Thanks again for your time, will be good to see what you think of it.
 
I’ve just sanded back/sprayed the rear door in satin black to tidy up the Edixa Pano. After decades of use it was looking a bit tatty;

IMG_0831.jpegIMG_0825.jpeg

Once the paint dried, I cutout the new skin I’ve drawn up from a thin adhesive leather and trimmed up the camera.

DSC05242-Photoroom.jpegDSC05245-Photoroom.jpegDSC05244-Photoroom.jpeg

Last few jobs are respraying the film guide plate inside in the same satin black and draw up a new skin piece for the base of the camera to finish.
 
Last edited:
Back
Top