Olympus 35RC Top Plate Repair

Messages
8,309
Name
Ian
Edit My Images
No
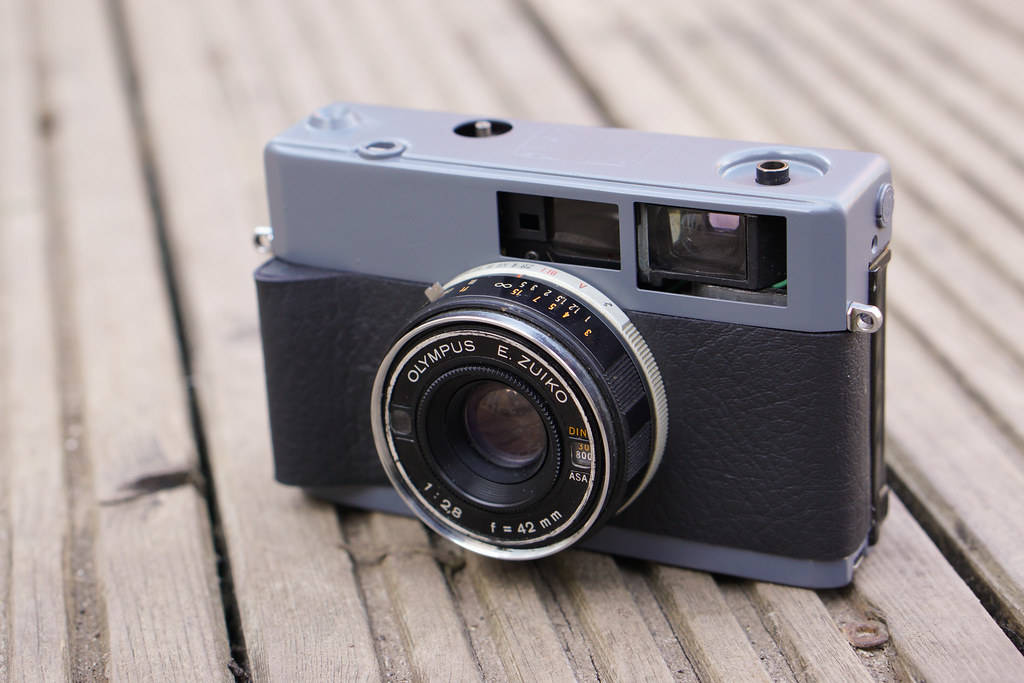
So I picked this little Olympus 35RC camera up off eBay a while ago and fell in love with it. It was cheap because it has a ding in the top plate. The problem is that is enough of a ding to prevent the film advance lever auto returning. It just sticks and needs to be "encouraged" to return. The camera works absolutely fine btw.

It became enough of an issue in-use that I just bought another one which is very minty and seems to work fine (1st test roll about to go int soup). I've had an eBay search for "35RC Top Plate" for weeks, and also my "35RC" search generally always turns up working cameras (with working camera prices) so I'm not holding out much hope for an undamaged top plate on eBay.

I've been quoted about £100 for the repair which is uneconomical (and they were unclear on whether they would fix the damage to the plate), and so I wondered if there were any other options... Eventually, Google led me to 35mmc and an article by @stevelmx5 and his journey refurbishing a 35RC as well as the forum thread here...

So my question to you (all) is how easy would you say it would be for someone with very basic metalworking/woodworking skills (and limited tools) to repair this top plate? I'm sure I'm not capable of anything like the stuff Steve did, but getting the top plate off looks straightforward enough, and I can be a dab hand with some sandpaper...

Images of the danage on the advance lever side...
IMG_1404.jpg
IMG_1403.jpg

And this is a ding on the rewind spool side. Cosmetic only.
IMG_1402.jpg
 
Wouldn't it be funny if this was the same one that fell out of my pocket in the Falmouth maritime museum on the F&C holiday to Cornwall in 2017.....

That one took a ding to the top plate and stopped winding on completely. @Andysnap sold it on eBay to someone who was going to try and repair it. :thinking::D
 
H'mm you must have a hammer..take the plate off put it face down i.e. the side that shows onto a smooth bit of hard wood (if you don't have some steel\aluminiun) and hammer it flat.
 
Last edited:
H'mm you must have a hammer..take the plate off put it face down i.e. the side that shows onto a smooth bit of hard wood (if you don't have some steel\aluminiun) and hammer it flat.
A very technical fix that even I should be capable of... I guess if I use a bit of wood as a blunt chisel I can get the dents out that way. Is the top plate made of Aluminium?
 
Any silversmith could tap it out with out trouble, however you would need to remove it from the camera. it would probably need to be plated to resurface it invisibly..
 
With a bit of luck, @stevelmx5 will see this thread and can offer some pearls of wisdom to help you get the top plate functional, if not perfect.
 
Did someone call me? :0)

There’s a good visual guide here for removing the top plate;


The only non-standard tool you would need is the one for removing the self timer lever. Although, I don’t have one of those either so I ‘think’ I probably Macguyver’d an alternative with two small fine nails through a small piece of wood at the correct distance apart. A little cowboy but it will do the job.

However, with regards to reshaping your top plate, I’d ask whether you want to get it looking original (pretty difficult due to the complexity of the pressed top plate corners), or if you just want the wind on lever to stop sticking?

Looking at the pictures above it looks like the slot in the top plate, where the wind on lever moves through it, has been pinched together when the camera took a whack on the top. Are you able to get a pair of needle nosed pliers into the slot (pliers closed) and open them up gently to open up the slot, without taking the top plate off?
 
Last edited:
I hope you find a solution, they were (are?) good little cameras. I binned mine and the matching flash unit during a house move about 10 years ago. Both were working perfectly, but I didn't think I'd ever use them again. I have some regrets about that now, but whatever. I suppose I could buy another one, but I don't do enough film photography to justify it.
 
Last edited:
Looking at the pictures above it looks like the slot in the top plate, where the wind on lever moves through it, has been pinched together when the camera took a whack on the top. Are you able to get a pair of needle nosed pliers into the slot (pliers closed) and open them up gently to open up the slot, without taking the top plate off?

Thanks for the reply Steve. I wondered how many tags it would take :)

I was going to jam a flat head screwdriver in there and wiggle it to try and release it a bit, but I have a tendancy to break things when I have tools in my hand. Then Terry mentioned plating and I watched a very cavalier YouTube video from an Aussie chap splashing sulphuric acid around and thought that I'd take it off, do some careful work with a really blunt centre punch, then zinc or copper plate it for the lulz. My main problem is that my ideas are well above my capability execute them sadly. When I was 16, a friend of mine at college repainted their car in black Hammerite from Halfords. It was very cool to look at but I can imagine terrible to live with. Still, it triggered me to paint my (red) Vauxhall Astra hubcaps pea green. Not a proud moment. However a black Hammerite repaint may well be on the cards...

Thanks for the pointer to the site. I'll give it a read. The question is: Do I humiliate myself by showing the results of my endeavours here, or just let the thread dissappear quietly :)

Cheers to all the replies btw.

@MartynK : Shoot more film.
 
Last edited:
Thanks for the pointer to the site. I'll give it a read. The question is: Do I humiliate myself by showing the results of my endeavours here, or just let the thread dissappear quietly :)

I think that the whole process, documented in the projects forum, is the only right thing to do. :)
 
Thanks for the reply Steve. I wondered how many tags it would take :)

I was going to jam a flat head screwdriver in there and wiggle it to try and release it a bit, but I have a tendancy to break things when I have tools in my hand. Then Terry mentioned plating and I watched a very cavalier YouTube video from an Aussie chap splashing sulphuric acid around and thought that I'd take it off, do some careful work with a really blunt centre punch, then zinc or copper plate it for the lulz. My main problem is that my ideas are well above my capability execute them sadly. When I was 16, a friend of mine at college repainted their car in black Hammerite from Halfords. It was very cool to look at but I can imagine terrible to live with. Still, it triggered me to paint my (red) Vauxhall Astra hubcaps pea green. Not a proud moment. However a black Hammerite repaint may well be on the cards...

Thanks for the pointer to the site. I'll give it a read. The question is: Do I humiliate myself by showing the results of my endeavours here, or just let the thread dissappear quietly :)

Cheers to all the replies btw.

@MartynK : Shoot more film.

No problem, give me a shout if I can add any more.

I’ve actually got my own project 35RC that’s in a half-finished state on my shelf, and has been for the last 12 months! I’ve stripped the base plate and repainted it matte black, but haven’t got around to the top plate yet. The lens is a little hazy, which caused some flare when I took it away on holiday with us last year, but I’ve since picked up an original lens hood which should sort that out. Ideally I should strip the lens and clean the internals, but I’ve got a pile of Chroma’s to build before I get to plate with another project :0)
 
give me a shout if I can add any more.

I do have one question actually. On the mmc article you talked about removing the hotshoe, and I noticed you removed the self timer. These are things I'd like to remove too. How did you fill the gaps? My life experience with filler is polyfilla and plastic wood. Neither of which would be up to the job of sticking on metal I guess.
 
I took the top plate off my 35RC last weekend, I just used two very small flat head screwdriver ends held together in my hand to remove the self timer and shutter speed dial. Worked fine, I think the self timer turned clockwise to losen surprisingly. Just remember what the shutter speed is set at before you take the dial off.

You'll then need to remove the small screws and carefully manover it around the film advance lever and shutter button. Once you remove the top there is a wire holding the body and top plate together and soldered in. I was just cleaning the viewfiner and rangefinder so I left this hanging on. But you'll probably need to remove it and then resolder it back together.

I followed this YT video for the removal, which is a 35RD but a lot is the same:
View: https://www.youtube.com/watch?v=mLhwnJyADrQ
.

I'd recommed cleaning the viewfinder and rangefinder whilst the top is off. I just used a cotton bud and some lens cleaner and it made the world of difference. The only other thing you need to remove to get at them is a peice of cardboard which is glued in place. I just carefully peeled this 3/4 of the way back.
 
I do have one question actually. On the mmc article you talked about removing the hotshoe, and I noticed you removed the self timer. These are things I'd like to remove too. How did you fill the gaps? My life experience with filler is polyfilla and plastic wood. Neither of which would be up to the job of sticking on metal I guess.

I bonded small pieces of plastic behind the hole for the self timer leaver, along with the holes for the hotshoe using epoxy, then used fine automotive body filler to smooth off the face of the plate.
 
There are a selection of build photos in my Flickr album here;


I forgot that I used fine knifing putty for the final finish to smooth out the top plate. That’s basically very smooth filler, which is easier to sand back.
 
Super helpful guys. Many thanks.
 
then used fine automotive body filler to smooth off the face of the plate.

Aha! My 1st car was an Allegro so I know all about automotive body filler. Great stuff.

Once you remove the top there is a wire holding the body and top plate together and soldered in. I was just cleaning the viewfiner and rangefinder so I left this hanging on. But you'll probably need to remove it and then resolder it back together.

I think that's the PC Sync cord which I don't think I'll be using (will double check!). Also discovered that the timer switch is a LH thread. The tip for cleaning the mirror though is sound and I may even attempt to get the Rangefinder back in (vertical) alignment. Or maybe not...
 
Update: I got the top off last night (thanks for that video @kanebaguley ) and set to with a pair of pliers. I now have a 35RC with a properly functioning film advance lever!

Getting those dings out is going to be very difficult though. Any tips for getting the hotshoe off? It's riveted in place and I'm thinking that levering it off is likely to bend the top plate even more...
 
A working, dented camera is better than a broken pretty one

Indeed..film cameras are supposed to be used and I suppose the digi guys have their mint film cameras in display cabinets. :rolleyes:
 
Any tips for getting the hotshoe off? It's riveted in place

Quoting myself but answering in case of search... There's a thin metal plate on the hotshoe that can be encouraged to slide off revealing 4 screws underneath for removing the hotshoe.

I'm ignoring the above advice to "leave well alone" and have ordered up some body filler and black paint. I can't get the dings out, but I should be able to hide them behind the paint. Might as well go for the proper stealth look with the removal of the hotshoe and self-timer as per Steve's conversion. Copying is flattery isn't it?

IMG_1406.jpg
 
Sorry, I’m repainting my daughters’ room so hadn’t got chance to reply. I see you’ve already found the slot in cover over the screws though so that’s good :0)

Good luck with the body smoothing. I’d recommend some filler primer too, along with Araldite (if you don’t already have any) for bonding the cover plates to the inside of the top plate before filling.
 
Well, I've given the camera a nice clean and rocket blow inside. Mirrors and rangefinder all cleaned up.

Top plate has been given a bit of reshaping in the vice, "Olympus" logo and self timer hole filled as well as the hotshoe divot. Doesn't look quite as pretty as the photo represents, but black Hammerite (up to coat 5 at the moment) will cover a multitude of sins.

Took the bottom plate off today to give it a respray too. It's three coats behind. Also just realised the strap lugs are on the camera and are silver. I hope they don't stand out too much...

Question: To brass or not to brass?

IMG_1408.jpg
 
Last edited:
That has really covered up the dings. Looks decent to. You'll have to upload a pic when it's all sorted.

If you remove the self-timer and are planning on just throwing it out give me a shout. Mine snapped and I've been looking for a replacement. No worries if you wanna keep it.
 
All (sort of!) done.

Maybe at the weekend, I'll take the winding handle off and give that a coat too... It looks a bit incongruous!

Loaded up with Tri-X and now we'll see if it still works!

IMG_1410.jpgIMG_1409.jpg
 
Last edited:
Indeed, looking good! Strap lugs don't leap out at my eyes and TBH, neither does the rewind knob.
 
All (sort of!) done.

Maybe at the weekend, I'll take the winding handle off and give that a coat too... It looks a bit incongruous!

Loaded up with Tri-X and now we'll see if it still works!

View attachment 285581View attachment 285582

That looks great, job well done [emoji1303]

With regards to the strap lugs, you can’t remove them entirely on the 35RC because the holes they leave let light into the film chamber. I left mine in place but ground them down as flat plates;

Adjustments.JPG
 
Back
Top