Photoshop Script for Border (with Exif data)

Status
Not open for further replies.
uploaded to where? :thinking:

I'm looking to try and get it to add a layer of another file for landscape, and a different one for portrait, so that I can have a layer with copyright signs over it, thus making it annoying for folks trying to steal photos rather than buying prints from my website. Is this possible to do?


See post #104 for download of my version

Copyright layer could be quite doable! Leave it with me, I have only been programming javascript for ..... what time is it?.... oh yes about 8 hours:) but it seems simple enough. I will have a look at the copyright layer tonight or tomorrow.
 
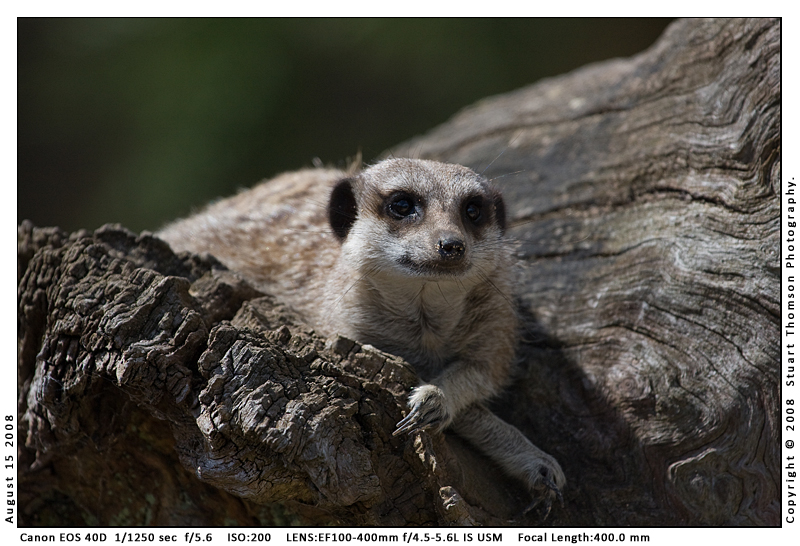
Found that it does not work and crashes out if you use the script on non photographic images due to lack of exif data so just adding checks for that too. Here is the picture I scripted :)

ruud-in-space800.jpg


Just having a mess with photoshop at Ruud's expense!
 
Just noticed that when I run script EXIF v3 which adds the focal length of the lens, the lens size is give in 35mm equivalent. i.e. my 10-20mm lens at 20mm is listed as 30mm.

35mm Equivalent is one of the listed EXIF variables, it is now available in the new script (well it will be when I new upload it later).
 
I have just fixed the problem with errors caused by running the script on non photographic images and uploaded the new script with the above change too.

Will sort the copyright message in the main image bit tomorrow if I get chance. Might be worth looking at adding OPTIONS for user input such as resize y/n? etc..... will think about that one.

Download new file here : ZIP FILE >>>> same as the other link just placed here to make it easier to find....
 
Fantastic script and many thanks to all involved.(y)
 
I dont think this can be used with Photoshop Elements can it?

I've just downloaded it and it works fine on Elements 6.

To use the script, load your picture in the editor as usual.

Then command File > Open > Exif..... .js

and it'll run the script.
 
35mm Equivalent is one of the listed EXIF variables, it is now available in the new script (well it will be when I new upload it later).

I've just tried out your new script with the 35mm equivalent but it's still coming up with 30mm for my focal length instead of the 20mm that it should be. Looking at the script I'm not sure whether the line
if(EXfilmeq){strTemp = strTemp + " 35mm Equivalent:"+ filmeq + "mm ";**
is only changing the exif data from digital equivalent up to film equivalent. I may be wrong as I don't program in javascript and I haven't got round to reading up on it yet.

My exif data is from a Nikon D80, so I don't know whether anyone else has noticed this problem.

Thank you for all the work you are doing on this script, as I know just how much work this involves.

AFTERTHOUGHT
When I think about it I suppose the actual focal length is 30mm, so what I really need to include is not the focal length but the lens that I used. Any suggestions on what line I need to incluse for this?
 
I've just downloaded it and it works fine on Elements 6.

To use the script, load your picture in the editor as usual.

Then command File > Open > Exif..... .js

and it'll run the script.

Hmm does work LOL... Did not know we could get it to work like this.

All I did think it what you said. As I am using Mac.... I open my image... I then open the script though File Open...

It did the work anyway.. Just wish there was a quicker way
 
Is there a way to run this script without having any of the setting details on the boarder just my copyright name
 
Is there a way to run this script without having any of the setting details on the boarder just my copyright name

Yes, that was one of the reasons I re-wrote it - to make this kind of change easier.

To do that just change the following lines....

var DisplayTop = true;
var DisplayLeft = true;
var DisplayRight = true;
var DisplayBottom = true;

In your case you don't want the bottom line, the left line or the top line so:

var DisplayTop = false;
var DisplayLeft = false;
var DisplayRight = true;
var DisplayBottom = false;

NOTE: javascript is CaSe SeNsItIvE make sure false and true are as written.
 
Wow loving this.... Glad i got it working in elements :)
 
silly question. Is the save file function ever actually called? and if it isn't what is it looking for to call it? and can I define where the file should be saved?

That function was already in the file when I started messing with it. I have left it in there as I actually only started programming in javascript YESTERDAY ! and I have no instructions so I am not deleting anything so as not to loose possible hints about things I might want to do later :)

Just finishing user colours and movable copyright notice at the moment THEN will look at merging a jpg into the picture to use as an alternative copyright notice
 
I've just tried out your new script with the 35mm equivalent but it's still coming up with 30mm for my focal length instead of the 20mm that it should be. Looking at the script I'm not sure whether the line
if(EXfilmeq){strTemp = strTemp + " 35mm Equivalent:"+ filmeq + "mm ";**
is only changing the exif data from digital equivalent up to film equivalent. I may be wrong as I don't program in javascript and I haven't got round to reading up on it yet.

My exif data is from a Nikon D80, so I don't know whether anyone else has noticed this problem.

Thank you for all the work you are doing on this script, as I know just how much work this involves.

AFTERTHOUGHT
When I think about it I suppose the actual focal length is 30mm, so what I really need to include is not the focal length but the lens that I used. Any suggestions on what line I need to incluse for this?

The variable filmeq is JUST READ straight from the EXIF data, that line simply adds the text to the EXIF return value if the boolean variable is set to true. I cannot do anything about the EXIF data not being right :) Unless the EXIF variable named "Focal Length in 35mm Film" isn't for this purpose.

Unfortunately there is no EXIF variable for lens name :( I am assuming it is a code and I would need a list of code versus names... I will look into this shortly.
 
That function was already in the file when I started messing with it. I have left it in there as I actually only started programming in javascript YESTERDAY ! and I have no instructions so I am not deleting anything so as not to loose possible hints about things I might want to do later :)

Just finishing user colours and movable copyright notice at the moment THEN will look at merging a jpg into the picture to use as an alternative copyright notice

Yep I saw it originally, just wondered if anyone knew how to use it.

Your doing really well with these changes - A big THANKS from me :clap:
 
is that with the original file (latest) or when you have altered your copyright etc?

The original file runs fine as is, but I wonder if you've perhaps removed a ; by mistake when altering.

I runs on CS3 on the Mac but I had missed a good few ; and have just checked the new one and uploaded a replacement....
 
NEW VERSION.....

Now with rotatable and placeable copyright notice....

Also with two user defineable colours to use for any of the text or boarders (if anyone wants more colours I can add as many as you like!)....

Start of image add is in place but does nothing yet..... Thats what I'm doing now whilst watching the GP :)


Download new file here : ZIP FILE >>>> same as the other link just placed here to make it easier to find....
 
Any further ideas for things you want let me know as I am going to run out of things soon :)
 
I've not done any programming for a few years but I'm having LOADs of fun doing this !

I've got some monster ideas for further scripts too, this time from scratch...


I will split up the variables file from the main file for this script after sorting out the copyright image. This will mean that people can set up their variables and just download the main file without having to mess around every time (especially when there are likely to be numerous versions of the file!)
 
For the wish list

Border width control
resize to 800 after adding border, so its always the max width
Saving to a given location
Closing the original PSD file down without alteraton, so batch is easier

I know theres no satisfying some folk ;)

Border width control DONE
resize to 800 after adding border DONE (this was actually an error in the original script)

As for batch processing.... I am going to do this later with a prompt for a directory and then process everything in the directory.

I will upload the file when I have sorted out the copyright image bit --- I STILL cannot find the javascript command to load a named file !!!
 
To load

var id609 = charIDToTypeID( "Opn " );
var desc131 = new ActionDescriptor();
var id610 = charIDToTypeID( "null" );
desc131.putPath( id610, new File( "C:\\moon.jpg" ) );
executeAction( id609, desc131, DialogModes.NO );
 
Well I'm going to make tea now...

Cannot, as yet, find a way to load a jpeg directly to a newly created layer. Will try again later as all I can currently do is load a jpg file to a totally new document. Also cannot suss out javascript's variables enough to make the filename work from a string so currently testing it with filename coming from a dialog!

Anyway the newest version has adjustable boarders as requested (I will fix the centering on text within them after I have fixed this latest thing which is giving me a headache.......)

Come back PASCAL all is forgiven :)


This is the current position but it does not as yet work, please note there are lots of commented out statements etc as I am having to work out a lot of the javascript stuff using trial and error!

--------------------------------------------------------------------------------


function addcopyrightimage() **

alert("Copyright Image: Give me a chance !!!!!");

var docRef = activeDocument;

var filename = File.openDialog("Select file");

// Create a EPS option object [height & width are doc size]
var epsOpenOptions = new EPSOpenOptions;
epsOpenOptions.antiAlias = true;
// epsOpenOptions.height = // Deprecated for CS3
// epsOpenOptions.width = 600; // Deprecated for CS3
epsOpenOptions.mode = OpenDocumentMode.RGB;
epsOpenOptions.resolution = 200;
epsOpenOptions.page = 1;
epsOpenOptions.constrainProportions = true;

open( filename );

// var copydocRef = activeDocument;
// copydocRef.copytoclipboard;

activeDocument=docRef;

var myLayerRef = docRef.artLayers.add();
myLayerRef.kind = LayerKind.NORMAL;
myLayerRef.name = "Copyright Image";
myLayerRef.image = docRef ;


// STILL TRYING TO LOAD IMAGE DIRECTLY TO NEW LAYER BUT WOULD SETTLE FOR OPENING IT AND COPYING IT TO THE NEW LAYER


// var id609 = charIDToTypeID( "Opn " );
// var desc131 = new ActionDescriptor();
// var id610 = charIDToTypeID( "null" );
// desc131.putPath( id610, new File( filename ) );
//executeAction( id609, desc131, DialogModes.NO );

// var myTextRef = myLayerRef.textItem;
// myTextRef.size = CT_Size;
// myTextRef.font = CT_Font;
// myTextRef.color = CT_Colour;
// myTextRef.fauxBold = CT_Bold;
// myTextRef.position = [ CT_X*PictureWidth/100, CT_Y*PictureHeight/100 ];
// myLayerRef.blendMode = BlendMode.NORMAL;
// myLayerRef.opacity = CT_Transparency;
// myTextRef.contents = CT_Text;


// AD.activeLayer.rotate(-CT_Angle,AnchorPosition.BOTTOMLEFT); // rotate the text


**
 
Thanks. Just reading it now. Its just a matter of a few lines that I cannot sort currently but this looks promising ! Thanks also to dogfish_magnet who has also tried to help.

The position I am at at the moment is that I can load the image but it currently ends up in its own document !
 
Got it ! Its now loading the jpg into the new layer.... Just needs a bit of tinkering
 
My head hurts :bang::bonk:

Anyway copyright image is now added and working at last !!

The new variables are:

// Displaying copyright IMAGE

var DisplayCopyrightImage = false;
var IM_Name = "~/Documents/Signature.png";
var IM_X = 10; // Percentage
var IM_Y = 10; // Percentage
var IM_percentage = 20; // Height as a Percentage
var IM_Transparency = 100;

Just change DisplayCopyrightImage to true and point IM_Name at your chosen signature file. I use a png file with the background as transparent which gives the best effect but I will leave that up to you. IM_X and IM_Y point and the top left corner of the signature images location as a percentage of the overall image. IM_percentage is the percentage size of the signature against the image. IM_Transparency obviously sets how transparent the signature is.

I have also added a global flatten switch

var complete_flatten = false;

If you set this to true it flattens all the layers at the end rather than leaving them as layers.

Any problems let me know !!!


Next job is to split the variables and program script up so that people can upgrade the program part without having to change all the variables again!
 
STOP PRESS !!!!!

Well Cosmix3 has just pointed me at the bit of info I needed for the lens name and now this is in and working !!

Set the global variable EXlens to true....

The data regarding the lens is only available from a RAW file so the script checks if the data is there and if it is not it will not try and display it.

New version uploaded....


Download new file here : ZIP FILE >>>> same as the other link just placed here to make it easier to find....
 
Thanks for adding that (y) , works well, see what you meen about Raw files, tryed it on a jpeg converted from Raw, worked (y) , tryed and old shot that was taken in jpeg, did'nt work, but use raw all the time now so all OK,

:ty:

STOP PRESS !!!!!

Well Cosmix3 has just pointed me at the bit of info I needed for the lens name and now this is in and working !!

Set the global variable EXlens to true....

The data regarding the lens is only available from a RAW file so the script checks if the data is there and if it is not it will not try and display it.

New version uploaded....


Download new file here : ZIP FILE >>>> same as the other link just placed here to make it easier to find....
 
I aint getting lens detials on mine... Show us a example what it should look like and where it appears
 
Thanks for adding that (y) , works well, see what you meen about Raw files, tryed it on a jpeg converted from Raw, worked (y) , tryed and old shot that was taken in jpeg, did'nt work, but use raw all the time now so all OK,

:ty:

By didn't work do you mean that it just didn't tell you anything ie missed the entry LENS:????????? or something else happened?

It is supposed to display LENS:18-200 f4/5.6 or similar from an RAW and just say nothing about the lens from an old jpeg. Works on my Mac in CS3
 
I aint getting that lens detials in mine....

Could you post me a edited file that will do this..

In fact send me the file your using as I love your white boarder I know where to alter the copyright name
 
I aint getting lens detials on mine... Show us a example what it should look like and where it appears

Cosmix3 has posted it thanks! Anyway make sure you have the absolute latest script because I only added the LENS part in the last hour. What camera and lens do you have? Some software removes this information as well so are you using a RAW file itself?
 
I am using a canon 400d with 17 - 40 L and a Sigma 105 Macro lens

Yeah am shooting Raw always have done
 
Status
Not open for further replies.
Back
Top