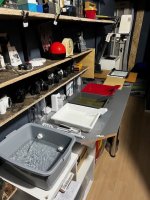
Beginner Ready to Enlarge ... I think!

Messages
67
Name
Matt
Edit My Images
Yes
Hi,

Since getting back into analogue 35mm photography during the lockdown, I have been developing C41 & B&W at home with some successes and scanning the negs with a V500 Epson.

A few months ago I was gifted an Axomat 4 B&W enlarger (without the filters?) and Santa bought me trays, chemicals, microfocus etc.

Included was a pack of Ilford Multigrade RC Dulux ... my question is how do I work out the exposure times and do I need the filters that did not arrive with my old style enlarger?

There is a purple filter gel in the carrier and I have managed to set up the size and focus on a negative.

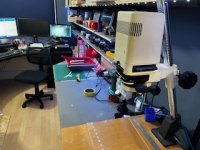
My darkroom is light-sealed (thanks to some channels I designed and 3D printed for the blackout blind and some black tape on the power lights of various devices.

Thanks In Advance

MattIMG_9206.jpg
 
Hey Matt,

Good stuff, looks like a nice set up!
About working out the exposure times.
The only way i know (other film gurus will jump in with more info) is by using “test strips”. see the link for the description of the process: https://www.aspirationalphotos.com/... initial exposure,time within two test strips.
About the filters, for B&W you don’t need but they are handy for adjusting the contrast of the print. If this is your first time wet printing don’t worry about it yet,it will only complicate things more.
.
.
Have you got somewhere to wash and dry the print when it’s finished?
Also do you have an easel?

Marino
 
For exposure most people used to do a "test strip" in the safe light tear one sheet into strips about 30mm wide, then place one over an important part of the image. Expose for say 10 secons, then dev it, depending on how it comes out ajust from there.
I'm guessing you know the enlarger lens stops down like a camera lens. In my experience most work best stopped down a few stops. that also makes the exposure time longer and easier to control or for burning or dodging.
You used to be able to buy enlarger timers, dont know if they are still made.

I see used enlarger timers available, including the Philips one I last used. Philips also made one that included an exposure sensor.
 
Might get a few more responses if moved to the Film & Conventional sub-forum?
 
I used to make test exposures, using a sheet of card to cover the paper and moving it at intervals to give (for example) 2, 4, 6, 8, 10, 12 seconds on the same sheet. You might want to use a different exposure interval as you gain experience. This works for mono and colour. It's also useful because you may get an idea of how much time to dodge or burn for.
 
Report your own post with a request to move it. One of the staff members will then do it for you.
 
I see used enlarger timers available, including the Philips one I last used. Philips also made one that included an exposure sensor.
I use an enlarger timer, invaluable really. Same goes for what has been said about test strips.

The enlarger (made by Meopta) are good sturdy things. I have an Axomat and Opemus (for 120 film to 6x6). All Meopta enlargers have a handy "split line" function to get the image into focus so you don't need a separate focus finder.

Nice little darkroom set up you've got there. Welcome to the Film & Conventional section.
 
The enlarger (made by Meopta) are good sturdy things. I have an Axomat and Opemus (for 120 film to 6x6). All Meopta enlargers have a handy "split line" function to get the image into focus so you don't need a separate focus finder.

My last enlarger was a Besseler 23CII XL, the best I've ever used. The glassless neg carriers would hold the negative completely flat, and its condensers in bellows could be adjusted via a scale to cover 16mm to 6x9. The largest prints I made on the base board were 24" x 24" from my Mamiya TLR negs. I never used its option to tilt the head and project onto a wall. 24 x24 was too big for my trays, so I developed blind in a big colour drum that I rolled. Had to do a test print first on an 8x10, then often with papers in darker and lighter areas so I could burn in or hold back as necessary. It was long winded but I achieved nice large B&W prints. I do miss it.
 
I see used enlarger timers available, including the Philips one I last used. Philips also made one that included an exposure sensor.
Cant remember the make of mine, it didnt have the sensor though, a big dial and the hand swept around for the X number of minutes or seconds set. To be honest I got it later on so it didnt get used anything like as much as counting one elephant........ Two elephamts...
 
Still got the Smiths timer that Dad used to use way back when! Still use it as a cooking timer - I can hear its bell (but not the electronic timer's beeps) without my ears in (hearing aids!)
 
At one stage I didn't have a timer, so used the ticking of the central heating timeswitch and counted along. The sodium streetlight outside our bathroom didn't shine in directly, and served as a safelight.
 
For exposure most people used to do a "test strip" in the safe light tear one sheet into strips about 30mm wide, then place one over an important part of the image. Expose for say 10 secons, then dev it, depending on how it comes out ajust from there.
I'm guessing you know the enlarger lens stops down like a camera lens. In my experience most work best stopped down a few stops. that also makes the exposure time longer and easier to control or for burning or dodging.
You used to be able to buy enlarger timers, dont know if they are still made.
Tearing strips of paper is a very crude way to go about making them. Use a pair of scissors, or a guillotine or a sharp craft/Stanley type knife. One accessory I have which is indispensable is a Patterson test strip printer. This is a frame with 5 fingers that you raise up insert the strip of paper ans make your first exposure, then drop the 1st finger. then make the 2nd exposure and drop that finger so on and so forth. Depending on how large the print you intend to make is your gauge the exposure. For a 10x8 print** I would suggest 5 steps of 5 seconds each If the steps are too light increase the exposures to 7 seconds to dark reduce the steps to 3 seconds. It is an easy skill that you soon acquire. Then develop for the full 2 minutes moving the test strip around in the dish followed by stop bath and then fix. If you find say the 3rd and 4th step are in between the ideal exposure make a further test strip starting of at 15 seconds and 4 steps each of 1 second so the final exposure is not far off. ** (EnlargingLens adjusted to F8)
 
Last edited:
Tearing strips of paper is a very crude way to go about making them. Use a pair of scissors, or a guillotine or a sharp craft/Stanley type knife. One accessory I have which is indespensible is a Patterson test strip printer. This is a frame with 5 fingers that you raise up insert the strip of paper ans make your first exposure, then drop the 1st finger. then make the 2nd exposure and drop that finger so on and so forth. Depending on how large the print you intend to make is you gauge the exposure. For a 10x8 print I would suggest 5 steps of 5 seconds each If the steps are too light increase the exposures to 7 seconds to dark reduce the steps to 3 seconds. It is an easy skill that you soon acquire. Then develop for the full 2 minutes moving the test strip around in the dish followed by stop bath and then fix. If you find say the 3rd and 4th step are in between the ideal exposure make a further test strip starting of at 15 seconds and 4 steps each of 1 second so the final exposure is not far off.
They dont need to be neat, they are going in the bin, and it's quicker. I'd be working to a deadline with a newspaper, we'd even be printing wet negs on times and using X-ray developer to get dev times way down. I argree a test strip printer is a better way if your doing home printing and time isnt a factor, but they cost money.
 
They dont need to be neat, they are going in the bin, and it's quicker. I'd be working to a deadline with a newspaper, we'd even be printing wet negs on times and using X-ray developer to get dev times way down. I argree a test strip printer is a better way if your doing home printing and time isnt a factor, but they cost money.

With my test strip printer (Patterson) cost me about £10 from Second hand Darkroom Supplies (They are not sold new as far as I am aware) which would hardly break the bank, and what you get is consistency. I use a box of 5x7 paper bought only for test strips cut into 5 strips across the width and the 5"lengths fit the test strip printer exactly. And in a darkroom have you tried to get consistent widths just by tearing them - I'd wager. probably not! I also use a guillotine to cut them before I start printing so |I don't have to keep stopping to cut/tear more!

Also when I am processing RA4 colour, to help judge the replenishment rate, I also include the test strips in the total area used to calculate when replenishment is due. Again consistency with my printing.

Again enlarger timers are still available new with the Kaiser name but cost an arm and a leg. I have one made by Rayco who went out of business perhaps 40+ years ago but it is still going strong. It has three timing switches: X-10 secs, X-single secs, and X-1/10ths of a second which is used when I am calculating and adjusting colour balance via filters, the 1/10ths of a second can make all the difference.
The RAYCO timers still appear 2nd hand at the same company I have used and are around £40. Again it is consistency will help a beginner to progress.
 
Last edited:
With my test strip printer (Patterson) cost me about £10 from Second hand Darkroom Supplies (They are not sold new as far as I am aware) which would hardly break the bank, and what you get is consistency. I use a box of 5x7 paper bought only for test strips cut into 5 strips across the width and the 5"lengths fit the test strip printer exactly. And in a darkroom have you tried to get consistent widths just by tearing them - I'd wager. probably not! I also use a guillotine to cut them before I start printing so |I don't have to keep stopping to cut/tear more!

Also when I am processing RA4 colour, to help judge the replenishment rate, I also include the test strips in the total area used to calculate when replenishment is due. Again consistency with my printing.

Again enlarger timers are still available new with the Kaiser name but cost an arm and a leg. I have one made by Rayco who went out of business perhaps 40+ years ago but it is still going strong. It has three timing switches: X-10 secs, X-single secs, and X-1/10ths of a second which is used when I am calculating and adjusting colour balance via filters, the 1/10ths of a second can make all the difference.
The RAYCO timers still appear 2nd hand at the same company I have used and are around £40. Again it is consistency will help a beginner to progress.
I wouldnt use use a different size or batch of paper, ideally you use the actual paper your going to print on if your after consistant results.
 
I wouldnt use use a different size or batch of paper, ideally you use the actual paper your going to print on if your after consistant results.
There was a myth that circulated several years ago, well about 20 + years which I found to be broadly bunkum that different batches of paper all could be variable but I never found it to be significant. With MG paper especially from Ilford is now a thing of the past, I use only Ilford B&W and Fuji RA4 where the consistency is incredibly close, so much so, that any differences cannot be detected. With the fibre based single grade papers it was different and there could be significant changes between batches, but the quality control with Ilford is outstanding. I do believe though that Foma brand papers do sometimes show significant differences, but there again \I have never used it so cannot say yay or nay.

With FUJI RA4 their quality control is incredibly good be it lustre or gloss. I have no choice but to use that make because they are at present the sole manufacturer of RA4 paper. But once again I have never found any significant changes in colour balance/speed with that product. I preferred Kodak before it became unobtainable, but I find the Fuji is slightly higher contrast which suits me perfectly.
 
I like to see test strips across the whole thing.
I use a sheet the same size as the print I want to make and shift a piece of card across it in increments, I don't care that this at first appears wasteful, its a darn sight less wasteful than the multitude of not quite right attempts I'd need to make up for the nuances I didn't notice because I half arsed test stripped...lol
Saying that though, I do draw a line, half a sheet on 16 x 12 and try to span the elements I think will require attention, A3 is not cheap enough to use a full one.
Fiber is a tricky call though.
I think, if I only use 4 sheets of whatever size to make one finished print, that's a win...:)
It is not wasteful, but just a little (lot) more expensive. With a 12x16 print it would be very expensive at over a £1 per sheet. I used to make 12x16 prints in B&W but I find the A4 size sold by Ilford is better for me because I can use almost the whole negative. Plus I rarely now have any need to make anything larger. For colour, Fuji still sell their paper in a 10x12 box which if you trim the the long edge you can use them a test strips as well.

Before Kodak stopped the supply of their RA4 paper I had made a light-tight dispenser so that I could load a 88m x12" roll of paper on a roller that fed the paper out from a slot near the base. Buying it like that meant I could save about 2/5ths of the cost of equivalent boxes of paper. This had an advantage that I could cut any length up to 16" long and 12" wide so there was little wastage.
With Fuji the central roller that I used inside the dispenser is larger and so is the outside diameter of the roll, so my dispenser won't work with one of their similar sized rolls. Apart from that they will only sell 2 rolls at a time, which would mean an outlay of about £250 which is not feasible considering the controlled storage for the unused roll.

For those interested the dispenser was made from 12 gauge aluminium sheet cut to size by the metal merchant. It was riveted together using 1" aluminium angle strips with sealant between the metal surfaces and the hollow rivets sealed with black waterproof non-silicone sealant. The exit slit was at the bottom of the container and approx 1/20" deep lined with thick black felt. (Like a giant 35mm film cassette.)
The paper is rolled in the factory with the emulsion side out, and this allowed it to be fed out of the dispenser with the emulsion side facing down.
 
Last edited:
There was a myth that circulated several years ago, well about 20 + years which I found to be broadly bunkum that different batches of paper all could be variable but I never found it to be significant. With MG paper especially from Ilford is now a thing of the past, I use only Ilford B&W and Fuji RA4 where the consistency is incredibly close, so much so, that any differences cannot be detected. With the fibre based single grade papers it was different and there could be significant changes between batches, but the quality control with Ilford is outstanding. I do believe though that Foma brand papers do sometimes show significant differences, but there again \I have never used it so cannot say yay or nay.

With FUJI RA4 their quality control is incredibly good be it lustre or gloss. I have no choice but to use that make because they are at present the sole manufacturer of RA4 paper. But once again I have never found any significant changes in colour balance/speed with that product. I preferred Kodak before it became unobtainable, but I find the Fuji is slightly higher contrast which suits me perfectly.
I'm going to disagree it's a myth, it was easy enough to see back in the 1980s/1990's. You can print any way you like but it's still best practice to "TEST" the actual paper your using for the print. Especially if your after top quality. But then not everybody is.....
 
Can we agree to disagree. I have my own results and that says it all for me. I have been in this game too long to take on new or old suggestions which I find in all practicality doesn't really exist with modern materials.
 
Hey Matt,

Good stuff, looks like a nice set up!
About working out the exposure times.
The only way i know (other film gurus will jump in with more info) is by using “test strips”. see the link for the description of the process: https://www.aspirationalphotos.com/articles/teststrip.html#:~:text=You do an initial exposure,time within two test strips.
About the filters, for B&W you don’t need but they are handy for adjusting the contrast of the print. If this is your first time wet printing don’t worry about it yet,it will only complicate things more.
.
.
Have you got somewhere to wash and dry the print when it’s finished?
Also do you have an easel?

Marino
Hi Marino,

On your advice, I've picked up a second-hand easel on eBay (12" x 10") for £15.00 and I have just ordered a 35l mango chutney tank (screw lid etc) as the basis for a washer .... will get a fish tank pump (450l/hr) and upcycle a plastic tray with 19mm tank connectors for a "dry dark room" print washer ... will also be able to drain used chems to the tank at the end of the session/life and then carry the chutney tank to the dobi room for disposal. Thanks for the advice .... I will update you when I have all in place.1704221272881.png
 
About the easel, rulers would be fine (for keeping the paper flat). But an easel makes your life easier, imagine having to get these rulers even on every single print.
.
.
I'd be interested to see the wet print washing set up when you're done.
At the moment I'm washing the prints when I'm done with the tap outside the garage, so it's a pain in the @ss for me having to go outside every single time.
Id love to see if there's a better way to wash the prints.
About drying, I'm using a portable electric radiator for drying prints i don't want to keep, like test strips and prints that didn't go as planned.
For the keepers I'm using a window squeegee to remove the excess water from the print and then let the print lean on a DIY Rack upright, and it dries with no watermarks.
 
Hi Marino,

On your advice, I've picked up a second-hand easel on eBay (12" x 10") for £15.00 and I have just ordered a 35l mango chutney tank (screw lid etc) as the basis for a washer .... will get a fish tank pump (450l/hr) and upcycle a plastic tray with 19mm tank connectors for a "dry dark room" print washer ... will also be able to drain used chems to the tank at the end of the session/life and then carry the chutney tank to the dobi room for disposal. Thanks for the advice .... I will update you when I have all in place.View attachment 410939
A 10x12 masking frame is big enough to start off with so well done with a good price. Just make sure the movable blades when crossed over make a perfect 90 degree angle. If not they can be generally adjusted 'carefully.'
Part of the fun with a darkroom is improvising the items that will be useful(apart from the items that need to be essential (Enlarging lenses etc) so you seem to be on the right track. I don't have running water but my bathroom is right next door so a 2 gallon bucket of water is brought in at the start of the session and the completed prints are left to soak before washing.
The washing cycle is also an improvisation. My bathroom walls are tiled and I briefly rinse the prints then wet the walls and stick the prints to the tiles and use the shower head which is angled to wash off the prints. I have been doing it for years without a problem and no staining on the tiles. 3 mins is enough for resin coated paper both colour & B+W so I also think I save water too!
 
Last edited:
About the easel, rulers would be fine (for keeping the paper flat). But an easel makes your life easier, imagine having to get these rulers even on every single print.
.
.
I'd be interested to see the wet print washing set up when you're done.
At the moment I'm washing the prints when I'm done with the tap outside the garage, so it's a pain in the @ss for me having to go outside every single time.
Id love to see if there's a better way to wash the prints.
About drying, I'm using a portable electric radiator for drying prints i don't want to keep, like test strips and prints that didn't go as planned.
For the keepers I'm using a window squeegee to remove the excess water from the print and then let the print lean on a DIY Rack upright, and it dries with no watermarks.
I have 3D printed a couple of guides for framing the print (3mm border all round) and for test printing with defined strips of space over the print and have the easel to keep them in place for multiple prints from the same roll or of the same neg.


I was wondering about watermarks, we are near the Chilterns and the water is VERY HARD... would a drop of FotoFlo (Belini's wetting agent) in the tank that I use for the last rinse of the neg dev process help do you think?
 
Photoflow cannot harm anyway. I know the problems of hard water from when I lived in Kent. If it is really bad I would wash as normal then wipe the print dry to remove the excess water with a thick pad of kitchen roll and do a final rinse in de-ionised or distilled water with the photoflo.

If you are having problems with drying prints how on earth are you managing with film development?

I fortunately live in north Durham where the water comes off the moors and is very soft so I never have the problems you must have.
 
We have hard water and even a final rinse in deionised water followed by a wash in wetting agent / deionised water solution doesn't always help.

My solution has been to put the reel in a salad spinner after this final stage to expel as much remaining fluid as possible, and then hang to dry. My negs are generally free of marks after doing this.
 
Our water is also very hard. I would do a final rinse in DI water with a small amount of wetting agent in it, then gently use squeegee tongs to remove the majority of the water. That worked OK for modern (HP5/FP4) emulsion, though might still be too harsh for older, softer film stock.
 
I have 3D printed a couple of guides for framing the print (3mm border all round) and for test printing with defined strips of space over the print and have the easel to keep them in place for multiple prints from the same roll or of the same neg.


I was wondering about watermarks, we are near the Chilterns and the water is VERY HARD... would a drop of FotoFlo (Belini's wetting agent) in the tank that I use for the last rinse of the neg dev process help do you think?
Water is soft were i live so can’t help with this.
If it helps, when i finish the print i squeegee the print (Resin coated paper) and there’s literally no water on the print after. The paper I’m using is Pearl(between Matt and gloss).
 
Photoflow cannot harm anyway. I know the problems of hard water from when I lived in Kent. If it is really bad I would wash as normal then wipe the print dry to remove the excess water with a thick pad of kitchen roll and do a final rinse in de-ionised or distilled water with the photoflo.

If you are having problems with drying prints how on earth are you managing with film development?

I fortunately live in north Durham where the water comes off the moors and is very soft so I never have the problems you must have.
I don't have an issue with drying negs post dev as am using photo flo .... wanted to check if I could use it on prints too ... thanks for letting me know I can.
 
Water is soft were i live so can’t help with this.
If it helps, when i finish the print i squeegee the print (Resin coated paper) and there’s literally no water on the print after. The paper I’m using is Pearl(between Matt and gloss).
Thanks ... I have pearl too so will do 1st test batch without fotoflo and see what the results are.
 
We have hard water and even a final rinse in deionised water followed by a wash in wetting agent / deionised water solution doesn't always help.

My solution has been to put the reel in a salad spinner after this final stage to expel as much remaining fluid as possible, and then hang to dry. My negs are generally free of marks after doing this.
Thanks, I am looking at washing prints .... negs all sorted (and am off to Scotland tomorrow so will bring back some of their granite filtered water)
 
About the easel, rulers would be fine (for keeping the paper flat). But an easel makes your life easier, imagine having to get these rulers even on every single print.
.
.
I'd be interested to see the wet print washing set up when you're done.
At the moment I'm washing the prints when I'm done with the tap outside the garage, so it's a pain in the @ss for me having to go outside every single time.
Id love to see if there's a better way to wash the prints.
About drying, I'm using a portable electric radiator for drying prints i don't want to keep, like test strips and prints that didn't go as planned.
For the keepers I'm using a window squeegee to remove the excess water from the print and then let the print lean on a DIY Rack upright, and it dries with no watermarks.
Finished my set up with wash that seems to work very well (washing up bowl, fish tank pump, some tube, a 35l mango chutney container and a couple of 3D printed tank manifolds...IMG_9300.jpg
 
Clearing the darkroom had it's benefits. I found a part used12x16 box of Kentmere fibre based glossy. There must be about 20 sheets and another box of Kentmere 12x16 Fineprint Lustre with possibly slightly more sheets. I knew I had the fibre based paper, but simply cannot remember the Fineprint. The darkroom never gets really warm even in the summer, nor do I put the heating on in the winter unless I am in there. so there is a good chance it is still eminently usable. However if you find something you loose something else - now where on earth is one of my 10x8 developing dishes. I have the other two!
 
Last edited:
What a lovely setup, im jealous it looks clean and tidy!
 
I have just realised why my d/room always looks untidy and that is lack of shelves. Not difficult to put up I just need the time.
There is water being pumped into the bowl, so where is your supply and probably more importantly where does it go?The bathroom is next to my darkroom but I have been refused planning permission (by the management) that would be easy to fit a supply and the drain could be via the main water pipe from the darkroom. But still a definite thumbs down.
 
Back
Top