A wanna be wilde life image maker's bus

Messages
4,294
Name
Stu
Edit My Images
Yes
A few years ago I read a post by Jerry....it basically set the seed of an idea. Jerry uses a T5 campervan as part of his image making exploits. Instantly the idea appealed to me,basically We could do small trips and be able to shoot the golden hour at both ends of the day. In the winter going somewhere and seeing sunset and rise isn't so bad, but in the summer months I end up as a sleep deprived wreck so somewhere to kip where ever it might be was beguiling.

So around 3 years back I finally ground out enough cash for a sort of bargain basement little van an early T5. I guess we haven;t had a holiday for maybe 20 years life an all so actually buying a bus was a huge thing especially for me lass it's kinda this two fold dream stuff.

Bus came part converted i basically wanted to make an off grid leccy system in it, that would allow us a few creature comforts centered on a big Li Fe PO4 lithium iron phosphate battery, and some wood units that would allow my lady to cook.she is an amazing stunning cook

I sort of design and work in an add hoc fashion most of the design you will see is slept on dreamt if ya like..there is no workshop whole thing being made on an old black 'n' decker work mate in a garden . The transient from photography that haunts this build is wot you togs call negative space .essentially how do I cram all this stuff into a teeny tiny space and make things wrap around each other.

I wanted curves in this build something I've never done in wood...................in a tiny space they allow lines of sight allows things to move look cool bla de bla.

This humble bit of ply is sort of my start point.....the card template represents something called a wallas XC duo...it's the base start point of what's behind which also will also hold something called a weaco CRX 65 fridge.a 12 V fridge a bit bigger than the norm for a van of this size


_S2I8211 by Stuart Philpott, on Flickr


and that's enough for a ragged ragamuffin for one day

TBC

bye

stu
 
Last edited by a moderator:
Picture not showing for me, Stu. BUT, I can click through and see the set on Flickr.
 
it might be too big Nod? It's showing as a red crossed blue square here.so I've done something wrong Most of the bus pics that follow are rushed and record...........I tend to get my head down on the graft side the making of wood and don't really remember my camera is meant to be an artist's tool in these situations .........one of my many many failings Nod. Ha not enough brain to design make and be a tog,ahh well there is a simplicity to that I can own

It's a shame really not a great way to start a thread of 3 years of head down graft................I'll see what happens with the next wood posts and maybe seek help...bless ya for the heads up and your time mate

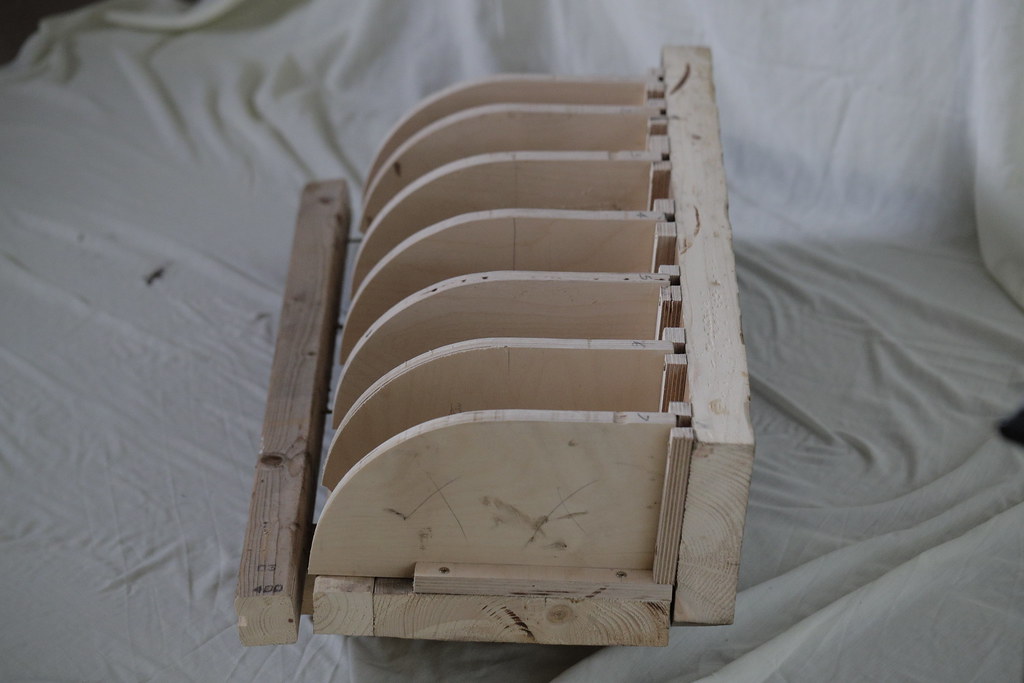
Let me try another before seeking help............ this is a jig I made to make a curved door from :


_S2I8197 by Stuart Philpott, on Flickr

Nod does that show? at first it came up with the same red cross,but now I can see it...so if that works ?
 
Last edited by a moderator:
I wonder if the codes were for images larger than 1024PX on the longest side Stu?

Grab the BB code that is 1024 px or smaller on the longest side, from Flickr. (y)

I've edited the above codes now, let me know if you can see the images please. :)
 
  • Like
Reactions: Nod
Dale thank you so so so much for the help ( bless ya mate) yes I can and although I thought I couldn't do this I think this might work

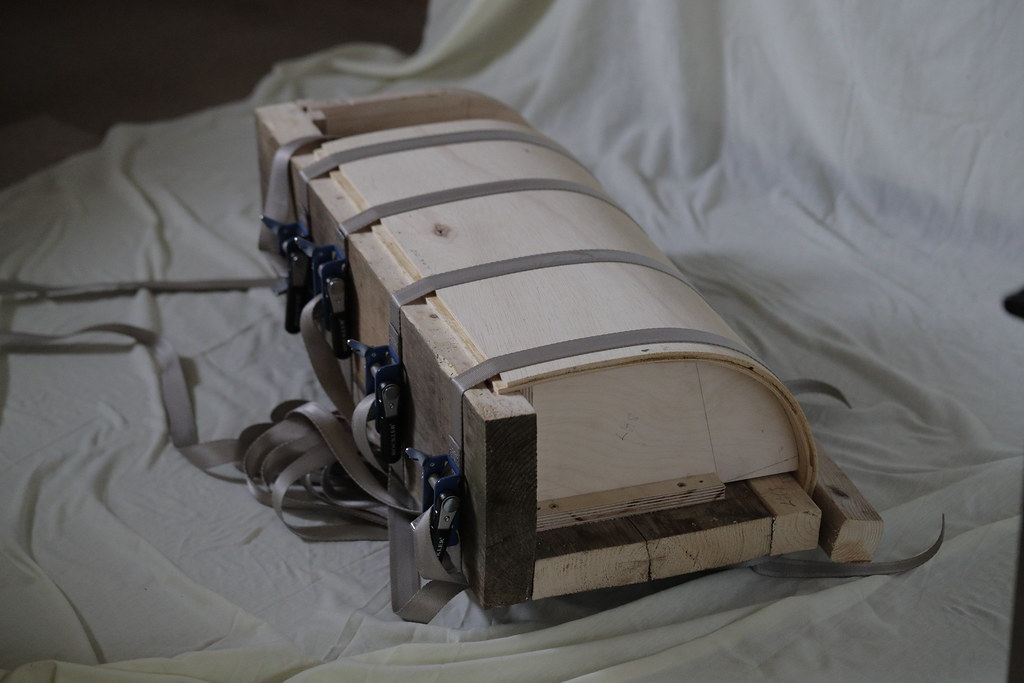
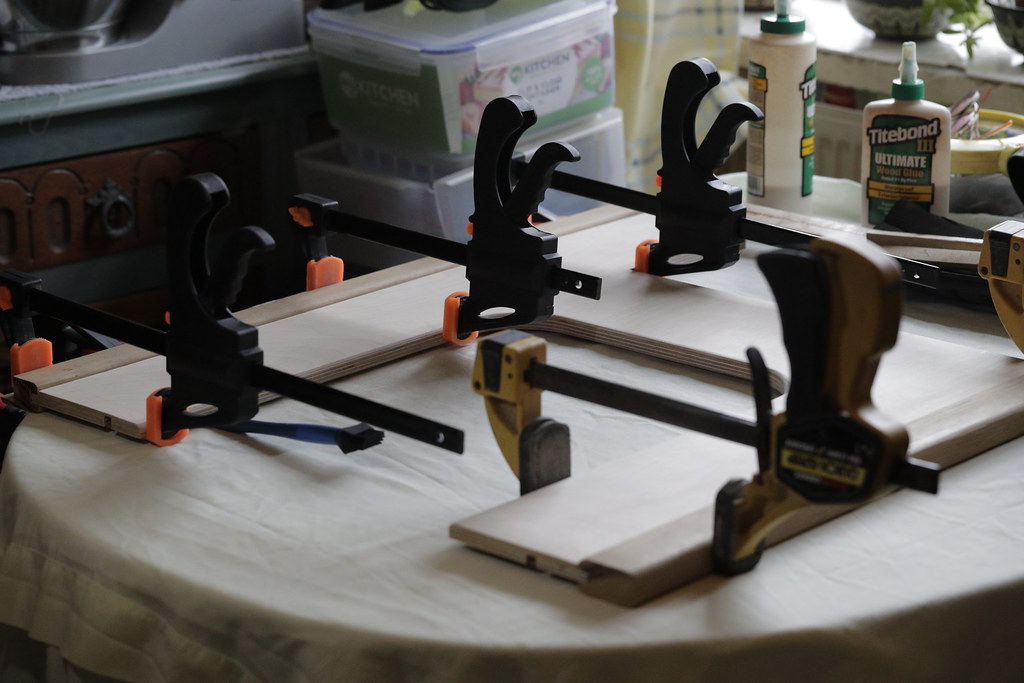
The jig is used to wrap two pieces of bendy ply around......................the tow bits of bendy ply are absolutely covered in glue on the inner edge ( the glue beiing tightbond iii) and a teeny tiny bit of sand to stop sliding like this : "hopes image finally shows without more botherence of kind patient mods"

_S2I8195 by Stuart Philpott, on Flickr
 
First picture now showing - thanks, team!

Should have said in the first reply - good work, Stu! I know from bitter experience how hard it can be to get wood to do what you want it to but also how satisfying it is when it does!

May you and Mrs P. get many years of enjoyment out of the result.
 
First picture now showing - thanks, team!

Should have said in the first reply - good work, Stu! I know from bitter experience how hard it can be to get wood to do what you want it to but also how satisfying it is when it does!

May you and Mrs P. get many years of enjoyment out of the result.
Have to say the mods here are so lovely.....tis their patience Nod on dealing with the not so sharp tools in the box...I've no malice in me bro but I just wish I didn't have to bother 'em with brain dead stuff....@Dale fankyou bro. Way of the world I guess we all have wonderful gifts and all have failings.

Nod Gav ta on the kind words ,ha we are barely started but ta......the secret with wood bar using the right language, IE talking to it......that language shall not be repeated here is this simple concept

"all ya do it make it smaller "

Let's get back to it hopefully with images we can all see and little mod botherence.

I leave the glued up ply for a good 24 probably morelike 48 hours in a nice warm spot then remove all the clamps.the first time I did this I was STUNNED......there was no kick back the curved just stayed exactly where it was clamped...second it is so so strong and so so light..........................i've never done anything like this before it was properly bewildering

here's the result

_S2I8199 by Stuart Philpott, on Flickr

We made 4 of them 2 for the fridge cabinet 2 for the overhead lockers.which aren't actually overhead but hey :LOL:

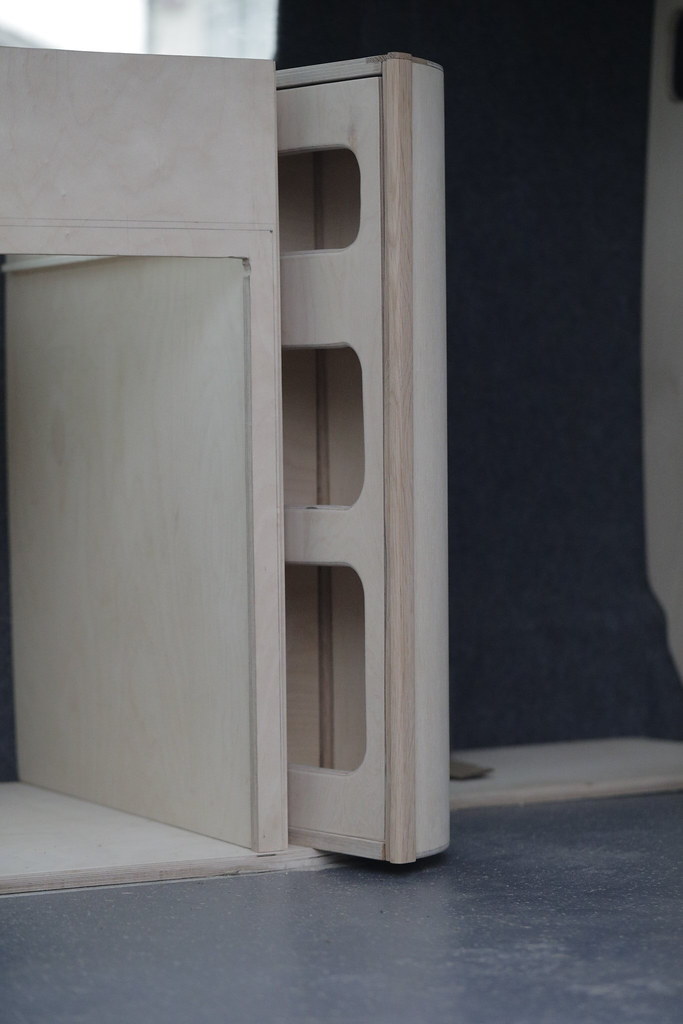
The first curve has become known as the shell door...it's a proper form of madness..it holds 16 ickle clip top jars like miini kilners that poppet wiill stash all manner of stuff for cooking etc in............it also hinges on 3 hinges so i can get the drivers seat to swivel....lmao it's complicated but seem to somehow of worked out.................there are no drawings here it's dreamt then made

this little lot are the components

_S2I8222 by Stuart Philpott, on Flickr
 
That little lot took an age carving out there was this moment I can remember where there was no longer a right angle to make a measurement from, from there it was all be eye

a shed load more glue and loadsa an loadsa clamps later we got here :

_S2I8217 by Stuart Philpott, on Flickr

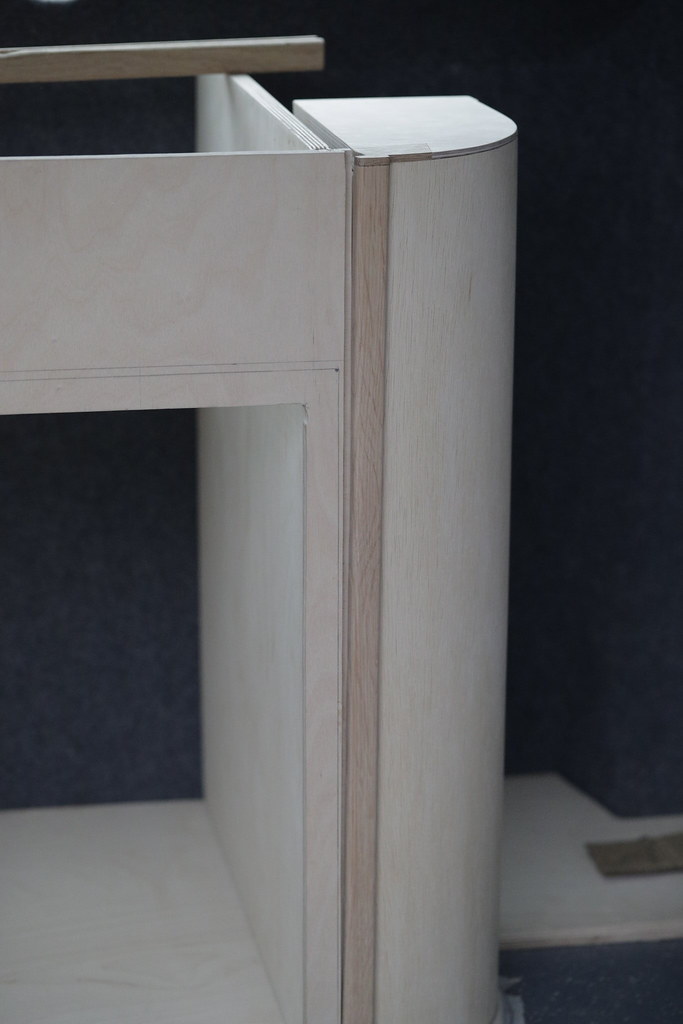
Cobbled in a bit of oak at the top for preddyness reasons note in second piccy showing inside that little jar the design is based around

_S2I8216 by Stuart Philpott, on Flickr


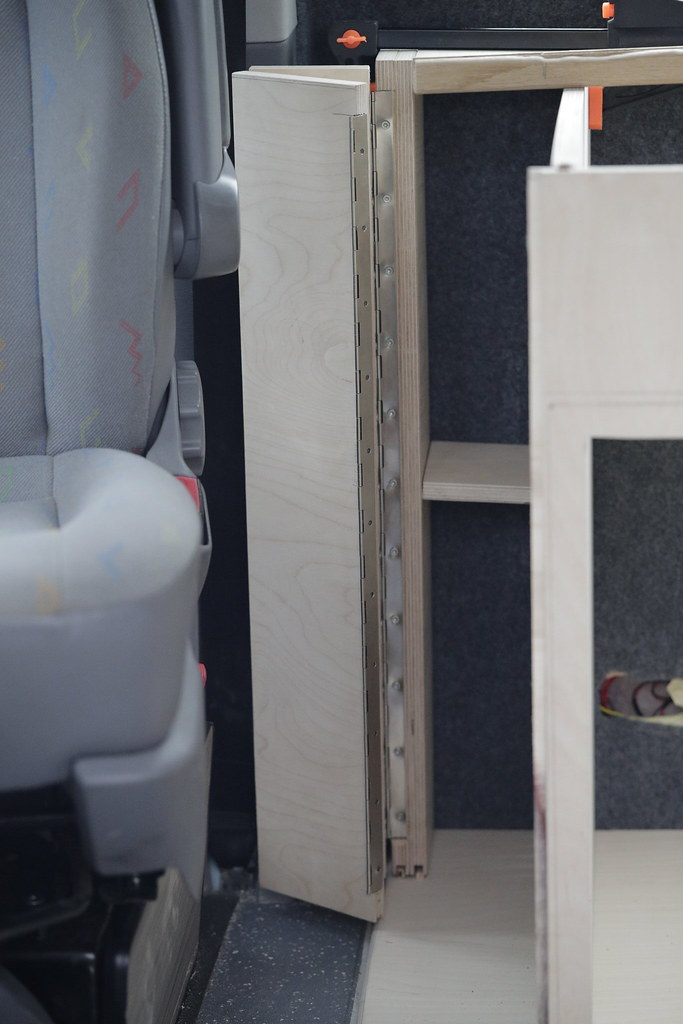
and whilst we are here the mech it swings on......... 3 yeah 3 hinges piano they are...........an a drivers seat on a TUV approved swivel as I mentioned negative space

_S2I8213 by Stuart Philpott, on Flickr
 
Behind that is the fridge an on the other side is what we call the door drawer......well it's a door and a drawer whatcanisay?

_S2I8206 by Stuart Philpott, on Flickr

_S2I8207 by Stuart Philpott, on Flickr

what the above basically represents is the base of a concept where poppet can cook and reach almost everything from one chair, obviously the wallas hasn't come inito play yet but it's going to sit right atop all this right in the middle

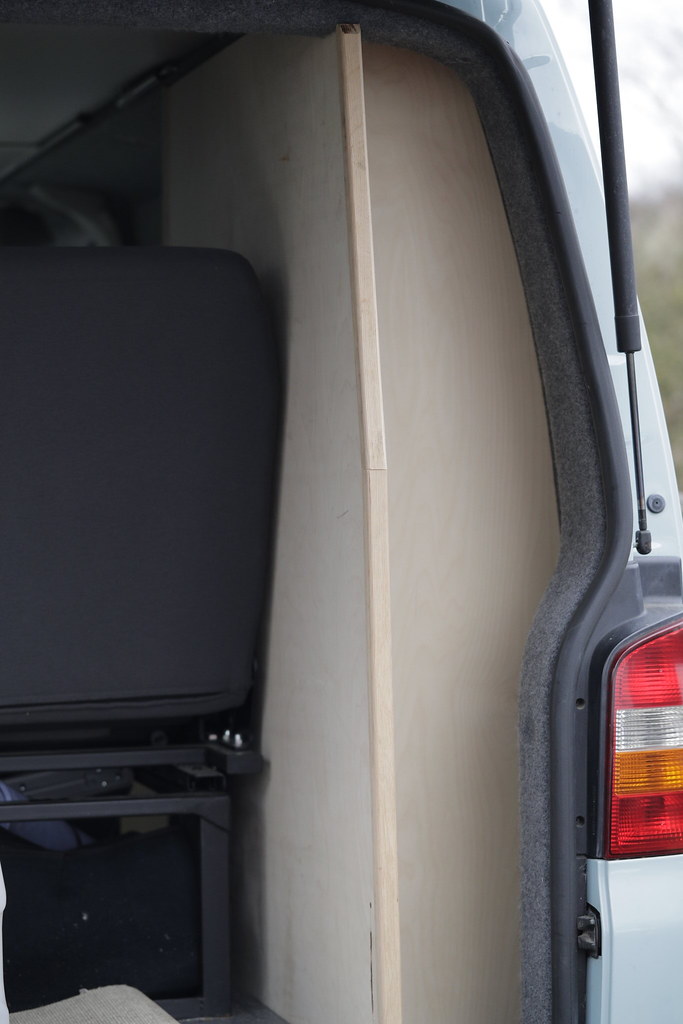
Moving to the back is a taller cupboard this rearmost space will house our coats leggins, oh note at this stage we are in baltic birch ply.structurally very strong and oak ( oak for it's hardness for edging ) so the rear view

_S2I8200 by Stuart Philpott, on Flickr

At this stage the front looks like this

_S2I8205 by Stuart Philpott, on Flickr
 
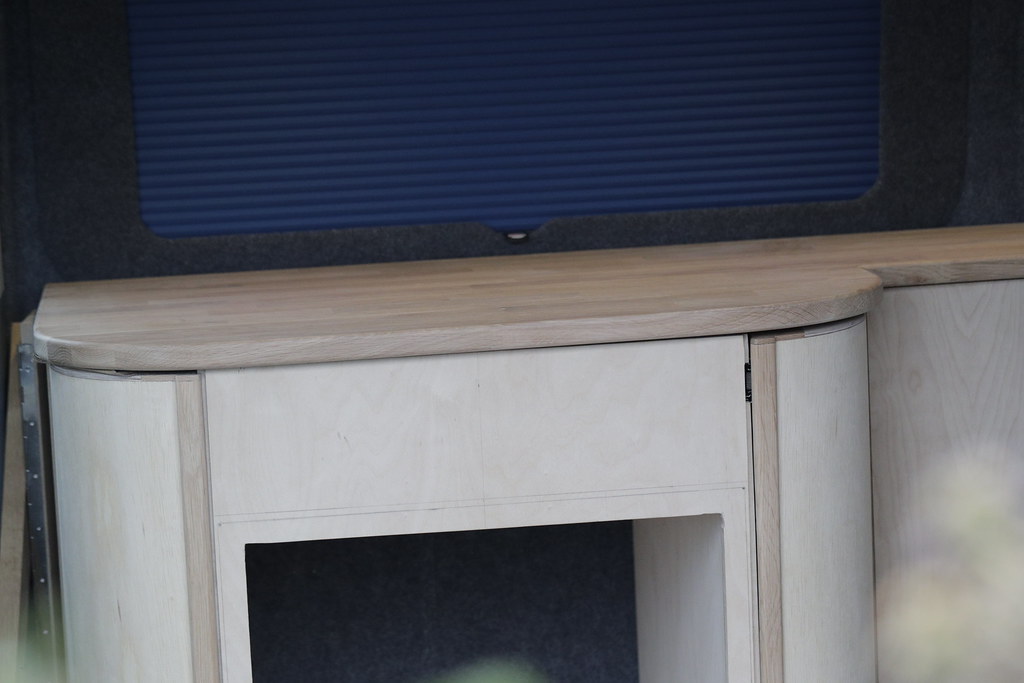
Around this stage an oak worktop came into play....................the cool bit here was knowing I had to make a stepped saw cut..................not only was the oak worktop at act as a work top.LMAO that's so funny DOH,but also this same bit of wood is eventually gonna act as my locker hanger wood.the base off which the lockers will hang if ya like. It's sort of wierd the lockers will be made maybe 2 years later on, but I'm dreaming so so far ahead that crucial cuts like this are in hand

_S2I8283 by Stuart Philpott, on Flickr

I'll stop there for tonight on da wood

Thanks for the words Gav wood metal even plastique it's all doable ya just need to talk to it in the right way buddy:LOL:

Nod thankyou for the wishes ..........We both love it mate..it's not yet being used with any seriousness, ( lol spent most of the day honing something leccy wise ..).............that said it's just so lovely snatching a couple or 3 hours............ going out for dinner on a cold grey day to a wild quiet place and being warm and watching......it doesn't matter if there is nowt to distract me.

Hmm TFB there's always somethiing to distract me ( for a friend elsewhere) OOOOHHHHHHH look a squiggle:runaway:

_S2I6591 sm j peeping red by Stuart Philpott, on Flickr
 
Thanks for the words Gav wood metal even plastique it's all doable ya just need to talk to it in the right way buddy:LOL:
I switch between metals and plastics from time to time, sometimes get carried away in the switch between to two ... glad the machine has 'bullet proof' glass :LOL:
As you say it's talking to it the right way and using the right tools ;)

Back on track .. lovely work, look forward to seeing the finished bus!
 
Shussh on the finished Gav :LOL: :LOL: :LOL: I'm trying to drag out 3 years of graft into maybe a couple of weeks of thread, ;) I might even cajole some of the other members into a reply at some stage bro ya never know? I'd guess most will be so tired they can only manage a likey button bless their cottons,but i'm hell bent on trying mate(y)

Wait till I start to talk leccy mate...you my son are gonna be taught about lava nets:D:exit:

The plot thickens.:runaway:
 
Thanks Glenn., call me stu bro everyone does ....I'm devious as well as being easily distracted.the red squiggle sidestep was actually our first ever exporitary van trip and first time seeing a UK red...I learnt alot from that trip on what I wanted to try and make us.......we are just in from a little afternoon trip..........., damn I love having this little van, it's the sheer indulgence of it Glenn, being able to snag a bit of warmth turning a tap and water coming out.................. tiny things for tiny minds.

Gav we still have some hares and some deer at me little spot, give me a few weeks to assess damage but decimated might be a fair assumption, hoping i'm wrong though

Hopefully be back in a while
 
That is some lovely workmanship. I’m quite in to tinkering with stuff and woodworking but being lazy find I tend to lean towards practicality rather than aesthetics. I’m quite envious of you having the patience to blend the two. Definitely looking forward to seeing how this progresses (y)
 
Gav we still have some hares and some deer at me little spot, give me a few weeks to assess damage but decimated might be a fair assumption, hoping i'm wrong though
Good to hear, hope the damage isn't too bad.
I've got 6 Hares and around 8 CWD, hoping more are still hiding in the hedges, seen some boxing, no images yet, I'm in no fit state :headbang:
..sorry, not wanting to derail your thread :)
 
That is some lovely workmanship. I’m quite in to tinkering with stuff and woodworking but being lazy find I tend to lean towards practicality rather than aesthetics. I’m quite envious of you having the patience to blend the two. Definitely looking forward to seeing how this progresses (y)
Thank you..............anything I make needs to work first,making stuff preddy is next........I'm driven more than usual here ,want my lady to feel she has something special. That's a huge motivational force for me ......................a proper monster

But then if one shoots wildlife one has to have patience, tis funny folks say i'm patient I don't really see that,funny old world :D
 
Stuart

Fantastic work with your camper, the quality looks class.
Looking forward to all the images that will follow.

David
 
That looks like it will be an impressive van-kitchen!

I have a Transporter, albeit not converted (yet), and it is great for days out with lots of stuff. I have gone for the Cadac route, to keep cooking, and associated smells, out of the van. But the beauty of these is that every single one is different and set up for their owner.
 
What a great project, Stu.
Keep the updates coming. (y)
 
Good to hear, hope the damage isn't too bad.
I've got 6 Hares and around 8 CWD, hoping more are still hiding in the hedges, seen some boxing, no images yet, I'm in no fit state :headbang:
..sorry, not wanting to derail your thread :)
Bro you are never ever gonna be able to derail a thread like me. so first up stop worrying .....and being utterly honest mate your health is more important to me than my wafflings about me bus . So you say what ya like here my mate and I'll say GWS. I want you back out there making cracking pics bud........nuff said (y) Bro life isn't about self tis alsowatchiing out for folks ya don't know.it comes back bud

Lol I wrote ya a bigger post last night.it was funny dude but work caught up and I had to sleep. Let me spend a bit of time in hare spot Gav and I'll come back with some nouce it isn't good bro, but a bit 'o' time first.

Oh mate just brief, ok it won't be :LOL::LOL::LOL::LOL: I got home early on monday...poppet................. shall we go and find barn owls. and I'll make ya a coffee in your bus

Ok I'd love that...but ya didn't find me any last time ( she's HARSH mate) ;) .

So I find her a new red kite roost.wow that's cool stu, ten in one tree but I thought we were going to see a barn owl No pressure then :ROFLMAO:

I drive on clock some ace habitat and a snick of an overgrown barn. Darling we'll go and turn round and I'll make your coffee in that gateway and you will see an owl. She smiled "ok that would be nice."

Mate hand on heart I knew that spot was right I could smell it..........and yet every fibre in my being said nah stupid old fool ..................

Oh look there's one in a tree stu and the other one is hunting over there.you've found me a pair haven't you?

'Erm yes babe ( in utter disbelief )

Couldn't make it up Gav.the bad bit was when she said well you are going to have to make yourself presentable now to get permission

never gonna happen, but if ya don't ask no one says no

all digits crossed huh:LOL:;)

2nd try on unknown lands I haven't seen for a good good while isn't bad though mate......if I ever trust that voice in my head....hmmmmm:runaway::D

GWS bro no worries ever nuff said

stu
 
guys I'm a raggedy ass I''ll come back to each of ya replies above bless ya for 'em THANK YOU

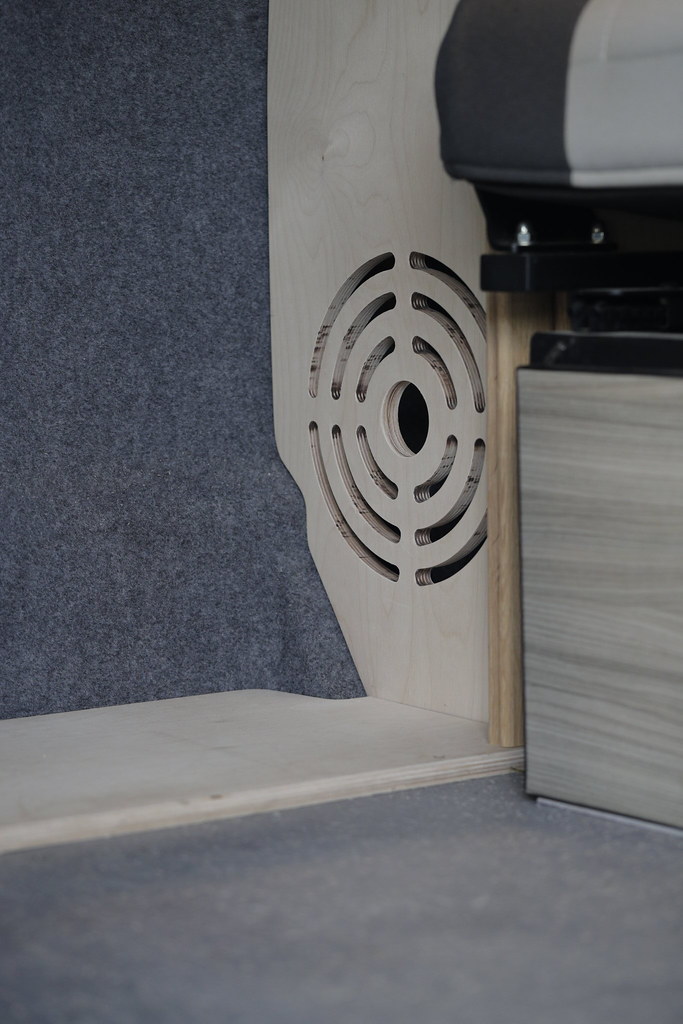
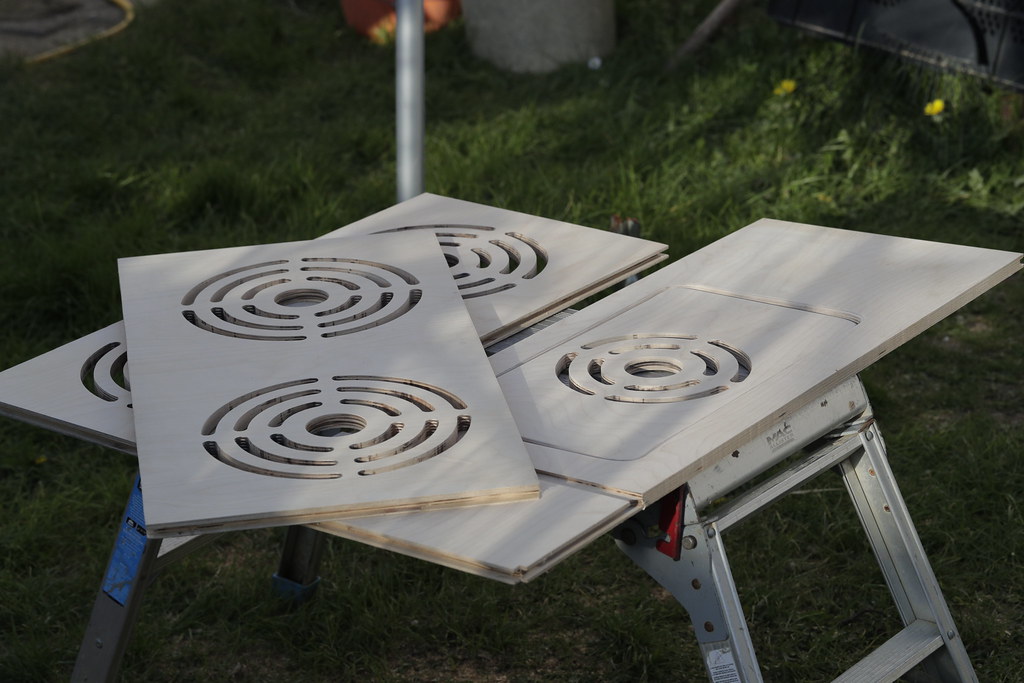
See what's in my head is kinda dreamt I sort of design while asleep one of the proviso of this design is it's gonna be built like a BSH..I'm using 15mm BB ply not the usual camper fare laminated poplar .....so I wanted to not only remove physical weight but also allow air to move .heat to dissapate..........so here's me workaround.....

it's done with a router bound into a perspex type template mount fingy I knocked up

so this allows heat to move away from me fridge and the wallas

_S2I8671 by Stuart Philpott, on Flickr

_S2I8672 by Stuart Philpott, on Flickr

this allows air into the base of the rear unit

_S2I8673 by Stuart Philpott, on Flickr


and that same design folds into the rear cupboards shelves

_S2I8668 by Stuart Philpott, on Flickr

The bigger lowest shelf has a lift out section which allows me a second access point into the base of the rear cupboard.sharp togging eyes have already clocked that but hey worthy on note.alot of T designs miss the obvious
 
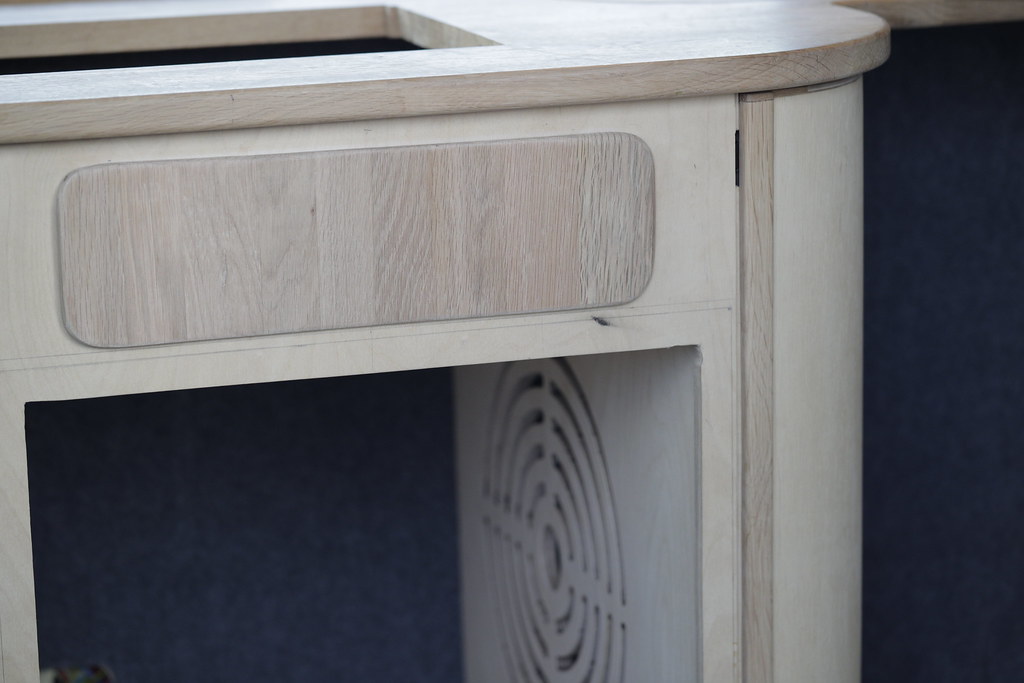
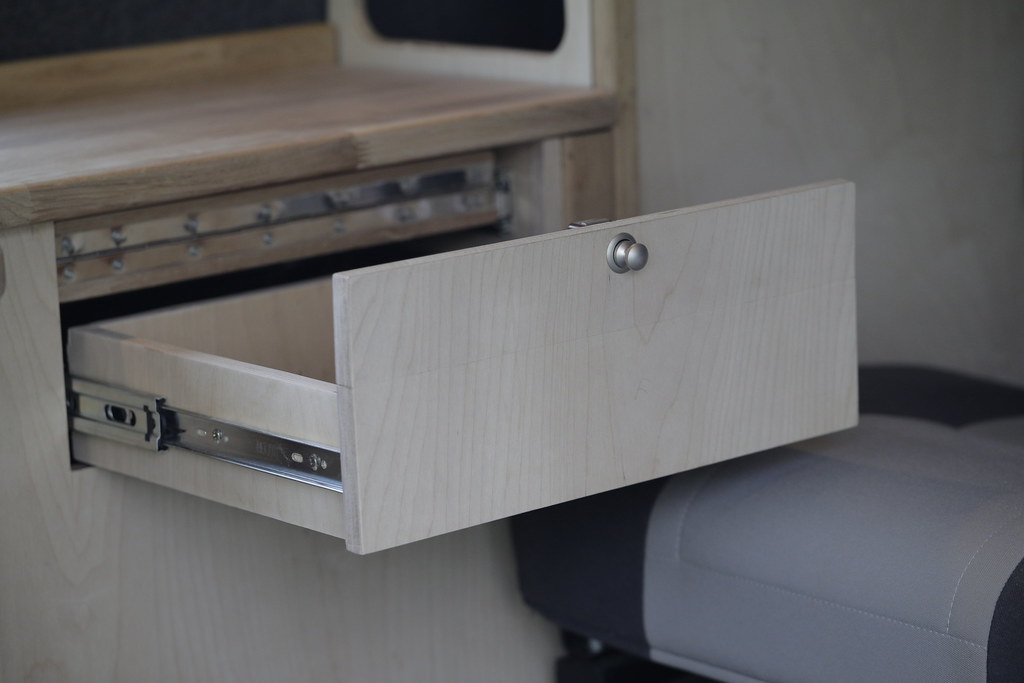
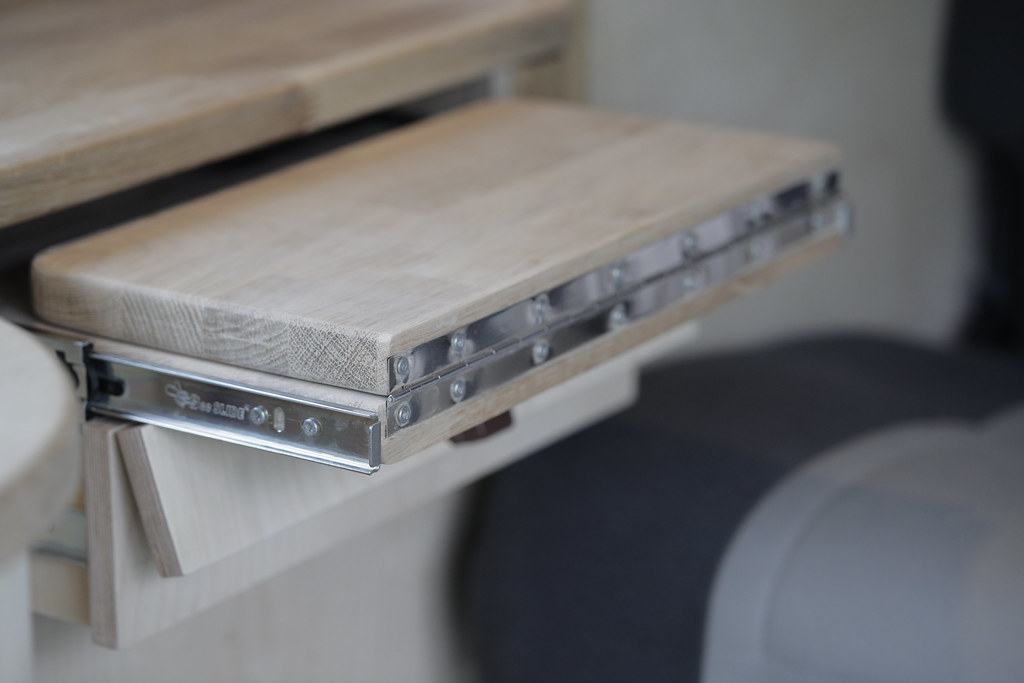
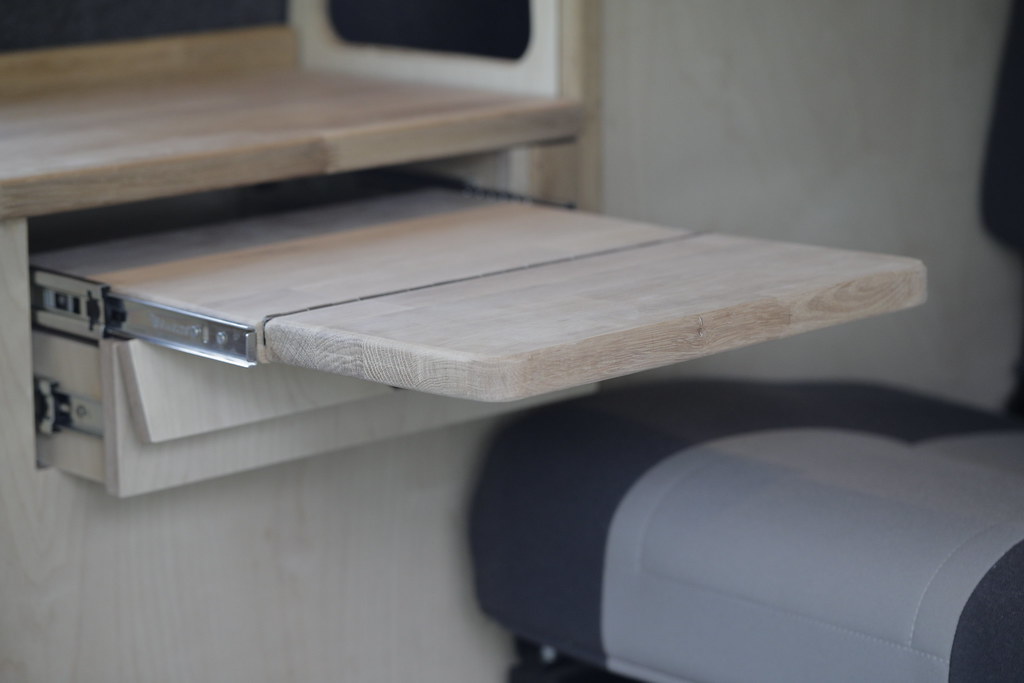
So then we bat into the middle unit.......hmm and more jiggery pockery a drawer front that folds in two base premise make a cultlery drawer and add some more worktop into the design, extra room for cooking extra room for maybe a laptop image editing deleting stuff.just trying every which way to max space

So in essence this
_S2I9352 by Stuart Philpott, on Flickr

does this
_S2I9354 by Stuart Philpott, on Flickr

which then does this
_S2I9355 by Stuart Philpott, on Flickr


and this

_S2I9358 by Stuart Philpott, on Flickr

and then this

_S2I9361 by Stuart Philpott, on Flickr

LMAO you have no idea how tight this is I've just about somehow sneaked it but damn it's tight , the important bit is I can sit on the RIB bed and have this WT open....our curvey first cupboard precludes the more normal campervan table so I needed to claw back a bit of WT.
 
If it fits, there's enough space! (As long as it's not rubbing on places that shouldn't be rubbed...)

I like the way you've cut the front so it's got the grain running across the joint and drawer edges - not easy but worth the effort.
 
Here's a nice ickle moment..wallas in place for first time................... had this sat upstairs in a box for eons before this first trial fit, it probably went back to box for another 18months.

Wallas XC duo is a desiel night heater and sort of ceramic hob in one....it means I don't carry gas and have no need of it. The wallas sucks fuel from the bus fuel stand ,via a stand pipe that is short of the base of said tank......so it can never run us dry of fuel for the van

So lid up it's a cooker

_S2I8290 by Stuart Philpott, on Flickr


lid down and with a swivel of the heat controller thermostat gizmo it turns into a night heater the lid also means tiiny fingers are safe.not a worry for us but nice to know for a lad or lass with a younger family than us

_S2I8294 by Stuart Philpott, on Flickr

Basically the lid has a fan in it and also has a kiddy proof lock mech.it's a clever little tool.....I'll come back to cooking and cookiing gizmos later it's not our only source of cooking

and along with a cooker comes a sink

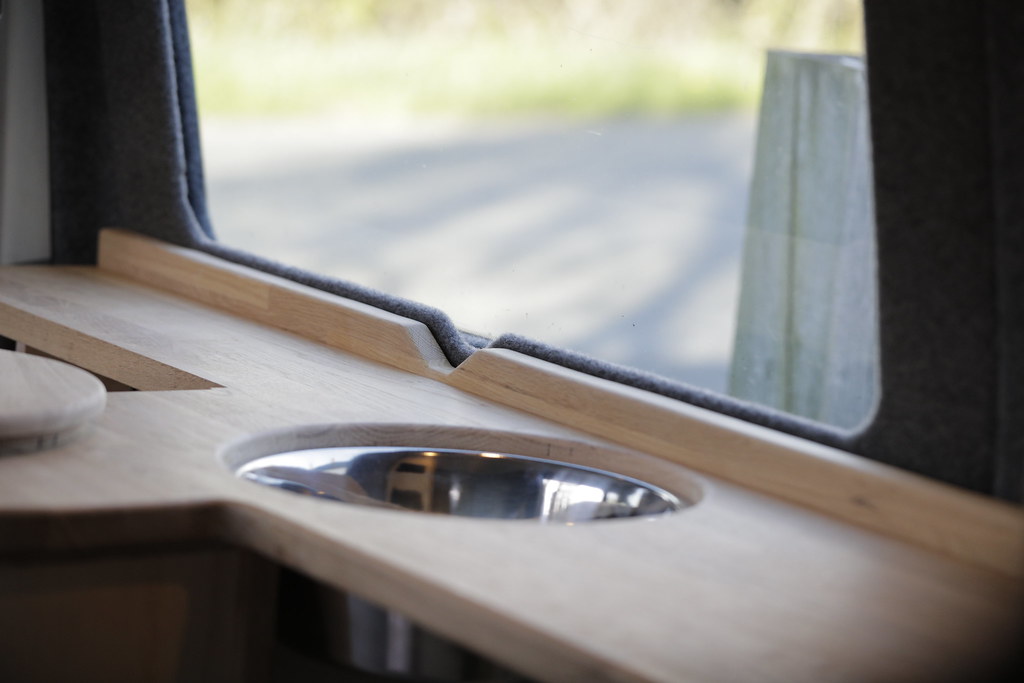
_S2I8677 by Stuart Philpott, on Flickr

and cover naturally

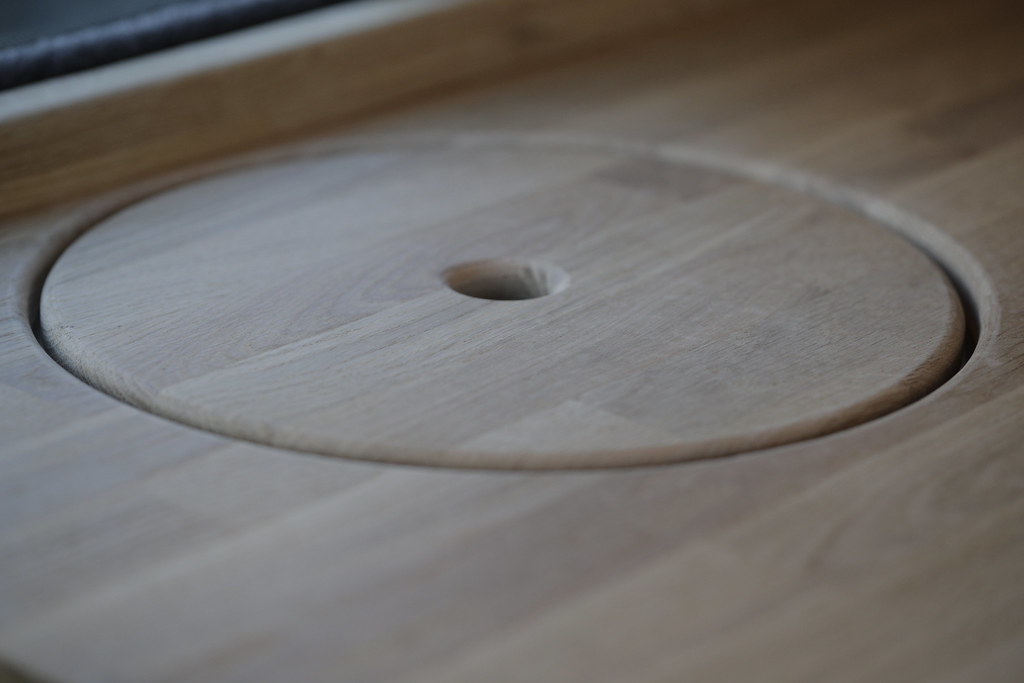
_S2I8674 by Stuart Philpott, on Flickr

Nuff piccies for tonight........ need to show ya the two tambour openiings and the rear cupboard back doors but that above is the base breakdown of the 3 units that run alongside a fairly tradition transporter design utilizing a RIB bed


A RIB is a crash tested TUV approved bed come seat with properly anchored seat belts and a big old lump of metal underneath the floor to basically mean one can sleep and hold passengers in a safe way.............to me it's alo far more versitile than a rock am roll bed...................there are sort of chaise lounge options both ways.so we can sit in bed and watch TV up front or edit images on a screen or face the back of the bus tailgate open and soak up some views.great seating design an absolute pig to sleep on......I'll come back to that:runaway:


At some stage we are going to do off grid leccy.....WARNING I AM NOT A SPARKY DO NOT COPY ME caviat I've ground the leccy out over probably 3 years, so many sos sos so many hours of study I still know nuffin bar this

the one thing I have learnt if someone else converts a bus for you you need to know they know what they are doing....I've come across so much that worries me....sure I worry I am who I am but if you do get someone to convert , have your eyes wide open huh(y)

ta for reading take care


stu
 
If it fits, there's enough space! (As long as it's not rubbing on places that shouldn't be rubbed...)

I like the way you've cut the front so it's got the grain running across the joint and drawer edges - not easy but worth the effort.
Hellish jig saw work Nod, really really good jigsaw a seriously reseached jigsaw blade and hours of one incantation

don't mess up stu don't .U mess up...... don't mess up......lol SOSS hinges ha that's scary too.......

.later I'll share the EPIC mistake an me cover up

it's not how we fall Nod it's how we pick ourselves up....lol it just took me a while tis all;):LOL:

Cryptic I am:)
.
 
  • Like
Reactions: Nod
Stuart

Fantastic work with your camper, the quality looks class.
Looking forward to all the images that will follow.

David
Thank you David for the kind words very much appreciated call me stu. .........Damn it's been a lot of work, I think what this really brought home to me is the sheer diligence a cabinet maker works with.I'm not that guy in any way shape or form,but that was so apparent throughout this process.
 
That looks like it will be an impressive van-kitchen!

I have a Transporter, albeit not converted (yet), and it is great for days out with lots of stuff. I have gone for the Cadac route, to keep cooking, and associated smells, out of the van. But the beauty of these is that every single one is different and set up for their owner.
I concur and also adore the individuality of what folks do to their busses Lewis.there were so many inspirations in this build................recooking I hear you, ha no fish no curry's. Seriously though besides the night heater aspect of the wallas I wanted that internal ability to cook.....I will come back to cooking at a later date as above.we have options.

Lew I want this to be a year round tool to go off stealing beasties souls in !! We live in blighty........I can see a winters day when we come back to the bus sodden and it's hammering down with rain............in the depths of winter it might be dark from 4PM till 8AM next day..

So that ability to get warm and cook internally is bigger to me than bus smells horses for courses I guess needs must an all that.................. mind I do have options (y)

Oh ta on the kitchen , she's such a good cook wanted it to be special
 
What a great project, Stu.
Keep the updates coming. (y)
Wanted to try and give a bit back Chris this idea/ journey started here............................... at some stage nearing completion i wanted to bring it back.....you mods put alot into this place, which allows lunatics like moi to learn stuff ha LMAO go on journey's Updates will follow bud ta for the help previously when I can't even manage to sign in

I'm not terribly bright Chris but I forget little .;)
 
Diggin' oneself out of a hole.................

This is a diversion to explain me comments to Nod.......if ya go at somethiing for as long as this took , one is going to make a mistake,by biggy was quite early on. I make the bits of wood with templates....I start in card for intricate curvy places and then male the piece in thin ply cut out with a jigsaw, sanded honed bla de bla.

I then cut a rough in the BB ply slightly big and then transfer an accurate cut with a template router bit..........it's basically a straight cut bit with a baring at the top to follow the template

does that make sense?

so I've knocked up the biggest bit of ply the face of the rear cupboard all is good it fits like a glove and because I haven't a workshop or a big table to work on I'm beiing a fool and using it as a table..........

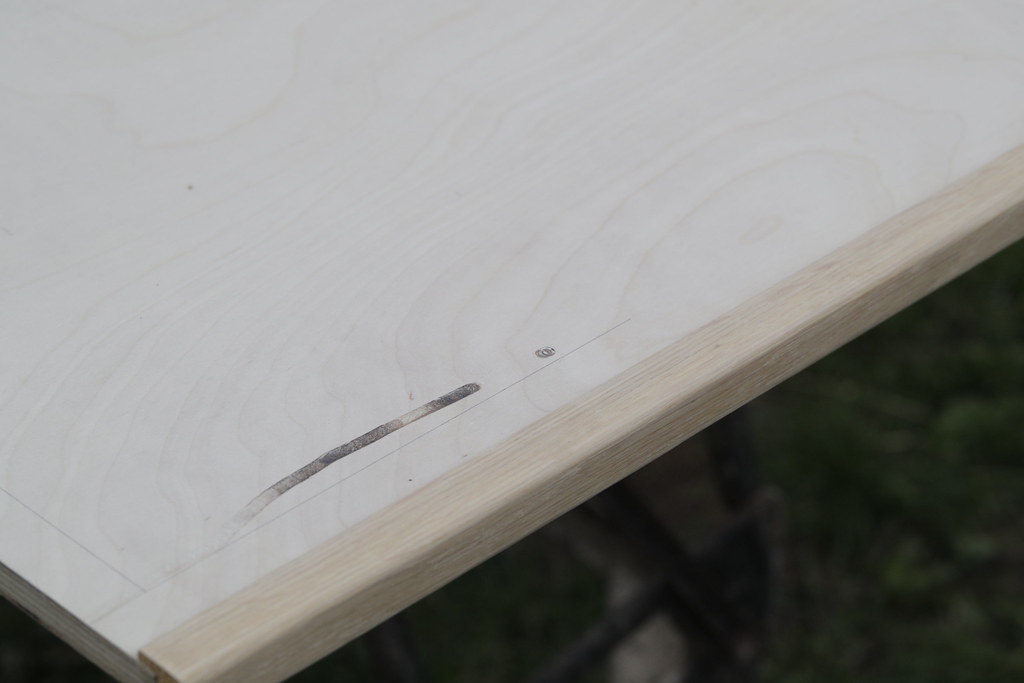
At this stage I'm using a 20year old router and a bit starts to drop and this is the result

_S2I0231 by Stuart Philpott, on Flickr


To try and explain more there will have been hours and hours and hours to get this piece where it is.we will go into strip joints later:runaway::exit:

but to mess up like this was huge..........so I turned me back on it walked away and waited for a day when I'd find a way to sort it
 
ta for the help previously when I can't even manage to sign in
You are most welcome.
But I have to say, you weren't the first, and I'm sure you won't be the last :)
 
My best mate came round "stu the furniture guys have thrown a load of wood out on the industrial it's going to be burnt miight be something for the bus buddy?

That's when walnut entered the build guys and then I started to figure a workaround

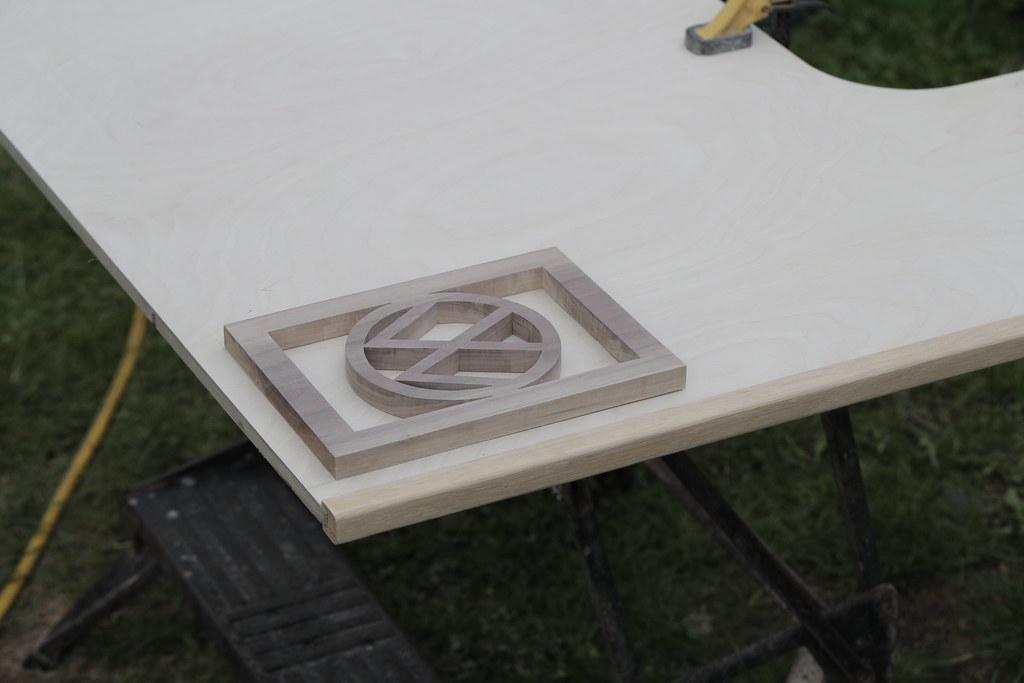
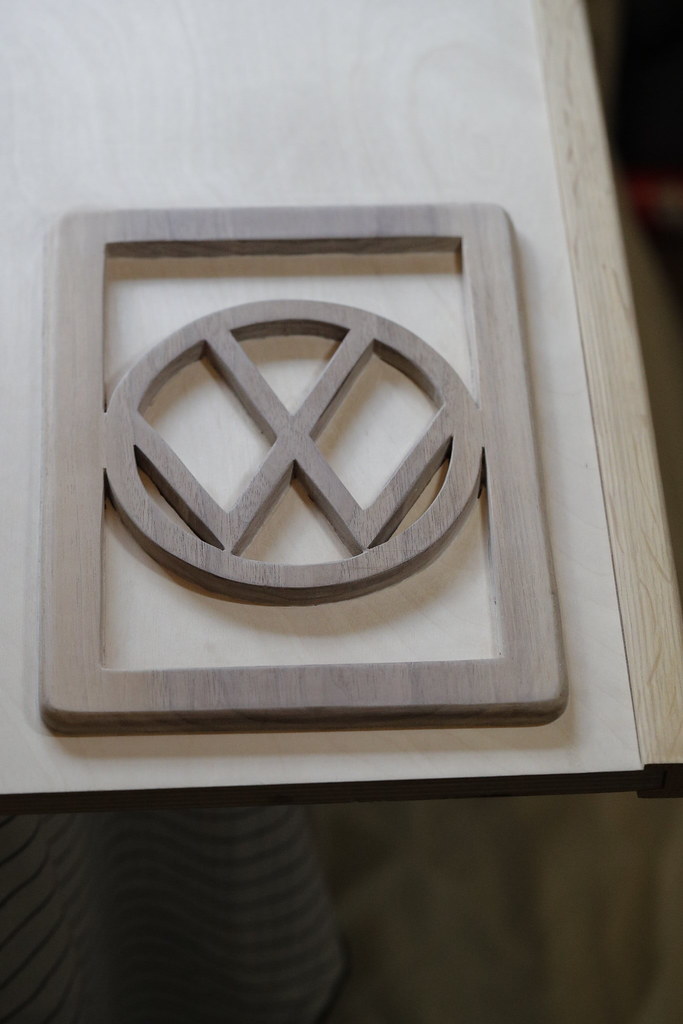
you can see 2 fine lines above that will be the frame of a VW logo I'll cut in walnut and let into the ply.............

no one will know they'll just think that's ok init.

The bonfire walnut was naturally warped, so I made a router sled and after a few hours 'n' hours it became flat


Then drew in said logo and boarder and hung to with jigsaw the don't mess up mantra is really strong here:runaway::ROFLMAO:

_S2I0221 by Stuart Philpott, on Flickr

which became

_S2I0224 by Stuart Philpott, on Flickr

with a bit of the original walnut underneath for comparison.

which get's me here

_S2I0228 by Stuart Philpott, on Flickr

Now the really hairy bit let that walnut bit into the ply..................I rarely keep track of time it's not good for self esteem me and time, but I did here.......there's way over 40 hours in this madness the inlet was eye wateringly hard so much concentration didn't do too bad though


_S2I0242 by Stuart Philpott, on Flickr

then clamped that in place with bricks'n' shedlodsa glue

_S2I0232 by Stuart Philpott, on Flickr

which left us here

_S2I0247 by Stuart Philpott, on Flickr

hole dug out of big pile of shavings
onwards and downwards:ROFLMAO:
 
Around this time we start to get diverted.there is ALOT going on right now

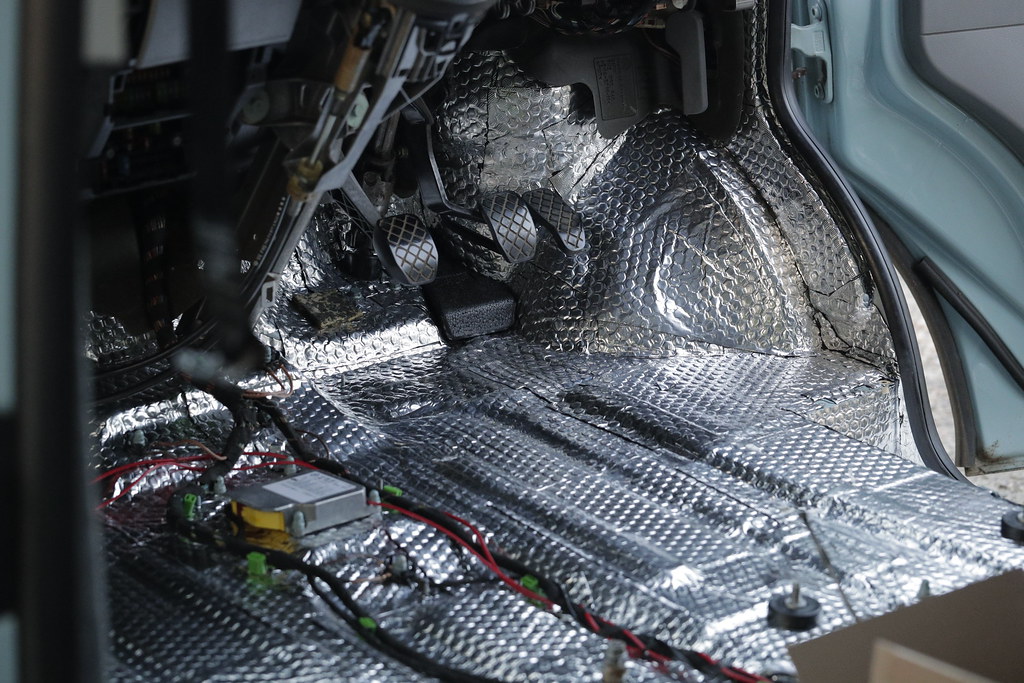
this is my van cab with no seats and original ish ..........it's an old bus................ wiring

_S2I0354 by Stuart Philpott, on Flickr

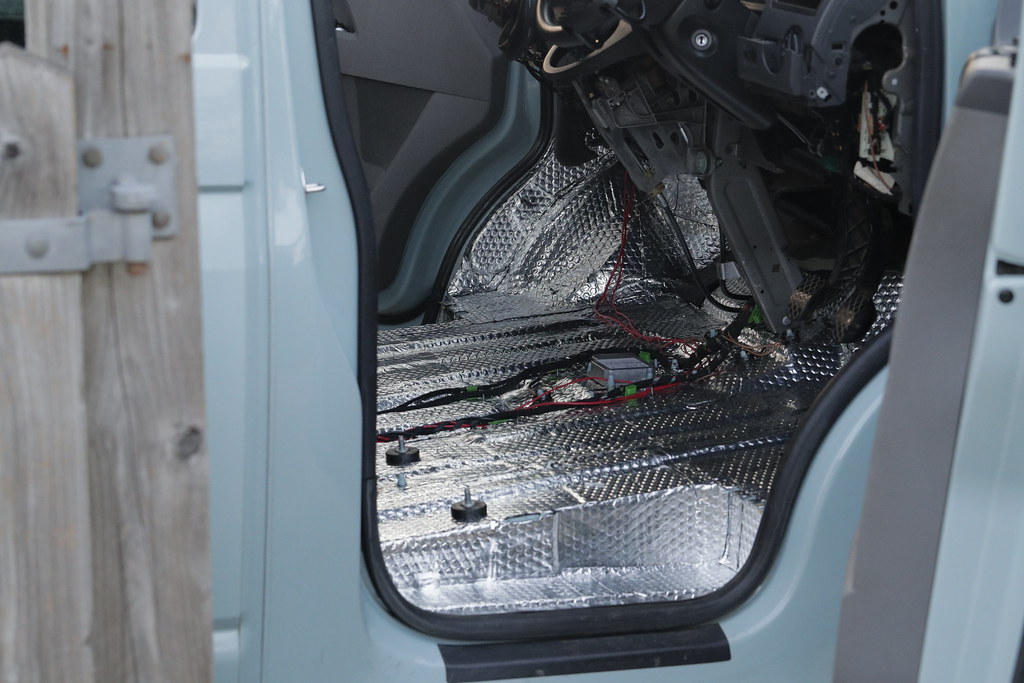
this is the same after we have added a shed load of sound deadn stuff which gets followed by same of an insulation.....insulation is popped in with huge care......I'm forward thining for cable runs creating vertical lift if ya like

_S2I0366 by Stuart Philpott, on Flickr

_S2I0367 by Stuart Philpott, on Flickr
 
Back
Top