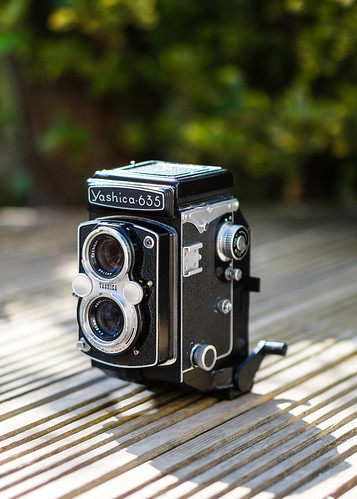
InsTLR Project

Great stuff Steve.

Ever thought of making a digital back for the TLR with a sliding sensor? On a tripod, take a shot with the sensor bottom left, slide it to the right for the next shot. Slide the L-R slider up to the top and take another 2 shots. Then use stitching software to get the final medium format image.
 
Last edited:
I hadn't thought about doing a digital sensor but I have thought about using a 35mm lens on a similar slider mount to overlap the images and cover medium or even large format but that's just because I'm too poor to buy a proper LF lens ;0)
 
Mmmmmm... Judith Hann...
 
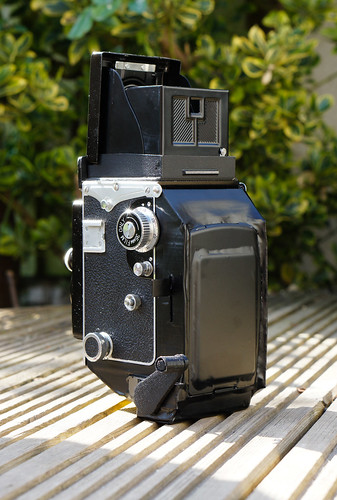
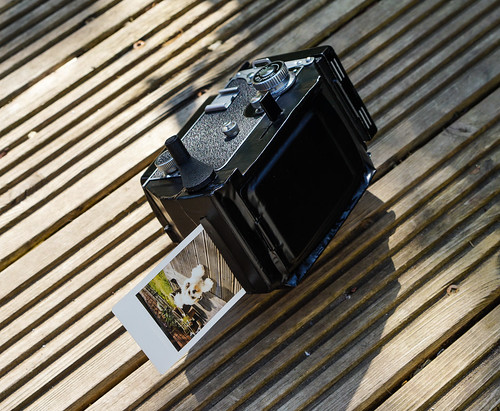
I've just wrapped the rear and sides of the Instax back in a single piece of black plastic wrap using the heat from the hob burner to soften the plastic into shape because the hair dryer is too noisy! As well as giving a more finished appearance this is light tight as well so will block any remaining gaps.

I'm rubbish at wrapping Christmas presents so I think I'll use sticky back plastic wrap in future ;0)

ImageUploadedByTalk Photography Forums1462919239.903639.jpg

ImageUploadedByTalk Photography Forums1462919247.387009.jpg

ImageUploadedByTalk Photography Forums1462919254.214158.jpg

The new bracket for the wlf has finished printing tonight so I'll grab that from my folks' tomorrow and check the fit. For now, the wlf is just sitting in place but I'm happy with the result.

ImageUploadedByTalk Photography Forums1462919305.951490.jpg

ImageUploadedByTalk Photography Forums1462919315.128125.jpg

Cheers
Steve
 
Last edited:
A wierd and wonderful frankencamera Steve. Im, as always, very impressed.

Andy
 
Cheers Andy. It is a bit of a 'unique' creation but I'm strangely really enjoying using Instax which I didn't think I would. I reckon I'll still use 120 more because I like the results but as a different option I think the new back really works :0)
 
Last edited:
Ok, I'm trying to learn how Instax handles different lighting/exposure and I think Velvia is easier and more consistent ;0)

Shot at iso800 in very low light, F3.5 1/25th. Gives a very warm white balance.

ImageUploadedByTalk Photography Forums1463040086.120171.jpg

Left - Iso800, F11 1/500th with bright backlight shows very little dynamic range.

Middle - Iso800, F16 1/250th in shade. Better contrast overall but blown the highlights.

Right - Iso1000, F16 1/500th in open sun with side lighting. Best overall contrast and exposure with very little blown out.

ImageUploadedByTalk Photography Forums1463040077.685454.jpg

Interesting comparison and I can see that I'm going to have to think about my composition/conditions a lot more than with traditional film as Instax is pretty unforgiving. I guess this is why standard Instax cameras generally use a flash and F8-16 to get consistent results.

I've also removed the lingering light leaks by wrapping the body as well as covering the film transport rollers inside the body with black tape which has stopped he reflections from them.
 
Last edited:
Thanks, I'll have to embrace the reduced dynamic range and enjoy the instant feedback. I do like the fact I can see the result within a few minutes though instead of having run a complete film through it.
 
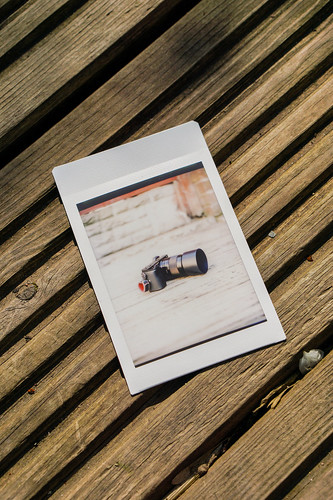
I've just shot some final images for the Phoblographer article;

26933956376_32c45fd77a.jpg


26362039504_0652aaae3d.jpg


26967610865_f6c7ec65fc.jpg


I metered for the dark camera in a shaded area with this one, iso 1000, F5.6 @1\125th

26899010961_b6d5b188ea.jpg


Cheers
Steve
 
Anyone gonna point out the error in #3. Or is that artistic license ?
 
Ok, I'm trying to learn how Instax handles different lighting/exposure and I think Velvia is easier and more consistent ;0)

Shot at iso800 in very low light, F3.5 1/25th. Gives a very warm white balance.

View attachment 64344

Left - Iso800, F11 1/500th with bright backlight shows very little dynamic range.

Middle - Iso800, F16 1/250th in shade. Better contrast overall but blown the highlights.

Right - Iso1000, F16 1/500th in open sun with side lighting. Best overall contrast and exposure with very little blown out.

View attachment 64343

Interesting comparison and I can see that I'm going to have to think about my composition/conditions a lot more than with traditional film as Instax is pretty unforgiving. I guess this is why standard Instax cameras generally use a flash and F8-16 to get consistent results.

I've also removed the lingering light leaks by wrapping the body as well as covering the film transport rollers inside the body with black tape which has stopped he reflections from them.
I don't want to be funny, but the pictures are upside down! The wide, thumb, edge of the print is at the top. Tragic!
 
Last edited:
Loving the extra mirror arrangements (as per post number 138!) ;)
 
Tell you what, next time I do an Instax TLR I'll remove the WLF housing so the film can eject from the top.

Alternatively, I could just write above the picture or not at all? [emoji848]
 
"I've just wrapped the rear and sides of the Instax back in a single piece of black plastic wrap"
"I'm rubbish at wrapping Christmas presents so I think I'll use sticky back plastic wrap in future ;0)"


You deserve it!

BP badge by Barry Smith, on Flickr
 
I'm still trying to get to grips shooting Instax. Just been out for a quick walk near work at lunchtime and grabbed a couple of shots.

This one was exposed perfectly to isolate the bluebells but the light leak has really peed me off! The leak isn't inside the camera so I think this was caused by me ejecting the film with the camera facing towards me so the sun hit it as it ejected [emoji35]

ImageUploadedByTalk Photography Forums1463405258.726057.jpg

This one has no leaks because I turned the camera away from the sun when I ejected the shot but has way overexposed the highlights. I metered for the scene and shot at 1 stop under. I think this is still a result of the sometimes limited latitude of Instax (there's gold writing on the face of that memorial).

ImageUploadedByTalk Photography Forums1463405338.464562.jpg

Oh well, keep trying! I'll pick up a lens hood for the 635 to block any stray light too.
 
Thanks buddy. As much as I build cameras for the fun of doing it, it's always nice seeing them 'in print'. I've just had the first message through Facebook as a result, asking if I'm going to be producing more backs to sell!
 
You'll have your own show soon. :D
 
Thanks Andy. By the amount of emails/messages I've got this morning from people asking about buying a kit version of this I think I might need to start looking properly into testing it on other cameras! My mate has just bought an old Rolleiflex so I'm going to test the back against that to see if it's anywhere near the right shape before I look into any re-designs.

I've also had a message from PetaPixel asking if I've got any videos of the camera in action so they can feature it. Not sure I want to be getting in on the video action, especially when they decided against featuring the Polaroid 110a I did after initially wanting to run an article ;0)
 
Last edited:
I've been thinking about the possibility of making more of these (usually dangerous when I start thinking...). I might have no chance, but I've started to draw up a complete back including all of the Instax parts that I took from the donor camera to print. If I can print the cartridge caddy/rollers/gears and back door it would mean there would be no need to buy a donor camera and hack it apart which makes the kit more viable.

I'll need to take some measurements from the existing back/rollers before I get a rough model together but I figure it's worth a go!
 
It sure is Steve, good luck with it mate! (y)
 
Are you talking about the density of the plastic?
 
Yeah, the original rollers are rough textured (not smooth like Polaroids) metal that are sprung to allow the chemical pod to pass through and burst then close together to spread the developer across the film. I'm not sure how the density will affect the development but I've seen Instax film developed using a pencil as a rolling pin so it might work.
 
Back
Top